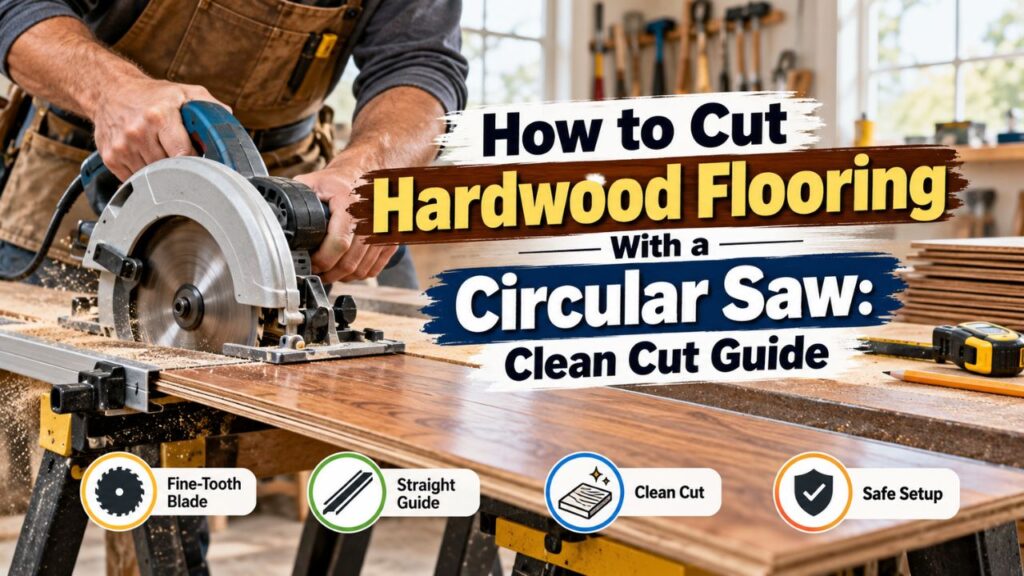
How to Cut Hardwood Flooring With a Circular Saw: Clean Cut Guide
If you want to know how to cut hardwood flooring with a circular saw, use a sharp fine-tooth carbide blade, support the flooring securely, mark the cut accurately, set the blade only slightly deeper than the board, and guide the saw steadily without forcing it. For standard circular saws that cut upward into the material, placing the finished face down usually reduces visible splintering on the decorative surface.
A circular saw is an excellent tool for hardwood flooring because it can make fast crosscuts, long rip cuts, angled cuts, and many of the custom cuts needed along walls and room edges. It is especially useful when installing solid hardwood or engineered hardwood and you do not have access to a miter saw or table saw.
The key challenge is avoiding splintering. Hardwood flooring often has a factory-finished surface that needs to remain clean, and the tongue-and-groove edges must remain intact wherever they are needed for installation. Using the wrong blade, pushing too aggressively, or cutting from the wrong side can damage an otherwise good plank.
You also need to account for the flooring manufacturer’s required expansion space around walls and fixed objects. A perfectly clean cut can still create installation problems if the board is fitted too tightly.
In this guide, I’ll explain how to cut hardwood flooring with a circular saw step by step, which blade works best, whether the finished side should face up or down, how to make crosscuts and rip cuts, how to prevent splintering, and how to cut both loose and already installed hardwood safely.
Can You Cut Hardwood Flooring With a Circular Saw?
Yes. A circular saw is one of the most practical tools for cutting hardwood flooring.
It has enough power to cut dense species such as oak, maple, hickory, and walnut, and it can also handle engineered hardwood flooring when fitted with an appropriate blade.
For a typical flooring project, a circular saw can make nearly every straight cut you need.
It works particularly well for shortening boards at the ends of rows and ripping the first or final row to width.
Its main limitation is precision compared with stationary tools. A miter saw makes repeated square crosscuts easier, while a table saw is generally better for multiple long rip cuts. A circular saw can still produce equally usable results when you use a straightedge or cutting guide.
Solid Hardwood vs. Engineered Hardwood
Both can be cut with a circular saw.
Solid hardwood is made from one piece of wood and can be relatively dense depending on species.
Engineered hardwood usually consists of a hardwood wear layer bonded to plywood or another layered core.
Engineered flooring can sometimes splinter differently because the blade passes through several layers and adhesives. A sharp fine-tooth blade is therefore just as important for engineered flooring as it is for solid boards.
The cutting technique is essentially the same, but you should always check the flooring manufacturer’s installation instructions before beginning.
What Circular Saw Blade Is Best for Hardwood Flooring?
Blade selection has one of the biggest effects on cut quality.
For most hardwood flooring, use a sharp carbide-tipped blade with a relatively high tooth count designed for clean crosscuts or finish work.
On a standard 7-1/4-inch circular saw, a 40- to 60-tooth finish blade is a practical range for many flooring cuts. A blade toward the higher end of that range generally leaves a smoother crosscut, while a slightly lower tooth count can cut dense wood faster and clear chips more easily.
You do not need the maximum tooth count available. A very fine blade can cut slowly in thick hardwood and may generate more heat if pushed aggressively.
Blade Type by Cut
| Cutting Job | Recommended Blade Style |
| Clean hardwood crosscuts | Fine-tooth carbide finish blade |
| Engineered hardwood | Fine-tooth carbide blade |
| Long hardwood rip cuts | Combination or quality ripping-capable blade |
| Occasional mixed cuts | Combination blade |
| Factory-finished flooring | Sharp finish blade to minimize chipping |
For a flooring project involving both ripping and crosscutting, a quality combination or fine-finish blade is usually the most convenient option.
If you have many long rip cuts through dense solid hardwood, switching to a blade better suited to ripping can reduce heat and strain on the saw.
Avoid Dull or Coarse Construction Blades
A coarse framing blade can physically cut hardwood flooring, but I would not use one when appearance matters.
Fewer, aggressive teeth tend to leave more visible tear-out.
A dull blade is even worse. You may notice that the saw requires more forward pressure, burns the wood, produces rough edges, or wanders from the line.
If the first several boards cut beautifully but later cuts become rough, inspect or replace the blade.
Key Takeaways:
- A sharp carbide finish blade is the best starting point for hardwood flooring.
- Around 40–60 teeth on a standard circular saw works well for many clean flooring cuts.
- Replace a blade that starts burning, tearing, or requiring excessive pressure.
How to Cut Hardwood Flooring With a Circular Saw Step by Step
Good cuts begin with careful layout and stable support.
Do not rush directly to the saw.
1. Measure the Required Length
Dry-fit the flooring row or measure the available space carefully.
If the board ends at a wall, subtract the required expansion clearance.
Floating and nail-down hardwood systems can have different installation requirements, so follow the flooring manufacturer’s specified perimeter gap rather than assuming one universal dimension.
Remember that baseboard or shoe molding normally hides the gap after installation.
2. Mark the Cut
Use a sharp pencil and a square to draw the cut line.
For a normal crosscut, carry the line across the entire board so you can see whether the saw stays square.
If you are ripping a plank lengthwise, mark both ends and connect them with a straightedge.
For irregular walls, transfer the shape more carefully rather than assuming the wall is perfectly straight.
3. Identify the Waste Side
Always decide which side of the line will be discarded.
A circular saw blade removes material equal to the blade kerf.
If you center the blade directly over the finished measurement line, the board will end up slightly short.
Keep the blade on the waste side and preserve your layout line.
4. Position the Finished Face Correctly
Most standard handheld circular saws rotate so the teeth enter the bottom of the workpiece and exit through the top.
The exit side is usually more prone to splintering.
Therefore, for a standard circular saw, I generally place hardwood flooring finished face down when the visible surface needs the cleanest possible edge.
However, saw designs and blade configurations can vary. Make a test cut on scrap if you are unsure.
5. Support the Board Securely
Place the flooring on sawhorses, a workbench, or a sacrificial cutting surface.
Both the main board and offcut should be supported so they do not bend, pinch the blade, or fall unpredictably.
For a crosscut, leave the cut line clear so the blade will not hit the bench underneath.
For long rip cuts, support the board along its length.
Never balance a narrow flooring plank loosely across two unstable supports.
6. Set the Blade Depth
Adjust the circular saw so the teeth extend only a small distance below the flooring.
A practical starting point is approximately 1/8 to 1/4 inch below the board.
There is rarely a reason to expose the entire blade when cutting a relatively thin flooring plank.
A shallow setting reduces unnecessary blade exposure and can help improve control.
7. Position a Guide if Needed
For a short crosscut, you can often follow a square pencil line freehand.
For long rip cuts, I strongly recommend using a straightedge, rip fence, or circular-saw guide.
Measure the offset from the edge of the saw’s base plate to the blade.
Clamp the guide so the blade falls on the waste side of your layout line.
Make sure the clamps will not interfere with the motor or base plate as the saw passes.
8. Start the Saw Before Entering the Wood
Hold the saw with the base plate resting securely on the flooring but keep the blade clear of the edge.
Start the saw and allow it to reach full operating speed.
Then move forward gradually.
Do not start the blade while it is already touching the wood because it can kick, grab, or damage the edge.
9. Guide the Saw Steadily
Move at a controlled pace.
The blade should cut without heavy pushing.
Keep the base plate flat against the flooring and watch your cut line ahead of the blade.
If the motor slows noticeably or you need substantial force, reduce your feed rate and check the blade.
10. Finish the Cut Without Breaking the Offcut
As you reach the end, support the waste piece if necessary.
An unsupported offcut can break away before the blade finishes, tearing fibers from the finished board.
Let the blade clear the material before releasing the trigger.
Keep holding the saw securely until the blade stops.
Should Hardwood Flooring Face Up or Down When Cutting?
With most standard circular saws, place the finished hardwood surface down.
This is because a typical circular saw blade cuts upward through the material. The teeth enter the lower face and exit through the upper face, where they can lift fibers and create tear-out.
Putting the finished surface down generally gives the decorative face the cleaner edge.
When Might the Finished Face Go Up?
Some track saws, specialty blades, or different cutting setups behave differently.
You may also need the finished side up when transferring a complicated layout directly from the visible surface.
If you must cut with the finish facing up, scoring the line and using a sharp fine-tooth blade can reduce damage.
A test cut is always worthwhile before cutting expensive flooring.
How to Prevent Splintering When Cutting Hardwood Flooring
Factory-finished hardwood can show even small chips along a cut edge.
Fortunately, most flooring cuts near perimeter walls will eventually be hidden by trim. Still, clean cuts make installation easier and reduce the chance of visible damage.
Use a Sharp Fine-Tooth Blade
This matters more than almost anything else.
A sharp blade shears fibers cleanly.
A dull blade tears and burns.
If you see increasing tear-out after many cuts, change the blade rather than trying to compensate by pushing slower and harder.
Score the Cut Line
For highly visible cuts, score the finish lightly with a sharp utility knife along the cut line.
This severs surface fibers before the saw reaches them.
Use a straightedge and keep the knife cut precisely on the correct side.
Be careful not to let the blade slip across the finished surface.
Use Painter’s Tape When Helpful
Painter’s tape can make a pencil line easier to see on dark or glossy flooring.
It may also help support small surface fibers.
Apply the tape over the cut area, mark your line on top, and cut through it.
Do not expect tape to compensate for a dull blade.
Support the Board Properly
Vibration contributes to rough cutting.
Keep the board stable and support both sides of the cut.
The flooring should not bounce or flex while the blade passes through it.
Maintain a Controlled Feed Rate
Do not race through the board.
Allow the blade to cut at its natural rate.
Equally, do not move so slowly that the blade rubs excessively and burns the hardwood.
A steady feed is better than either extreme.
Key Takeaways:
- Place the finished side down with a standard circular saw unless your setup requires otherwise.
- A sharp blade, good support, and moderate feed pressure are the best defenses against chipping.
- Scoring or painter’s tape can help when an edge will remain visible.
How to Make a Crosscut in Hardwood Flooring
Crosscuts shorten flooring boards across their width.
They are the most common circular-saw cut during installation.
Use a speed square or combination square to mark a 90-degree line.
Support the flooring face down and position the board so the waste end extends beyond the support.
For greater accuracy, you can clamp a speed square to the plank and run the saw base against it.
Make sure the guide is positioned so the blade stays on the waste side.
Start the saw, reach full speed, and move through the board in one controlled pass.
A clean crosscut should require almost no sanding if the blade is sharp.
How to Rip Hardwood Flooring With a Circular Saw
A rip cut runs lengthwise with the grain.
You commonly need it for the first or last row when a full-width plank does not fit.
Long rip cuts are more challenging with a handheld circular saw because even a small steering error becomes noticeable over several feet.
A straightedge guide makes the job much easier.
Measure the Final Row at Several Points
Walls are not always straight or square.
Measure the distance from the installed flooring to the wall at several positions along the plank.
Subtract the required expansion gap.
Transfer those measurements to the board.
If the wall varies, connect the marks rather than making one perfectly parallel factory-style cut.
Preserve the Correct Edge
Before ripping, check which side of the plank contains the tongue and which contains the groove.
The installation layout may require you to keep one specific locking edge.
Cut the correct side.
This sounds obvious, but it is easy to remove the edge you needed when working quickly through an entire room.
Use a Rip Fence or Straightedge
Clamp a long straight guide parallel to your layout line.
Measure the saw-base offset accurately.
Guide the saw along the straightedge without twisting it.
For a very narrow rip, make sure the plank is fully supported so the saw’s base plate does not tilt.
If you need to make many identical rips, a table saw is usually faster and more repeatable.
How to Cut Engineered Hardwood Flooring With a Circular Saw
The process is nearly identical to cutting solid hardwood.
Use a sharp finish blade and support the plank well.
Because engineered flooring contains several bonded layers, splintering can occur both in the hardwood wear layer and along the underlying plies.
A clean-cut carbide blade helps minimize this.
If the engineered flooring uses a click-lock system, protect the tongue-and-groove profile carefully.
Damaging the locking edge can make the board unusable even if the visible surface looks perfect.
For crosscuts at the end of a row, losing the end profile may be intentional because that side will face the wall.
For rip cuts, verify exactly which long edge needs to remain before cutting.
How to Cut Hardwood Flooring Around a Wall or Obstacle
A circular saw works well for straight portions, but it cannot make every shape.
For an L-shaped notch, you can make two straight circular-saw cuts toward the corner, but the round blade cannot complete a perfectly sharp inside corner without overcutting.
Finish the final portion with a jigsaw, oscillating multi-tool, or handsaw.
For pipes, curved columns, or other irregular obstacles, a jigsaw is normally the better tool.
Use the circular saw where the cut is straight and switch tools when the geometry changes.
Trying to force one tool to do every flooring cut often produces worse results.
Can You Cut Installed Hardwood Flooring With a Circular Saw?
Yes, but this is a very different operation and requires much more caution.
Cutting installed hardwood may be necessary during repairs, room transitions, cabinet modifications, or removal of damaged sections.
The blade depth becomes critically important because materials below the flooring may include subfloor, underlayment, radiant-heating components, electrical wiring, plumbing, or other building systems.
Set the Blade Depth Carefully
Determine the flooring thickness first.
Set the blade only deep enough to pass through the hardwood.
Avoid cutting deeply into the subfloor unless the repair specifically requires it.
A plunge-style track saw or oscillating tool may offer better control in certain repair situations.
Know What Is Below the Floor
Do not assume the subfloor is empty underneath.
Plumbing and wiring often pass through or directly below floor systems.
Radiant heating is an especially important concern.
If you cannot determine what lies below the planned cut, do not blindly increase blade depth.
Circular Saws Cannot Cut Flush to Walls
The motor housing and base plate prevent the blade from reaching directly against a wall.
An oscillating multi-tool, jamb saw, toe-kick saw, or another specialized tool may be required for those situations.
Toe-kick saws in particular require careful handling and are not a casual substitute for an ordinary circular saw.
How to Cut Hardwood Flooring at an Angle
Angled cuts are sometimes needed around diagonal walls, stairs, hearths, and unusual room layouts.
Use a bevel gauge or protractor to capture the angle.
Transfer it to the board and mark the waste side.
For a short angled crosscut, cut freehand along the line or clamp an appropriate guide.
If you need many identical angled cuts, a miter saw is generally more efficient.
Keep in mind that room corners are not always exactly 90 degrees. Measuring the actual angle can prevent unnecessary gaps.
How to Cut the First and Last Rows
The first and last rows often require the most precise lengthwise cutting.
For the first row, you may need to rip boards so the opposite side of the room finishes with an acceptable board width.
For the final row, measure from the last installed row to the wall at several points.
Subtract the manufacturer’s required expansion gap.
Transfer the measurements to the final plank and connect them.
If the wall is wavy, your line may not be perfectly straight.
A circular saw with a rigid straightedge cannot follow a heavily irregular scribe line. In that case, make the main rip with the circular saw and finish irregular portions with a jigsaw.
Circular Saw vs. Other Tools for Hardwood Flooring
A circular saw is versatile, but different tools have different strengths.
| Cut Type | Tool I Would Prefer |
| Occasional crosscuts | Circular saw |
| Many repeated crosscuts | Miter saw |
| Long straight rip cuts | Table saw or guided circular saw |
| Curves and notches | Jigsaw |
| Door-jamb undercuts | Oscillating tool or jamb saw |
| Installed-floor repair cuts | Circular saw with controlled depth or suitable specialty tool |
| Extremely precise guided cuts | Track saw |
For a DIY hardwood-flooring installation, a circular saw plus a jigsaw can handle a very large percentage of the required cuts.
If the project is large, adding a miter saw can save considerable time.
Key Takeaways:
- Use the circular saw for straight crosscuts and rips.
- Switch to a jigsaw or oscillating tool for curves, notches, and inside corners.
- When cutting installed flooring, blade-depth control and knowledge of concealed utilities become critical.
Common Mistakes When Cutting Hardwood Flooring With a Circular Saw
One common mistake is cutting the board from the wrong face.
If the finished side faces up with a standard saw, the blade may chip the decorative surface as the teeth exit.
Another mistake is using a framing blade for finish work. It cuts quickly but can leave rough edges.
Poor support can pinch the blade and increase kickback risk.
Cutting directly on the finished measurement line is also a common layout error because the blade kerf removes part of the material you intended to keep.
Perhaps the most expensive mistake is cutting off the wrong tongue or groove during a rip.
Always check plank orientation twice before starting the saw.
Finally, do not ignore expansion clearance. Hardwood naturally changes dimension with moisture conditions, and flooring systems require perimeter space to accommodate that movement.
Circular Saw Safety for Hardwood Flooring
Wear eye and hearing protection.
Hardwood cutting produces chips and fine dust, so dust collection and suitable respiratory protection are also important, particularly when making many cuts.
Cut flooring outdoors or in a designated cutting area whenever practical. This keeps sawdust away from newly installed boards and reduces cleanup.
Always disconnect power or remove the battery before changing blades.
Check that the blade guard moves freely before each cutting session.
Keep the power cord away from the cutting path on corded saws.
Never place your free hand under the flooring to support it while the saw is operating. The exposed portion of the blade below the board may not be visible.
Stand slightly to the side of the blade path rather than directly behind it.
If the blade binds, release the trigger and let it stop before moving the saw.
Do not pull a spinning circular saw backward out of a pinched kerf.
FAQs about how to cut hardwood flooring with a circular saw
Can you cut hardwood flooring with a circular saw?
Yes. A circular saw is excellent for straight crosscuts, rip cuts, and angled cuts in solid and engineered hardwood flooring.
Use a sharp fine-tooth carbide blade for the cleanest results.
What blade should I use for hardwood flooring?
A carbide-tipped finish or combination blade with approximately 40–60 teeth on a typical 7-1/4-inch circular saw works well for many hardwood flooring applications.
The best blade depends on whether you are crosscutting, ripping, or doing both.
How many teeth should a circular saw blade have for hardwood flooring?
Around 40–60 teeth is a practical range for many clean flooring cuts.
Higher tooth counts generally favor smoother crosscuts, while slightly lower counts can clear chips more efficiently during ripping.
Do you cut hardwood flooring face up or face down?
With a standard circular saw, place the finished face down for the cleanest visible edge in most situations.
The blade teeth usually exit through the upper surface, where tear-out is more likely.
Can a circular saw cut solid oak flooring?
Yes.
A sharp carbide blade can cut oak flooring easily.
Use a controlled feed rate and replace the blade if you notice burning or increasing tear-out.
Can a circular saw cut engineered hardwood flooring?
Yes.
Use a fine-tooth carbide blade and protect the finished wear layer and locking edges.
How do I stop hardwood flooring from splintering?
Use a sharp finish blade, cut with the decorative side oriented correctly, support the plank firmly, and avoid forcing the saw.
Scoring the line or adding painter’s tape can further reduce surface damage.
Should I use painter’s tape when cutting hardwood flooring?
It can help support delicate finish edges and make layout marks more visible.
However, it is optional when you already have a sharp blade and correct cutting orientation.
How deep should I set the circular saw blade?
Set it only slightly deeper than the flooring, commonly around 1/8 to 1/4 inch below the board.
Excessive blade exposure is unnecessary.
Can I rip hardwood flooring with a circular saw?
Yes.
Use a straightedge or rip guide for long cuts, support the entire board, and make sure you preserve the tongue or groove required for installation.
Can I make the final-row cut with a circular saw?
Yes.
Measure the wall at several locations, subtract the required expansion space, transfer those measurements, and rip the plank to fit.
A jigsaw may be easier if the wall is very irregular.
Can I cut hardwood flooring after it is installed?
Yes, but use extreme care.
Set the blade only deep enough to cut the flooring and confirm what lies below the floor before cutting.
Can I cut hardwood flooring directly on the floor?
I do not recommend cutting loose boards directly on a finished floor.
Use sawhorses, a workbench, or a sacrificial cutting surface so the blade cannot damage the floor underneath.
Can I use a framing blade for hardwood flooring?
It will cut the wood, but a coarse framing blade is more likely to leave rough or chipped edges.
A fine-tooth finish blade is a better choice.
Why is my circular saw burning hardwood?
Possible causes include a dull blade, pushing too slowly, blade misalignment, excessive friction, or using an inappropriate blade for the cut.
Inspect the blade before continuing.
Why is my circular saw chipping the finish?
The blade may be dull or too coarse, or you may be cutting with the finished side facing the wrong direction for your saw.
Try a fine-tooth blade and place the decorative face down with a standard circular saw.
Do I need a guide for crosscuts?
Not always.
A short flooring plank can often be cut accurately by following a square layout line.
A speed square used as a saw guide can improve repeatability.
Do I need a guide for rip cuts?
I strongly recommend one.
A long straightedge or rip fence makes it much easier to maintain a consistent width over the entire plank.
Can I use a circular saw for curved flooring cuts?
No, not effectively.
Use a jigsaw for curves and irregular shapes.
What tool is best for cutting hardwood flooring around pipes?
A drill or hole saw works well for round openings, while a jigsaw is best for irregular cutouts.
What should I do if the wall is not straight?
Measure the gap at several points and transfer those measurements to the plank.
For a mildly irregular line, a circular saw may still work. For a pronounced curve or wave, use a jigsaw.
Do hardwood floors need an expansion gap after cutting?
Yes, hardwood flooring installations typically require perimeter clearance, but the exact dimension depends on the flooring system and manufacturer.
Follow the specific installation instructions for your product.
Conclusion
If you are learning how to cut hardwood flooring with a circular saw, the most important steps are using the right blade, supporting the plank correctly, cutting from the appropriate side, and guiding the saw without forcing it.
For most flooring projects, I recommend a sharp carbide finish blade in roughly the 40- to 60-tooth range on a standard 7-1/4-inch circular saw. Place the finished face down with a conventional circular saw unless your blade or saw configuration requires otherwise, because the upper surface is normally more prone to tear-out.
Mark every cut carefully and keep the blade on the waste side of the line. For long rip cuts, use a straightedge or saw guide. For short crosscuts, a square can provide all the guidance you need.
Keep the blade depth only slightly greater than the flooring thickness and support both the board and offcut so the material cannot pinch the blade or break away prematurely.
A circular saw is excellent for straight work, but it does not have to handle every cut. Use a jigsaw for curves and irregular notches, and an oscillating tool for certain jamb or repair cuts.
Most importantly, preserve the tongue or groove your installation requires and leave the manufacturer’s specified expansion clearance at walls and fixed objects. With a sharp blade, stable support, and controlled feed pressure, a circular saw can produce fast, clean hardwood-flooring cuts without damaging the factory-finished surface.