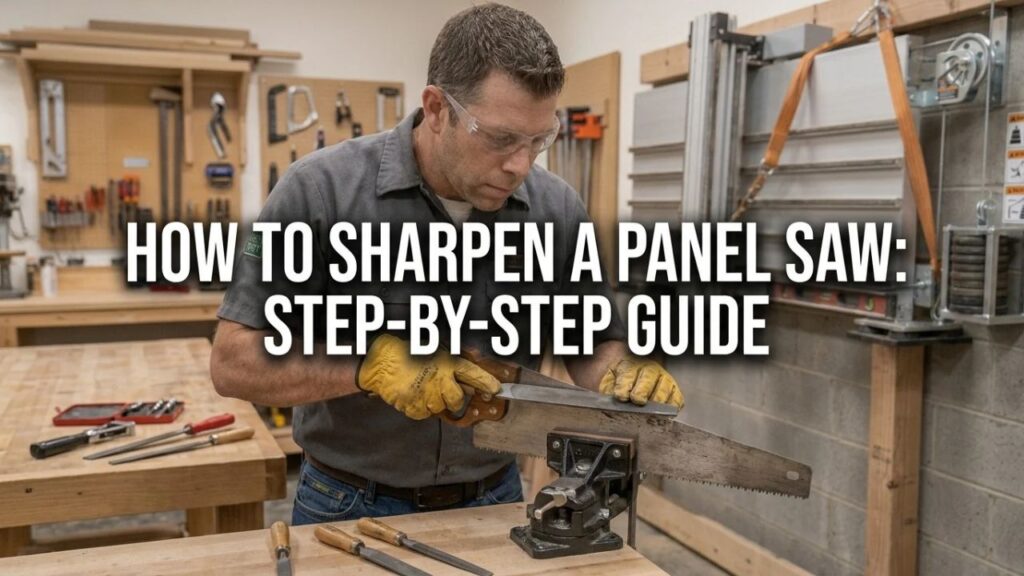
How to Sharpen a Panel Saw: Step-by-Step Guide
If you want to know how to sharpen a panel saw, first make sure its teeth are actually resharpenable. Then secure the saw in a saw vise, lightly joint uneven teeth if necessary, correct the set, and sharpen each tooth with a properly sized triangular saw file. Rip teeth are normally filed straight across with little or no fleam, while crosscut teeth require alternating bevels, or fleam, to create knife-like cutting edges.
A traditional panel saw with ordinary spring-steel teeth can usually be sharpened repeatedly. Many modern hardpoint panel saws are different: their teeth are induction or impulse hardened. These teeth are harder than ordinary saw files and are generally intended to be replaced rather than resharpened.
Assuming you have a resharpenable saw, the most important rule is to preserve consistent tooth geometry. You do not need to remove much steel. When the teeth are already even and correctly shaped, one or two light file strokes per gullet may be enough to bring a dull panel saw back to excellent cutting condition.
The procedure becomes more involved when the teeth are uneven, damaged, badly set, or previously filed incorrectly. Then you may need to joint, reshape, set, sharpen, and lightly stone the blade.
In this guide, I’ll explain how to sharpen a panel saw, how to identify rip and crosscut teeth, which saw file to use, how to joint and set the teeth, what filing angles work, and how to correct common problems such as drifting or binding.
Can All Panel Saws Be Sharpened?
No.
Before purchasing files or altering the teeth, determine whether your panel saw has traditional resharpenable teeth or hardened disposable teeth.
Traditional Western panel saws usually have a steel plate whose teeth can be cut with a triangular saw file. Many vintage saws and high-quality modern traditional hand saws fall into this category.
Modern construction-type panel saws frequently have hardpoint or induction-hardened teeth.
These teeth often have a visibly darkened, blue-gray, or differently colored area along the tooth line because only the teeth were hardened.
A normal saw file will tend to skate over these teeth rather than cutting them.
Hardpoint Panel Saws
A hardpoint saw is designed to maintain a sharp edge for a long time without routine sharpening.
The tradeoff is that once those hardened teeth finally become dull, ordinary hand filing is generally impractical.
In most cases, replacement is more economical than trying to grind every hardened tooth.
If you place a sharp saw file gently against a tooth and it barely bites while easily cutting ordinary steel elsewhere on the blade, the saw may have hardened teeth.
Do not ruin a good file repeatedly trying to sharpen them.
Traditional Resharpenable Panel Saws
If the file cuts the teeth cleanly, you can sharpen the saw normally.
Traditional panel saws are excellent candidates for home sharpening because you can maintain them for decades.
Key Takeaways:
- Traditional steel panel saw teeth can usually be sharpened with a triangular file.
- Induction-hardened or hardpoint teeth generally cannot be sharpened with an ordinary saw file.
- Test the tooth carefully before starting if you are uncertain what type of saw you own.
Know Whether Your Panel Saw Is Rip or Crosscut
This is the most important step before filing.
A panel saw may be sharpened for rip cutting, crosscutting, or a compromise pattern.
The filing technique changes accordingly.
Rip-Cut Panel Saw
Rip teeth cut approximately parallel with the wood grain.
They work somewhat like a row of tiny chisels.
Viewed from above, the cutting edges normally run nearly square across the saw plate rather than being heavily beveled.
A rip saw is therefore sharpened with little or no fleam.
Crosscut Panel Saw
Crosscut teeth cut across wood fibers.
They work more like pairs of small knives, slicing fibers on opposite sides of the kerf.
To create these knife edges, the teeth are filed at alternating horizontal angles.
That angle is called fleam.
Crosscut sharpening is slightly more difficult because you need to maintain the same angle while filing alternating teeth.
What if You Have a General-Purpose Panel Saw?
Some panel saws use a hybrid tooth pattern.
If the saw previously cut well, the easiest approach is usually to reproduce the existing tooth geometry rather than redesign it.
Look at how the tooth faces and bevels are already filed and follow them.
For a first sharpening, preserving a good existing pattern is far easier than trying to calculate a completely new rake and fleam combination.
Understanding Rake, Fleam, Set, and Pitch
Four terms make panel saw sharpening much easier to understand.
Rake
Rake describes the angle of the front face of the tooth relative to the tooth line and filing orientation.
Less rake generally makes a tooth more aggressive.
More relaxed rake makes the saw easier to start and smoother to control.
A coarse rip saw can tolerate relatively aggressive rake, while a fine crosscut panel saw normally benefits from a more relaxed tooth.
You usually do not need to know an exact number when touching up a saw. Match the existing rake.
Fleam
Fleam is the horizontal angle at which you hold the file across the saw plate.
Rip teeth normally use approximately 0 degrees of fleam, meaning you file square across the plate.
Crosscut saws commonly use somewhere around 15–25 degrees of fleam, depending on how smooth or aggressive the saw is intended to be.
More fleam creates more pronounced knife-like cutting edges and generally produces a cleaner crosscut, although excessive fleam can make the edges more delicate.
Set
Set is the slight alternating bend of the teeth.
One tooth bends slightly left, the next slightly right.
This makes the kerf wider than the saw plate so the body of the blade can pass through the wood without binding.
Too much set produces a unnecessarily wide kerf and makes the saw feel loose.
Too little set causes binding.
Pitch
Pitch describes how closely spaced the teeth are, usually expressed as teeth per inch or points per inch.
A coarse saw has relatively few, large teeth.
A fine panel saw has more, smaller teeth.
The tooth pitch determines which triangular file size you should use.
What Tools Do You Need to Sharpen a Panel Saw?
You do not need a large sharpening setup.
The essential tool is a triangular taper saw file correctly sized for the teeth.
A saw vise is extremely helpful because the blade needs to be held rigidly close to the tooth line. If you do not own one, you can make wooden vise jaws and clamp the blade between them.
For a complete restoration, you may also need a small mill file for jointing, a saw set for correcting tooth set, and a fine sharpening stone for light side dressing.
A file handle is strongly recommended. Small saw files have sharp tangs and should not be pushed bare-handed.
Good lighting is equally important. Saw teeth are small, and uneven filing often begins because the sharpener cannot clearly see the flats and cutting edges.
What Size File Do You Need for a Panel Saw?
Choose a triangular file large enough that the tooth gullet uses only part of each file face.
This allows you to rotate the file periodically and expose fresh cutting surfaces.
A useful general guide is:
| Panel Saw Tooth Pitch | Typical Saw File |
| 4–5½ TPI | 7-inch regular taper |
| 5–6 TPI | 7-inch slim taper |
| 6–7 TPI | 6-inch slim taper |
| 8–9 TPI | 6-inch extra-slim taper |
| 9–10 TPI | 6-inch double-extra-slim taper |
| 11–14 TPI | 5-inch double-extra-slim taper |
File manufacturers vary slightly, so treat this as a practical starting point rather than an absolute rule.
A file that is too large will not sit properly in a fine gullet.
A file that is too small wears quickly and can create overly sharp gullet corners.
For many common panel saws in approximately the 7–10 TPI range, a slim, extra-slim, or double-extra-slim triangular saw file is usually appropriate.
Step 1: Clean and Inspect the Panel Saw
Before sharpening, clean the blade enough that you can clearly see the teeth.
Remove resin, heavy dirt, or surface contamination.
Then inspect the tooth line from the side and from directly above.
Look for teeth that are:
much shorter than their neighbors, bent badly sideways, missing, rounded over, irregularly set, or filed at noticeably different angles.
Also check whether the blade itself is bent or kinked.
Sharpening cannot correct a badly kinked saw plate.
A saw that wanders may have a sharpening problem, but it can also have unequal set or blade distortion.
Decide How Much Work Is Actually Necessary
If the saw cuts straight and all the teeth are approximately equal height but simply feel dull, do not perform a full restoration.
A light sharpening pass may be all it needs.
Jointing every time unnecessarily removes tooth height.
Setting every time can also overwork the teeth.
Traditional hand saws often need several light sharpenings before their set requires significant correction.
Step 2: Clamp the Saw Firmly
Place the saw in a saw vise with the teeth just above the jaws.
Having only a small amount of blade exposed reduces vibration and noise while filing.
The tooth gullets should generally sit only around 1/8 inch or so above the clamping jaws when practical.
Position the vise high enough that you can see the teeth comfortably while maintaining a consistent filing position.
Chest height works well for many people.
Try to stand in the same position through the sharpening sequence because moving your body constantly can change your filing angle.
Step 3: Joint the Teeth if Necessary
Jointing means lightly filing across the tops of the teeth so they all reach the same height.
Do this only when necessary.
Place a fine mill file in a saw jointer or hold it carefully so it stays square to the blade.
Run it lightly along the entire tooth line.
The goal is not to flatten the teeth substantially.
You want only a tiny shiny flat to appear at the tip of each tooth.
These small flats become visual guides during sharpening.
Why Jointing Matters
If some teeth are higher than others, the tall teeth do most of the cutting.
Short teeth may barely touch the wood.
The saw then feels rough and inefficient even if every individual tooth is technically sharp.
Jointing puts all the tooth tips into the same cutting plane.
Do Not Over-Joint
If you create large flat surfaces on every tooth, you have removed more steel than necessary and created much more reshaping work.
Use only enough file pressure to reveal the high spots.
Step 4: Reshape Badly Uneven Teeth
If jointing produces tiny, fairly equal flats, you can proceed to sharpening.
If some flats are much wider than others, tooth geometry needs correction.
Use the triangular file to reshape the gullets while watching those shiny flats.
A saw file simultaneously cuts the back of one tooth and the face of the next tooth.
Your objective is to redistribute material so the teeth become equal in size and the flats become progressively smaller and more uniform.
Do not simply deepen every gullet by the same amount.
That can preserve the irregularity.
Instead, bias file pressure toward whichever tooth needs more material removed.
This is one of the skills that improves with practice.
Step 5: Correct the Tooth Set if Necessary
After the tooth line is reasonably uniform, inspect the set.
Viewed from the end, the teeth should alternate slightly left and right.
Only a small amount is required.
The goal is simply to make the kerf slightly wider than the saw plate.
How to Set the Teeth
Adjust your saw set for the approximate tooth pitch.
Work along the blade and set every other tooth in one direction.
Then turn the saw around and set the remaining teeth to the opposite side.
Bend only the upper portion of each tooth.
Do not try to bend the tooth from its base near the gullet because this can crack it.
More Set Is Not Better
A common beginner mistake is applying excessive set.
A saw with too much set removes more wood than necessary and can feel imprecise.
Hardwood typically needs relatively little set.
Softer or wetter material can tolerate slightly more because it tends to pinch the blade more readily.
For general dry woodworking, use the minimum set necessary to prevent binding.
Step 6: Sharpen a Rip-Cut Panel Saw
Rip sharpening is the easier place to learn hand saw filing.
The file is normally held square across the saw plate, producing approximately zero fleam.
Place the triangular file into the first gullet.
Maintain the existing rake by matching the original tooth face.
Push the file forward smoothly.
A saw file cuts on the forward stroke, so lift or relax pressure while returning it.
Watch the Jointing Flats
The shiny flats created during jointing tell you when to stop.
Each file stroke cuts two neighboring teeth.
Continue until the flats disappear and the two faces meet in sharp edges.
Do not keep filing once the tooth is sharp.
Extra strokes simply make that tooth shorter than its neighbors.
Work systematically across the entire tooth line.
For a straightforward rip filing, many sharpeners file all the gullets from one side while maintaining the same geometry.
The critical requirement is consistency.
Typical Rip Geometry
For an existing saw, reproduce its original rake.
As a broad reference, woodworking rip saws commonly use modest rake rather than extremely vertical, aggressive teeth.
A very aggressive rake cuts quickly but can feel grabby and difficult to start.
A slightly more relaxed rake is a good choice for an everyday panel saw.
If you are new to sharpening, preserve what the manufacturer or previous competent sharpener already established.
Step 7: Sharpen a Crosscut Panel Saw
Crosscut sharpening requires an additional horizontal file angle—the fleam.
A practical starting range for many traditional crosscut saws is approximately 15–25 degrees.
Instead of holding the file square across the blade, rotate it horizontally so it crosses the saw at the desired angle.
File Every Other Gullet
Identify the teeth set away from you.
Place the file in the appropriate gullet and sharpen every other tooth while maintaining the same fleam and rake.
Skip the next gullet and move to the following one.
Continue along the length of the saw.
Then reverse the saw or your working direction and file the gullets you skipped using the opposite fleam direction.
The result should be alternating beveled cutting edges.
Why Alternating Fleam Matters
Crosscut teeth work in pairs.
One beveled edge slices the wood fibers on one side of the kerf, while the opposite tooth slices the other side.
The center material is then removed as the saw advances.
If the fleam angles differ substantially from side to side, the saw may drift.
Consistency is more important than achieving a mathematically perfect angle.
How Many File Strokes Should You Use?
There is no universal number.
A well-maintained saw might need only one or two light strokes per gullet.
A badly jointed or damaged saw may require considerably more.
Do not count strokes blindly.
Watch the metal.
The tooth is ready when the small jointing flat disappears and neighboring tooth faces meet cleanly.
If one tooth needs one stroke and another needs three because their flats differ, giving each exactly two strokes would preserve the error.
Use the flats as your guide.
Key Takeaways:
- Sharpen only until the jointing flats disappear.
- Rip teeth are normally filed with approximately zero fleam.
- Crosscut teeth need alternating fleam, commonly around 15–25 degrees on many traditional panel saws.
Should You File From the Heel or Toe?
Either direction can work if your method remains consistent.
Many sharpeners arrange the saw so the handle is on the right and work systematically along the blade.
With crosscut teeth, the direction can depend on which teeth are set toward or away from you.
What matters most is developing a repeatable routine.
Starting in the same location and following the same sequence makes it less likely that you will skip a gullet or file one twice.
A marker can help.
Darken the tooth line with a permanent marker before sharpening. The file removes the ink as you work, making your progress much easier to see.
Should You Stone a Panel Saw After Sharpening?
Light side stoning can be useful, but it should be done carefully.
Filing can leave small burrs on the sides of the teeth.
A very fine stone passed gently along each side of the blade can remove these burrs.
Stoning can also help correct a saw that consistently pulls to one side because of slightly unequal effective set.
Correcting a Saw That Pulls to One Side
First confirm that your sawing technique is not causing the drift.
Make several relaxed test cuts.
If the saw repeatedly pulls in the same direction, examine the set.
When the saw pulls to the right, the right-hand effective set may be greater. A very light pass with a fine stone along that side can reduce it.
If the saw pulls left, the opposite side may need attention.
Make only one light pass at a time, then test again.
It is easy to remove set and difficult to put it back uniformly.
How to Test a Sharpened Panel Saw
Choose a straight, representative piece of wood.
For a crosscut saw, test across the grain.
For a rip saw, test along the grain.
Start the cut lightly.
A properly sharpened saw should begin cutting without excessive downward pressure.
Once established in the kerf, the saw should advance using smooth strokes and roughly its own weight.
Pay attention to four things:
starting behavior, cutting speed, straight tracking, and surface quality.
If the saw is sharp but binds in the kerf, it may need slightly more set.
If it feels loose and leaves an unnecessarily wide kerf, it may have too much set.
If it drifts, compare the two sides and check both set and filing symmetry.
Why Does My Panel Saw Still Cut Slowly After Sharpening?
The teeth may be sharp yet still have poor geometry.
For example, excessively relaxed rake can make a saw easy to control but slow.
Too much fleam on a rip saw also reduces the chisel-like action needed for efficient ripping.
Other possibilities include too many teeth for the thickness of material, too little set, or a bent saw plate.
Also inspect your file.
A worn saw file can polish the tooth surfaces rather than cutting them cleanly.
Saw files are consumables and eventually need replacement.
Why Does My Panel Saw Bind After Sharpening?
Binding usually indicates insufficient kerf width.
The teeth may not have enough set, or previous stoning may have reduced it too far.
Before increasing set, make sure the blade itself is straight and clean.
Pitch or resin on the plate can also increase friction.
If set truly is inadequate, use the saw set conservatively.
Do not radically bend every tooth.
Small corrections are usually enough.
Why Does the Saw Wander After Sharpening?
Unequal set is one common cause.
Unequal crosscut fleam can also create stronger cutting edges on one side than the other.
Another possibility is uneven tooth height.
If a group of teeth is much taller, it can dominate the cut and steer the blade.
This is why sharpening should be treated as a system:
tooth height + tooth shape + sharpness + set must all work together.
Correcting only one factor cannot always solve the problem.
Can You Sharpen a Panel Saw With a Regular File?
You should use a proper triangular saw file.
The file’s 60-degree triangular shape is designed to fit the gullets of traditional Western saw teeth.
A general flat file is useful for jointing the tooth tips but cannot properly sharpen the gullets.
Needle files can work for extremely fine teeth, but an ordinary panel saw generally needs a purpose-made taper saw file sized to its pitch.
Using the correct file makes maintaining consistent tooth geometry much easier.
Can You Use a Dremel to Sharpen a Panel Saw?
I do not recommend it for a traditional fine-tooth panel saw.
A rotary abrasive tool removes metal extremely quickly and makes it difficult to maintain identical tooth geometry.
It can also generate heat and remove too much material from individual teeth.
Hand filing is slower but provides much greater control.
A traditional panel saw may have dozens of teeth that need to remain remarkably uniform.
A sharp triangular saw file is the right tool.
How Often Should You Sharpen a Panel Saw?
Sharpen it before it becomes extremely dull.
A light touch-up is much easier than rebuilding heavily rounded teeth.
Signs that your saw needs sharpening include needing excessive downward pressure, noticeably slower cutting, ragged surfaces, difficulty starting the cut, or shiny rounded tooth edges.
If the saw remains properly set and evenly shaped, a light filing can restore it quickly.
Waiting until the teeth are badly worn usually means jointing and reshaping become necessary.
Can You Change a Crosscut Panel Saw to Rip?
Yes, a traditional resharpenable panel saw can be retoothed or refiled into another pattern.
However, changing crosscut teeth to true rip geometry may require substantial reshaping.
Simply filing a single light pass square across deeply beveled crosscut teeth will not instantly create good rip teeth.
You may need to joint the saw substantially, reshape the teeth to the desired rake, restore the set, and then perform the final rip filing.
For a valuable vintage saw or your first sharpening attempt, I would practice on an inexpensive saw before attempting a complete tooth conversion.
Can You Change a Rip Panel Saw to Crosscut?
Yes.
Once the rip tooth geometry is even, you can introduce alternating fleam during the final filing.
However, rake may also need adjustment depending on the desired crosscut behavior.
Again, converting tooth geometry is more advanced than simply sharpening a dull saw.
For beginners, learning to preserve an existing good pattern is the better first project.
Common Panel Saw Sharpening Mistakes
The most damaging mistake is filing every tooth based on a fixed stroke count rather than watching the tooth height.
That creates uneven teeth.
Another common mistake is over-setting the saw. The blade only needs enough clearance to move freely in the kerf.
Beginners also tend to change file angle as they move along the blade. Using a simple visual filing guide attached to the end of the file can make rake and fleam much easier to maintain.
Over-jointing is another problem. Joint only enough to identify the high teeth.
Finally, avoid sharpening a hardpoint panel saw with a conventional file. If the teeth are significantly harder than the file, neither the sharpening quality nor the file life will be good.
FAQs about How to Sharpen a Panel Saw
Can you sharpen a panel saw yourself?
Yes, if it has traditional resharpenable steel teeth.
With a saw vise, correctly sized triangular file, and some practice, home sharpening is very practical.
Can hardpoint panel saws be sharpened?
Generally no with normal hand-saw files.
Their induction-hardened teeth are harder than ordinary files and are usually designed to be replaced when dull.
What file do you use to sharpen a panel saw?
Use a triangular taper saw file sized to the saw’s tooth pitch.
Coarse teeth require larger files; fine teeth require slimmer files.
How do I know what size saw file I need?
Count the saw’s teeth or points per inch and select a file recommended for that range.
For example, an 8–9 TPI saw commonly uses approximately a 6-inch extra-slim taper file.
Do you sharpen every tooth on a panel saw?
Yes.
Every cutting tooth needs a sharp edge, although crosscut saws are commonly filed in alternating groups so the bevel angles remain correct.
What angle do you sharpen a rip panel saw?
Rip teeth are generally filed with approximately 0-degree fleam, meaning the file is held square across the saw plate.
Preserve the existing rake unless deliberately changing the tooth geometry.
What angle do you sharpen a crosscut panel saw?
Many traditional crosscut saws use roughly 15–25 degrees of fleam.
The ideal value varies with tooth size, wood type, and desired smoothness.
What is fleam on a hand saw?
Fleam is the horizontal angle of the saw file relative to the saw plate.
It creates the beveled knife edges used by crosscut teeth.
What is rake on a panel saw?
Rake describes the front-face angle of the saw tooth.
It influences how aggressively the tooth enters the wood and how easily the saw starts.
Do you have to joint a saw every time you sharpen it?
No.
If the teeth are already equal height, a simple light touch-up may be enough.
Jointing is particularly useful when teeth have become uneven.
Do you need to set a panel saw every time you sharpen it?
No.
Properly maintained teeth can often be sharpened several times before significant resetting is required.
Set only when the kerf has become too narrow or uneven.
How much set should a panel saw have?
Only enough to make the kerf slightly wider than the saw plate so it does not bind.
Using excessive set wastes effort and produces a wider, less precise cut.
Why does my sharpened saw pull to one side?
Unequal tooth set, asymmetric filing, uneven tooth height, blade distortion, or sawing technique can cause drift.
Confirm the problem with several relaxed test cuts before adjusting the saw.
Can you fix too much set?
Yes.
A fine stone can be used very lightly along the sides of the teeth to reduce excessive set.
Work conservatively and test frequently.
Can a rusty panel saw be sharpened?
Usually, provided the rust has not deeply pitted or weakened the tooth line.
Clean the blade first so you can inspect the actual condition of the teeth.
How do you know when a panel saw is sharp?
A sharp saw should start easily, cut without excessive downward pressure, track predictably, and produce clean chips or sawdust appropriate to its tooth pattern.
Conclusion
Learning how to sharpen a panel saw is mainly about maintaining consistent tooth height, geometry, and set.
First, verify that the saw has traditional resharpenable teeth. If it has induction-hardened hardpoint teeth, a normal saw file generally will not sharpen them effectively, and replacement is usually the practical option.
For a traditional saw, clean and inspect the blade, clamp it securely in a saw vise, and decide whether it needs a simple touch-up or complete restoration.
If the teeth are uneven, lightly joint them with a mill file until each tip has a small shiny flat. Reshape badly uneven teeth before final sharpening and correct the set only if necessary.
For a rip panel saw, use a correctly sized triangular saw file and file approximately square across the blade with little or no fleam. Preserve the existing rake and stop filing when the jointing flats disappear.
For a crosscut panel saw, file alternate teeth with consistent opposing fleam angles, commonly around 15–25 degrees on traditional woodworking saws. The alternating bevels create the knife-like edges that slice cleanly across wood fibers.
Do not assume more filing makes the saw sharper. Once the tooth faces meet at a sharp point, additional strokes only make the tooth shorter and disturb the overall tooth line.
Likewise, use only enough set to keep the blade from binding.
My recommendation for a first sharpening is to avoid redesigning the saw. Copy its existing tooth geometry, use a file matched to the tooth pitch, remove as little metal as necessary, and concentrate on consistency.
After sharpening, make a few relaxed test cuts. A properly tuned panel saw should start easily, cut with little downward pressure, follow a straight line, and move smoothly without binding.
Once you become comfortable reading the tiny jointing flats and controlling your file angles, maintaining a traditional panel saw becomes far easier than it initially appears—and a quick touch-up can keep the same saw cutting well for many years.