How to Rip Laminate Flooring With a Circular Saw: Easy Guide
If you want to know how to rip laminate flooring with a circular saw, use a fine-tooth carbide blade suitable for laminate, mark the required width carefully, support the entire plank, clamp a straightedge guide in place, and feed the saw steadily along the length of the board. Because a conventional circular saw blade rotates upward through the workpiece, placing the laminate’s finished face down will usually put the cleaner side of the cut on the visible surface.
Ripping means cutting along the length of a laminate plank rather than shortening it across its width. You commonly need a rip cut when the final row beside a wall is narrower than a full plank, when fitting flooring around an irregular wall, or when adjusting the first row so the last row does not end up excessively narrow.
Laminate is relatively easy to cut, but its hard decorative wear layer can chip if you use a coarse framing blade, force the saw, or allow the plank to vibrate. The fiberboard core also creates fine dust, so safe workpiece support and dust control are important.
In this guide, I’ll explain how to rip laminate flooring with a circular saw step by step, which blade works best, which side should face up or down, how to make a straight cut without a table saw, how to minimize chipping, and what mistakes to avoid.
Can You Rip Laminate Flooring With a Circular Saw?
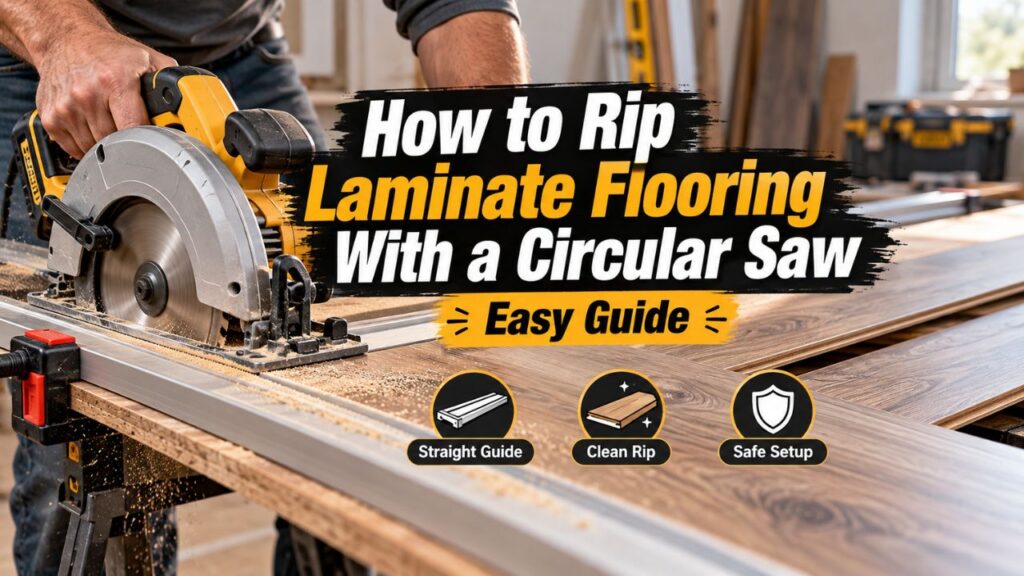
Yes. A circular saw is a practical tool for making long rip cuts in laminate flooring.
In fact, it can be easier than a jigsaw when you need a long, straight cut along an entire plank. A jigsaw is excellent for curved notches and irregular shapes, but its narrow blade can wander slightly during long cuts.
A circular saw has a larger, rigid blade and wide base plate, making it easier to follow a straightedge.
However, there is one important difference between ripping a solid board and ripping laminate flooring.
Laminate typically has a hard wear layer over a decorative printed layer and a high-density fiberboard core. The top surface is brittle enough to chip along the cut if the wrong blade or cutting direction is used.
The goal is therefore not simply to get through the plank. You want a cut that is straight enough for installation while minimizing damage to the decorative edge.
Fortunately, the ripped edge of the first or last flooring row is usually hidden beneath baseboard or quarter-round molding. That means the cut does not always need furniture-grade appearance, but it still needs to be straight and correctly positioned so the flooring can maintain its required expansion gap.
What Circular Saw Blade Is Best for Laminate Flooring?
Blade selection makes a major difference.
For laminate flooring, I recommend a sharp carbide-tipped fine-finish or laminate-specific blade rather than a coarse 18- or 24-tooth construction blade.
A coarse blade is excellent for rapidly ripping framing lumber, but it takes relatively large bites from the material. On a brittle laminate surface, those larger bites can produce visible chips along the cut.
A finer blade produces smaller cuts and usually leaves a cleaner edge.
For a typical 7-1/4-inch circular saw, a blade in roughly the 40- to 60-tooth range is often a practical choice for clean laminate cutting. Some manufacturers also make dedicated laminate or composite-material blades with tooth geometry designed specifically for abrasive laminated materials.
Do not focus on tooth count alone. The blade should also be rated for the material and compatible with your saw’s diameter, arbor, speed, and rotation requirements.
Why Carbide Teeth Matter
Laminate flooring is surprisingly abrasive.
The hard wear layer can dull ordinary cutting edges faster than softwood does.
Carbide-tipped teeth hold their edge much longer and are standard on quality circular saw blades intended for laminate, hardwood, plywood, melamine, and similar sheet materials.
If you are flooring an entire room and making many cuts, starting with a sharp blade is worthwhile.
A blade that was already dull from years of construction work may technically cut the plank, but it is much more likely to tear the surface, burn the material, and require excessive feed pressure.
Can You Use a 24-Tooth Blade?
Yes, especially when the cut will be hidden beneath baseboard.
But it would not be my first choice.
A sharp 24-tooth blade can rip laminate quickly, but it generally produces more chipping than a fine-finish blade.
If a 24-tooth blade is all you have, make a test cut on a scrap plank first. If the visible side remains acceptable for your installation, you can use it.
For a clean exposed edge, I would switch to a finer blade.
Key Takeaways:
- A fine-tooth carbide blade is better for laminate than a coarse framing blade.
- Roughly 40–60 teeth on a common 7-1/4-inch saw is a useful general range.
- Laminate is abrasive, so a sharp carbide blade helps maintain a cleaner cut.
Which Side of Laminate Flooring Should Face Up When Cutting?
With a conventional handheld circular saw, I generally place the finished decorative side down.
The reason is blade rotation.
On a standard circular saw, the teeth enter the material from the underside and exit through the top surface. Most splintering and chipping therefore occurs where the teeth exit.
If the decorative side faces downward, the blade enters through that finished surface first, which typically produces a cleaner edge there.
So for a standard circular saw:
Finished face down = usually cleaner visible surface.
This rule is different from some other saws.
For example, a typical table saw cuts upward through the workpiece, so the finished face is commonly placed up.
A track saw or specialty blade configuration may also behave differently.
That is why it is smart to make one test cut before processing all your flooring. Blade tooth geometry and laminate construction vary, and a scrap test tells you exactly which orientation gives the best result with your specific saw.
How to Rip Laminate Flooring With a Circular Saw Step by Step
A long rip cut is simple when you set it up carefully.
The majority of the work is actually measuring and guiding the saw. Once the plank is secure and the guide is correctly positioned, the cut itself should take only a few seconds.
1. Measure the Width You Need
Measure from the edge of the previously installed flooring to the wall.
Then subtract the expansion gap required by your laminate manufacturer.
Do not cut the final row tightly against the wall.
Laminate is usually installed as a floating floor, which means the floor needs space to expand and contract. The exact required gap varies by product and installation conditions, so use the instructions supplied with your flooring.
Measure at several points along the wall.
Walls are frequently not perfectly straight or parallel to the flooring.
For example, you might find that the required plank width is 4-3/8 inches at one end but 4-1/8 inches at the other. In that case, simply cutting a perfectly parallel strip may leave the wrong gap.
Transfer the actual wall shape to the plank when necessary.
2. Mark the Cut Line
Turn the plank so the decorative face is down if that is the orientation you have chosen for your circular saw.
Measure from the correct edge and make several marks along the length.
Connect those marks with a straightedge.
Use a sharp pencil so the cut line remains precise.
Remember to identify which side of the line is waste.
A circular saw removes material equal to the width of its blade kerf. You want the blade to travel on the waste side of the line so the finished flooring piece remains at the intended dimension.
3. Apply Painter’s Tape if Chipping Is a Concern
Painter’s tape can sometimes help control minor chipping and make a pencil line easier to see.
Place the tape along the cutting area and redraw your cut line over it.
Tape is not a substitute for a sharp, appropriate blade, but it can provide an additional little bit of surface support.
If the ripped edge will disappear under baseboard, this step may be unnecessary.
4. Support the Entire Plank
Place the laminate on a stable cutting surface.
Do not hold it across your leg or allow one end to hang freely while operating the saw.
A simple setup is a sacrificial sheet of rigid foam insulation on the floor or work surface. The laminate can lie flat while the blade extends slightly into the foam.
You can also support it on sawhorses with sacrificial boards, provided both the finished piece and offcut remain controlled and the blade will not strike the supports.
The important point is preventing the plank from bending, bouncing, or pinching the blade.
5. Set the Circular Saw Cutting Depth
Adjust the blade so it extends only slightly beyond the thickness of the laminate.
You do not need several inches of blade protruding below a plank that may be only a few millimeters thick.
A shallow, appropriate blade setting provides better control and reduces unnecessary blade exposure.
Check where the blade will travel before starting so it cannot contact your workbench, floor, clamps, or sawhorses.
6. Position a Straightedge Guide
For a long rip, I strongly recommend using a guide rather than trying to follow the pencil line entirely by eye.
You can use:
A factory circular-saw rip fence, if the required cut width falls within its range.
A clamped straight board.
A level.
A dedicated saw guide.
A track-compatible circular saw system.
The guide needs to be offset from the actual cut line by the distance between your saw blade and the edge of the circular saw’s base plate.
Measure that offset carefully.
For example, if the distance from the blade to the left edge of the base is 1-1/2 inches, position the straightedge 1-1/2 inches away from the desired blade path.
7. Clamp the Guide and Plank Securely
Clamp the guide so it cannot move while you cut.
Make sure the clamps do not interfere with the circular saw’s motor or base.
The flooring itself should also remain stationary.
Before turning on the saw, slide the unpowered tool along the guide to verify that the blade will follow the intended cut from beginning to end.
This quick dry run can prevent an expensive measuring error.
8. Start the Saw Before Entering the Plank
Position the saw base on the workpiece with the blade clear of the material.
Hold the saw firmly with both hands when the design provides appropriate grips.
Turn it on and allow the blade to reach full speed.
Then move the saw smoothly into the laminate.
Starting the motor while the blade is already touching the flooring can cause an abrupt movement or damage the cut edge.
9. Keep the Saw Base Flat
As you move forward, keep the entire saw base firmly against the laminate.
Do not tilt the saw.
Maintain gentle sideways contact between the base and straightedge guide without forcing the saw hard against it.
Feed at a steady pace.
If you move excessively slowly, friction can create unnecessary heat. If you rush, you can increase chipping or cause the saw to wander.
Let the blade determine the natural feed speed.
10. Finish the Cut Without Twisting the Saw
Continue all the way through the end of the plank.
Do not rotate the saw sideways if you notice the cut drifting.
Twisting a circular saw while the blade is engaged can bind the blade and increase kickback risk.
If something goes wrong, release the trigger, keep the saw still until the blade stops, remove it safely, and correct the setup.
After the blade has completely stopped, inspect the ripped edge.
How to Make a Perfectly Straight Rip Cut
The easiest way to make a straight rip cut is to stop relying solely on your ability to follow a pencil line.
A clamped straightedge transforms the circular saw into a much more controlled cutting tool.
The side of the saw base rides against the guide, preventing the blade from wandering away from the intended path.
For one or two planks, almost any truly straight board can work.
For an entire flooring project, a dedicated saw guide or ripping accessory is more convenient because it reduces setup time.
Using a Circular Saw Rip Fence
Many circular saws accept a small edge guide or rip fence.
The fence runs along the factory edge of the laminate plank while the saw makes a parallel cut.
This is particularly efficient when you need to rip several boards to exactly the same width.
The limitation is reach.
A small rip fence may not extend far enough for a narrow or unusually positioned cut.
For those situations, a clamped straightedge is more flexible.
Key Takeaways:
- Measure the required width at multiple points because walls are not always straight.
- Keep the manufacturer’s expansion gap rather than ripping the plank tight to the wall.
- Use a straightedge or rip fence for long cuts instead of freehanding whenever possible.
- Support the plank fully so the blade cannot bind as the cut finishes.
How to Prevent Chipping When Cutting Laminate
Chipping usually occurs because the decorative layer is brittle and poorly supported as the blade teeth exit the surface.
The first defense is the correct blade.
Use a sharp fine-tooth carbide blade designed for clean cuts in laminate, plywood, melamine, or similar materials.
Next, orient the plank so the blade enters the visible face before exiting the opposite side. On a conventional handheld circular saw, that typically means decorative side down.
A straight, steady feed also helps. Stopping, twisting, or repeatedly correcting the saw can leave a rougher edge.
Painter’s tape may reduce small chips, particularly on brittle finishes.
For an especially clean cut, some specialty saws and track saws allow a shallow scoring pass before the full-depth cut. With a regular circular saw, however, a good fine-tooth blade and correct orientation are normally sufficient for flooring work.
Remember that the cut edge against a perimeter wall is typically concealed later by baseboard or shoe molding. Do not spend excessive time polishing an edge that will never be visible.
How to Rip the Last Row of Laminate Flooring
The final row is where most laminate ripping occurs.
Begin by placing a full plank directly over the last installed row, keeping its tongue-and-groove orientation correct.
Use measurements or a scribing method to transfer the wall shape while accounting for the required expansion gap.
If the wall is perfectly straight, you can simply measure the width.
If the wall bows or changes direction slightly, scribing is more accurate.
After marking the plank, cut along the transferred line with the circular saw.
Before installing it, test-fit the piece without forcing the locking joint.
Check the expansion space all along the wall.
A narrow final piece can be awkward to lock into place, so follow your flooring manufacturer’s recommended method for installing the last row. A pull bar is commonly useful for closing perimeter joints where a tapping block cannot fit.
Should You Rip the First Row Too?
Sometimes.
Installers often begin with a full-width first row, but that can produce a very narrow strip at the opposite wall.
A better approach is to measure the room before installation.
Suppose the room width would leave only a 1-inch-wide final row.
Rather than accepting that narrow strip, you can rip some width from the first row so the first and final rows are more balanced.
This generally looks better and can make the final row easier to install.
Also check whether the starting wall is straight.
If it is significantly out of square, ripping or scribing the first row may be necessary to establish a straight flooring layout across the rest of the room.
Can You Rip Laminate Flooring Freehand With a Circular Saw?
Yes, but I do not recommend it when the cut needs to be accurate over the full plank length.
A skilled user can follow a pencil line reasonably well, especially when the edge will be hidden.
However, laminate planks are long and relatively narrow. A small steering error can create a visibly wavy cut.
A straightedge takes only a few extra minutes to set up and makes the result much more predictable.
If you must cut freehand, draw a clear line, support the entire plank, move slowly, and watch the blade guide rather than the outside edge of the saw.
Do not make abrupt corrections while the blade is buried in the material.
Circular Saw vs. Table Saw for Ripping Laminate Flooring
A table saw is often faster when you need to rip many laminate planks to the same width.
Its rip fence makes repeated parallel cuts straightforward.
The downside is portability. Carrying each plank to a stationary saw may be inconvenient during flooring installation.
A circular saw lets you cut near the installation area and requires much less equipment.
For a single final row, the circular saw is often the more practical choice.
For dozens of identical rip cuts, I would generally prefer a table saw if one is available and the work can be handled safely.
Circular Saw vs. Jigsaw for Laminate Flooring
These tools complement each other.
Use the circular saw for long, straight rip cuts.
Use the jigsaw for curves, notches, pipe cutouts, door jamb details, and irregular shapes.
A jigsaw is more maneuverable but usually slower and more likely to wander during a long straight rip.
Trying to do an entire flooring installation with only one cutting tool is possible, but having both can make the project much easier.
Common Mistakes When Ripping Laminate Flooring
One of the biggest mistakes is using a dull construction blade.
The saw may still cut, but the decorative layer can chip badly and the motor has to work harder.
Another mistake is forgetting the expansion gap. Measuring exactly to the wall and cutting the plank to that dimension can leave the floating floor unable to move normally.
Poor support is another common problem. If the offcut drops before the cut is complete, it can pinch the blade or tear the final section of laminate.
Do not place clamps in the saw’s travel path.
And never attempt to straighten a drifting cut by aggressively twisting the running saw. Stop, allow the blade to come to a complete halt, and reposition the guide.
Circular Saw Safety When Cutting Laminate
A circular saw can make this job quickly, but the plank’s thinness should not make you less cautious.
Wear eye protection because laminate chips can be ejected rapidly.
Hearing protection is also appropriate.
Cutting laminate and its fiberboard core can create substantial fine dust. Work in a well-ventilated area and use appropriate respiratory protection and dust collection when practical.
Keep both hands away from the blade path.
Never hold the laminate in your hand or across your leg while cutting.
Support the workpiece on a stable surface.
Set the depth so only a small amount of blade extends below the flooring.
Before changing the blade, adjusting the saw, or clearing material, disconnect the tool from power or remove its battery.
After releasing the trigger, remember that the blade continues spinning briefly. Keep the saw stable until it has stopped completely.
Key Takeaways:
- Laminate should be fully supported during a circular-saw rip cut.
- Keep the saw base flat and never twist the blade to correct a wandering cut.
- Use eye, hearing, and appropriate dust protection.
- Disconnect power before blade changes or adjustments.
FAQs about How to Rip Laminate Flooring With a Circular Saw
Can you rip laminate flooring with a circular saw?
Yes. A circular saw is an excellent choice for long straight rip cuts, especially when used with a fine-tooth carbide blade and a clamped straightedge guide.
What blade should I use to cut laminate flooring with a circular saw?
Use a sharp carbide-tipped fine-finish or laminate-specific blade. On a common 7-1/4-inch saw, roughly 40–60 teeth is a practical general range for cleaner cuts.
Should laminate flooring face up or down when using a circular saw?
With a conventional handheld circular saw, place the finished decorative face down for the cleanest visible edge in most cases because the blade teeth enter from below and exit through the top.
Make a scrap test if surface appearance is critical.
Can I use a wood blade to cut laminate flooring?
Yes, provided it is a sharp carbide-tipped blade appropriate for clean wood or laminate cutting.
A fine-finish blade generally produces less chipping than a coarse framing blade.
Can I cut laminate flooring with a 24-tooth blade?
Yes, but the cut may chip more.
A 24-tooth blade can be perfectly acceptable when the edge will be hidden under baseboard. For cleaner visible cuts, use a higher-tooth-count fine-finish blade.
How do I cut laminate flooring without chipping it?
Use a sharp fine-tooth blade, place the finished face on the cleaner-cut side for your saw, support the plank fully, feed the saw steadily, and consider painter’s tape along the cutting line.
How do I make a straight rip cut in laminate?
Clamp a straightedge parallel to the desired line and run the edge of the circular saw base against it.
A factory rip fence can also work when the cut is parallel to the existing plank edge and falls within the fence’s adjustment range.
How much blade should stick below laminate flooring?
Only a small amount needs to extend below the plank.
Set the cutting depth slightly deeper than the flooring thickness rather than exposing a large section of blade unnecessarily.
Can I rip laminate flooring without a table saw?
Yes.
A circular saw and straightedge can make excellent rip cuts. A jigsaw can also work, although it is harder to keep perfectly straight over a long distance.
Is a jigsaw or circular saw better for ripping laminate?
A circular saw is generally better for long straight rips.
A jigsaw is better for curved or irregular cuts.
Do I need to tape the cut line?
No.
Painter’s tape is optional. A sharp laminate-appropriate blade is more important.
Tape can provide a little additional protection against chipping and make the marked line easier to see.
Why does my laminate chip when I cut it?
Likely causes include a dull or coarse blade, incorrect board orientation, excessive vibration, poor support, or feeding the saw irregularly.
Can I use a circular saw to cut the last row of laminate?
Yes. This is one of the most common uses for a circular saw during laminate installation.
Measure or scribe the final row carefully and maintain the required expansion gap beside the wall.
How wide should the last row of laminate flooring be?
There is no universal width because plank dimensions and manufacturer instructions vary.
Before beginning installation, calculate the expected final-row width. If it would be excessively narrow, rip the first row so the two perimeter rows are more balanced.
Should laminate flooring be cut tight to the wall?
No.
Floating laminate generally needs a perimeter expansion gap.
Use the exact gap required by your flooring manufacturer rather than cutting the plank to touch the wall.
Can I rip multiple laminate planks at once?
I do not recommend stacking loose laminate planks and cutting them together with a handheld circular saw unless your tool and flooring manufacturer specifically support that method.
Individual planks are easier to secure and control.
Can a circular saw damage laminate flooring?
It can chip the decorative surface if the blade is dull, coarse, or used incorrectly.
With a sharp fine-tooth carbide blade and proper support, a circular saw can produce clean cuts.
Do I need a special laminate blade?
Not always.
A high-quality fine-finish carbide wood blade can work very well.
A dedicated laminate blade may last longer or produce cleaner results when you have a large flooring project because laminate surfaces are abrasive.
Should I cut laminate flooring indoors?
You can, but laminate cutting produces substantial fine dust.
Whenever practical, make saw cuts outdoors or in a well-ventilated work area with dust collection and appropriate respiratory protection.
Conclusion
Learning how to rip laminate flooring with a circular saw is straightforward once you control three things: blade choice, workpiece support, and the cutting guide.
For most DIY installations, I recommend a sharp fine-tooth carbide blade, typically around 40–60 teeth on a standard 7-1/4-inch saw, or a blade specifically rated for laminate flooring. Position the decorative side down with a conventional circular saw when that produces the cleaner entry-side cut, and verify the result on scrap before cutting an important plank.
Measure the required width at several points, maintain the expansion gap specified by the flooring manufacturer, and mark the complete rip line. Then clamp a straightedge in the correct offset position rather than trying to guide a long cut entirely by hand.
Support both the finished plank and offcut, set the blade only slightly deeper than the material, bring the saw to full speed before entering the laminate, and move steadily while keeping the base flat.
For the final flooring row, accuracy matters more than having a perfectly polished cut edge because baseboard or shoe molding will normally cover the perimeter. What matters is that the plank fits properly, maintains the required expansion space, and locks correctly with the previous row.
My preferred setup is simple: fine-tooth carbide blade, finished face down, fully supported plank, and a clamped straightedge guide. That combination makes a circular saw one of the easiest and most reliable tools for producing long, accurate rip cuts in laminate flooring.