How to Cut Laminate Flooring With a Miter Saw: Easy Guide
If you want to know how to cut laminate flooring with a miter saw, use a sharp fine-finish carbide blade, place the plank firmly against the fence, align the cut mark with the blade, let the saw reach full speed, and lower the blade smoothly through the flooring without forcing it. For many laminate products, keeping the decorative face upward on a miter saw produces the cleanest visible edge because the teeth enter the finished surface first, but the flooring manufacturer’s instructions should take priority.
A miter saw is one of the most convenient tools for shortening laminate planks during flooring installation. It makes fast, square crosscuts and can easily create angled cuts when a plank meets an unusual wall or architectural feature. Unlike a jigsaw, however, a miter saw is primarily suited to cutting across the width of a plank, not making long rip cuts along its length or curved cutouts around pipes.
Blade selection matters because laminate flooring is more abrasive than ordinary softwood. The hard decorative wear surface and dense fiberboard core can dull woodworking blades relatively quickly, while a coarse or damaged blade can chip the decorative layer.
Cutting technique matters just as much. Supporting the plank, preventing movement, using a clean blade, and avoiding an overly aggressive feed rate can dramatically improve the finished edge.
In this guide, I’ll explain how to cut laminate flooring with a miter saw step by step, what blade to use, which side should face up, how to avoid chipping, how to make angled cuts, and when a different saw is a better choice.
Can You Cut Laminate Flooring With a Miter Saw?
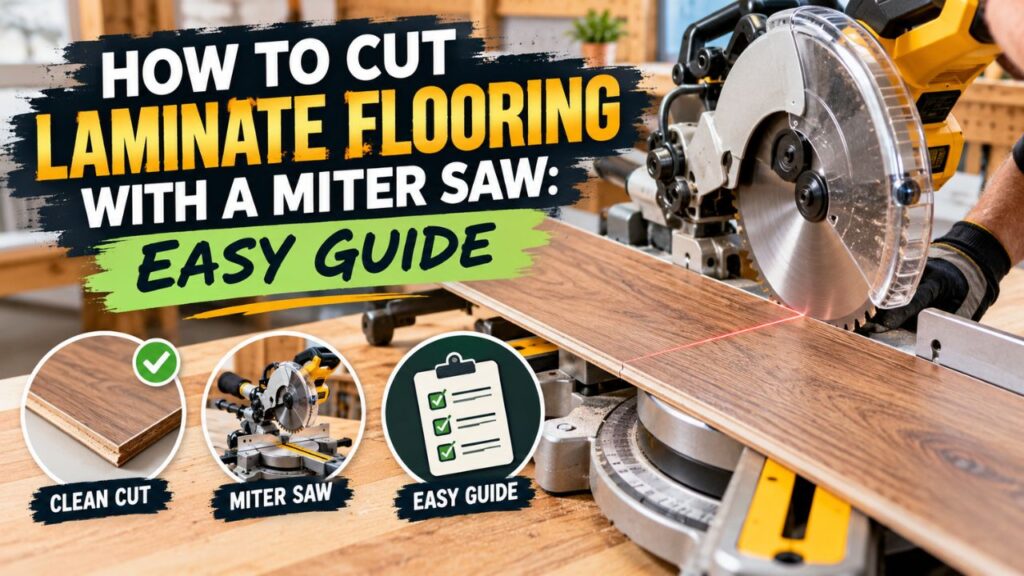
Yes. A miter saw is an excellent tool for crosscutting laminate flooring planks to length.
During a normal floating-floor installation, each row usually ends with a plank that must be shortened before it reaches the wall. A miter saw can make this type of repetitive cut quickly and accurately.
It is particularly useful for:
Crosscutting planks to length, making square 90-degree cuts, creating mitered or angled end cuts, and cutting several planks accurately during a large installation.
It is less useful for cutting a narrow strip from the entire length of a plank.
That type of cut is called a rip cut, and a table saw or circular saw with an appropriate blade is normally a better choice.
For curved cuts around door frames, plumbing penetrations, columns, or irregular shapes, a jigsaw is generally much more practical.
Why a Miter Saw Works Well for Laminate
A miter saw holds the cutting path at a controlled angle.
Once the saw is correctly adjusted, you can place each plank against the fence, align your mark, and make a repeatable crosscut.
That is considerably faster than manually guiding a circular saw across every plank.
The main disadvantage is blade wear.
Laminate flooring can be hard on carbide teeth, so a blade used for an entire flooring project may become noticeably duller than one used only on ordinary lumber.
If you have an expensive fine-woodworking blade that you want to preserve for furniture or trim, using a separate quality blade for laminate flooring can make sense.
Key Takeaways:
- A miter saw is one of the best tools for making quick crosscuts in laminate flooring.
- It is not the ideal tool for long rip cuts or curved openings.
- A sharp, fine-finish carbide blade greatly reduces chipping.
What Miter Saw Blade Should You Use for Laminate Flooring?
Blade choice has a major effect on the quality of the cut.
A coarse framing blade designed to cut dimensional lumber quickly may technically cut laminate flooring, but it can leave chipped edges and a rough decorative surface.
For laminate flooring, I recommend a fine-finish carbide-tipped blade that is approved for your miter saw and suitable for laminate, melamine, composite panels, or similar materials.
For many 10-inch miter saws, an 80-tooth fine-finish blade is a very practical starting point.
For a 12-inch saw, 80-tooth fine-finish blades are common, while 100-tooth ultra-fine-finish blades are also available when a particularly smooth crosscut is desired.
More teeth are not automatically better in every situation, however. The blade must still be designed for the material and saw.
Why Fine Teeth Reduce Chipping
A coarse blade removes relatively large pieces of material with each tooth.
That is useful when speed matters more than appearance, such as rough framing.
Laminate flooring has a thin decorative top layer. Large aggressive teeth can catch that layer and break away small pieces along the edge.
A fine-finish blade makes smaller cuts with each tooth and generally produces a smoother edge.
Use Carbide Teeth
Carbide-tipped blades are preferable because laminate’s wear layer and dense composite core can be abrasive.
A basic steel blade may lose its cutting edge quickly.
Even carbide will eventually dull, so pay attention to how the saw begins behaving.
If a blade that previously produced clean cuts starts requiring more force or causing more chipping, it may need sharpening or replacement.
Check the Blade Rating
Never install a blade simply because its diameter appears correct.
Confirm that its:
Diameter, arbor size, maximum RPM rating, kerf, and intended application are compatible with your miter saw.
Follow both the saw manufacturer and blade manufacturer’s requirements.
Which Side of Laminate Flooring Should Face Up on a Miter Saw?
For many conventional laminate flooring products, the decorative or finished face should be up when cutting with a miter saw or crosscut saw.
This is because the blade normally enters the top surface of the plank first as it moves downward.
Any significant breakout is more likely to occur where the blade exits the material.
Keeping the decorative surface on the entry side can therefore help protect the visible finish.
However, flooring products, blades, and saw configurations vary.
Some installation instructions may recommend a different orientation.
The safest procedure is to check the instructions supplied with your flooring and make one test cut on an offcut before processing the rest of the room.
Why Saw Direction Changes the Answer
You may have heard advice saying laminate should always be cut “face down.”
That advice can be correct for certain tools.
A handheld circular saw, for example, normally has teeth moving upward through the visible top side of the workpiece, so the preferred orientation can differ from a miter saw.
A jigsaw’s ideal orientation depends on whether the blade has conventional upward-cutting teeth or reverse teeth.
That is why a universal “face up” or “face down” rule for every saw is misleading.
For a standard miter saw, finished side up is generally a sensible starting point, but verify it with the flooring instructions and a scrap test.
Tools You Need to Cut Laminate Flooring With a Miter Saw
You do not need an extensive collection of equipment.
At minimum, you need the miter saw, an appropriate fine-finish blade, a tape measure, and a pencil or fine marking tool.
A square is extremely useful when transferring a straight cut line across a plank.
Painter’s tape can sometimes help protect the decorative surface around a particularly visible cut.
You should also have suitable eye and hearing protection and use appropriate respiratory protection and dust collection.
Laminate cutting can generate considerable fine composite and wood-based dust, especially during a whole-room installation.
A support stand or extension support is helpful when planks are long enough to overhang the miter-saw table significantly.
The goal is to keep the plank flat and stable throughout the cut.
How to Cut Laminate Flooring With a Miter Saw Step by Step
Once your saw has the correct blade, the process is straightforward.
1. Measure the Required Plank Length
Measure from the end of the last installed plank to the wall or termination point.
Do not forget the required expansion gap around fixed walls and structures.
Laminate is normally installed as a floating floor and needs room to expand and contract.
The exact expansion space varies by flooring system, room dimensions, environmental conditions, and manufacturer.
Do not automatically assume one universal gap.
Check the installation instructions for your laminate.
Subtract the required expansion gap from the available space before marking your cut.
For example, if the space from the previous plank to the wall is 31 inches and your product requires a 3/8-inch expansion gap at that wall, your plank cannot simply be cut to the full 31 inches.
Measure carefully rather than estimating.
2. Mark the Plank
Use a tape measure to mark the required length.
Then use a square to extend the mark across the plank.
A fine pencil line is normally adequate because most end cuts eventually disappear beneath baseboard or quarter-round molding.
Make sure you understand which side of the line will become the installed piece.
A miter-saw blade removes a strip of material equal to its kerf width.
If you center the blade directly on your measurement mark without accounting for that kerf, the finished plank may end up slightly shorter than intended.
Mark the waste side so there is no confusion at the saw.
3. Position the Plank Correctly
Place the plank flat on the miter-saw table with its edge firmly against the fence.
For a conventional crosscut where your flooring instructions permit it, position the decorative face upward.
The plank should not rock, twist, or sit on top of loose sawdust.
If the floorboard is long, provide support outside the saw table so the board remains level.
Allowing the far end to hang unsupported can lift or twist the cutting area and reduce accuracy.
4. Align the Blade With the Cut
With the saw switched off, lower the blade toward the board to check alignment if your saw’s design allows this to be done safely.
Do not touch the blade.
Position the teeth on the waste side of your line.
Raise the blade again before starting the motor.
If your saw has a shadow-line or laser guide, use it as an aid, but verify its accuracy before relying on it for an entire floor.
The actual blade determines the cut, not the projected guide.
5. Hold or Clamp the Plank Securely
Keep the plank flat against both the table and fence.
Many small laminate planks can be safely held with your hand provided your hand remains well outside the saw manufacturer’s designated danger zone.
For small pieces or whenever your hand would be too close to the blade, use an appropriate clamp rather than holding the part manually.
Never cross your arms or reach into the blade path.
6. Start the Saw and Let It Reach Full Speed
Press the trigger while the blade is above the workpiece.
Allow the motor to reach full operating speed before the teeth touch the laminate.
Starting the blade while it is already touching the plank can produce a rougher cut and unnecessary kick or movement.
7. Lower the Blade Smoothly Through the Plank
Bring the blade down at a steady, controlled rate.
Do not force it.
A sharp fine-finish blade should move through a typical laminate plank without excessive pressure.
Forcing the saw can increase chipping and put unnecessary stress on the blade and motor.
Let the carbide teeth perform the cutting.
8. Complete the Cut Before Raising the Blade
Once the blade has passed completely through the plank, release the trigger.
Keep the saw head down until the blade has stopped or nearly stopped according to your saw manufacturer’s operating procedure.
Allowing a spinning blade to rise back through a loose offcut can sometimes catch or chip it.
Once the blade is safely stopped, raise the saw head and remove the pieces.
9. Inspect the Edge
Check the cut before taking the plank back to the floor.
Minor roughness on a hidden wall end usually does not matter because trim will cover it.
However, significant chipping can indicate that your blade is too coarse, dull, dirty, or poorly suited to laminate.
Correct the problem before cutting dozens more planks.
Key Takeaways:
- Measure while accounting for the flooring manufacturer’s expansion gap.
- Keep the plank flat against the table and fence and cut on the waste side of your mark.
- Start the blade before contacting the flooring and use a smooth feed rather than forcing the saw.
How to Prevent Laminate Flooring From Chipping
Chipping is probably the most common concern when cutting laminate with a miter saw.
Fortunately, several simple adjustments can make a major difference.
Use a Sharp Fine-Finish Blade
This is the most important improvement.
A dull blade tears more than it cuts.
If your first few planks look excellent but the edges become progressively worse during the project, inspect the blade.
Laminate can dull cutting edges faster than ordinary lumber.
Keep the Finished Face in the Correct Direction
With a typical miter saw, placing the decorative face upward usually allows the teeth to enter the finished layer before passing through the core.
That tends to protect the most visible surface.
Again, verify the recommendation for your specific laminate.
Apply Painter’s Tape to the Cut
For especially chip-sensitive laminate, place painter’s tape across the planned cut line and remark the measurement over the tape.
The tape can help support the decorative surface fibers during cutting.
It is not a substitute for a good blade, but it can provide an additional level of protection.
Remove the tape carefully after cutting.
Use a Sacrificial Backer
Chipping often occurs where the blade exits the material.
Placing a flat sacrificial board behind the flooring against the fence can support the back edge as the teeth exit.
A zero-clearance insert or sacrificial fence setup can also reduce the amount of unsupported material around the blade.
Any homemade miter-saw accessory must be securely positioned and must not interfere with the blade, guards, fence operation, or other safety features.
Slow Down the Cut
You do not need to creep through the plank extremely slowly, but slamming the blade down aggressively can produce poor results.
Use a smooth, controlled cutting rate.
If the motor noticeably labors, stop forcing the blade and investigate whether it is dull or unsuitable.
Making Angled Cuts in Laminate Flooring With a Miter Saw
One major advantage of a miter saw is its ability to produce repeatable angled crosscuts.
If a wall is not square or a plank terminates beside an angled feature, measure and transfer the required angle to the flooring.
Unlock the miter mechanism and rotate the saw table to the required angle.
Lock it securely before cutting.
Make a test cut on scrap laminate whenever the fit matters.
Rooms frequently look square without actually being square, so the angle indicated by the wall may not be a perfect 45 degrees or another convenient number.
A bevel cut is different from a miter cut.
A miter rotates the cut across the plank in plan view, while a bevel tilts the saw blade.
Normal laminate-floor installations rarely require complicated compound cuts, but a compound miter saw can perform them when necessary.
Can You Rip Laminate Flooring With a Miter Saw?
Generally, no.
A miter saw is designed to make cuts across the width of material.
Suppose your final row needs to be only 3 inches wide but the plank is 7 inches wide.
That requires removing material along almost the entire length of the board.
A miter saw cannot practically make that kind of cut because its travel is limited across the saw table.
For a long rip cut, use a table saw or an appropriate circular saw setup.
A jigsaw can also make a rip cut when extreme precision is not required, although it is slower and harder to keep perfectly straight.
A flooring cutter may work for certain crosscuts but often cannot perform long rips either.
Can You Cut Curves With a Miter Saw?
No.
A miter saw’s circular blade creates a straight cutting path.
If a plank needs to fit around a pipe, curved wall, toilet flange, column, doorway detail, or another irregular shape, use a jigsaw with a suitable laminate blade.
For pipe penetrations, a hole saw may also be useful depending on the required diameter and flooring instructions.
Do not attempt to create a curved opening by making repeated unsafe partial cuts with a miter saw.
Use the tool designed for the shape.
Miter Saw vs. Other Tools for Cutting Laminate Flooring
No single saw is best for every flooring cut.
A miter saw is arguably the most convenient tool for repetitive crosscuts, but a complete installation may require two or three cutting methods.
| Tool | Best Laminate Flooring Use | Main Limitation |
| Miter saw | Fast crosscuts and angled end cuts | Cannot make long rip cuts |
| Table saw | Long, accurate rip cuts | Less portable |
| Circular saw | Crosscuts and long rips | Requires careful guidance |
| Jigsaw | Curves and irregular cutouts | Slower and less straight |
| Flooring cutter | Quiet, low-dust crosscuts | Limited versatility |
| Handsaw | Occasional cuts | Slow for a whole floor |
If I were installing an entire room, I would normally use a miter saw for end cuts and either a table saw, circular saw, or jigsaw for the final-row rip cuts.
That combination covers almost every normal laminate-flooring situation.
Can You Stack Laminate Planks and Cut Several at Once?
Although cutting multiple pieces simultaneously may seem faster, I generally recommend cutting planks individually unless your saw, blade, flooring manufacturer, and cutting setup specifically support stacked cutting.
Several boards stacked together can shift.
Even a small movement can alter the cut length or create chipped surfaces.
Individual cutting also lets you verify measurements as the installation progresses.
Walls are not always perfectly straight, so ten identical end pieces may not actually fit ten different positions.
For production-style work, repeatable stops can speed up cutting, but only when you genuinely need identical lengths.
Why Does Laminate Flooring Dull Saw Blades?
Laminate flooring is not simply ordinary wood.
Most laminate planks contain a dense wood-fiber core covered with decorative and protective layers.
The wear layer is deliberately manufactured to resist scratching and abrasion during years of foot traffic.
Unfortunately, those same properties are hard on cutting tools.
A blade that can crosscut hundreds of pieces of soft pine may lose its edge much faster when cutting abrasive laminate flooring.
This does not mean you need to buy the cheapest disposable blade.
A good carbide blade often produces noticeably cleaner cuts and may be resharpenable depending on its design.
But you should expect more blade wear than you would from cutting ordinary trim lumber.
How to Make Repeat Cuts Faster
Flooring installation involves many repeated crosscuts, so an organized saw station can save considerable time.
Place the miter saw near the work area while keeping cutting dust away from installed flooring as much as practical.
Use a stable saw stand with extension supports so full planks sit flat.
Keep the tape measure, square, and pencil in the same location rather than constantly searching for them.
As you work across a row, measure the required final piece, take the plank to the saw, cut it, and test the fit before proceeding.
Do not rush into mass-cutting pieces unless you know they are identical.
Saving a few seconds at the saw is not useful if several boards end up too short.
What to Do With the Cutoff Piece
Do not automatically discard every offcut.
Depending on the flooring manufacturer’s minimum stagger requirement and locking-system orientation, the leftover section from the end of one row may be suitable for starting another row.
This can reduce waste and produce a more natural staggered appearance.
However, the remaining piece must be long enough to meet the manufacturer’s minimum end-joint spacing and minimum plank-length requirements.
The locking profile also needs to be oriented correctly.
Plan the flooring layout before cutting so you know which offcuts are useful.
Miter Saw Safety When Cutting Laminate Flooring
A miter saw can cut flooring extremely quickly, but it can also cause severe injury.
Read and follow the manual for your specific saw.
Wear eye protection and hearing protection.
Cutting laminate also generates fine dust, so use the saw’s dust-collection system where possible and wear appropriate respiratory protection, particularly when making many cuts.
Keep your hands outside the manufacturer’s marked no-hand or danger zone.
If a piece is too short to hold safely, clamp it or use another appropriate cutting method.
Never try to hold a tiny offcut close to the blade.
Do Not Cut a Loose or Unsupported Plank
A plank should rest flat against the saw table and fence.
If one end hangs significantly below the saw, the cutting area can lift.
Use extension supports for long pieces.
Wait for the Blade to Reach Full Speed
Do not start the saw with the teeth pressed against the laminate.
Start clear of the workpiece, reach full speed, and then make the cut.
Keep Offcuts Clear
Do not reach for an offcut while the blade is moving.
Wait until the blade stops.
A small piece can be thrown if it contacts a spinning blade.
Use Dust Collection
A whole flooring installation may involve dozens or hundreds of cuts.
The amount of dust adds up quickly.
Connecting a compatible shop vacuum or dust extractor can keep the work area significantly cleaner, although you should still follow appropriate respiratory-protection guidance.
Key Takeaways:
- Keep hands well outside the blade area and clamp pieces that are too small to hold safely.
- Support long planks so they remain flat against the table and fence.
- Use eye, hearing, dust protection, and dust collection during repetitive cutting.
Common Mistakes When Cutting Laminate With a Miter Saw
One of the most common mistakes is using the blade that happened to come installed on the saw.
A general-purpose or framing blade may be fine for construction lumber but too coarse for clean laminate cuts.
Another mistake is cutting the wrong side of the measurement line.
Always identify the waste side and account for the blade kerf.
Do not forget the flooring expansion gap either. Cutting every board tightly against the walls can create problems after the floor expands.
Poor support is another major source of inaccurate cuts. If a long plank tips downward beyond the saw table, it may no longer sit square against the fence.
Finally, do not force a dull blade through the flooring.
If the saw suddenly requires much more pressure than it did earlier, stop and inspect the blade rather than pushing harder.
FAQs About How to Cut Laminate Flooring With a Miter Saw
Can you cut laminate flooring with a miter saw?
Yes. A miter saw is excellent for crosscutting laminate planks to length and making angled end cuts.
What blade should I use to cut laminate flooring with a miter saw?
Use a sharp, carbide-tipped fine-finish blade approved for laminate or similar composite materials. An 80-tooth fine-finish blade is a common practical choice for many 10- and 12-inch miter saws, while higher tooth-count blades are also available.
Should laminate flooring face up or down on a miter saw?
For many laminate products, the decorative face should be up when using a miter or crosscut saw because the blade enters from the top. Always verify your flooring manufacturer’s instructions and make a test cut.
Will a miter saw chip laminate flooring?
It can if the blade is coarse, dull, or used too aggressively. A sharp fine-finish blade, proper plank orientation, controlled cutting, and optional painter’s tape can reduce chipping.
Is an 80-tooth blade good for laminate flooring?
Yes. An 80-tooth carbide fine-finish blade is commonly suitable for clean laminate crosscuts when it is compatible with your saw and approved for the material.
Can I use a 40-tooth blade for laminate flooring?
It may cut the plank, but the result can be rougher and more prone to chipping than with a finer blade. For visible clean edges, I prefer a fine-finish blade.
Can I use a 12-inch miter saw for laminate flooring?
Yes. Install an appropriate fine-finish blade that matches the saw’s diameter, arbor, RPM requirements, and manufacturer specifications.
Can I use a 10-inch miter saw for laminate flooring?
Yes. A 10-inch miter saw is more than capable of crosscutting typical laminate planks when fitted with the correct blade.
Can a miter saw make angled laminate cuts?
Yes. Angled crosscuts are one of the main advantages of a miter saw. Set and lock the miter angle before cutting.
Can a miter saw cut laminate flooring lengthwise?
A miter saw is not designed for long rip cuts. Use a table saw or a properly guided circular saw for cutting a strip along the length of a plank.
What is the best tool for curved laminate cuts?
A jigsaw with a suitable fine-tooth laminate blade is usually the best choice for curves, notches, and irregular cutouts.
Should I use painter’s tape when cutting laminate?
It is optional but can sometimes reduce small chips around the cut line. The most important factors remain a sharp appropriate blade and good cutting technique.
Why does my laminate chip when I cut it?
Common causes include a dull blade, coarse teeth, incorrect cutting orientation, excessive feed pressure, poor support, or an unsuitable blade.
Why is my miter saw burning the laminate?
Burning or excessive heat can indicate a dull or dirty blade, overly slow cutting, blade misalignment, or excessive friction. Stop and correct the problem rather than continuing through the entire floor.
How do I measure laminate flooring before cutting?
Measure the available space, subtract the manufacturer’s required expansion gap, transfer the dimension to the plank, and clearly mark the waste side of the cut.
Do I need to leave an expansion gap at the wall?
Yes, floating laminate flooring generally requires a perimeter expansion gap. The exact size depends on the flooring manufacturer and installation conditions, so follow the product instructions.
Can I use the leftover piece to start the next row?
Often, yes, provided the piece is long enough, the locking profile is oriented correctly, and using it maintains the required end-joint stagger specified by the flooring manufacturer.
Can I cut several laminate planks at once?
It is generally safer and more accurate to cut them individually unless the saw, blade, and flooring manufacturer specifically support stacked cutting and the pieces can be securely controlled.
Is a laminate flooring cutter better than a miter saw?
A flooring cutter can be quieter and create much less dust, making it attractive for simple crosscuts. A miter saw is more versatile, especially when you need precise angled cuts.
Do laminate flooring cuts have to be perfectly smooth?
Wall-end cuts that will be covered by baseboard or molding do not need furniture-quality edges, but the plank still needs to be accurately sized and free from serious damage that affects the locking system.
Conclusion
Learning how to cut laminate flooring with a miter saw is straightforward once you combine the right blade with accurate measuring and controlled cutting technique.
For most installations, I recommend a sharp fine-finish carbide blade, with an 80-tooth blade being a practical choice for many common 10- and 12-inch saws. Use a blade specifically suitable for the material and compatible with your saw rather than choosing based on tooth count alone.
For a typical miter-saw crosscut, place the decorative face upward unless your flooring manufacturer specifies otherwise. Measure the space carefully, account for the required expansion gap, mark the waste side of the line, keep the plank firmly against the fence, and support long boards so they remain flat.
Let the blade reach full speed before entering the laminate and lower it smoothly rather than forcing the cut. If chipping becomes a problem, the first things I would check are blade sharpness, tooth configuration, plank orientation, and support. Painter’s tape or a sacrificial backing surface can provide additional help when necessary.
A miter saw is particularly good for repetitive crosscuts and angled end cuts, but it is not the only tool you may need. Use a table saw or guided circular saw for long rip cuts and a jigsaw for curved or irregular shapes.
The practical bottom line is simple: use the miter saw for what it does best—fast, accurate crosscuts—pair it with a sharp fine-finish carbide blade, keep the finished surface properly oriented, and never sacrifice safety or measurement accuracy for speed. With that setup, you can cut laminate flooring cleanly and efficiently throughout an entire room.