How to Cut Laminate Flooring With a Hand Saw: Easy Guide
To learn how to cut laminate flooring with a hand saw, measure and mark the plank carefully, place the decorative face upward, support the board firmly near the cut line, start with several light strokes, and then saw steadily through the plank with a sharp fine-tooth hand saw. A regular hand saw can make clean straight crosscuts in laminate flooring when you use the right blade and avoid rushing the cut.
You do not need a table saw, circular saw, or jigsaw for every laminate flooring installation. Power tools are certainly faster when an entire room requires dozens of cuts, but a hand saw is inexpensive, quiet, portable, and perfectly practical for occasional flooring work.
The biggest challenge is preventing the decorative surface from chipping. Laminate flooring has a hard wear layer over a decorative layer and a dense wood-fiber core. An aggressive or dull saw can tear the top surface at the cut, leaving a rough visible edge. Fortunately, careful marking, good support, and a sharp fine-tooth blade make a substantial difference.
Hand saws are best for straight cuts across the width of a plank. Long rip cuts, complicated notches, curves, and pipe cutouts are possible with hand tools but are usually easier with another saw.
In this guide, I’ll explain how to cut laminate flooring with a hand saw step by step, which type of saw and blade works best, which side should face up, how to prevent chipping, how to make crosscuts and lengthwise cuts, and what mistakes to avoid during installation.
Can You Cut Laminate Flooring With a Hand Saw?
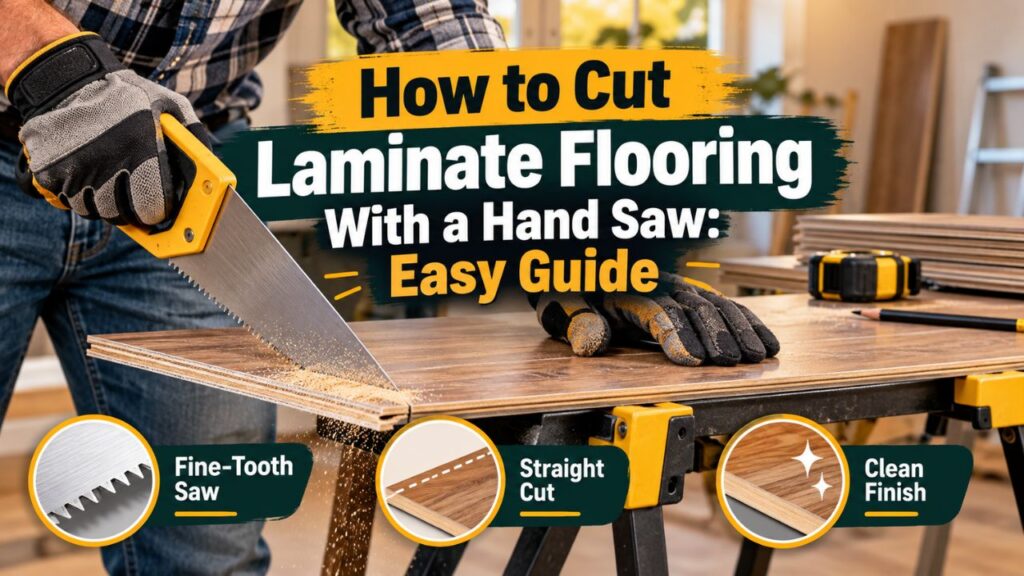
Yes. Laminate flooring can be cut successfully with an ordinary hand saw.
In fact, hand sawing has several practical advantages. There is almost no setup time, you do not need electricity, and there is less airborne dust thrown around the work area compared with many power saws.
A hand saw is particularly useful when you have only a few planks to shorten.
For example, if you are installing laminate in a small bedroom and mainly need to shorten the last plank of each row, a good hand saw may be all you need for those straight cuts.
The main disadvantages are speed and effort. Laminate flooring has a dense core and a hard surface layer, so cutting many planks manually can become tiring.
If you need to install hundreds of square feet of flooring, a powered saw may save considerable time.
When a Hand Saw Works Best
A hand saw is particularly practical for straight crosscuts, such as shortening a plank at the end of a row.
It also works well when electrical power is unavailable or when you want to avoid carrying a power saw into a finished room.
For detailed curved cuts around plumbing, irregular walls, or obstacles, a jigsaw or other appropriate cutting tool is generally easier.
Key Takeaways:
- A regular hand saw can cut laminate flooring successfully.
- Hand sawing is best for straight crosscuts and small installations.
- A sharp fine-tooth blade and proper plank support are the keys to a clean edge.
What Kind of Hand Saw Is Best for Laminate Flooring?
For most laminate flooring work, I recommend a fine-tooth crosscut hand saw.
Laminate flooring is usually cut across its width when you reach the end of a row. A crosscut saw is designed to sever fibers across the workpiece rather than rip parallel with them.
The blade should be reasonably fine rather than extremely coarse.
A coarse construction saw can cut laminate quickly, but the larger teeth are more likely to leave a rough edge or chip the decorative surface.
A finer saw removes material more gradually and gives you greater control near the finished face.
Fine-Tooth Panel Saw
A fine-tooth panel saw is one of the most practical options.
It is compact enough for flooring work and generally leaves a cleaner cut than a coarse framing saw.
If you expect to cut only a handful of laminate planks by hand, this is the type I would choose.
Traditional Crosscut Hand Saw
A full-size crosscut saw also works.
Its longer blade provides an efficient cutting stroke, although it can feel oversized when working with relatively narrow flooring planks.
Make sure the teeth are sharp and reasonably fine.
Back Saw
A backsaw can produce controlled, accurate cuts, particularly across narrow flooring.
Its rigid spine helps keep the blade straight.
However, the metal back limits the maximum depth of cut, so make sure the blade depth is sufficient for your cutting orientation.
For ordinary laminate planks, this is rarely a problem when crosscutting flat.
Japanese Pull Saw
A fine-tooth Japanese pull saw can also cut laminate cleanly.
Because the blade cuts on the pull stroke and can be very thin, it often produces a narrow, controlled kerf.
If you already own one and are comfortable using it, it can be an excellent choice.
How Many Teeth Should a Hand Saw Have for Laminate?
There is no single TPI that is mandatory for every laminate plank.
The general rule is more important:
Use a relatively fine-tooth blade rather than a coarse demolition or framing blade.
Fine teeth reduce the amount of material removed by each tooth and can help limit chipping around the decorative layer.
However, an extremely fine blade can cut very slowly through a dense laminate core.
The best balance is a sharp crosscut blade designed for relatively clean work in sheet goods, flooring, trim, or similar materials.
If you are unsure, test the saw on a scrap piece of flooring before cutting a plank that needs to fit the room.
That one test can tell you whether your blade leaves an acceptable finish.
Which Side Should Face Up When Cutting Laminate With a Hand Saw?
When using a conventional hand saw, place the decorative finished side facing upward.
This orientation generally helps reduce visible chipping on the finished face with a traditional hand saw.
The reason involves the direction in which the teeth attack and exit the material.
However, tooth direction differs among saw designs. A Japanese pull saw, for example, works differently from a conventional Western push saw.
Therefore, the safest method is to make one test cut on a scrap section of the same flooring.
Look closely at both faces.
Whichever orientation leaves the decorative surface cleaner is the orientation you should use for the remaining planks.
Why Saw Direction Matters
A saw can create more breakout on the side where the teeth exit the material.
Laminate’s decorative layer is thin, so even a small amount of breakout can be noticeable.
This becomes especially important when the cut edge will remain visible instead of being covered by baseboard, quarter-round, or a transition profile.
For conventional handsaw cutting, finished-side-up is the normal starting point.
Tools You Need to Cut Laminate Flooring by Hand
You do not need a large collection of tools.
A basic setup requires a sharp fine-tooth hand saw, pencil, tape measure, straightedge or square, and a stable work surface.
Clamps can make the process easier by keeping the plank from moving.
Eye protection is also important because small laminate chips and sawdust can come off during cutting.
A dust mask can be worthwhile when making many cuts, particularly because the dense fiberboard core produces fine dust.
For flooring installation itself, you will also normally need spacers and whatever tapping or pulling tools are required by your flooring system.
How to Cut Laminate Flooring With a Hand Saw Step by Step
The cutting process is simple, but accuracy matters.
A plank that is cut 1/8 inch too short can leave an excessive gap, while one that is too long may prevent the floating floor from maintaining the required perimeter expansion space.
1. Measure the Required Plank Length
Install the previous planks in the row according to the flooring manufacturer’s instructions.
Measure the distance from the end of the last installed plank to the wall or obstruction.
Do not simply cut the next plank to that exact distance.
A floating laminate floor requires an expansion gap around fixed boundaries so it can move with changes in environmental conditions.
The required gap varies by flooring system. Many installations call for something in the neighborhood of 5/16 to 3/8 inch, but the correct dimension is the one specified by your flooring manufacturer.
Subtract the required gap from your wall measurement.
2. Confirm Which End of the Plank You Need
Laminate flooring uses interlocking tongues, grooves, or click profiles.
Before making a cut, check which end must connect to the previous plank.
It is surprisingly easy to cut the wrong end and remove the locking profile you needed.
Place the plank beside the installed row and mentally confirm its orientation before marking anything.
A few extra seconds here can save an entire plank.
3. Mark the Cut Line
Measure from the correct end of the plank.
Make a small pencil mark at the required length.
Use a carpenter’s square or another straightedge to draw a line square across the width of the plank.
Do not assume that following the printed wood-grain pattern will produce a square cut. Decorative lines are not reliable measuring references.
If you need an angled cut, transfer the actual wall angle with a bevel gauge or template.
4. Position the Decorative Side Up
For a conventional hand saw, lay the plank with the decorative surface facing upward.
Position the marked cut line slightly beyond your workbench or support.
Keep the cut close enough to the support that the board does not flex excessively while you saw.
If too much plank hangs unsupported, vibration can make the cut rougher and harder to control.
5. Secure the Plank
Hold the plank firmly or clamp it to your work surface.
Make sure the clamp does not damage the decorative surface. A scrap piece of wood between the clamp and flooring can help distribute pressure.
Also support the waste piece.
If a large offcut hangs freely, its own weight can tear the last part of the cut before the saw reaches the bottom.
6. Start the Kerf Gently
Place the saw teeth on the waste side of your line.
Use your thumb or another safe guide initially if your saw technique allows, keeping fingers away from the actual tooth path.
Make a few short, light strokes to establish a small groove.
Do not immediately take long aggressive strokes.
A carefully established kerf keeps the blade from wandering away from the line.
7. Saw With Smooth, Controlled Strokes
Once the blade tracks correctly, lengthen your stroke.
Let the teeth do the work.
Pushing down excessively does not make the cut substantially better or faster. Instead, it can cause the blade to wander, increase chipping, and make the plank vibrate.
Keep the blade aligned with your marked line.
Watch both the front and side of the saw if necessary so you do not accidentally tilt the blade.
8. Support the Offcut Near the End
As the cut nears completion, reduce pressure.
Support the waste section so it cannot snap downward and tear the decorative layer.
Finish with several gentle strokes.
You should now have a straight, relatively clean edge ready for installation.
9. Test-Fit the Plank
Place the cut plank in position before proceeding to the next row.
Check that the locking joint closes properly and that the specified expansion gap remains at the wall.
Do not force an oversized plank into place.
If the board is slightly too long, remove it and trim it carefully.
Key Takeaways:
- Measure the wall space and subtract the flooring manufacturer’s required expansion gap.
- Double-check the plank’s click-joint orientation before cutting.
- Start with short strokes and support the waste piece through the final part of the cut.
- Test-fit every cut plank before continuing.
How to Prevent Laminate Flooring From Chipping
Clean cutting is mostly about blade condition, orientation, and support.
The first priority is using a sharp saw.
A dull saw makes you apply more pressure, which increases the chance that the blade will wander or tear the decorative layer.
The second priority is using a fine enough tooth pattern.
If your saw visibly tears large chips from the surface during a test cut, switch to a finer blade.
Use Painter’s Tape When Needed
Painter’s tape can be placed over the cut area before you mark your line.
The tape may help hold the surface fibers and decorative layer together while you saw.
Draw your cut line on the tape and remove it carefully after cutting.
Tape is not a substitute for a sharp blade, but it can provide additional protection on flooring that chips easily.
Score the Cut Line
For particularly chip-prone laminate, you can lightly score along the cut line with a sharp utility knife and straightedge before sawing.
The goal is only to cut the decorative surface, not to slice through the entire plank.
Keep your hands clear of the blade path and make sure the straightedge cannot slip.
This technique can create a controlled boundary where the surface layer separates.
Cut on the Waste Side of the Mark
A hand saw removes material equal to the width of its kerf.
If you cut directly through the center of your pencil line, you may remove part of your intended finished dimension.
Keep the saw on the waste side and preserve the line on the piece you are installing.
This becomes more important when fitting flooring closely around trim or transitions.
How to Make a Straight Cut With a Hand Saw
Maintaining a square cut is often harder for beginners than getting through the laminate itself.
Start with an accurate line made with a carpenter’s square.
Then position your eye directly behind the saw so the blade appears aligned with that mark.
Do not watch only one end of the blade.
If the saw begins leaning sideways, the top of the cut may look accurate while the underside drifts substantially.
A well-supported plank makes this easier because you can focus on guiding the blade rather than holding the flooring still.
Practice on an offcut before making an important final-row or transition cut.
Can You Rip Laminate Flooring Lengthwise With a Hand Saw?
Yes, but it is considerably less convenient than making a crosscut.
A rip cut runs along the length of the plank.
You commonly need this type of cut on the final row where an entire plank must be narrowed to fit between the previous row and the wall.
A regular hand saw can make the cut, but laminate planks may be four feet or longer, so maintaining a perfectly straight line by hand takes patience.
Mark the entire length carefully and support the plank on a workbench or several stable supports.
Use a saw suited to the direction of the cut.
Take your time and avoid allowing the unsupported end to flex.
For a full-room installation, I generally prefer a jigsaw, circular saw with an appropriate guide, table saw, or laminate cutter for repeated long cuts.
A hand saw remains a workable solution when power tools are unavailable.
How to Cut the Last Row of Laminate With a Hand Saw
The final row frequently requires lengthwise cuts.
Start by measuring the distance from the previous installed row to the wall at several locations.
Walls are not always perfectly straight, so one measurement may not represent the entire row.
Subtract the required expansion gap.
Transfer those measurements to the plank and connect them with a straight line or scribed line that follows the wall.
Clamp the plank securely and make the long cut slowly.
The sawn edge will normally face the wall, where baseboard or another approved trim detail will conceal the expansion gap.
This means minor cosmetic chipping on that edge is generally less important than maintaining the correct width.
How to Cut Laminate Around a Door Frame With Hand Tools
Flooring usually looks cleaner when it slides beneath door casing rather than being intricately cut around every contour.
A common method is to use a scrap section of laminate plus any required underlayment as a height guide.
Place the scrap beside the door casing.
Lay a hand saw flat on top of it and cut the bottom of the casing or trim at the height needed to allow the flooring to slide underneath.
Be careful not to cut into structural or finished material that should remain.
Once the casing is undercut, the flooring plank can be trimmed to maintain its required expansion clearance beneath the opening.
This typically creates a cleaner appearance than attempting to duplicate the casing’s profile in the flooring.
How to Cut Laminate Around Pipes
A regular straight hand saw alone is not the ideal tool for pipe cutouts.
You normally need to mark the pipe position and create an appropriately oversized hole that includes the manufacturer’s required movement clearance around the pipe.
A hole saw, drill, jigsaw, or coping-type hand tool may be better suited to this job.
The cut can then be concealed with a pipe cover or escutcheon when appropriate.
Do not fit laminate tightly against a pipe.
The floor needs room to expand and contract.
Hand Saw vs. Jigsaw for Laminate Flooring
A hand saw is best for simple straight cuts.
A jigsaw is better for irregular shapes.
| Job | Better Choice |
| Shortening a plank | Hand saw |
| A few straight cuts | Hand saw |
| Curves and notches | Jigsaw |
| Cutting around obstacles | Jigsaw |
| Long rip cuts | Jigsaw or guided power saw |
| Working without electricity | Hand saw |
| Large flooring installation | Power saw is generally faster |
A jigsaw is not automatically cleaner. Blade choice and cutting direction still matter.
For a simple crosscut, a carefully used hand saw can leave an excellent edge.
Hand Saw vs. Circular Saw for Laminate Flooring
A circular saw is dramatically faster when many straight cuts are required.
It can also handle long rip cuts efficiently with a guide.
However, it creates more noise and dust and requires more setup and safety awareness.
A hand saw is slower but highly controllable.
For a single bedroom, closet, or repair involving a few boards, the simplicity of a hand saw can outweigh the speed advantage of a circular saw.
For a whole-house flooring installation, I would generally choose powered cutting equipment.
Can You Cut Laminate Flooring With a Coping Saw?
Technically, yes, but I would not use a coping saw for normal straight plank cuts.
Its narrow blade is designed to follow curves.
The frame also limits how far the blade can reach across a broad workpiece.
A coping saw becomes more useful when you need a small curved notch or irregular detail.
For shortening ordinary planks, a fine-tooth straight hand saw is much faster and easier.
Can You Cut Laminate Flooring With a Hacksaw?
A hacksaw can physically cut many laminate materials, but it is not my preferred choice.
Its fine blade is primarily designed for metal and may cut the dense flooring core quite slowly.
The narrow frame can also restrict access.
If a hacksaw is the only tool available and you need a very small cut, it may work.
For regular flooring cuts, a woodworking hand saw is more practical.
Can You Cut Laminate Flooring With a Utility Knife?
Standard laminate flooring should not normally be treated like thin sheet vinyl that can simply be scored and snapped with a utility knife.
Laminate usually has a rigid fiberboard core.
Trying to force a knife through it is inefficient and can cause the blade to slip or break.
Use an appropriate saw or a flooring cutter designed for the product.
A utility knife is still useful for carefully scoring a decorative surface when appropriate or cutting certain underlayment materials.
Why the Expansion Gap Matters When Cutting Laminate
Laminate flooring is generally installed as a floating floor.
The planks lock together but are not intended to be trapped tightly between opposing walls.
Changes in temperature and humidity can cause the flooring system to change dimensions.
A perimeter expansion gap gives the floor room to move.
If you cut the final plank of every row exactly to the wall, you may eliminate this clearance.
That can contribute to problems such as lifting, peaking, or joints being placed under unwanted stress.
The exact expansion requirement depends on the flooring product, room dimensions, installation conditions, and manufacturer.
Many systems use a gap in roughly the 5/16- to 3/8-inch range, but do not treat that as a universal specification.
Follow the installation instructions supplied with your particular laminate.
Common Mistakes When Cutting Laminate Flooring by Hand
One of the most common mistakes is using a very coarse or dull saw.
It may still make the cut, but the decorative edge can look badly chipped.
Another mistake is failing to support the offcut. As the saw approaches the end, the unsupported waste section can break away and tear a large chip from the corner.
Incorrect measurement is equally common. Remember that the floor needs its specified expansion clearance.
Cutting the wrong end of a click-lock plank is another frustrating error.
Always determine which tongue or groove must remain before you mark the cut.
Finally, avoid forcing the saw.
Laminate is dense, and a hand saw may require more strokes than it does in soft lumber. Smooth, controlled sawing usually produces a cleaner and straighter result than excessive downward pressure.
Key Takeaways:
- Most chipped cuts are caused by poor blade selection, inadequate support, or excessive force.
- Preserve the click-lock edge you actually need before shortening a plank.
- Keep the manufacturer’s expansion gap instead of fitting laminate tightly against walls and obstacles.
Safety When Cutting Laminate Flooring With a Hand Saw
Secure the flooring before cutting it.
Trying to hold a narrow plank against your knee or in one hand while sawing with the other increases the risk of slipping and produces a less accurate cut.
Wear eye protection.
Laminate can release small hard chips along with fine fiberboard dust.
Keep your supporting hand away from the saw path and do not place fingers beneath the cut where the blade will emerge.
Inspect your saw before starting. A damaged handle, loose blade, or badly worn teeth can make the tool difficult to control.
If you are cutting many planks, control dust and work in a well-ventilated area. Clean up sawdust regularly so it does not get into click joints or beneath the flooring.
How to Get Professional-Looking Hand-Sawn Cuts
The easiest way to improve the final appearance is to distinguish between visible and hidden cut edges.
Many cuts at the perimeter are ultimately covered by baseboard, quarter-round, or transition profiles.
They still need to be accurate, but a tiny amount of edge chipping may never be visible.
Cuts that remain exposed deserve more attention.
For those, use your sharpest fine-tooth saw, tape or score the surface if needed, and make a test cut first.
Measure twice before cutting.
A clean cut in the wrong location is still a wasted plank.
Finally, use the factory edge wherever appearance matters most. When possible, position your cut edge toward a wall or other location that will receive trim.
FAQs about How to Cut Laminate Flooring With a Hand Saw
Can you cut laminate flooring with a regular hand saw?
Yes. A regular fine-tooth woodworking hand saw can make clean straight cuts in laminate flooring.
For conventional handsaw cutting, place the decorative side upward, support the plank near the cut, and start with light strokes.
What is the best hand saw for laminate flooring?
A sharp fine-tooth crosscut or panel saw is an excellent choice.
A fine Japanese pull saw can also work well if you are comfortable using one.
Avoid unnecessarily coarse teeth when a clean decorative edge matters.
Which side of laminate should face up when using a hand saw?
With a conventional hand saw, the decorative surface should generally face upward.
Because tooth direction differs among saws, test your particular blade on a scrap plank before making important cuts.
How do you cut laminate flooring without chipping it?
Use a sharp fine-tooth blade, support the plank close to the cut, keep the finished face in the correct orientation, and reduce pressure near the end.
Painter’s tape or lightly scoring the surface can provide additional protection on chip-prone flooring.
Can you cut laminate flooring lengthwise with a hand saw?
Yes, although a long rip cut requires patience.
Mark the entire line accurately, support the plank well, and saw steadily.
For numerous lengthwise cuts, a suitable power saw is normally faster.
Can I use a coping saw to cut laminate flooring?
A coping saw is useful for small curves and notches but is inefficient for ordinary straight crosscuts.
Use a regular fine-tooth hand saw for shortening planks.
Can I cut laminate with a hacksaw?
A hacksaw can cut laminate, but it is generally slower and less convenient than a woodworking hand saw.
Its primary design is for cutting metal and similar materials.
Can laminate flooring be cut with a utility knife?
Rigid laminate flooring generally should not be cut entirely with a utility knife.
Its dense fiberboard core requires a saw or an appropriate flooring cutter.
How do I cut the last laminate plank in a row?
Measure from the installed plank to the wall, subtract the manufacturer’s required expansion gap, transfer the measurement to the correct end of the new plank, and saw along a square line.
Test-fit the plank before continuing.
How do I cut the last row of laminate flooring?
Measure the remaining width at several points, subtract the required perimeter expansion gap, mark the plank lengthwise, and rip it to width.
Walls may not be straight, so multiple measurements are important.
How big should the gap be around laminate flooring?
The required expansion gap varies by flooring manufacturer and installation.
Many systems specify approximately 5/16 to 3/8 inch around fixed boundaries, but use the exact instructions for your product rather than relying on a universal number.
Should I tape laminate before sawing?
It is optional.
Painter’s tape over the cutting area can help protect some decorative surfaces and gives you a convenient place to mark the cut line.
A sharp fine-tooth blade remains more important.
Why does my laminate chip when I cut it?
Common causes include a coarse or dull blade, incorrect cutting orientation, poor support, excessive pressure, or allowing the waste piece to snap off before the cut is complete.
Should I cut directly on my pencil line?
Keep the saw kerf mainly on the waste side of the mark.
This preserves your intended finished dimension.
Do I need a power saw to install laminate flooring?
No.
A hand saw can handle straightforward plank shortening, and other hand tools can complete many installations.
Power saws become much more convenient when there are many cuts, long rip cuts, or complicated shapes.
Can a hand saw make angled laminate cuts?
Yes.
Transfer the required angle accurately with a square, bevel gauge, or template, secure the plank, and carefully follow the marked line.
A miter box can make certain repeatable angled cuts easier.
How do you keep a hand saw straight when cutting laminate?
Draw a clear line with a square, start the kerf gently, keep the blade vertical, and avoid forcing it.
Supporting the plank close to the cut also reduces movement that can push the saw off line.
What do I do if my cut edge is slightly rough?
If the edge will be hidden under perimeter trim and the plank is otherwise undamaged, minor chipping may not matter.
For an exposed edge, make a cleaner replacement cut rather than trying to disguise severe damage.
Conclusion
Learning how to cut laminate flooring with a hand saw is straightforward and does not require expensive equipment. For ordinary straight cuts, use a sharp fine-tooth crosscut or panel saw, measure accurately, place the decorative surface upward with a conventional hand saw, and support the plank close to the cutting line.
Start each cut with several light strokes so the blade creates a controlled kerf. Once it tracks correctly, use smooth full strokes and let the saw do the work. As you approach the end, support the offcut and reduce pressure to prevent the final corner from tearing away.
For most flooring installations, hand sawing works best when shortening planks at the ends of rows. Long rip cuts, complex notches, and curved openings can still be made with hand tools, but a jigsaw, circular saw, or another appropriate cutting tool may be faster and easier.
Most importantly, remember that accurate cutting includes the installation clearance. Do not measure a plank so tightly that it eliminates the required perimeter expansion gap. Follow the laminate manufacturer’s specification rather than assuming one gap works for every product.
If I were cutting laminate by hand, I would prioritize a sharp fine-tooth saw, a securely supported plank, careful measurement, and a test cut on scrap before beginning the finished pieces. With those basics in place, a hand saw can produce clean, accurate laminate flooring cuts without the expense or setup of power equipment.