How to Cut Laminate Flooring Lengthwise With a Table Saw
To learn how to cut laminate flooring lengthwise with a table saw, measure and mark the required plank width, install a sharp fine-tooth carbide blade, set the rip fence to the correct dimension, keep the finished face oriented for the cleanest cut your blade produces, and feed the plank steadily past the blade while using appropriate push sticks and support. A table saw is one of the fastest and most accurate tools for making long, straight rip cuts in laminate flooring, especially when you need to narrow the first or last row of planks along a wall.
The job is straightforward, but laminate flooring is harder on saw blades than ordinary softwood. Its decorative wear layer and dense fiberboard core can dull cutting edges relatively quickly, and an unsuitable blade or poor feed technique can leave chipped edges.
Safety is equally important. Laminate planks are long and relatively narrow, which can make them awkward to control on a table saw. The rip fence, riving knife, push stick, proper blade height, and outfeed support all matter. You should never place your hands close to the blade or try to freehand a lengthwise cut.
In this guide, I’ll explain how to cut laminate flooring lengthwise with a table saw, which blade works best, how to measure the final row, how to minimize chipping, which side should face up, and how to avoid the most common cutting and installation mistakes.
How to Cut Laminate Flooring Lengthwise With a Table Saw
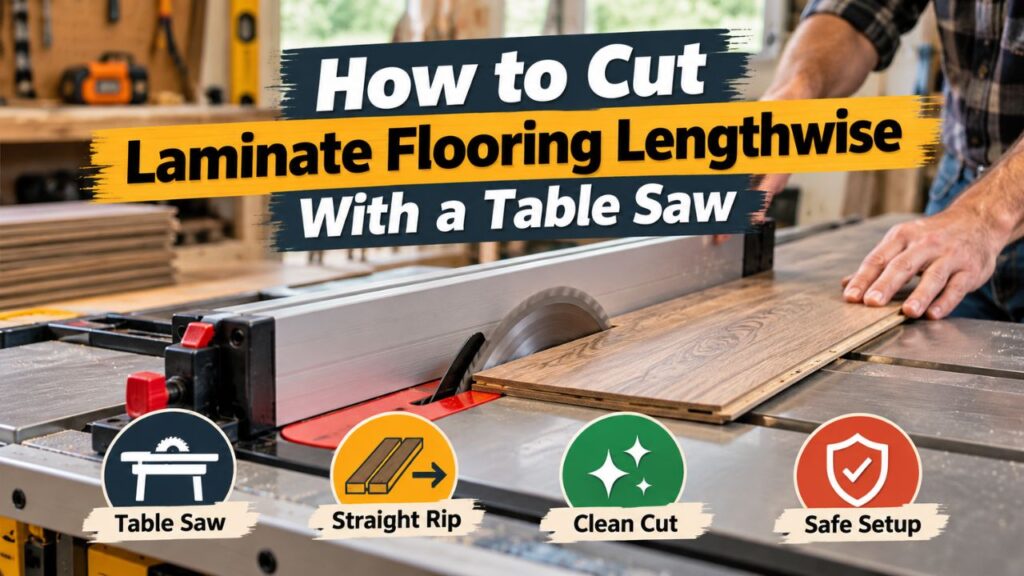
Cutting laminate flooring lengthwise is usually called ripping the plank.
Instead of shortening the plank across its width, you are cutting parallel to its long edge to make the board narrower.
This is commonly necessary when installing:
- The first row along a wall.
- The final row of flooring.
- Flooring around long cabinets or built-ins.
- Narrow filler pieces.
- Planks near irregular wall sections.
A table saw is particularly well suited to this job because the fence keeps the cut parallel to the plank edge.
The basic process is to calculate the finished width, set the fence, support the plank properly, and feed it straight through the blade.
What You Need
You do not need many special tools. A properly set up table saw and accurate measuring tools are the essentials.
Useful equipment includes a table saw, sharp carbide blade, tape measure, pencil, straightedge, push stick or push block, eye protection, hearing protection, and suitable respiratory protection or dust extraction.
If the plank is long, an outfeed stand or helper can make the cut much easier to control.
Key Takeaways:
- Lengthwise cuts are rip cuts made parallel to the long edge of the plank.
- Always use the rip fence rather than trying to follow a pencil line freehand.
- Long planks need stable infeed and outfeed support for safe, accurate cutting.
Is a Table Saw Good for Cutting Laminate Flooring?
Yes. For long, straight lengthwise cuts, a table saw is one of the most efficient choices.
Its biggest advantage is repeatability.
If several planks need to be ripped to exactly the same width, you can set the fence once and make consistent cuts much faster than you could with a jigsaw.
A table saw is especially useful when installing the last row of laminate against a wall because that row often needs to be reduced in width across several boards.
Where a Table Saw Is Less Useful
A table saw is not ideal for every flooring cut.
It is less convenient for:
- Curved cuts around pipes.
- Notches around door jambs.
- Short irregular cuts.
- Flooring already installed on the floor.
- Very small pieces that cannot be safely controlled against the fence.
For those situations, a jigsaw, oscillating multi-tool, or another appropriate saw may be easier.
For straight ripping, however, I would generally choose the table saw if one is available and the workpiece can be handled safely.
Choose the Right Table Saw Blade for Laminate Flooring
Blade selection makes a noticeable difference in edge quality.
Laminate flooring typically consists of multiple layers, including a hard wear layer over a decorative layer and a dense wood-fiber core.
These materials are abrasive compared with ordinary lumber.
A poor blade can chip the decorative surface and become dull relatively quickly.
Use a Carbide-Tipped Blade
A sharp carbide-tipped blade is the practical choice for laminate flooring.
Carbide cutting edges hold up much better against abrasive flooring materials than ordinary steel teeth.
For clean cuts, I prefer a relatively fine-tooth blade rather than a very coarse framing or ripping blade.
A general-purpose 40-tooth blade can work, but a finer 60- to 80-tooth blade often produces a cleaner finish on laminate, depending on the blade diameter and design.
The best choice is a blade specifically recommended for laminate, melamine, plywood, or other finished sheet goods.
More Teeth Are Not Always Automatically Better
A fine blade can reduce chipping, but tooth count is only one part of blade design.
The tooth geometry, hook angle, carbide quality, blade condition, saw power, and feed speed also affect the result.
A dull 80-tooth blade can cut worse than a sharp 40-tooth blade.
Before starting an entire flooring installation, make one test cut on a scrap plank.
That immediately tells you whether the blade is producing acceptable results.
Which Side of Laminate Flooring Should Face Up on a Table Saw?
This question matters because table-saw blades normally rotate so the teeth rise through the front of the table and enter the workpiece from the top before exiting through the bottom.
Depending on blade geometry and laminate construction, chipping may be more visible on one face than the other.
For many table-saw cuts, placing the finished decorative face up can help produce a cleaner visible edge because the teeth enter the finished surface first.
However, blade design can affect the result.
The safest approach for appearance is to make a test cut on a leftover piece using the exact blade and flooring you intend to use.
Inspect both faces.
Then orient the production planks so any minor chipping occurs on the hidden or less visible side.
Does the Cut Edge Need to Be Perfect?
Often, no.
Lengthwise cuts are commonly made on the first or final row, where the ripped edge will be covered by baseboard, quarter-round, shoe molding, or an expansion gap at the wall.
In that situation, a tiny amount of edge chipping may not matter.
What matters more is maintaining a straight cut and not damaging the visible surface several inches away from the edge.
Measure Before You Rip the Flooring
Accurate measuring is more important than cutting speed.
Before ripping the first or last row, determine the space between the previously installed flooring and the wall.
Then account for the required expansion gap.
Laminate flooring is typically installed as a floating floor, meaning it needs room to expand and contract.
The exact expansion clearance depends on the flooring manufacturer’s installation instructions, so do not assume one universal measurement.
Measuring the Last Row
Measure the distance from the edge of the installed plank to the wall at several locations.
Walls are rarely perfectly straight.
For example, one end may measure 3 3/4 inches while the other measures 3 1/2 inches.
If you rip every plank to one fixed dimension without checking the wall, you could end up with an uneven or overly large gap.
Subtract the manufacturer’s required expansion gap from your measurements.
That gives you the approximate width of the final row.
Example
Suppose the distance from the previous row to the wall is 4 inches.
If the installation instructions require a 3/8-inch expansion gap:
4 inches − 3/8 inch = 3 5/8 inches
The plank should therefore be ripped to approximately 3 5/8 inches at that location.
If the wall varies, transfer those variations to the plank rather than assuming it is straight.
Important Tip: Measure each end of a long run. Never assume the wall is parallel to the previous flooring row.
Step-by-Step: How to Cut Laminate Flooring Lengthwise With a Table Saw
The following process works for most straight laminate rip cuts.
1. Confirm the Required Width
Measure the space where the plank will be installed.
Account for the expansion gap specified by the flooring manufacturer.
Mark the finished width on the plank.
If the wall is straight and you need multiple pieces at the same width, you can use the table-saw fence to repeat the measurement.
If the wall is irregular, each board may require slightly different marking.
2. Inspect the Plank
Check that the plank is flat and undamaged.
Do not try to rip a badly bowed plank on a table saw.
Also identify the locking tongue and groove edges.
Make sure you are removing the correct side.
Cutting away the locking profile you actually need can make the plank impossible to connect to the previous row.
3. Install the Correct Blade
Disconnect power before changing a blade.
Install a sharp carbide blade suitable for laminate or fine finish cutting according to the table-saw manufacturer’s instructions.
Check that the blade is mounted in the correct rotation direction and tightened properly.
Reinstall the throat plate and any guards or safety components that were removed during blade changing.
4. Keep the Riving Knife Installed
The riving knife helps prevent the material from closing against the back of the blade and contributes to reducing kickback risk.
Use it whenever the cut and saw configuration permit.
Do not remove safety equipment merely because the plank is thin.
5. Set the Blade Height
Set the blade only as high as needed to cut through the flooring.
A common woodworking practice is to have the top of the blade teeth project only modestly above the workpiece rather than exposing a large amount of blade unnecessarily.
Follow the recommendations for your table saw and blade.
6. Set the Rip Fence
Measure from the correct side of the blade to the fence.
Remember that the blade removes material equal to the width of its kerf.
If the finished plank width needs to be 3 5/8 inches, set the fence so the piece you are keeping finishes at that dimension.
Lock the fence securely.
Verify the measurement before starting the saw.
7. Support the Plank
Long laminate planks need adequate support before and after the blade.
Arrange an outfeed stand if necessary.
The plank should remain reasonably level throughout the cut.
If the far end drops off the table, it can cause the workpiece to twist or lift as it moves past the blade.
That affects both safety and cut quality.
8. Start the Saw and Allow It to Reach Full Speed
Stand in a stable position and keep yourself out of the direct kickback path behind the workpiece.
Turn on the saw and let the blade reach full operating speed.
Do not place the plank into a blade that is still accelerating.
9. Feed the Plank Against the Fence
Keep the reference edge of the plank firmly against the rip fence.
Feed it forward at a smooth, controlled rate.
Do not push sideways into the blade.
Your pressure should primarily move the plank forward while maintaining consistent contact with the fence before the blade.
10. Use a Push Stick Near the Blade
As your hand approaches the blade area, transition to an appropriate push stick or push block.
Never reach over or directly beside the spinning blade to finish the cut.
Narrow rips require particular care because there is less room between the blade and fence.
If the remaining piece is so narrow that you cannot safely control it using the proper accessories and saw setup, use another cutting method.
11. Keep Feeding Until the Plank Clears the Blade
Do not stop halfway through the cut unless an emergency requires it.
Maintain steady movement until both the workpiece and waste section have safely cleared the blade.
Do not reach toward loose offcuts while the saw is running.
Wait for the blade to stop completely before retrieving material near it.
12. Inspect the Edge
Check the rip for straightness and chipping.
If the edge will face a wall, minor cosmetic imperfections may be hidden.
If the edge is visible or needed for another joint, determine why chipping occurred before cutting the remaining planks.
Key Takeaways:
- Measure the required finished width after allowing for the manufacturer’s expansion gap.
- Keep the plank against the fence and feed at a smooth, steady pace.
- Use a push stick as your hand approaches the blade and never reach toward the blade for an offcut.
How to Prevent Chipping When Cutting Laminate Flooring
Chipping is probably the most common quality problem when sawing laminate.
Several small improvements can make a big difference.
Use a Sharp Fine-Tooth Blade
This is the first thing I would address.
A coarse or dull blade tears at the wear layer rather than slicing it cleanly.
If your first test piece chips badly, try a sharper fine-finish or laminate-compatible blade before experimenting with other techniques.
Keep the Flooring Flat Against the Table
If the plank vibrates while being cut, edge quality suffers.
Keep steady downward control well away from the blade and make sure long sections are supported.
Do not force a warped plank flat next to the blade with your hand.
Maintain a Consistent Feed Rate
Feeding too quickly can increase tear-out and place unnecessary load on the blade.
Moving extremely slowly with a dull blade can also generate heat and poor cuts.
Use a smooth rate that lets the blade cut without bogging down.
Use Painter’s Tape When Helpful
For particularly chip-prone flooring, applying painter’s tape along the cut line may help support the decorative surface.
This is not a substitute for a proper blade, but it can improve some cuts.
Make your test cut first to see whether it provides a useful improvement with your particular flooring.
Cutting the First Row Lengthwise
Sometimes the first row needs to be ripped rather than the last.
This may be necessary to avoid finishing the opposite side of the room with an extremely narrow strip.
Good flooring layout begins before installation.
Measure the room width and determine roughly how wide the first and final rows will be.
If the calculation shows that the final row would be only an inch wide, for example, it can be better to rip material from the first row so the first and last rows are more balanced.
Be Careful With the Locking Edge
When ripping the first row, remove the edge that will face the wall—not the locking profile needed to connect the next row.
The exact profile varies by flooring manufacturer.
Examine the installation instructions before cutting.
Once a locking edge is removed, it normally cannot be restored.
Cutting the Last Row Along an Uneven Wall
A wall that appears straight may bow in or out over several feet.
For the last row, you may need to scribe the wall shape onto the flooring.
One common method is to place the plank in position relative to the previous row and transfer the wall profile while maintaining the required expansion gap.
If the variation is gentle and the resulting cut remains essentially straight, a table saw can still handle it with careful fence adjustments for individual pieces.
If the wall profile curves significantly, however, a table saw is not the right tool because the fence produces straight cuts.
A jigsaw is usually better for a curved or irregular scribed cut.
Pro Tip: Use the table saw for straight rips and switch to a jigsaw for noticeable wall curves. Trying to steer a plank sideways while using the table-saw fence can cause binding and kickback.
Why You Should Never Freehand a Rip Cut on a Table Saw
It can be tempting to draw a line and guide the plank through the blade by eye.
Do not do this.
Without the rip fence or an appropriate jig, the workpiece can rotate slightly and become trapped between the blade teeth.
That can lead to kickback.
For a straight lengthwise cut, use the fence.
For a curved cut, use a different saw.
A table saw is extremely effective when the workpiece is properly guided and supported. It becomes much more dangerous when used for cuts it was not designed to make.
How to Cut Narrow Laminate Strips Safely
Narrow strips are more difficult because your hands cannot safely occupy the space near the blade.
Use a push stick, push block, featherboard, or other table-saw accessory appropriate for your machine and cut.
The exact setup depends on whether the narrow strip is the kept piece or the waste side.
The goal is to maintain control of the plank without placing fingers near the blade.
If the required strip is extremely narrow, I would seriously consider another cutting method or a dedicated thin-rip setup rather than improvising.
Do not use your fingers as a substitute for a push stick.
Laminate Flooring Dust and Safety
Cutting laminate produces fine dust from both the fiberboard core and surface materials.
Use the table saw’s dust collection system whenever possible.
Wear suitable respiratory protection, especially when making many cuts indoors.
Eye and hearing protection should also be used.
Whenever practical, cut flooring in a well-ventilated work area rather than directly inside the finished room.
Watch for Kickback
Kickback occurs when a workpiece becomes caught by the rotating blade and is thrown back toward the operator.
To reduce the risk:
Keep the rip fence aligned and locked.
Keep the riving knife installed.
Support long planks.
Do not twist the workpiece during the cut.
Do not stand directly behind the line of the blade.
Never place your hand behind a running blade to pull the plank through.
The table saw should move the work by cutting action only; you should always control and push the board from a safe position.
Table Saw vs. Circular Saw for Lengthwise Laminate Cuts
Both can make long rip cuts.
The better tool depends on your setup.
| Feature | Table Saw | Circular Saw |
| Straight repetitive rips | Excellent | Good with guide |
| Repeated identical widths | Excellent | Slower |
| Portability | Lower | Excellent |
| Long plank control | Requires support | Workpiece stays stationary |
| Narrow rip cuts | Good with proper setup | Can be awkward |
| Jobsite convenience | Moderate | High |
| Curved cuts | No | No |
If I have many flooring planks that need the same straight rip, I prefer the table saw.
If the flooring is already at the installation site and moving long planks across a small portable table saw feels awkward, a circular saw with a straight guide may be easier.
Table Saw vs. Jigsaw for Laminate Flooring
A jigsaw and table saw serve different roles.
Use a table saw for long straight cuts.
Use a jigsaw for notches, curved wall profiles, vents, pipes, and other irregular shapes.
A jigsaw is slower and harder to keep perfectly straight over a long rip, even with a guide.
Trying to make every flooring cut with one tool usually creates unnecessary difficulty.
Common Mistakes When Ripping Laminate Flooring
One common mistake is cutting the wrong side of the plank and removing the locking profile you need.
Always identify which edge faces the wall before you start.
Another mistake is forgetting the expansion gap.
A plank that fits perfectly tight against the wall may look impressive during installation, but floating laminate needs the clearance specified by its manufacturer.
Using a dull, coarse blade is another common problem. It can leave chipped decorative edges and force you to feed harder.
Poor support also causes trouble. A long plank hanging off the back of a small table saw can tilt or twist as the cut progresses.
Finally, never move the fence or try to steer the board sideways during the cut. Set the correct width first and keep the plank traveling straight.
Can You Cut Laminate Flooring Upside Down on a Table Saw?
You can, but whether you should depends on which orientation gives the cleanest finished edge with your blade.
On many table-saw setups, cutting decorative-face-up works well because the blade enters the upper surface.
Other blade designs and flooring products may behave differently.
The simplest solution is a scrap test.
Cut one piece face up and inspect both surfaces.
If necessary, repeat face down.
Then use the orientation that leaves the visible face cleaner.
This is more dependable than following a universal rule that ignores your particular blade.
Can You Use a Regular Table Saw Blade?
Yes, provided it is sharp and appropriate for the material.
A good general-purpose carbide blade may cut laminate flooring adequately.
However, if you are installing a large amount of flooring or need especially clean edges, I prefer a fine-tooth finish or laminate-compatible blade.
Remember that laminate can dull blades faster than ordinary lumber.
A blade that cuts pine beautifully may begin producing rough laminate edges after significant use.
How Much Blade Should Be Above the Laminate?
You do not need several inches of exposed blade to cut a plank that is only a fraction of an inch thick.
Set the blade to an appropriate height for the material and follow your table saw manufacturer’s guidance.
Keeping unnecessary blade exposure to a minimum reduces the amount of blade above the table and can improve control.
Do not attempt to adjust blade height while the saw is running.
FAQs about How to Cut Laminate Flooring Lengthwise With a Table Saw
Can you cut laminate flooring lengthwise with a table saw?
Yes. A table saw is one of the best tools for making straight lengthwise rip cuts in laminate flooring, particularly when several planks need to be narrowed to the same width.
What blade should I use to cut laminate flooring on a table saw?
Use a sharp carbide-tipped blade. A fine-tooth finish, laminate, melamine, or quality general-purpose blade can work well. Fine-tooth blades generally reduce visible chipping compared with coarse construction blades.
How many teeth should a table saw blade have for laminate?
There is no single required number. On a typical 10-inch table saw, a 60- to 80-tooth finish blade can provide very clean laminate cuts, while a sharp 40-tooth general-purpose blade may also work adequately.
Blade design and sharpness matter as much as tooth count.
Which side of laminate flooring should face up when using a table saw?
Face-up cutting often gives a clean visible surface because of the way a conventional table-saw blade enters the material, but blade geometry can change the result.
Make a scrap test before cutting finished planks.
Can you use a table saw to cut the last row of laminate flooring?
Yes. This is one of the most common reasons to rip laminate flooring.
Measure the available width, subtract the required expansion gap, and rip the boards accordingly.
How do you cut laminate flooring without chipping it?
Use a sharp fine-tooth carbide blade, support the plank properly, feed at a smooth rate, and test which face orientation gives the cleanest result.
Painter’s tape along the cut line can also help in some cases.
Do I need to leave an expansion gap after ripping the last row?
Yes, if the flooring manufacturer’s installation instructions require one, as floating laminate systems typically do.
Use the specific clearance recommended for your flooring rather than guessing.
Can I freehand laminate flooring through a table saw?
No. Do not make a freehand rip cut on a table saw.
Use the rip fence or an appropriate jig for straight cuts. Use a jigsaw or another suitable tool for curved cuts.
Can I cut laminate flooring with the decorative side down?
You can, but test the resulting edge first.
The cleanest orientation depends partly on your blade and flooring construction.
Can I use a miter saw to cut laminate flooring lengthwise?
A miter saw is excellent for cutting planks across their width but is generally not designed for long lengthwise ripping.
A table saw or guided circular saw is much more suitable.
Can a jigsaw cut laminate flooring lengthwise?
Yes, but it is slower and harder to keep perfectly straight over a long distance.
A jigsaw is more useful for curved or irregular cuts.
Why does laminate flooring dull saw blades?
The hard wear layer and dense composite core are abrasive compared with many ordinary woods.
Repeated laminate cutting can therefore wear cutting edges more quickly.
How do I cut a narrow first row of laminate?
Calculate the required width before installation, set the table-saw fence, and rip the wall-facing edge while preserving the locking edge needed to connect the second row.
How do I cut laminate along a crooked wall?
Measure or scribe the wall profile while allowing for the expansion gap.
Use a table saw only if the required cut remains straight. For significant curves or irregularities, use a jigsaw.
Do I need a push stick for cutting laminate flooring?
Use an appropriate push stick or push block whenever your hands would otherwise approach the blade.
It is especially important for narrow rip cuts.
Conclusion
Knowing how to cut laminate flooring lengthwise with a table saw makes first-row and final-row installation much faster and more accurate. Measure the required plank width carefully, account for the flooring manufacturer’s expansion gap, identify which locking edge must remain intact, and set the rip fence before beginning the cut.
For the blade, I recommend a sharp carbide-tipped finish or laminate-compatible blade. A fine-tooth blade generally provides a cleaner decorative edge than a coarse construction blade, but always make a test cut because the exact results depend on your flooring and blade.
Keep the plank flat and firmly registered against the fence, support long pieces before and after the blade, and feed at a smooth rate without twisting the workpiece. As your hands approach the cutting area, use appropriate push sticks or push blocks rather than trying to guide the board with your fingers.
For straight repetitive rips, the table saw is an excellent choice. For curved wall profiles, pipe cutouts, and irregular notches, switch to a jigsaw or another tool designed for those shapes.
Most importantly, do not freehand a lengthwise cut, remove the riving knife unnecessarily, or force a narrow plank through an unsafe setup. Accurate measurements, a sharp blade, solid support, and controlled feeding will give you cleaner laminate cuts while keeping the operation much safer.