How to Cut Wood Flooring Without a Table Saw: Easy Methods
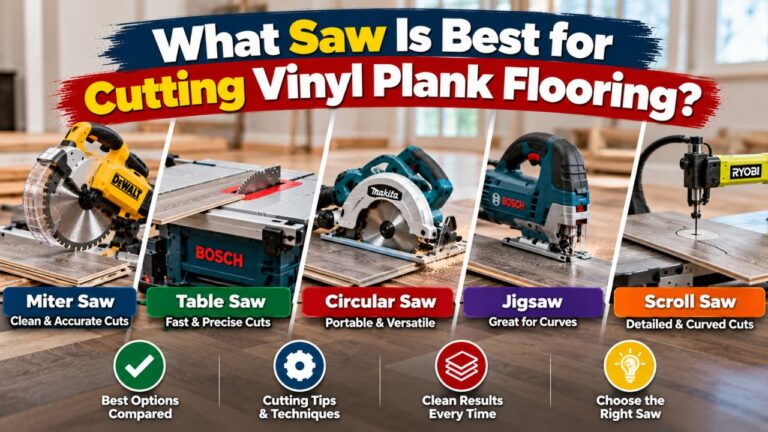
If you want to know how to cut wood flooring without a table saw, the best approach is to use a circular saw with a straightedge for long rip cuts, a miter saw for crosscuts, and a jigsaw for notches or irregular shapes. You can also use a handsaw, track saw, flooring cutter, or oscillating multi-tool depending on the flooring material and the type of cut you need.
A table saw is convenient when installing hardwood or engineered wood flooring because it makes long, straight rip cuts quickly. However, it is far from essential. Most flooring installations can be completed with two or three portable tools that many homeowners already own.
The key is choosing the right tool for each cut. Shortening a plank across its width is very different from trimming an entire plank lengthwise. Likewise, cutting around a door jamb, vent, pipe, or irregular wall requires a different approach from making a straight end cut.
You also need to identify exactly what kind of flooring you are cutting. Solid hardwood, engineered hardwood, bamboo, and laminate-style wood flooring can behave differently under a saw blade. Blade selection and cutting direction can affect splintering, chipping, and overall cut quality.
In this guide, I’ll explain how to cut wood flooring without a table saw, which alternative tools work best, how to make straight rip and crosscuts, how to reduce splintering, and which method I recommend for different flooring installation situations.
How to Cut Wood Flooring Without a Table Saw
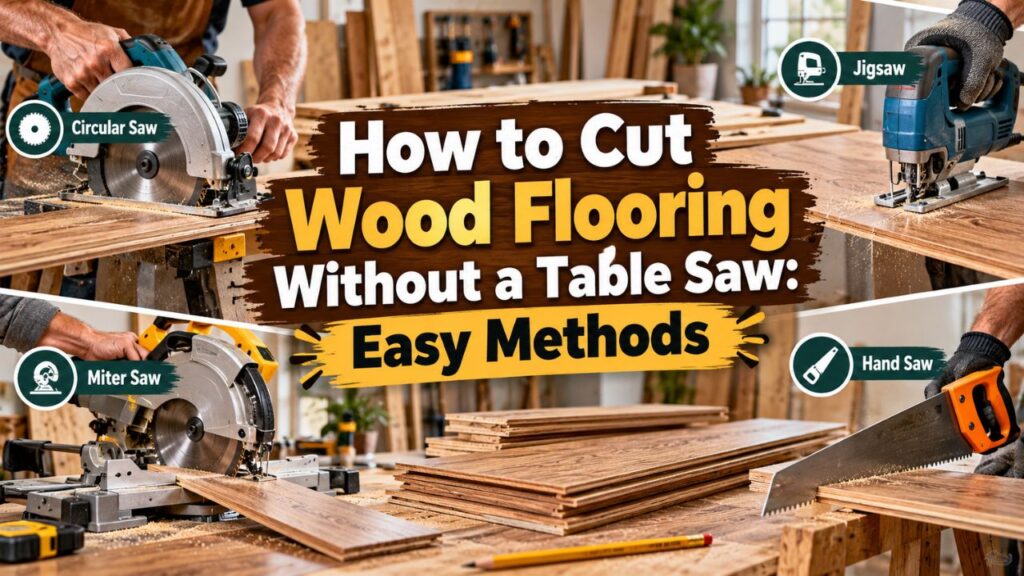
The easiest way to install wood flooring without a table saw is to divide the work by cut type.
Use a miter saw or circular saw for crosscuts, a circular saw with a guide for rip cuts, and a jigsaw for notches and irregular shapes.
That three-tool setup can handle almost everything you would normally encounter during a hardwood or engineered wood flooring installation.
If you do not own a miter saw, a circular saw can also make crosscuts. If you do not own power saws at all, a sharp handsaw can work for smaller installations, although it requires more time and effort.
Best Tool for Each Flooring Cut
| Type of Cut | Best Table-Saw Alternative |
| Straight crosscut | Miter saw |
| Long rip cut | Circular saw with straightedge |
| Wide plank crosscut | Circular saw or sliding miter saw |
| Curved cut | Jigsaw |
| Door-jamb notch | Jigsaw or oscillating multi-tool |
| Vent opening | Jigsaw |
| Small trim cut | Handsaw |
| Very clean guided rip | Track saw |
| Cutting installed flooring | Oscillating multi-tool or circular saw with depth control |
For most DIY installers, I recommend owning or borrowing a circular saw and jigsaw at minimum. Add a miter saw if you expect to make many repetitive end cuts.
Key Takeaways:
- You do not need a table saw to install most wood flooring.
- A circular saw is the most versatile alternative because it can make both rip and crosscuts.
- Use a jigsaw for shapes and a miter saw when you want fast, repeatable end cuts.
Use a Circular Saw for the Most Versatility
If you could choose only one power saw for cutting flooring without a table saw, I would choose a circular saw.
A circular saw can make long rip cuts, crosscuts, bevel cuts, and even plunge-style cuts when the saw is designed and used appropriately.
It is especially useful for trimming the first or last flooring row where a plank needs to be narrowed along its entire length.
The biggest difference compared with a table saw is that the saw moves across the flooring rather than the flooring moving through the saw.
That means your accuracy depends heavily on marking and using a guide.
Use a Fine-Tooth Blade
Wood flooring often has a finished surface that can splinter if you use a coarse framing blade.
For clean flooring cuts, use a sharp carbide-tipped blade designed for finish work, plywood, flooring, or similar materials.
A fine-tooth blade generally produces a cleaner edge than a coarse ripping blade, although the exact tooth count depends on blade diameter.
For engineered wood or prefinished flooring, cut quality matters even more because the decorative top layer can chip.
Set the Blade Depth Correctly
Do not leave the circular saw blade at maximum depth.
Adjust the blade so it extends only slightly below the flooring.
Approximately 1/8 to 1/4 inch beyond the material is usually enough for a normal through-cut.
A shallow blade setting improves control and reduces the amount of exposed blade.
Place the plank on a sacrificial foam board or another stable cutting surface that allows the blade to pass through without damaging your workbench or floor.
How to Make Long Rip Cuts With a Circular Saw
A rip cut runs parallel with the length of the flooring plank.
These cuts are commonly required along the first or last row because the remaining space near the wall is narrower than a full plank.
Without a table saw, use a circular saw and a straightedge guide.
Measure the Required Width
Measure from the installed flooring to the wall at several locations.
Walls are often not perfectly straight, so do not assume the required width is identical at both ends.
Remember to subtract the expansion gap required by the flooring manufacturer.
Transfer the measurements to the plank.
If the wall is uneven, connect the marks with a line that follows the wall rather than forcing the cut perfectly parallel with the opposite plank edge.
Account for the Saw’s Offset
The circular-saw blade is not positioned directly at the edge of the saw’s base plate.
Measure the distance from the blade to the edge of the shoe that will ride against your guide.
Position the straightedge that distance away from the actual cut line.
Clamp the guide securely so it cannot move during the cut.
Make the Cut Smoothly
Start the saw with the blade clear of the flooring.
Allow it to reach full speed and then guide it steadily through the plank.
Keep the saw’s shoe flat against the workpiece and its edge firmly against the guide.
Do not push aggressively.
If the saw slows significantly, either your blade is dull or you are feeding too quickly.
With a good guide and sharp blade, a circular saw can make a rip cut almost as straight as a table saw.
Which Side Should Face Up When Using a Circular Saw?
A conventional circular saw blade rotates upward through the material at the front of the saw.
Because the teeth typically exit through the upper surface, the top side is more likely to splinter.
For that reason, when appearance matters, wood flooring is often cut with the finished face down when using a handheld circular saw.
The cleaner edge generally appears on the underside, which in this case is the decorative surface.
However, blade design and saw configuration can vary.
I recommend making a test cut on an offcut before cutting expensive flooring.
If you are using a track saw or specialty blade, follow the manufacturer’s recommendations.
Painter’s Tape Can Help
Place painter’s tape over the cut line before marking and cutting.
The tape supports the surface fibers and can reduce minor splintering.
A very sharp pencil line on top of the tape is also easier to see on dark or highly patterned wood flooring.
Key Takeaways:
- Use a straightedge guide for long circular-saw rip cuts.
- Set the blade only slightly deeper than the flooring.
- With most conventional circular saws, finished-side-down orientation helps reduce visible splintering.
Use a Miter Saw for Crosscuts
A miter saw is one of the best tools for shortening flooring planks.
A crosscut goes across the plank rather than along its length.
This is the cut you make repeatedly when fitting the final board in a flooring row.
A miter saw makes these cuts fast, square, and repeatable.
Place the flooring flat on the saw table and firmly against the fence.
For a standard square cut, set the miter angle to 0 degrees.
Align the blade with the waste side of your mark, start the saw, wait until the blade reaches full speed, and lower it smoothly through the board.
Should Finished Wood Flooring Face Up on a Miter Saw?
For a standard miter saw where the blade cuts downward into the workpiece, the decorative finished side normally faces up.
This allows the blade to enter the finished surface rather than exit through it.
A sharp fine-tooth blade is still important.
After completing the cut, keep the saw head down until the blade stops rotating. Raising a spinning blade back through the flooring can sometimes chip the cut edge or catch a small offcut.
What if the Plank Is Too Wide?
A non-sliding miter saw has a limited crosscut capacity.
Very wide engineered flooring may require a sliding miter saw.
If your plank exceeds the capacity of the saw, use a circular saw rather than attempting an awkward two-sided cut that may not line up correctly.
Use a Jigsaw for Notches and Irregular Cuts
A jigsaw is not normally my first choice for long straight cuts, but it is extremely useful during flooring installation.
Use a jigsaw when you need to cut around:
- Door frames
- Pipes
- Floor vents
- Columns
- Corners
- Other irregular obstructions
A jigsaw’s narrow blade can turn corners that a circular or miter saw cannot.
Choose the Correct Jigsaw Blade
Use a fine-tooth blade intended for hardwood, laminate, or clean wood cuts.
Standard jigsaw blades cut on the upstroke, which can splinter the upper surface.
If you are using a standard up-cut blade, placing the finished face down can reduce visible chipping.
Down-cut blades are also available and can allow you to cut with the decorative side facing up, but they behave differently and require good control.
Always confirm the blade’s tooth direction before deciding which face should be visible.
Cut Slightly Outside the Line if Necessary
If the cut will be hidden beneath trim, perfection is unnecessary.
However, when fitting around a visible transition or obstacle, cut just outside your line and refine the fit gradually.
Trying to remove the exact amount in one aggressive cut often results in taking away too much material.
Use a Track Saw for Professional-Quality Rip Cuts
A track saw is one of the best alternatives to a table saw for long flooring cuts.
It works similarly to a circular saw, but the saw rides on a dedicated guide track.
That makes long straight cuts much easier.
Track saws also commonly have effective splinter-control features that help protect prefinished surfaces.
If you already own one, I would choose it over a handheld circular saw for long visible rip cuts.
Is a Track Saw Worth Buying Just for Flooring?
Usually not for a single small room.
A standard circular saw and straightedge can perform the same basic task at a much lower cost.
However, if you also build cabinets, install sheet goods, or regularly make long precision cuts, a track saw becomes far more valuable.
For professional or frequent flooring work, the improved speed and repeatability can justify the investment.
Can You Cut Wood Flooring With a Handsaw?
Yes.
A handsaw is completely capable of cutting hardwood or engineered flooring.
Before power tools became common, flooring and joinery work was routinely performed with hand saws.
For occasional cuts, a sharp fine-tooth handsaw can work very well.
The disadvantages are speed and effort.
If you are installing several hundred square feet of flooring, manually cutting every plank will become tiring.
For a small repair or a few boards, however, a handsaw may be all you need.
How to Make a Straight Handsaw Cut
Mark the cut using a square.
Secure the plank so it cannot move.
Start the cut with light, short strokes, using your thumb as a guide only before the teeth are fully engaged and while keeping it safely away from the cutting path.
Once the kerf is established, use longer relaxed strokes.
Do not push down heavily.
A sharp saw should do the cutting without excessive force.
Can You Use an Oscillating Multi-Tool?
Yes, but it serves a different purpose.
An oscillating multi-tool is excellent for small, controlled cuts where other saws cannot reach.
Its most common flooring job is undercutting door jambs and casings so flooring can slide neatly underneath.
It can also trim installed flooring in limited areas.
However, an oscillating tool is too slow for routine plank crosscuts or long rip cuts.
Use it as a precision problem-solving tool rather than your main flooring saw.
How to Cut Flooring Around Door Jambs Without a Table Saw
Door openings are one of the places where flooring installations become more complicated.
Instead of shaping every plank perfectly around the casing, it is usually cleaner to undercut the jamb and casing so the flooring can slide underneath.
Place a scrap piece of flooring next to the jamb.
If your flooring requires underlayment, include the underlayment beneath the scrap so your height is accurate.
Rest an oscillating multi-tool or jamb saw on top of the flooring scrap and cut horizontally through the casing.
Remove the small section and test whether the actual plank slides underneath.
This method creates a cleaner appearance than trying to contour the flooring around the door trim.
How to Cut Flooring Around Pipes
For radiator pipes or other vertical penetrations, use a jigsaw or suitable hole saw depending on the layout.
Measure the pipe location carefully and transfer the center point to the flooring.
The opening needs enough clearance to account for flooring movement where required.
When a plank must fit around an existing pipe that cannot be disconnected, installers commonly drill an appropriately sized hole and make an additional cut from the plank edge into that hole.
After installation, the removed piece can sometimes be replaced and concealed with appropriate trim or a pipe escutcheon.
Exact details depend on the flooring system and location.
How to Cut the First and Last Flooring Rows
These rows are where most installers miss having a table saw.
Fortunately, a circular saw handles the job well.
First Row
Depending on wall straightness and flooring layout, the first row may need to be ripped narrower.
Measure the room carefully before beginning because you generally want to avoid ending with an extremely narrow final row.
Some installations benefit from trimming both the first and last rows so their widths look more balanced.
Use a circular saw and guide for these lengthwise cuts.
Last Row
The last row rarely fits as a full-width plank.
Place a plank over the previous row or use the manufacturer’s recommended scribing method to transfer the wall profile.
Account for the expansion gap.
Then rip the plank with a circular saw or jigsaw if the wall is irregular.
A circular saw is better for a mostly straight wall.
A jigsaw is better when the cut has significant curves or variations.
Solid Hardwood vs Engineered Wood Flooring
The same tools can cut both materials, but their behavior differs.
Solid Hardwood
Solid hardwood consists of wood throughout its thickness.
It can splinter along grain lines, particularly with dull blades.
Hard species such as maple, hickory, or oak place more demand on blades than softer woods.
Use sharp carbide teeth and avoid forcing the saw.
Engineered Hardwood
Engineered flooring has a real-wood wear layer bonded to a multi-layer core.
The layered construction is dimensionally stable but can chip at the veneer surface if you use a coarse blade.
Clean-cutting blades and correct face orientation become especially important.
Some engineered flooring also includes particularly hard core materials, so blade wear can vary.
How to Prevent Wood Flooring From Splintering
A clean cut begins with a sharp blade.
Do not try to compensate for a dull blade by pushing harder.
Painter’s tape along the cut line can help support wood fibers.
Correct face orientation also matters.
As a general rule:
| Tool | Finished Face Orientation |
| Standard circular saw | Down |
| Standard miter saw | Up |
| Standard up-cut jigsaw | Down |
| Down-cut jigsaw blade | Up |
| Handsaw | Depends on tooth geometry and technique |
Use this table as a starting point rather than an absolute rule. A test cut is always worthwhile.
Score the Cut Line for Critical Cuts
For a particularly visible cut, lightly scoring the finished surface with a sharp utility knife can reduce splintering along the line.
This is especially useful on engineered flooring with a thin decorative veneer.
Do not cut deeply enough to damage more of the surface.
How to Measure Flooring Before Cutting
Accurate sawing cannot fix poor measuring.
When fitting the end of a row, measure the remaining distance and account for the required perimeter gap.
Confirm which end of the board needs to retain its tongue or groove before cutting.
Click-lock engineered flooring can become unusable in that position if you accidentally cut away the wrong locking profile.
I recommend placing the board in its intended orientation before marking it.
This small habit prevents many avoidable mistakes.
Expansion Gaps Still Matter
Wood and engineered flooring can expand and contract as environmental conditions change.
Your flooring manufacturer’s installation instructions should specify the required clearance at perimeter walls and fixed objects.
Do not measure a board to fit tightly against the wall.
The gap will usually be concealed later by baseboard, shoe molding, or another trim element.
The exact required gap varies among flooring types and manufacturers, so I would not rely on one universal measurement.
Which Method Is Best if You Own Only One Saw?
If you already own a circular saw, use it.
It can make almost every straight flooring cut.
Add an inexpensive jigsaw only if you need irregular cutouts.
If you already own a miter saw but no circular saw, use the miter saw for most crosscuts and rent or borrow a circular saw for the first and last row rip cuts.
For a very small flooring project, a jigsaw can technically make both straight and irregular cuts, but it will be slower and less precise for long straight lines.
For overall versatility, my ranking is:
Circular saw first, jigsaw second, miter saw third.
That does not mean the miter saw is less useful. It simply means a circular saw can replace more of a table saw’s functions.
Key Takeaways:
- If you buy only one saw, a circular saw is the most versatile choice for flooring.
- A jigsaw handles the shapes a circular saw cannot.
- A miter saw is worth adding when you want faster, repeatable crosscuts throughout a larger installation.
Common Mistakes When Cutting Flooring Without a Table Saw
The most common mistake is trying to make every type of cut with one tool.
A circular saw is excellent for straight lines but frustrating for tight curves. A jigsaw handles curves beautifully but is not ideal for a 6-foot precision rip cut.
Another mistake is working without proper support.
A flooring plank that hangs off a workbench can move, vibrate, or pinch a blade during the cut.
Use stable supports on both sides where appropriate.
Cutting with the wrong face orientation is another common cause of splintering.
So is using a dull or coarse construction blade.
Finally, do not forget the expansion gap. A perfectly clean board that fits too tightly against the wall is still incorrectly cut.
Safety When Cutting Wood Flooring
Woodworking saws can cause serious injuries, and flooring installation often creates awkward working positions.
Whenever possible, cut at a dedicated work station rather than holding boards near the floor while operating a saw.
Wear eye protection.
Hearing protection is appropriate for circular and miter saws.
Cutting engineered wood or finished flooring can create substantial fine dust, so use dust collection and appropriate respiratory protection when necessary.
Keep power cords away from cutting paths.
With circular saws, make sure the material is supported in a way that prevents the kerf from closing and pinching the blade.
Never hold a small offcut where your fingers would be close to the blade.
If a cut cannot be made while maintaining safe hand clearance, change the setup or use another tool.
FAQs about How to Cut Wood Flooring Without a Table Saw
Can you install wood flooring without a table saw?
Yes.
A circular saw, miter saw, and jigsaw can handle virtually all common flooring cuts.
Many DIY installations are completed without a table saw.
What is the best table saw alternative for flooring?
A circular saw with a straightedge is the best overall alternative.
It can make both crosscuts and long rip cuts and is easy to transport.
Can I rip hardwood flooring with a circular saw?
Yes.
Clamp a straightedge guide to the plank and run the saw along it.
Use a sharp carbide blade and support the board securely.
Can a miter saw cut wood flooring?
Yes.
A miter saw is excellent for crosscuts and angled end cuts.
It is not suitable for long rip cuts along the full length of a plank.
Can I use a jigsaw to cut wood flooring?
Yes.
A jigsaw is especially useful for notches, pipe cutouts, vents, and irregular walls.
It can make straight cuts too, but a circular or miter saw usually provides cleaner and faster results.
Can I cut hardwood flooring with a handsaw?
Yes.
A sharp fine-tooth handsaw can make clean flooring cuts, especially for small jobs or repairs.
It is simply slower than a power saw.
What saw is best for cutting the last row of flooring?
A circular saw with a straightedge is usually the best choice when the wall is fairly straight.
Use a jigsaw if the wall profile is irregular.
Which side of wood flooring should face up when cutting?
It depends on the tool.
With a standard circular saw, finished side down generally reduces visible splintering. With a standard miter saw, finished side up is usually better.
Always make a test cut.
How do I cut engineered hardwood without chipping it?
Use a sharp fine-tooth blade, orient the finished face correctly for the saw, and apply painter’s tape across the cut line if necessary.
Feed the saw smoothly rather than forcing it.
Can I use a track saw instead of a table saw?
Yes.
A track saw is one of the best tools for long, straight flooring rip cuts and often produces very clean edges.
How do you cut flooring around door frames?
Undercut the door casing with an oscillating multi-tool or jamb saw using a scrap piece of flooring as a height guide.
Then slide the flooring beneath the trim.
Do I need a special blade for hardwood flooring?
Not necessarily, but a sharp carbide finish blade produces better results than a coarse construction blade.
Very hard or abrasive flooring may justify a blade specifically designed for flooring materials.
Can I cut flooring after it is installed?
Yes, in certain situations.
A circular saw with carefully controlled depth or an oscillating multi-tool can trim installed flooring.
Before cutting, make sure you know what lies below the floor and avoid setting the blade deeper than necessary.
What tool makes the cleanest rip cut without a table saw?
A track saw usually provides the easiest combination of straightness and clean edge quality.
A circular saw with a good straightedge and sharp blade can produce nearly the same result at lower cost.
Do I need both a circular saw and a miter saw?
No.
A circular saw can make both rip and crosscuts.
The miter saw is mainly a convenience because it makes repeated crosscuts faster and more consistent.
Conclusion
If you are learning how to cut wood flooring without a table saw, you have several effective alternatives. For most installations, a table saw is convenient rather than essential.
My preferred setup is a circular saw for long rip cuts, a miter saw for repeated crosscuts, and a jigsaw for notches and irregular shapes. If you want to minimize the number of tools, start with a circular saw because it can handle both lengthwise and across-the-board cuts.
Use a sharp fine-tooth carbide blade, support every plank properly, and choose the correct finished-face orientation for the saw you are using. Painter’s tape and careful feed speed can further reduce splintering on prefinished and engineered flooring.
For first and last rows, a circular saw with a straightedge can replace the table saw very effectively. For door jambs, an oscillating multi-tool usually creates the cleanest installation. For vents, pipes, and curved obstacles, a jigsaw is the better choice.
Most importantly, measure carefully and include the expansion clearance specified by the flooring manufacturer. A perfectly straight cut is still wrong if the plank is too tight against a wall or if you accidentally remove the tongue or groove needed for installation.
With the right combination of portable tools and a careful setup, you can complete an accurate, professional-looking wood flooring installation without owning or using a table saw at all.