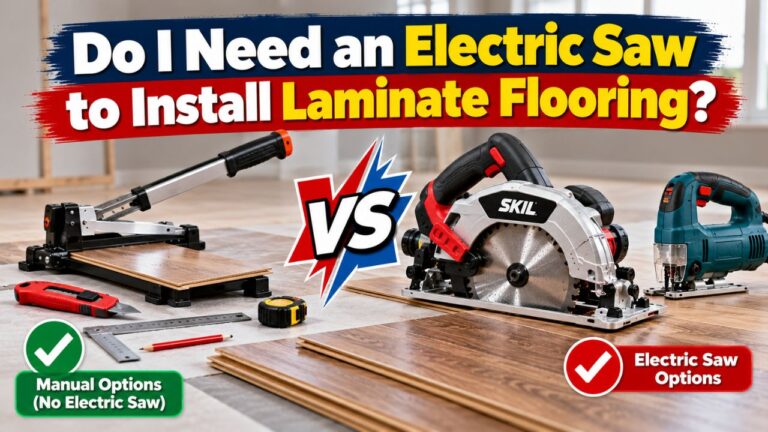
How to Use a Flooring Saw: Step-by-Step Guide for Beginners
To learn how to use a flooring saw, place the saw on a stable surface, install the correct blade for your flooring, measure and mark the plank, position it firmly against the fence or cutting guide, align the blade on the waste side of the line, start the saw, and feed or lower the blade smoothly through the material without forcing it. Always keep your hands outside the blade area, support long planks, and follow the operating instructions for your specific saw.
A dedicated flooring saw is designed to make flooring installation faster by handling several common cuts with one compact machine. Depending on the model, it may perform crosscuts, rip cuts, and miter cuts without requiring you to move between a miter saw, table saw, and circular saw.
That can be especially convenient when installing laminate, engineered hardwood, luxury vinyl plank, or some hardwood flooring products.
However, the term flooring saw can describe more than one style of tool. Some are compact stationary machines with a sliding saw head. Others operate more like small table saws or specialty portable cutting stations. The exact controls differ, but the basic cutting principles are very similar.
In this guide, I’ll explain how to use a flooring saw step by step, how to make crosscuts, rip cuts, and angled cuts, which blade to use, how to prevent chipping, and the most important safety mistakes to avoid.
What Is a Flooring Saw?
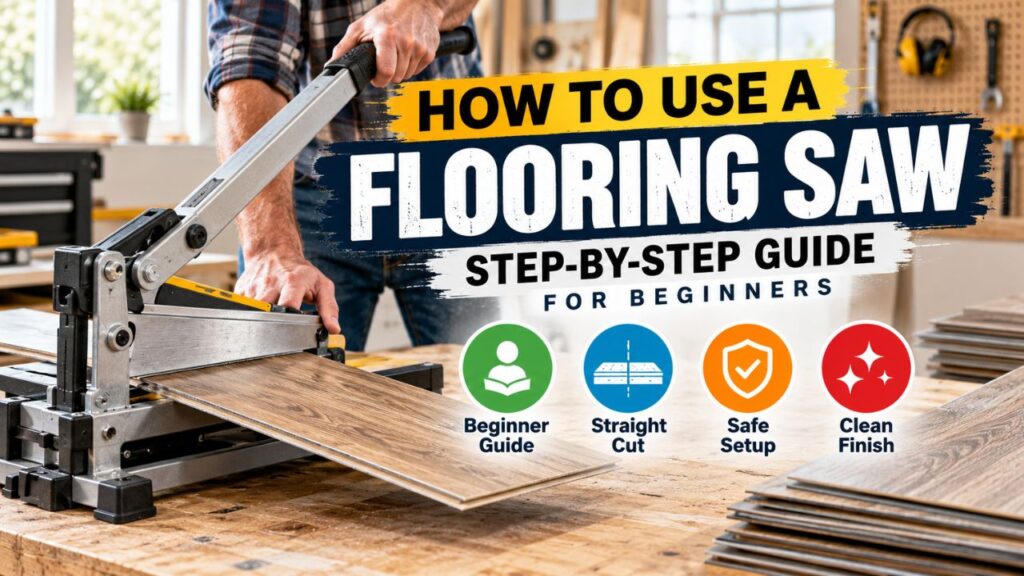
A flooring saw is a power saw designed specifically for cutting flooring planks and boards during installation.
The main advantage is versatility.
A conventional miter saw is excellent for shortening flooring but cannot normally rip a long plank lengthwise. A table saw can make rip cuts but is much larger and less convenient to move from room to room.
A dedicated flooring saw attempts to combine those functions in a smaller installation-focused machine.
Depending on the model, you may be able to make:
- Straight crosscuts
- Lengthwise rip cuts
- Miter cuts
- Bevel or compound cuts on some machines
That makes the tool useful when you need to shorten boards at the end of rows and narrow the first or final row without moving to a second machine.
Materials a Flooring Saw May Cut
Depending on the saw and blade, flooring saws may be suitable for laminate, engineered hardwood, solid wood flooring, luxury vinyl plank, SPC flooring, WPC flooring, and other composite materials.
Do not assume every blade is suitable for every product.
A blade that performs well in solid wood may chip laminate or wear quickly in mineral-filled rigid vinyl flooring.
The flooring and saw manufacturers’ recommendations should determine the final blade choice.
How to Use a Flooring Saw
Although machine layouts vary, the general process is straightforward.
Start by setting up the saw securely.
Then determine the type of cut you need, measure the plank, mark the waste, position the flooring correctly, and make the cut using smooth controlled pressure.
The most important rule is simple: let the blade do the cutting rather than forcing the flooring through it.
Before You Start
Inspect the flooring saw before use.
Make sure the blade is installed correctly, the guard moves freely, the fence or guide is secure, and no scraps are trapped near the blade.
Check that the blade is suitable for the flooring material.
Wear eye protection and appropriate hearing protection. Flooring materials can also create very fine dust, so use suitable respiratory protection and dust collection where appropriate.
Secure loose clothing and long hair and keep the work area free of flooring offcuts.
Key Takeaways:
- Set up the saw on a stable surface before cutting.
- Use a blade appropriate for the flooring material.
- Identify the finished piece and waste section before every cut.
- Never force the flooring through the blade.
Step 1: Set Up the Flooring Saw Properly
Place the machine on a solid, level workbench, floor stand, or other surface recommended by the manufacturer.
A flooring saw should not rock or slide when pressure is applied.
Some portable models are designed to sit directly on the floor. Others work better on a bench or dedicated stand.
If the saw has mounting points, securing it can reduce vibration and improve cutting accuracy.
Create Enough Working Space
Leave room on both sides of the saw for long flooring planks.
A six-foot plank can become difficult to control if furniture, walls, or boxes interfere with its movement.
You also need enough room to position yourself without standing directly in the blade path.
If you are installing flooring inside a house, a separate cutting station in a garage, driveway, or well-ventilated area can reduce dust inside the finished room.
Step 2: Install the Correct Flooring Blade
The blade is one of the biggest factors affecting cut quality.
For laminate and many engineered flooring products, a fine-tooth carbide blade generally gives cleaner cuts than a coarse construction blade.
For solid wood flooring, blade choice depends on whether you are making a crosscut or rip cut.
For rigid vinyl and SPC flooring, use a blade specifically appropriate for dense composite materials when recommended.
Fine Blades vs. Coarse Blades
More teeth generally produce a smoother finish, especially across decorative surfaces.
Fewer, larger teeth remove material faster but can create more chipping.
A coarse ripping blade can be useful in solid wood when speed matters, while a fine finish blade is usually preferable when cutting brittle laminate surfaces.
Do not choose a blade only by tooth count. Blade diameter, arbor size, tooth geometry, kerf width, and maximum RPM must also be compatible with the saw.
Step 3: Measure the Flooring Plank
Accurate cuts start with accurate measurements.
Measure the opening where the plank will fit.
For floating flooring, remember to account for the expansion gap specified by the flooring manufacturer.
Do not cut a floating floor tightly against the wall simply because the measurement allows it.
Expansion clearance is part of the installation system.
Check Which Locking Edge You Need
Most laminate and vinyl flooring has a tongue-and-groove or click-lock profile.
Before cutting, check which end or side must remain intact.
A perfectly measured plank is useless if you accidentally remove the locking edge required to connect it to the previous board.
I recommend positioning the plank near its intended location before marking it, especially when alternating cuts between the left and right ends of a room.
Step 4: Mark the Cutting Line
Use a sharp pencil and square for crosscuts.
For rip cuts, measure the required width at both ends of the plank and connect the marks with a straight line.
Walls are not always perfectly straight, so for the final row you may need several measurements rather than one.
Clearly mark the waste side.
This simple step prevents many mistakes.
Remember Blade Kerf
The blade removes material as it cuts.
This removed width is called the kerf.
If you place the center of the blade directly over your finished measurement line, part of the finished piece may be removed.
For accurate work, position the blade so the kerf remains primarily on the waste side of the mark.
Step 5: Position the Flooring Correctly
Place the plank securely against the appropriate fence or guide.
It should lie flat and should not rock.
If your flooring saw uses a moving carriage or sliding head, make sure the board is positioned according to the machine’s cutting direction.
Support any section that extends significantly beyond the machine.
A long unsupported plank can tilt during the cut and cause the blade to bind.
Which Side of Flooring Should Face Up?
This depends on the saw’s blade direction.
You generally want the blade to enter through the decorative surface rather than exit through it because the exit side is often more prone to chipping.
On many miter-saw-style machines, that means finished face up.
On some other configurations, finished face down may produce the cleaner edge.
Make a test cut in scrap material before beginning the installation.
Inspect both surfaces and use whichever orientation produces the cleaner finished face on your specific saw.
Step 6: Start the Saw Before Entering the Material
Keep the blade clear of the flooring.
Turn the saw on and allow it to reach full operating speed.
Then begin the cut.
Starting the motor with the blade already touching the flooring can cause chatter, movement, or a rough starting edge.
Hold the plank securely against the fence, but keep your hands well outside the blade area.
Step 7: Make the Cut Smoothly
Move the blade through the flooring at a controlled rate.
Do not force it.
A sharp blade should cut with moderate pressure.
If the motor slows dramatically, the flooring begins burning, or you need excessive force, stop and determine why.
The blade may be dull, dirty, inappropriate for the material, or being fed too quickly.
Once the cut is complete, keep the material under control until the blade has cleared it.
Allow the blade to stop before reaching near the cutting area or removing small scraps.
How to Make a Crosscut With a Flooring Saw
A crosscut shortens a plank by cutting across its width.
This is the most common flooring cut because almost every row needs a shortened board at the wall.
Measure the required length and mark a square line across the plank.
Place the board against the fence and align the blade on the waste side.
Start the saw and allow it to reach full speed.
Then move the blade smoothly through the flooring.
If your machine uses a sliding saw head, keep the movement straight and controlled.
Do not twist the saw carriage or shift the plank while the blade is engaged.
Why Flooring Saws Are Convenient for Crosscuts
A dedicated flooring saw allows you to keep the plank horizontal and supported.
This makes repeated end-of-row cutting fast.
For large installation jobs, you can measure a plank, walk to the cutting station, make the cut, and return to installation without changing tools or machine setups.
How to Make a Rip Cut With a Flooring Saw
A rip cut travels along the length of the flooring plank and makes it narrower.
This is commonly needed for the first or last row.
Unlike a miter saw, many dedicated flooring saws are designed specifically to handle these lengthwise cuts.
Measure the Required Width
Measure the distance between the previously installed flooring and the wall.
Take measurements at several locations if the wall is not perfectly straight.
Subtract the required expansion gap.
Transfer the measurements to the plank.
Make sure you preserve the locking edge that needs to connect to the previous row.
Set the Rip Guide or Fence
Adjust the saw’s guide according to the required width.
Lock it securely.
The guide must remain parallel to the blade throughout the cut.
If the fence shifts halfway through the plank, the flooring can bind or end up tapered unintentionally.
Feed the Flooring Evenly
Keep the plank against the guide and feed it steadily.
Do not twist the plank sideways.
If the saw uses a moving blade rather than feeding the plank, follow the manufacturer’s rip-cut procedure carefully because this varies more between flooring-saw designs than crosscutting does.
Key Takeaways:
- Crosscuts shorten flooring; rip cuts make it narrower.
- Use a square for accurate crosscuts.
- Measure the final row at several locations before ripping.
- Preserve the click-lock edge required for installation.
How to Make Miter Cuts With a Flooring Saw
Miter cuts are angled cuts across the face of the plank.
They may be useful around diagonal walls, transitions, bay windows, or unusual room layouts.
Set the saw’s miter angle to the required position.
Lock the adjustment securely before cutting.
Place the flooring against the fence, verify the blade position, and make a test cut when accuracy is important.
Do Not Assume Every Corner Is 45 Degrees
A corner that looks like 45 degrees may actually be slightly different.
Existing walls frequently are not perfectly square.
Measure the real angle or use a bevel gauge to transfer it when the fit will remain visible.
For cuts that disappear underneath baseboard, a small discrepancy may not matter as long as the expansion gap remains correct.
How to Cut Laminate Flooring With a Flooring Saw
Laminate has a hard decorative wear surface over a dense fiberboard core.
This surface can chip if the blade is coarse or dull.
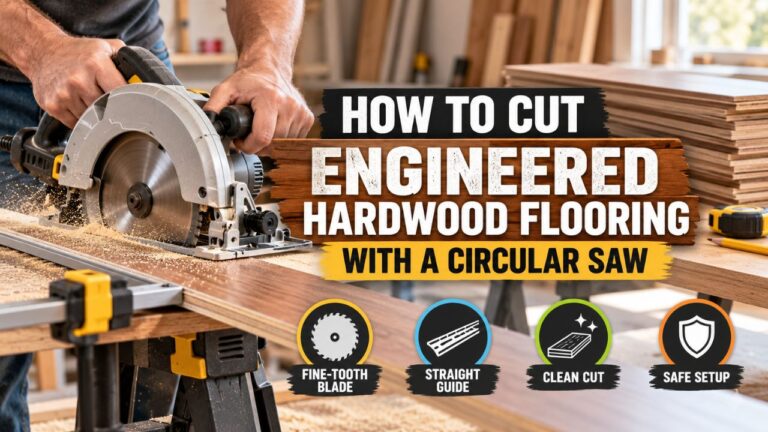
Use a sharp fine-tooth carbide blade suitable for laminate or composite materials.
Support the plank firmly and avoid rushing through the cut.
If chipping remains a problem, try painter’s tape over the cutting line and test the opposite plank orientation.
Laminate Is Hard on Blades
Laminate can dull blades faster than ordinary softwood.
During a large installation, watch for declining cut quality.
If a blade that initially produced clean cuts begins leaving ragged edges or requiring more pressure, it may need cleaning, sharpening, or replacement.
How to Cut Vinyl Plank Flooring With a Flooring Saw
Many flooring saws can cut rigid vinyl plank very efficiently.
SPC and other rigid-core products are particularly well suited to power-saw cutting when allowed by the manufacturer.
Use the appropriate fine-tooth or composite-material blade.
Keep the plank fully supported because some rigid vinyl products can fracture if they flex excessively near the cut.
Control Vinyl Flooring Dust
Rigid-core flooring can create significant fine dust.
Some products contain mineral fillers that make the dust particularly noticeable.
Use effective dust extraction where possible and follow the flooring manufacturer’s safety guidance.
If a thin flexible vinyl product can be scored and snapped cleanly, a flooring saw may be unnecessary for many cuts.
How to Cut Engineered Hardwood With a Flooring Saw
Engineered hardwood consists of a real-wood surface over a layered core.
It generally cuts more like wood than vinyl, but the decorative veneer can chip.
A sharp fine-finish carbide blade is a good starting point.
Make test cuts to determine which plank orientation provides the cleanest visible edge.
Because engineered planks can be longer than laminate or rigid vinyl, good support becomes especially important.
Can a Flooring Saw Cut Solid Hardwood?
Many can, provided the flooring thickness is within the machine’s capacity and the correct blade is installed.
Hardwood requires more cutting power than thin laminate or vinyl.
Feed the blade smoothly and do not overload the motor.
Dense species such as oak, maple, or exotic hardwood can dull a blade more quickly than softwood.
Check the saw’s maximum cutting thickness before attempting thick solid flooring.
How to Prevent Chipping With a Flooring Saw
Chipping is most common with laminate and veneered engineered flooring.
Start with the blade.
A sharp finish blade produces dramatically better results than a worn construction blade.
Next, determine which side of the material should face the blade based on the machine’s cutting direction.
Support the flooring close to the cutting area.
Vibration allows the surface layer to flex and break irregularly.
Painter’s tape can provide additional support along the cut line, but it is secondary to blade condition and proper technique.
Slow Down, but Do Not Burn the Material
A controlled feed is good.
An excessively slow feed with a dull blade is not.
If you see dark marks, melted material, smoke, or significant heat, stop.
Inspect the blade and cutting rate before continuing.
How to Cut the Last Row With a Flooring Saw
The final row is often the point where the flooring saw becomes particularly useful.
The planks may need both shortening and narrowing.
First measure the distance from the last full row to the wall at several points.
Subtract the required expansion clearance.
Transfer those measurements to the flooring.
If the wall is uneven, draw a tapered cutting line instead of assuming the rip will be perfectly parallel.
Preserve the locking edge that connects to the installed row.
Make the rip cut according to the saw’s guide system.
Then crosscut the plank to the required length if necessary.
Test-fit it before permanently completing the row.
Cutting Flooring Around Doorways
A flooring saw can make the straight cuts required around some door openings, but it is not the best tool for every notch.
For an L-shaped notch, you can make one straight cut with the flooring saw and complete the other with a jigsaw.
For complicated shapes around trim or pipes, a jigsaw is usually better.
Door casings and jambs are often undercut using an oscillating multi-tool so the flooring can slide underneath them rather than being cut around every contour.
This generally produces a cleaner finished appearance.
How to Support Long Flooring Planks
Flooring-saw tables are compact, while flooring planks can be several feet long.
Support is therefore essential.
Use roller stands, extension tables, workbenches, or another level support system.
Keep the plank approximately level with the saw table.
If the free end hangs downward, it may lift the section near the blade or pull the plank away from the fence.
The support should carry the weight without preventing the flooring from moving when a rip cut requires feeding the plank.
Flooring Saw Safety
A dedicated flooring saw may look less intimidating than a large table saw, but the blade can cause the same type of serious injury.
Never place your hands in the blade path.
Follow the manufacturer’s specified minimum hand distance.
If a short piece cannot be held safely, use a clamp or a different cutting method.
Do Not Remove or Disable Guards
Blade guards should move freely.
Never tie a guard open because it interferes with visibility or feels inconvenient.
If the guard sticks, disconnect the machine and correct the problem before continuing.
Disconnect Power Before Adjustments
Unplug the saw or remove its battery before changing blades, clearing material trapped around the blade, or making adjustments that require your hands close to moving parts.
Do not rely solely on the power switch.
Control the Dust
Flooring dust can accumulate quickly around a cutting station.
Connect a dust extractor or shop vacuum if the saw supports one.
Do not allow dust to bury ventilation openings or accumulate around the motor.
Vacuum the area periodically rather than allowing large piles to build up.
Keep Offcuts Away From Your Feet
Small flooring scraps can be slippery.
Move them into a waste container instead of allowing them to accumulate around the saw.
A clean floor gives you stable footing while cutting.
Key Takeaways:
- Keep hands outside the blade area at all times.
- Never disable the blade guard.
- Disconnect power before blade changes or clearing jams.
- Support long flooring and keep the cutting area free of dust and scraps.
Flooring Saw vs. Miter Saw
A miter saw excels at crosscuts and angled cuts.
A flooring saw may perform those same operations while also handling rip cuts.
That is its main advantage.
If you already own a miter saw and circular saw, you may not need a dedicated flooring saw for a small project.
For repeated flooring installations, however, having one compact machine that stays near the work area can be convenient.
Flooring Saw vs. Table Saw
A table saw is excellent for ripping flooring.
It can also crosscut when used with an appropriate miter gauge or sled.
However, a table saw is larger and generally less portable.
A flooring saw is designed around planks and installation work, which makes it easier to move between rooms or job sites.
For furniture or general woodworking, the table saw is much more versatile.
For flooring alone, the specialized saw may be more convenient.
Flooring Saw vs. Circular Saw
A circular saw can perform many of the same cuts.
With a guide, it can rip long flooring planks very accurately.
The advantage of a flooring saw is setup speed and repeatability.
You do not need to clamp a guide for every routine crosscut.
For a homeowner doing one room, a circular saw may be enough.
For frequent flooring work, the dedicated machine can save considerable time.
Flooring Saw vs. Flooring Cutter
A manual flooring cutter is quiet and creates little airborne dust.
For compatible laminate or vinyl flooring, it can be extremely fast.
Its limitation is material compatibility and cut type.
Some cutters cannot handle certain rigid products, thick hardwood, or precise angle and rip cuts.
A power flooring saw is messier and noisier but generally gives you a broader range of cutting options.
Common Mistakes When Using a Flooring Saw
Using the wrong blade is one of the most common mistakes.
A coarse framing blade may cut quickly but can chip decorative surfaces.
Another problem is failing to support a long board.
A plank that moves during cutting can produce an inaccurate edge or contribute to blade binding.
Users also sometimes forget to account for blade kerf and make every plank slightly short.
Cutting off the wrong click-lock edge is another surprisingly common mistake.
The board looks perfect until you return to the floor and discover that it no longer connects to the previous row.
Forcing the cut is another issue. If the saw needs significant pressure, inspect the blade and machine instead of simply pushing harder.
Finally, avoid trying to make a cut that your flooring saw was not designed to perform. Internal cutouts and curves are typically better handled by a jigsaw or oscillating tool.
How to Get More Accurate Flooring-Saw Cuts
Accuracy improves when you develop a consistent routine.
Use the same tape measure and marking method throughout the project.
Keep your square near the cutting station.
Mark the waste side every time.
Check the saw’s fence and angle settings periodically.
If you are making a series of identical cuts, a properly positioned stop can improve repeatability, provided it does not create a pinching hazard near the blade.
Before an important cut, test the measurement on a scrap plank.
It is better to waste a small offcut than a full flooring board.
How to Maintain a Flooring Saw
Flooring creates a large amount of fine abrasive dust.
Regular cleaning helps keep the machine accurate and reliable.
Disconnect the power before maintenance.
Vacuum dust from the table, fence, blade area, and ventilation openings.
Inspect the blade for pitch, resin, dull teeth, or damage.
Keep sliding mechanisms clean according to the manufacturer’s instructions.
Do not apply random oils or lubricants to areas where dust could stick and create buildup.
Check the power cord, guard, fence, and adjustment locks periodically.
A loose fence or worn blade can affect both accuracy and safety.
FAQs about How to Use a Flooring Saw
What is a flooring saw used for?
A flooring saw is designed to cut flooring planks during installation. Depending on the model, it can make crosscuts, rip cuts, miter cuts, and sometimes bevel cuts.
Is a flooring saw the same as a miter saw?
No. A miter saw primarily makes crosscuts and angled cuts. Many flooring saws can also rip planks lengthwise, making them more specialized for flooring installation.
Can a flooring saw cut laminate flooring?
Yes. Use a sharp fine-tooth carbide blade suitable for laminate or composite materials to reduce chipping.
Can a flooring saw cut vinyl plank flooring?
Many models can cut rigid vinyl, SPC, and WPC flooring. Always check that the saw and blade are appropriate for your specific flooring product.
Can a flooring saw cut hardwood?
Many flooring saws can cut hardwood within their specified thickness capacity. Use an appropriate sharp carbide blade and avoid forcing dense wood through the saw.
Can you rip flooring with a flooring saw?
Many dedicated flooring saws are specifically designed to make lengthwise rip cuts. Check your model because machine designs vary.
Which way should flooring face when cutting?
Use the orientation that places the cleanest side of the blade action on the decorative face. Because saw designs vary, make a test cut to determine whether finished-side-up or finished-side-down produces the best result.
How do you prevent laminate from chipping?
Use a sharp fine-tooth blade, support the plank properly, maintain a controlled feed rate, and test which surface orientation produces the cleanest edge. Painter’s tape can also help.
Do I need a special blade for a flooring saw?
You need a blade compatible with both the saw and material. A dedicated flooring or fine-finish carbide blade is often useful, especially for laminate and composite flooring.
Can a flooring saw make angled cuts?
Most flooring saws designed for installation work can make at least some miter cuts. The available angle range depends on the model.
Can I use a flooring saw for the last row?
Yes. One of its major advantages is the ability to rip the final row narrower when the full plank width will not fit.
Should I account for an expansion gap when cutting flooring?
Yes, when installing a floating floor that requires perimeter expansion clearance. Follow the flooring manufacturer’s specified gap rather than cutting the plank tightly against the wall.
Why is my flooring saw chipping the plank?
The blade may be dull or too coarse, the plank may be vibrating, or the material may be oriented poorly relative to the blade direction.
Why is my flooring saw burning the material?
A dull or dirty blade, excessive feed pressure, incorrect blade choice, or feeding too slowly can create excessive heat.
Is a flooring saw worth buying?
For frequent flooring installations, it can be very convenient because one portable machine may handle both crosscuts and rip cuts. For a small DIY project, tools you already own may be sufficient.
Conclusion
Learning how to use a flooring saw is mainly about understanding the type of cut you need, choosing the right blade, and controlling the flooring carefully throughout the cut.
Start by setting the saw on a stable surface and confirming that the blade, guard, fence, and adjustments are functioning correctly. Install a blade suitable for the flooring material, particularly when working with laminate, engineered hardwood, or rigid composite flooring.
Measure the plank accurately and account for any required expansion gap. Mark the waste side before you approach the saw so you do not accidentally cut away the locking edge you need.
For a crosscut, keep the flooring square against the fence and move the blade smoothly through the plank.
For a rip cut, set the appropriate guide or fence and maintain consistent contact as the cut travels along the plank’s length.
For a miter cut, set and lock the required angle before placing your hands near the workpiece.
Do not force any of these cuts. A sharp blade should move through appropriate flooring without extreme pressure.
I also recommend making a test cut before starting a large installation. This allows you to determine which flooring orientation gives the cleanest decorative surface and whether the blade is producing acceptable results.
Most importantly, keep your hands out of the blade area, support long planks, use the saw’s guards, disconnect power before adjustments, and control the fine dust generated by flooring materials.
A dedicated flooring saw is particularly useful because it can replace several different cutting setups during installation. Used correctly, it lets you move efficiently between crosscuts, rip cuts, and angled cuts while keeping the flooring accurate and consistent from the first row to the last.