How to Rip Cut With a SKIL Flooring Saw: Complete Guide
If you want to know how to rip cut with a SKIL flooring saw, lock the saw assembly in its rip-cut position, move the fence into the ripping position, set it to your required width, confirm the fence and riving knife are aligned with the blade, lower the anti-kickback pawls, and feed the flooring steadily against the fence using the push stick. Unlike a normal crosscut on this saw, you move the flooring through the stationary blade during a rip cut.
The common SKIL 3601/3601-02 Flooring Saw is unusual because it combines functions normally associated with a miter saw and a small table saw. It can make crosscuts, miter cuts, and lengthwise rip cuts while remaining compact enough to use near a flooring installation. For ripping, however, the setup changes significantly: the saw assembly is locked in place while the flooring moves through the blade.
A rip cut is simply a lengthwise cut. During flooring installation, you normally need one when a full-width plank will not fit along the first or last wall. Instead of shortening the plank, you remove a strip along its length.
Because rip cutting involves feeding material directly past an exposed rotating blade, setup and workpiece control are critical. The rip fence, riving knife, anti-kickback pawls, hold-down bracket, and push stick all play important safety roles and should not be treated as optional accessories.
In this guide, I’ll explain how to rip cut with a SKIL flooring saw step by step, how to set the rip fence correctly, how to measure the final flooring row, how to avoid crooked or chipped cuts, how the SKIL flooring saw differs from a regular circular or table saw, and the safety mistakes you should avoid.
Can a SKIL Flooring Saw Make Rip Cuts?
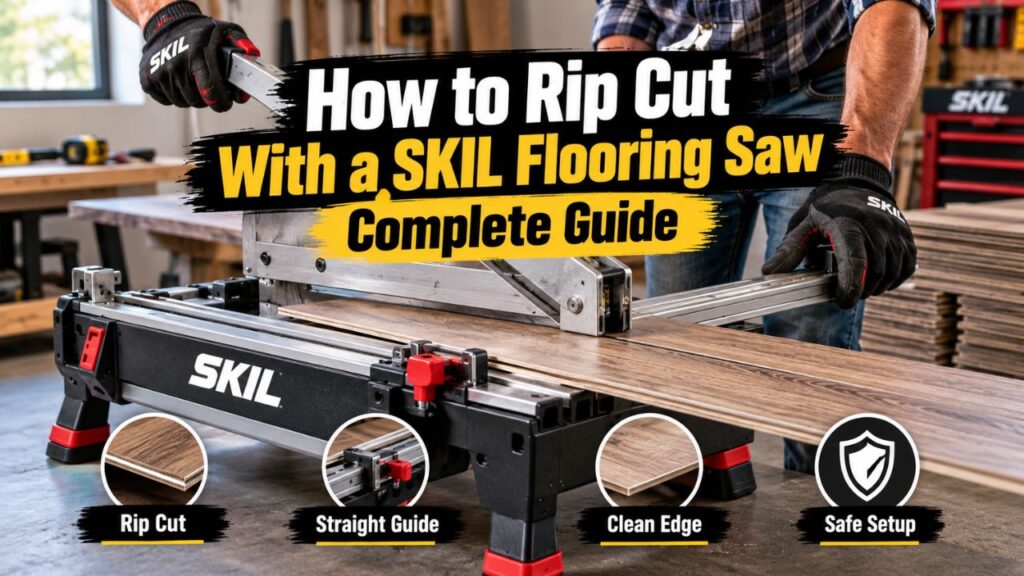
Yes. The SKIL flooring saw is specifically designed to make rip cuts in addition to crosscuts and miter cuts.
The common SKIL 3601-02 uses a compact table-and-rail design with a movable saw assembly. For crosscutting and mitering, the saw assembly travels through the stationary flooring plank.
For ripping, the operation is reversed.
The saw assembly is positioned around the middle of the rail and locked so it cannot slide. The rip fence is then installed on the table, and you feed the flooring lengthwise past the blade much like you would on a compact table saw.
This distinction is extremely important.
Do not attempt to make a lengthwise cut by holding a long plank stationary and trying to slide the saw assembly along its entire length. That is not the intended rip-cut procedure.
For a proper rip cut:
Blade stays stationary.
Flooring moves.
The rip fence controls the width.
The included push stick helps move the flooring safely beyond the blade.
What Materials Can the SKIL Flooring Saw Rip?
The SKIL 3601 series was designed primarily for common flooring materials, including laminate, engineered wood, and solid wood flooring within the saw’s rated cutting capacities.
Blade choice also matters.
The common 3601-02 was supplied with a small carbide-tipped flooring blade, but if you replace the blade, use one that meets the saw manufacturer’s dimensional and speed requirements and is suitable for the flooring material.
Do not install a larger blade simply to increase cutting capacity.
Key Takeaways:
- The SKIL flooring saw can make crosscuts, miters, and lengthwise rip cuts.
- During a rip cut, the saw assembly is locked and the flooring moves through the blade.
- Use the rip fence, riving knife, anti-kickback pawls, and push stick as intended.
When Do You Need to Rip Flooring?
Most flooring planks require more crosscuts than rip cuts.
Crosscuts shorten a plank at the end of a row.
Rip cuts reduce its width.
The most common rip occurs along the final wall.
Suppose your laminate plank is 7 inches wide, but only 4 inches of floor remain between the previous row and the wall. You need to cut approximately 3 inches from the width of the final plank while preserving the factory locking edge that connects to the previous row.
You might also need a rip cut when starting a room.
If laying full-width planks on the first wall would leave an extremely narrow final row on the opposite side, removing some width from the first row can create a more balanced installation.
Ripping may also be necessary when a wall runs noticeably out of parallel.
Instead of cutting every plank to exactly the same width, you may have to taper or scribe the row to follow the wall while maintaining the required expansion gap.
A straight rip fence works best for parallel cuts. A strongly tapered cut may require another tool or a different cutting method.
Measure Before Setting the Rip Fence
The quality of the cut begins before the saw is turned on.
Measure the distance from the installed flooring to the wall at several locations.
Do not assume the wall is perfectly straight.
One end might measure 4-1/2 inches while the other measures 4-3/8 inches. Even a small difference can affect whether the finished edge maintains the proper perimeter gap.
You also need to subtract the expansion gap required by your flooring manufacturer.
Floating laminate and engineered flooring should not normally be installed tightly against a wall. The required clearance varies by flooring system, so follow the instructions supplied with your product.
For example, if the measured space is 4-1/2 inches and your flooring requires a 3/8-inch perimeter gap, your finished plank width would be approximately 4-1/8 inches.
That measurement—not the distance all the way to the wall—is what you use to position the fence.
Preserve the Correct Locking Edge
This is one of the easiest flooring mistakes to make.
Before ripping the plank, determine which factory tongue or groove must remain intact so the piece will connect to the installed row.
Usually, you want the newly cut edge facing the wall while the factory locking profile faces the previous plank.
If you rip off the wrong side, you can remove the locking edge that the floor depends on.
I recommend placing the plank beside the installed row before making the cut and mentally confirming which side is waste.
Preparing the SKIL Flooring Saw for a Rip Cut
The rip-cut setup is different from the miter/crosscut configuration.
Before making adjustments, turn the saw off and disconnect it from power.
Lock the Saw Assembly in Position
Position the saw assembly around the middle of the rail.
The assembly must then be secured with its locking mechanism so it cannot travel along the rail during the rip cut.
This converts the tool from a sliding crosscut-style configuration into a stationary-blade ripping setup.
Check that the assembly is genuinely locked before continuing.
If the saw head can move while you feed the flooring through it, stop and correct the setup.
Move the Fence Into the Rip Position
The fence serves different functions depending on the type of cut.
For ripping, remove it from the miter configuration and reposition it in the designated rip-fence location on the table.
Secure the fence using its locking knob.
The fence should sit firmly without shifting when you apply normal sideways pressure.
Set the Front Hold-Down Bracket
On the SKIL 3601 configuration, the front hold-down bracket should sit very close to the workpiece while still allowing the plank to slide underneath.
The original operating instructions specify approximately 1/16 inch above the workpiece.
The purpose is to help control the material without clamping it so tightly that it cannot move.
If the bracket is too high, it provides less control.
If it presses directly against the flooring, feeding the plank can become difficult.
Lower the Anti-Kickback Pawls
The anti-kickback pawls should be lowered into their operating position for ripping.
These components are designed to help resist backward movement if the flooring begins moving toward the operator unexpectedly.
Make sure they move freely and are in good condition.
Do not tie them up or disable them simply because they leave light contact marks on scrap material.
Set the Rip Fence to the Correct Width
Once the saw is configured for ripping, position the fence for the desired finished plank width.
The width is measured between the blade and rip fence.
Do not assume the printed scale is perfectly accurate until you have checked your saw.
For an important flooring cut, I prefer measuring directly from the blade to the fence with the saw unplugged.
Measure to the cutting edge of the blade tooth that determines your actual cut line rather than casually measuring to the center of the blade plate.
After setting the width, lock the fence securely.
Then check that the fence is parallel with the blade.
Why Fence Alignment Matters
If the fence points toward the blade as the plank moves forward, the workpiece can become pinched.
That increases cutting resistance and can contribute to kickback.
If the fence angles significantly away from the blade, you may get an inaccurate or wandering cut.
The SKIL operating instructions specifically call for checking that the rip fence is parallel to the blade before ripping.
If yours is visibly misaligned, correct the fence adjustment before using the saw.
Do not try to steer the flooring against an incorrectly positioned fence.
Check the Riving Knife
The riving knife sits behind the blade and helps keep the freshly cut kerf from closing around the blade.
That makes it an important kickback-control component during ripping.
Before cutting, confirm that the riving knife is properly aligned with the blade.
The workpiece should be able to pass the blade and continue around the riving knife without binding.
A bent or misaligned riving knife can create unnecessary resistance.
If yours has been removed or damaged, restore the saw to its proper configuration before making a normal rip cut.
Key Takeaways:
- Measure the final flooring width only after accounting for the required expansion gap.
- Lock the saw assembly before feeding material through the blade.
- The rip fence must be parallel to the blade, and the riving knife must be properly aligned.
- Keep the factory locking edge you need for installation; rip the wall-facing side instead.
How to Rip Cut With a SKIL Flooring Saw Step by Step
Once the saw and fence are configured, the actual cutting process is straightforward.
1. Test the Setup With the Saw Off
Before applying power, place the flooring plank on the table.
Set its reference edge firmly against the rip fence.
Slide the plank forward by hand without allowing it to contact a moving blade.
Confirm that it can pass smoothly beneath the hold-down bracket and that nothing interferes with its path.
Make sure the offcut also has somewhere to move without becoming trapped.
Then remove the plank to the starting position.
2. Confirm the Required Safety Components
Before switching on the saw, check the three key items:
The rip fence is parallel to the blade.
The riving knife is correctly aligned.
The anti-kickback pawls are in their proper operating position.
Also make sure the saw assembly remains locked.
These checks take only a few seconds and are much easier than dealing with a workpiece that binds after entering the blade.
3. Position Yourself to the Side
Do not stand directly behind the portion of the flooring trapped between the blade and fence.
That is the potential kickback path.
Stand slightly to the side while maintaining comfortable control of the plank.
You still need to be able to feed the flooring straight against the fence without reaching awkwardly across the blade.
4. Turn On the Saw
Keep the flooring clear of the blade while the motor starts.
Turn on the saw and allow the blade to reach operating speed before feeding the plank into it.
Do not start the motor with the flooring already pressed against the teeth.
5. Feed the Flooring Against the Fence
Begin pushing the plank forward.
The edge of the flooring should stay in consistent contact with the rip fence throughout the cut.
Do not force the material sideways into the blade.
The goal is controlled forward pressure combined with enough sideways guidance to keep the reference edge along the fence.
Feed at a smooth, consistent rate.
If you push too quickly, the motor can bog down and the blade may leave a rougher edge.
Moving excessively slowly or stopping inside the cut can also produce an uneven surface or burning in wood flooring.
Let the blade cut at a natural rate.
6. Transfer Control to the Push Stick
As your hands approach the blade area, use the push stick rather than continuing to move your fingers closer.
The SKIL flooring saw is designed to be used with a push stick during ripping.
Apply your feed force to the section of flooring between the blade and rip fence—the piece whose width you are controlling.
Keep the plank against the fence while pushing it completely beyond the blade.
For very narrow rip widths where a normal push stick cannot safely be used, consult the saw’s instructions for the correct pushing method rather than attempting to feed the strip with fingertips close to the blade.
7. Continue Until the Plank Is Completely Past the Blade
Do not release the workpiece immediately after its leading edge clears the blade.
Continue the controlled feed until the entire plank is through the cutting area.
Trying to pull it backward while the blade is spinning is dangerous.
If you need to stop for any reason, turn the saw off and wait until the blade completely stops before repositioning material.
8. Turn the Saw Off and Wait
After completing the cut, switch off the saw.
Allow the blade to come to a complete stop before reaching near it or removing scraps from the table.
Never use your hand to slow a spinning blade.
Once stopped, remove the ripped plank and inspect the edge.
How to Keep the Rip Cut Straight
If the rip fence is properly aligned, the saw should make a straight parallel cut automatically.
Your job is to keep the reference edge consistently against the fence.
Do not watch only the blade.
Pay attention to how the flooring contacts the fence as it enters the cutting area.
If the board begins moving away from the fence, simply increasing sideways pressure near the blade is not a good solution. Stop safely and determine why the workpiece is not tracking correctly.
Possible causes include a warped plank, debris against the fence, a misaligned fence, or uneven feeding pressure.
What If the Flooring Is Warped?
A bowed plank can rock on the saw table.
That makes accurate ripping more difficult and can increase binding risk.
For a warped workpiece, the SKIL operating guidance calls for placing the concave side down during ripping so the flooring is less likely to rock.
However, severely damaged or distorted flooring should generally not be installed anyway.
If a plank will not remain stable enough to feed safely, use another plank rather than forcing it through the saw.
Which Side of Laminate Flooring Should Face Up?
With this flooring saw, cutting orientation is affected by the blade configuration and the need to keep the plank stable against the table and fence.
Rather than relying on a generic circular-saw rule, make a test cut on scrap from the exact flooring product you are installing.
Inspect both faces and determine which orientation produces the cleaner visible edge.
The supplied flooring blade is designed to handle flooring materials, but laminate can still chip, particularly when the blade is dull or the decorative layer is brittle.
Fortunately, the long ripped edge along a perimeter row is usually concealed by baseboard or shoe molding.
That means perfect cosmetic quality on the wall-facing cut is often less important than keeping the correct width and maintaining an intact locking joint.
How to Reduce Chipping on Laminate Flooring
If laminate is chipping badly, start with the blade.
A sharp blade designed for flooring or fine cutting will perform much better than a worn blade.
The SKIL 3601-02 was commonly supplied with a 4-3/8-inch 36-tooth carbide-tipped blade, which provides a relatively fine cut for its compact diameter.
If you replace it, use only a blade compatible with the saw’s specifications.
Do not install an incorrect blade diameter, arbor size, or blade not rated for the saw’s speed.
Next, keep the plank firmly supported against the table and fence.
Vibration can increase edge damage.
Feed smoothly instead of repeatedly stopping and starting.
If visible edge quality matters, make a test cut before cutting the actual final plank.
How to Rip the Last Row of Flooring
The final row deserves extra attention because this is where measurement errors are most noticeable.
Measure from the installed row to the wall at both ends of the plank.
If the numbers are the same, set the rip fence for a parallel cut.
If the wall varies only slightly and the baseboard will cover the difference while maintaining the proper gap, a parallel rip may still be appropriate.
If the wall is substantially out of parallel, the required piece is actually tapered, not simply ripped to a constant width.
A fixed rip fence is not intended to create arbitrary taper cuts.
Do not intentionally angle the flooring between the blade and fence to follow a diagonal pencil line. That can cause the material to bind.
Use a safer tool and technique intended for tapered cutting when necessary.
After ripping the final plank, dry-fit it before locking it permanently into the floor.
Check that the required expansion gap remains along the entire wall.
Can You Rip Vinyl Plank Flooring With a SKIL Flooring Saw?
Whether you should depends on the exact vinyl product and blade.
Many vinyl planks can be cut more easily using a utility knife and score-and-snap technique, which creates virtually no sawdust.
Rigid-core vinyl products may sometimes be saw-cut, but you should confirm the flooring manufacturer’s instructions and ensure your blade is suitable for the material.
Do not assume that because the SKIL saw can cut laminate and wood flooring it is automatically the preferred tool for every vinyl product.
For score-and-snap vinyl, a utility knife may be simpler.
For rigid flooring approved for saw cutting, the flooring saw can provide a straight rip when used with the correct setup.
SKIL Flooring Saw vs. Circular Saw for Rip Cuts
Both tools can rip flooring, but they approach the job differently.
With a circular saw, the flooring normally stays still while you guide the saw along the plank using a straightedge.
With the SKIL flooring saw in rip mode, the blade stays still and the flooring moves against the fence.
The SKIL setup can be particularly convenient when installing many flooring rows because the fence gives you repeatable width control.
A circular saw has an advantage when you need a long tapered cut because a clamped guide can follow a custom line.
For straight, parallel rips in flooring within the SKIL saw’s capacity, its integrated fence makes the job very convenient.
SKIL Flooring Saw vs. Table Saw
During a rip cut, the SKIL flooring saw works somewhat like a compact specialty table saw.
The workpiece moves past a stationary blade while riding against a rip fence.
Its main advantage is portability.
A full-size table saw may offer greater rip capacity and support for large workpieces, but moving it into a flooring installation area is often inconvenient.
The compact SKIL tool was designed so flooring installers could perform crosscuts, miters, and rips close to where the floor is being installed.
Its smaller table means workpiece control becomes particularly important.
Do not attempt to rip large sheet goods or material beyond the machine’s intended flooring applications.
Key Takeaways:
- Keep steady pressure against the fence rather than steering toward the blade.
- Use the push stick as your hands approach the cutting area.
- A straight rip fence should be used for parallel cuts, not improvised taper cutting.
- Test-cut brittle laminate when edge appearance matters.
Why Is My SKIL Flooring Saw Rip Cut Crooked?
A crooked cut usually points to setup or feeding rather than the saw’s basic capability.
The first thing to check is fence alignment.
If the rip fence is not parallel with the blade, the plank cannot track correctly.
Next, check whether the workpiece edge touching the fence is actually straight.
A damaged or irregular factory edge makes a poor reference surface.
Then inspect the riving knife.
If it is misaligned, the flooring may shift as it passes behind the blade.
Finally, consider your feed technique.
Pushing only from one corner of a wide plank can rotate the material away from the fence.
Apply smooth forward pressure while maintaining controlled contact with the fence.
Why Does the Flooring Bind or Kick Back?
Binding occurs when the workpiece becomes trapped against the spinning blade.
Possible causes include an incorrectly adjusted fence, twisted flooring, a misaligned riving knife, stopping during the cut, or allowing the plank to rotate.
Kickback is one reason you should never stand directly in line with the workpiece behind the blade.
The anti-kickback pawls and riving knife help reduce the risk, but they cannot compensate for unsafe feeding.
If the material begins binding, do not try to overpower it.
Shut off the saw while maintaining control, wait for the blade to stop completely, and determine what caused the problem.
Never reach across or behind the operating blade to pull the flooring through.
Common Mistakes When Rip Cutting With a SKIL Flooring Saw
One common mistake is forgetting to lock the saw assembly.
The moving saw head is useful for crosscuts, but ripping requires the blade assembly to remain fixed.
Another mistake is leaving the fence in its miter configuration rather than setting it up correctly for ripping.
Poor fence alignment can then create both accuracy and safety problems.
Do not remove the riving knife or anti-kickback pawls merely because they appear inconvenient.
Also avoid feeding the plank with your hand close to the blade instead of using the push stick.
A final mistake occurs before cutting even begins: measuring the final plank directly to the wall and forgetting the expansion gap.
That can leave an otherwise perfectly cut flooring row too wide.
Important Safety Rules for Rip Cuts
Rip cutting deserves more caution than ordinary flooring crosscuts because your hands move the workpiece past the blade.
Before adjusting the fence, blade, riving knife, hold-down bracket, or other components, disconnect the saw from power.
Wear eye protection.
Hearing protection is also appropriate.
Cutting laminate or engineered flooring can create fine dust, so use the saw’s dust collection provisions where possible and wear suitable respiratory protection when needed.
Keep loose clothing, jewelry, long hair, and other items away from the blade.
Do not wear loose-fitting gloves near a rotating saw blade because material can become caught.
Keep the floor around the saw clear of offcuts, cords, and sawdust that could cause you to lose your footing.
Most importantly, never freehand a rip cut. Use the rip fence.
A freehand plank can rotate into the blade and create kickback.
If a required cut cannot be safely made using the machine’s normal ripping setup, use a different cutting tool rather than improvising.
Key Takeaways:
- Never make a rip cut with the flooring unsupported by the rip fence.
- Stand out of the direct kickback path and keep the riving knife and anti-kickback system functional.
- Stop the saw completely before clearing scraps or correcting a problem.
- Use another tool when the flooring shape cannot be cut safely with a normal parallel rip.
FAQs about How to Rip Cut With a SKIL Flooring Saw
Can you rip flooring with a SKIL flooring saw?
Yes. Models such as the SKIL 3601-02 are specifically designed to make rip cuts as well as crosscuts and miter cuts.
For ripping, the saw assembly is locked in position and the flooring is pushed past the blade using the rip fence and push stick.
What is a rip cut on a flooring saw?
A rip cut runs lengthwise along the flooring plank and reduces its width.
It is commonly required for the first or final row beside a wall.
Do you move the saw or the flooring when ripping?
You move the flooring.
The SKIL flooring saw assembly is locked in place for a rip cut.
This is different from the crosscut operation, where the saw assembly moves through the stationary workpiece.
Do I need to use the rip fence?
Yes.
The rip fence controls the width of the cut and keeps the plank traveling parallel to the blade.
Do not freehand rip flooring through the saw.
How do I set the rip fence?
Position the fence in the saw’s designated ripping location, adjust it to the required distance from the blade, and tighten the locking knob.
Before cutting, verify that the fence is parallel with the saw blade.
Should I use a push stick?
Yes.
The SKIL flooring saw is designed to use a push stick during ripping.
Use it to keep your hands safely away from the blade as you complete the cut.
How high should the front hold-down bracket be?
For the common SKIL 3601 setup, the operating instructions call for positioning the front hold-down bracket approximately 1/16 inch above the workpiece during rip-cut setup.
It should help control the material while still allowing it to slide smoothly.
What does the riving knife do?
The riving knife travels in the kerf behind the blade and helps prevent the cut material from closing around the blade.
It is an important kickback-control feature during rip cutting.
Why are there anti-kickback pawls?
The pawls are designed to resist backward movement of the workpiece if it starts traveling toward the operator.
They should be lowered into their proper operating position for rip cutting.
What blade does a SKIL 3601-02 flooring saw use?
The common 3601-02 configuration was supplied with a 4-3/8-inch 36-tooth carbide-tipped contractor blade.
Replacement blades must match the saw’s required specifications and be suitable for the material being cut.
Can a SKIL flooring saw cut laminate?
Yes. The SKIL 3601-02 was designed for flooring materials including laminate, engineered wood, and solid flooring within its rated capacity.
Can I use the saw to rip engineered hardwood?
Yes, when the flooring dimensions fall within the saw’s capacity and the blade is appropriate for the material.
Use the same correct rip-cut setup with the locked saw assembly and rip fence.
Can I rip solid hardwood flooring?
The saw is designed for solid flooring within its rated capacity.
Harder or thicker material may feed more slowly than laminate, so use a sharp blade and do not force the cut.
How fast should I push flooring through the saw?
Use a smooth, consistent feed rate.
Do not rush the workpiece, but also avoid unnecessarily stopping while the blade remains engaged.
If the motor slows dramatically, reduce feed pressure rather than forcing the flooring forward.
Why is my laminate chipping?
A worn blade, unstable workpiece, brittle decorative layer, or inconsistent feed can cause chipping.
Use a sharp blade intended for clean flooring cuts and test the plank orientation on scrap when appearance matters.
Why does my flooring move away from the fence?
The reference edge may not be straight, the fence may be misaligned, or your feed pressure may be rotating the plank.
Stop safely and correct the cause instead of steering the workpiece toward the blade.
Can I use the rip fence to cut a taper?
A normal rip fence is intended for parallel cuts.
Do not angle the flooring between a fixed fence and blade to make a taper. Use another properly designed taper-cutting method or tool.
How do I rip the final row of laminate?
Measure the remaining space at several points, subtract the flooring manufacturer’s required expansion gap, preserve the locking edge that connects to the previous row, and set the fence to the required finished width.
Rip with the wall-facing edge as the waste side whenever the flooring profile allows it.
Should I dry-fit the ripped plank?
Yes.
Before permanently locking the final row into place, verify that the width is correct and the expansion gap remains adequate along the entire wall.
What should I do if the workpiece binds?
Maintain control, turn off the saw, and wait for the blade to stop completely.
Then determine whether the fence, riving knife, workpiece, or feed technique caused the binding.
Do not try to force a stuck plank through a running blade.
Conclusion
Learning how to rip cut with a SKIL flooring saw is straightforward once you understand that the machine operates differently for ripping than it does for crosscuts.
For a rip cut, lock the saw assembly in the middle of the rail, reposition and secure the rip fence, set the front hold-down bracket close to the flooring, lower the anti-kickback pawls, and verify that the fence and riving knife align correctly with the blade. Then feed the plank smoothly through the stationary blade while keeping its reference edge against the fence.
Use the included push stick as your hands approach the cutting area and continue moving the flooring completely past the blade. Stand to the side rather than directly in the kickback path, and never freehand a rip without the fence.
For flooring installation, measure carefully before setting the fence. Account for the manufacturer’s required expansion gap, and make sure you preserve the factory tongue or groove needed to connect the ripped plank to the previous row.
My recommendation is to make a test cut whenever you are setting up a new rip width or working with an unfamiliar flooring material. It lets you confirm the fence measurement, blade performance, and finished edge before sacrificing an important plank.
Used correctly, the compact SKIL flooring saw is particularly convenient because one tool can handle the three cuts flooring installers use most often: crosscuts, miters, and straight lengthwise rips.