What Is the Best Saw to Cut LifeProof Flooring? Complete Guide
If you are wondering what is the best saw to cut LifeProof flooring, a jigsaw with a fine-tooth blade is the best single all-around saw for most DIY installations because it can make straight cuts, notches, curves, and doorway cutouts. However, a miter saw is faster for repeated crosscuts, while a table saw is the better choice for long rip cuts. Many LifeProof vinyl planks can also be scored with a utility knife and snapped, so you may not need a power saw for every straight cut.
The important detail is that LifeProof is a flooring brand rather than one single material. The lineup includes luxury vinyl plank and newer hybrid resilient products, and individual products can have different core and wear-layer constructions. That means the easiest cutting method for one LifeProof plank may not be ideal for another.
For standard LifeProof vinyl plank flooring, score-and-snap can be extremely convenient for simple end cuts because it is fast and creates little dust. For more complicated cuts, LifeProof installation guidance also allows tools such as a jigsaw, circular saw, or miter saw. Some newer LifeProof hybrid resilient products have harder wear surfaces, and LifeProof support recommends fine-tooth laminate/Pergo blades on miter or table saws when cleaner and faster cuts are desired.
In this guide, I’ll explain which saw is best for each LifeProof flooring cut, what blade to use, when score-and-snap is better than sawing, how to prevent chipping, and which tools I would choose if I were installing an entire room.
What Is the Best Saw to Cut LifeProof Flooring?
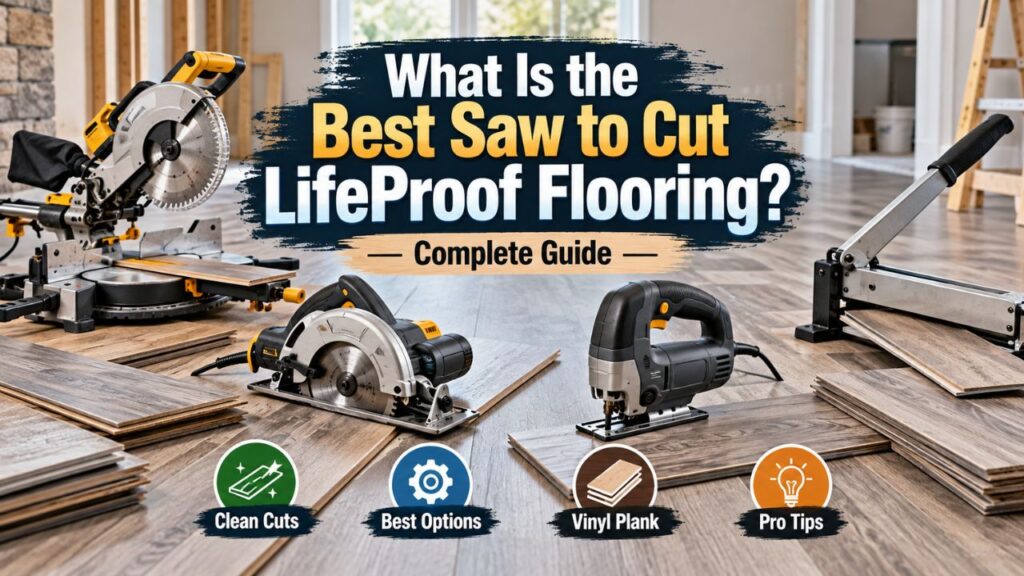
If I could choose only one powered saw for a typical LifeProof vinyl flooring installation, I would choose a jigsaw with a fine-tooth blade suitable for vinyl, laminate, or composite flooring.
A jigsaw is not the fastest saw, but it is by far the most versatile.
You can use it to shorten a plank, rip a plank lengthwise, create an L-shaped doorway notch, cut around a column, and make curved openings around pipes.
However, if your definition of “best” means fastest or cleanest for one specific type of cut, a different saw wins.
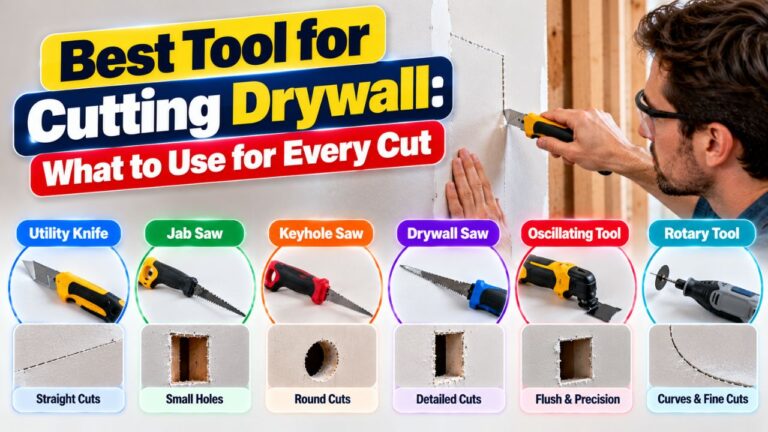
| Cutting Job | Best Saw or Tool | Why |
| Simple straight end cut | Utility knife/score-and-snap when approved | Fast and almost dust-free |
| Repeated crosscuts | Miter saw | Fast, accurate, repeatable |
| Long rip cuts | Table saw | Straight and consistent |
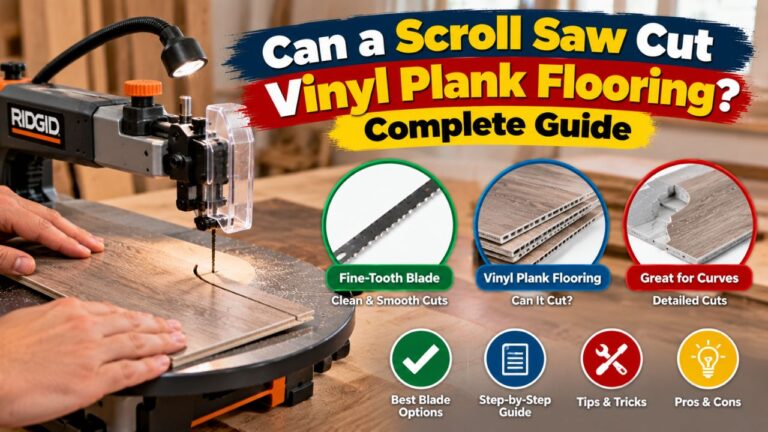
| Curves and notches | Jigsaw | Maximum versatility |
| Portable straight cuts | Circular saw | Handles both crosscuts and rips |
| Large-volume installation | Miter saw + table saw | Fastest combination |
| Quiet, low-dust straight cuts | Manual flooring cutter | No spinning blade |
So there is no universal winner for every situation.
For a homeowner installing one room, I recommend a utility knife plus jigsaw if the specific LifeProof plank supports score-and-snap cutting.
For a larger flooring job, I prefer a miter saw for end cuts, table saw for rips, and jigsaw for irregular cuts.
My Practical Recommendation
If you already own a miter saw, use it for most repetitive end cuts.
If you own a table saw, reserve it primarily for narrowing the first and final rows.
Keep a jigsaw available regardless, because sooner or later you will encounter a doorway, pipe, vent, cabinet, or other obstruction that requires an irregular shape.
Key Takeaways:
- A jigsaw is the best single all-around saw for a DIY LifeProof flooring installation.
- A miter saw is faster for repeated crosscuts, while a table saw is better for long rips.
- Many LifeProof vinyl planks can be scored and snapped, eliminating the need for a saw on simple straight cuts.
Why the Exact LifeProof Flooring Type Matters
Before choosing your saw, identify the flooring you actually purchased.
LifeProof products are not all constructed identically.
Traditional LifeProof luxury vinyl plank uses a rigid vinyl-style core and attached backing in many product lines. Other current LifeProof products are described as hybrid resilient flooring and can incorporate harder wear surfaces.
That difference changes how easily the plank scores, snaps, and saws.
Standard LifeProof Vinyl Plank
For many LifeProof vinyl planks, the installation instructions allow a simple score-and-snap method.
You mark the plank, place a straightedge over the line, score the face with a sharp utility knife, bend or snap the plank along the score, and cut through any attached backing that remains.
If the plank is difficult to snap, the instructions allow using a jigsaw, circular saw, or miter saw instead.
This makes standard LifeProof LVP relatively DIY-friendly.
LifeProof Hybrid Resilient Flooring
Some LifeProof hybrid resilient products use particularly durable surfaces. For at least some current products with aluminum-oxide-containing wear surfaces, LifeProof support says a utility knife can still be used for simple straight cuts but recommends a fine-tooth laminate or Pergo blade in a miter or table saw for cleaner, quicker, more precise cutting.
That is why I would not give every LifeProof owner the same blade recommendation without first identifying the product.
If you are unsure, check the carton or product installation sheet.
Is a Jigsaw the Best Saw for LifeProof Flooring?
For versatility, yes.
A jigsaw can make nearly every cut you are likely to encounter during a flooring installation.
It is especially valuable when flooring needs to fit around architectural details.
Where a Jigsaw Excels
Imagine a plank approaching a doorway.
You may need to remove a rectangular section so the plank fits underneath the casing.
A miter saw cannot easily create that L-shaped cut.
A table saw is equally awkward.
The jigsaw can follow the entire layout line without requiring multiple specialized setups.
It is also excellent around floor vents, cabinets, columns, plumbing penetrations, and other irregular obstacles.
Choosing a Jigsaw Blade
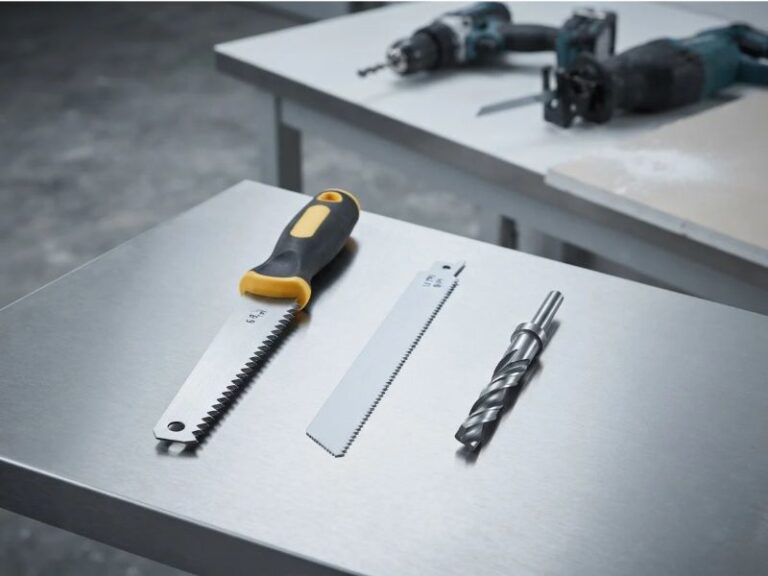
Use a fine-tooth blade rated for vinyl, laminate, plastic, or similar flooring material.
Avoid an aggressive demolition or coarse wood blade.
A coarse blade may cut quickly, but it can leave a ragged decorative edge or damage the click-lock profile.
Also pay attention to tooth direction.
Most conventional jigsaw blades cut on the upstroke, which can produce more surface breakout on the upper face.
Reverse-tooth blades cut differently and may allow you to keep the decorative side facing upward.
Rather than relying on a universal orientation rule, make a test cut on a scrap plank.
The Main Weakness of a Jigsaw
It is relatively slow.
Keeping a perfectly straight line over a 48- or 60-inch plank can also be difficult without a guide.
For one final-row rip, that may be acceptable.
For 20 planks that all need exactly the same width, I would much rather use a table saw.
Is a Miter Saw Good for Cutting LifeProof Flooring?
Yes. If your installation requires many end cuts, a miter saw may be the most useful powered saw on the jobsite.
Each flooring row normally ends at a wall, so you repeatedly need to shorten a plank.
With a miter saw, the process is simple.
Measure the required length, account for the manufacturer’s expansion gap, place the plank against the fence, align your mark, and make the cut.
A sharp fine-tooth blade produces a clean edge in seconds.
Why a Miter Saw Is Faster
The saw already controls the cutting path.
You do not need to clamp a guide or steer the tool across a line.
Once your cutting station is organized, repetitive crosscuts become extremely efficient.
That matters on a large flooring job because even small time savings add up over dozens of rows.
Can It Make Angled Cuts?
Yes.
If a wall meets the flooring at an unusual angle, rotate the miter table to match your measured angle and make a test cut.
This is another area where the miter saw is more convenient than a utility knife.
What a Miter Saw Cannot Do
The major limitation is rip cutting.
If a 9-inch-wide LifeProof plank needs to become 3 inches wide for the final row, the cut runs almost the entire plank length.
A miter saw cannot practically make that cut.
Use a table saw, circular saw, or jigsaw.
Is a Table Saw the Best Saw for LifeProof Flooring?
For rip cuts, absolutely.
A table saw is the tool I would choose when several LifeProof planks need to be reduced to the same width.
This usually happens on the first or last flooring row.
Set the rip fence once and feed each plank through using proper table-saw technique.
You get straight, repeatable cuts without needing to redraw or guide each one individually.
Why the Final Row Often Needs Ripping
Rooms rarely finish with exactly one full plank width remaining.
Suppose your plank is 8.7 inches wide but the remaining space beside the wall is only 5 inches.
You cannot install the full plank.
The flooring must be ripped lengthwise while still maintaining the manufacturer’s required expansion gap.
If the wall is straight, a table saw makes this easy.
If the wall bows or changes width noticeably, however, the final plank may need to be scribed and cut with a jigsaw instead.
Preserve the Correct Locking Edge
Before putting a plank on the table saw, identify which edge needs to remain.
The tongue-and-groove or click-lock profile connects your plank to the previous row.
If you rip off the wrong long edge, you may remove the locking profile you actually needed.
I recommend marking the waste side clearly before walking over to the saw.
Key Takeaways:
- A miter saw is the fastest choice for repeated straight end cuts.
- A table saw is the best tool for consistent lengthwise rip cuts.
- A jigsaw remains necessary when the wall or obstacle requires an irregular shape.
Is a Circular Saw Good for LifeProof Flooring?
Yes, and it may be the most practical saw for someone who does not own stationary shop equipment.
A circular saw can make both crosscuts and rip cuts.
The major requirement is good support and guidance.
For a long rip, clamp a straightedge or saw guide to the plank rather than trying to follow a pencil line freehand.
For a crosscut, use a square or appropriate guide.
Which Side Should Face Up?
With a traditional handheld circular saw, the blade generally cuts upward through the material.
That means breakout may be more noticeable on the top surface.
For many finished materials, placing the decorative side downward can improve the visible edge.
However, flooring constructions and blade designs vary.
Always make a test cut before processing a large number of planks.
When I Would Choose a Circular Saw
A circular saw makes sense when you already own one and do not want to buy a table or miter saw.
It is also useful when your saw station must remain portable.
With a suitable fine-tooth blade and straightedge, you can install an entire floor with a circular saw plus jigsaw.
What Blade Should You Use for LifeProof Flooring?
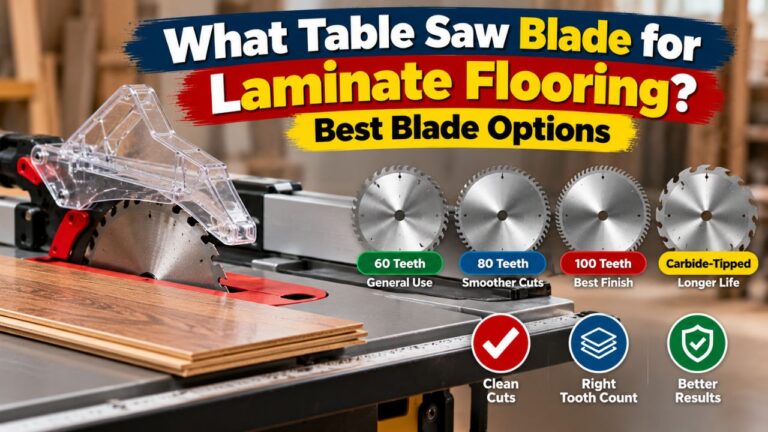
For power saws, use a sharp fine-tooth blade appropriate for laminate, vinyl, plastics, flooring, or composite panels.
For a common 10-inch miter or table saw, approximately 60–80 carbide-tipped teeth is a useful range.
I would favor the higher end of that range when edge quality matters.
For harder LifeProof hybrid resilient products, a laminate/Pergo-style blade is particularly attractive.
Why Carbide Is Better
LifeProof flooring surfaces can be abrasive.
Carbide-tipped teeth hold an edge much longer than ordinary steel teeth.
Even carbide will eventually dull if you cut enough flooring, particularly when the wear layer contains highly abrasion-resistant material.
This is why I would consider dedicating one blade to flooring rather than using an expensive furniture-making blade you want to keep razor sharp.
Is an 80-Tooth Blade Good?
Yes.
An 80-tooth fine-finish carbide blade is an excellent choice for many 10-inch miter and table saws.
It produces smaller bites per tooth than a coarse construction blade and usually leaves a cleaner decorative edge.
Is a 60-Tooth Blade Enough?
Yes.
A quality 60-tooth fine-finish blade provides a very good balance between cutting speed and finish.
If I already owned a sharp 60-tooth blade approved for laminate or composite material, I would test it before purchasing an 80-tooth replacement.
What About a TCG Blade?
A Triple Chip Grind blade can be especially useful for abrasive composite materials.
TCG tooth geometry is commonly used on blades designed for laminate, melamine, and similar hard-surfaced panels.
For a large LifeProof hybrid-flooring installation, a quality TCG laminate blade would be one of my preferred choices.
Can You Cut LifeProof Flooring With a Utility Knife?
For many LifeProof vinyl plank products, yes—and it may actually be better than a saw for simple straight cuts.
Current LifeProof installation instructions describe scoring the plank with a straightedge and utility knife and then snapping it along the line. They also note that the attached underlayment may need to be cut from the underside afterward.
The main advantages are obvious.
There is virtually no sawdust, no electrical setup, much less noise, and no trip back and forth to a saw station.
When Score-and-Snap Is My First Choice
If I am shortening a compatible LifeProof vinyl plank at the end of a row, I would try score-and-snap first.
Place a straightedge over the line and make several controlled passes with a sharp blade if needed.
Then snap the plank.
If it breaks cleanly and consistently, there is little benefit to powering up a miter saw for every row.
When I Would Switch to a Saw
Use a saw if the flooring is difficult to score, refuses to snap cleanly, has a particularly hard wear surface, or requires a rip, angle, curve, or notch.
Some newer LifeProof products can still be cut with a utility knife but may be faster and cleaner with a fine-tooth laminate blade.
Is a Manual Flooring Cutter Better Than a Saw?
For compatible LifeProof flooring, a good manual flooring cutter can be excellent.
It produces no spinning-blade dust and is substantially quieter than power equipment.
You position the plank, pull the lever, and shear through the flooring.
The limitation is compatibility.
Not every cutter can handle every rigid-core or hybrid plank thickness and composition.
Check the cutter manufacturer’s stated material and thickness capacity before assuming it will cut your flooring.
A flooring cutter also will not replace a jigsaw for complicated shapes.
I consider it a convenience tool for high-volume straight cuts rather than an all-purpose solution.
How to Cut LifeProof Flooring Without Chipping
Start with a sharp blade.
This makes a much larger difference than almost any trick involving tape or cutting speed.
A dull blade needs more feed pressure and is much more likely to damage the wear surface.
Keep the plank properly supported so it cannot vibrate.
Vibration creates rougher edges and puts extra stress on the click-lock profile.
Make a Scrap Test
Before cutting an installed-floor piece, sacrifice an offcut.
Test both plank orientation and feed rate.
If the decorative edge looks clean, keep the same setup.
If it chips badly, check the blade first.
Painter’s Tape Can Help
For a particularly visible cut, placing painter’s tape over the cut line can sometimes reduce small surface chips.
Mark your line over the tape and cut through both.
This is supplemental protection, not a substitute for the proper blade.
Don’t Force the Saw
Let the teeth cut.
Forcing the plank through a table saw or lowering a miter saw aggressively can worsen chipping.
A steady, controlled feed produces a cleaner edge.
What Is the Best Way to Cut LifeProof Around Doorways?
Use a jigsaw.
Doorways usually require shapes rather than simple straight cuts.
You may need an L-shaped notch around a jamb or casing.
Measure carefully, transfer the outline to the plank, and cut to the appropriate line while preserving the specified expansion space.
Often, the cleanest installation involves undercutting a wooden door casing so the flooring can slide underneath rather than trying to reproduce the casing’s exact profile in the plank.
LifeProof installation guidance calls for undercutting door jambs and casings while maintaining the required expansion space.
For the flooring itself, the jigsaw provides the control you need for the remaining irregular shape.
What Is the Best Saw for Cutting LifeProof Around Pipes?
Again, a jigsaw is usually the most useful saw.
A drill and hole saw may also be appropriate if you need a clean circular opening.
Locate the pipe center carefully and maintain the required clearance around fixed penetrations.
If the hole is near a plank edge, you may need to cut from the edge into the hole so the plank can be fitted around the pipe.
A pipe collar or escutcheon can conceal the finished expansion opening.
What Is the Best Saw for the First and Last Rows?
A table saw is my first choice if the cut is straight.
These rows often need to be ripped lengthwise.
Before cutting, calculate how wide the final row will be.
If it would become extremely narrow, you may need to reduce the first-row width as well to create a more balanced layout.
Measure the wall at several points.
If it is straight, set the table saw fence and make consistent rips.
If it is significantly uneven, scribe the wall profile onto the planks and use a jigsaw instead.
Dust Is One Reason Not to Saw Every Plank
One of the biggest practical differences between scoring and sawing is dust.
A utility knife produces almost none.
A miter, table, or circular saw can create a surprising amount of fine debris over the course of a room.
Use dust collection whenever possible.
Cut outside or in a dedicated well-ventilated location when practical.
Wear eye and hearing protection and use respiratory protection appropriate for the flooring and dust exposure.
This is another reason I recommend score-and-snap when the flooring manufacturer approves it and the cut is simple.
You save cleanup time in addition to cutting time.
Key Takeaways:
- Score-and-snap is often the cleanest method for straightforward cuts in compatible LifeProof vinyl plank.
- Use a saw when the plank is hard to snap or you need rips, curves, angles, or notches.
- Good dust control becomes important when power-sawing many flooring planks.
Should the Finished Side Face Up or Down?
The answer depends on the saw.
Miter Saw
For a conventional miter saw, finished-side up is generally a good starting point because the blade enters the upper decorative surface.
Table Saw
Finished-side up is also normally preferred because the teeth enter the top of the plank at the front of the blade.
Circular Saw
With a typical handheld circular saw, finished-side down is often preferable because the teeth move upward through the workpiece.
Jigsaw
This depends on the blade.
A standard up-cut jigsaw blade tends to create more surface breakout on the upper face.
A reverse-tooth blade changes the situation.
Instead of memorizing rules, use an offcut to verify which orientation gives the cleanest result with your exact flooring and blade.
Safety When Cutting LifeProof Flooring
Power-saw safety does not become less important because flooring planks are thin.
Keep hands outside the miter saw’s designated danger zone.
On a table saw, use a push stick or push block when the plank becomes narrow enough that your hand would approach the blade.
Keep the riving knife installed during appropriate rip cuts.
Support long planks so they remain flat and controlled as they enter and leave the blade.
Never clear small scraps while the blade is spinning.
If you are using a utility knife instead, cut away from your body, use a stable straightedge, and make several controlled scoring passes rather than trying to slice through the entire plank in one dangerous stroke.
Common Mistakes When Cutting LifeProof Flooring
One common mistake is assuming every LifeProof product cuts exactly the same way.
Check your specific installation guide first.
Another is automatically using a power saw for cuts that could be scored and snapped in seconds.
On the other hand, do not fight a utility knife repeatedly if your particular hybrid plank cuts better with a saw.
A coarse framing blade is another poor choice. It may work, but chipping and blade wear can be worse than with an appropriate fine-tooth blade.
The final major mistake is forgetting the click-lock orientation.
Before removing a long edge, make sure you are not cutting away the tongue or groove that must connect to the installed flooring.
FAQs About What Is the Best Saw to Cut LifeProof Flooring
What is the best saw to cut LifeProof flooring?
A jigsaw is the best single all-around saw because it can make straight cuts, rips, notches, and curves. A miter saw is better for repeated crosscuts, while a table saw is best for long rip cuts.
Can you cut LifeProof flooring with a miter saw?
Yes. A miter saw is excellent for shortening planks and making angled crosscuts.
Can you cut LifeProof flooring with a table saw?
Yes. A table saw is particularly useful for ripping planks lengthwise for the first or final flooring row.
Can you cut LifeProof flooring with a jigsaw?
Yes. A jigsaw is one of the most versatile choices and is especially good for irregular shapes, doorways, pipes, and notches.
Can you cut LifeProof flooring with a circular saw?
Yes. A circular saw can perform both crosscuts and rips when used with an appropriate fine-tooth blade and guide.
Can LifeProof flooring be cut with a utility knife?
Many LifeProof vinyl plank products can be scored with a utility knife and snapped. Always confirm the instructions for your specific product.
What blade should I use for LifeProof flooring?
Use a sharp fine-tooth carbide blade rated for laminate, vinyl, composite panels, or flooring. Approximately 60–80 teeth is a useful range for many 10-inch miter and table saws.
Is an 80-tooth blade good for LifeProof flooring?
Yes. An appropriate 80-tooth carbide blade can produce clean cuts with relatively little chipping.
Is a laminate blade good for LifeProof flooring?
Yes, particularly for harder hybrid resilient LifeProof products. A fine-tooth laminate or Pergo-style blade can provide clean, controlled cutting.
Can I use a 40-tooth blade?
A sharp 40-tooth carbide blade may be acceptable for a few hidden cuts, but I prefer a finer blade for a full flooring installation.
Does LifeProof flooring chip when cut with a saw?
It can. A sharp fine-tooth blade, correct plank orientation, stable support, and controlled feed rate help reduce chipping.
Which side of LifeProof flooring should face up on a miter saw?
Finished-side up is generally a good starting point with a conventional miter saw. Make a test cut on your specific flooring to confirm.
Which side faces up on a table saw?
The decorative surface normally faces upward on a conventional table saw.
Which side faces up with a circular saw?
With a typical handheld circular saw, placing the finished surface downward often produces a cleaner decorative edge.
Is a flooring cutter better than a miter saw?
For compatible straight cuts, a manual cutter is quieter and creates much less dust. A miter saw is more versatile for angles and harder products.
What is the best tool for straight LifeProof end cuts?
If the flooring supports it, score-and-snap is often the simplest method. For high-volume saw cutting, a miter saw is fastest.
What is the best tool for ripping LifeProof flooring?
A table saw is usually best for a straight rip. A guided circular saw is a good portable alternative.
What should I use for curved cuts?
Use a jigsaw with an appropriate fine-tooth blade.
What should I use around door jambs?
Undercut suitable wooden casings as required and use a jigsaw to shape the flooring where necessary.
Can I cut an entire LifeProof flooring installation with only a jigsaw?
Yes, in many cases. It will be slower for repeated straight cuts and long rips, but a jigsaw is versatile enough to handle most shapes encountered during installation.
Conclusion
So, what is the best saw to cut LifeProof flooring? If you want one powered saw that can handle almost every flooring situation, I recommend a jigsaw with a fine-tooth flooring, vinyl, or laminate blade. It handles crosscuts, rip cuts, curves, doorway notches, and other irregular shapes with one compact tool.
That does not make the jigsaw the fastest option for every job.
For a full installation, I would use a miter saw for repeated end cuts, a table saw for long first- and last-row rips, and a jigsaw for irregular cuts. A circular saw is an excellent portable alternative if you do not have the larger stationary tools.
Before using any saw, check the exact LifeProof flooring product you purchased. Many LifeProof vinyl planks can simply be scored with a utility knife and snapped, which is faster and creates almost no dust. Harder hybrid resilient products may benefit much more from a fine-tooth laminate or Pergo-style saw blade.
For power-saw cutting, a sharp 60- to 80-tooth carbide blade is a practical starting point for common 10-inch saws, with laminate-specific or TCG blades being particularly useful on abrasive hard-surface products.
My recommendation for most DIY homeowners is therefore straightforward: try score-and-snap for simple straight cuts, keep a jigsaw for all irregular work, and use a miter or table saw when speed and long straight cuts justify the additional setup. That combination gives you cleaner cuts, less wasted material, and a much easier LifeProof flooring installation.