What Saw Blade for Door Trim and Floor Molding? Best Choices
What saw blade for door trim and floor molding should you use? For most door casing, baseboard, and floor molding, a sharp fine-finish carbide-tipped crosscut blade is the best choice. On a 10-inch miter saw, a 60- to 80-tooth blade works well, while a 12-inch miter saw generally benefits from an 80- to 100-tooth finish blade. These finer blades leave smoother edges and reduce splintering compared with coarse framing blades.
The exact blade depends partly on what your trim is made from. Solid wood, finger-jointed pine, MDF, engineered molding, and PVC can all be cut with a miter saw, but they do not behave exactly the same way. MDF is abrasive and can dull a cheap blade quickly, while prefinished wood can splinter if the teeth are too coarse.
Door trim and floor molding also involve many visible cuts. A rough blade may technically cut the material, but chipped edges and fuzzy miters become obvious after installation. That is why finish carpentry generally benefits from a blade designed for clean crosscuts rather than one intended for fast framing work.
In this guide, I’ll explain the best blade tooth counts for 10- and 12-inch miter saws, what blade to use for wood, MDF, and PVC trim, whether a 40-tooth blade is good enough, how to reduce tear-out, and when to use a coping saw or another tool instead.
What Saw Blade Is Best for Door Trim and Floor Molding?
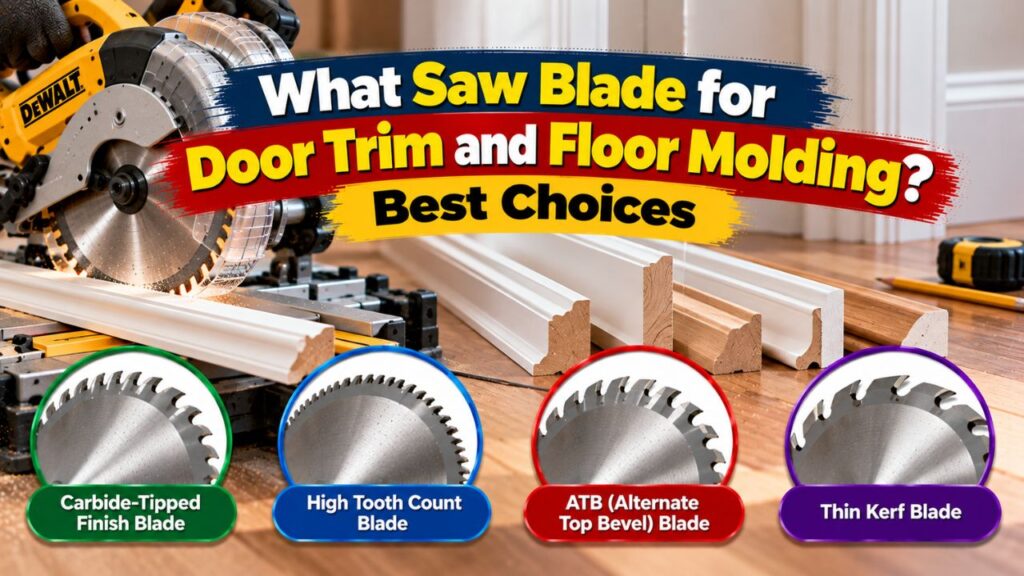
For the majority of trim work, choose a fine-tooth carbide-tipped finish blade with an ATB-style tooth pattern.
ATB stands for alternate top bevel. The teeth alternate their bevel direction, allowing the blade to slice cleanly across wood fibers.
That makes this type of blade particularly effective for door casing, baseboard, crown molding, shoe molding, quarter-round, and similar finish materials.
A good trim blade should prioritize surface quality over maximum cutting speed.
A framing blade might cut through a piece of pine casing almost instantly, but its relatively large teeth are more likely to leave splintered edges.
A finish blade cuts slightly more slowly but typically gives you a surface that needs little or no cleanup.
Best General Tooth Counts
For the common miter-saw sizes, these ranges work well:
| Saw Size | Good General Trim Blade |
| 7-1/4-inch | About 40–60 teeth |
| 8-1/2-inch | About 48–60 teeth |
| 10-inch | About 60–80 teeth |
| 12-inch | About 80–100 teeth |
These are practical ranges rather than strict rules.
Blade geometry, carbide quality, kerf, hook angle, and sharpness all influence cut quality.
A premium 60-tooth blade can easily produce a cleaner cut than a dull or poorly manufactured 80-tooth blade.
Why Fine-Tooth Blades Work Better for Trim
Door casing and baseboard are finish materials.
That means the cut edges can be highly visible, particularly at miters and scarf joints.
A fine blade has more teeth engaged during the cut, so each tooth removes a smaller amount of material.
That generally produces a smoother surface.
Coarse blades remove larger chips with each pass.
This is desirable when speed matters more than appearance, such as rough framing.
For finish carpentry, however, excessive tooth size can contribute to:
Chipped paint, torn wood fibers, fuzzy MDF edges, and rough miters.
This is particularly noticeable when cutting prefinished or prepainted molding.
More Teeth Are Not Always Better
It may sound logical to buy the blade with the highest tooth count available, but that is not always necessary.
An extremely fine blade can cut more slowly and may build heat if you force it through thick stock.
It can also become loaded with material or resin if it is not cleaned.
For normal casing and baseboard, a quality 60- to 80-tooth 10-inch blade or 80- to 100-tooth 12-inch blade usually provides an excellent balance between smoothness and cutting efficiency.
Key Takeaways:
- Use a fine-finish carbide crosscut blade for most door trim and floor molding.
- Around 60–80 teeth works well on a 10-inch miter saw.
- Around 80–100 teeth is a strong choice for a 12-inch miter saw.
- Blade quality and sharpness matter as much as tooth count.
What Blade for Door Casing?
Door casing is typically fairly thin, which means it benefits from a fine blade.
For painted pine, finger-jointed wood, poplar, MDF, or hardwood casing, a finish blade minimizes damage to the visible face.
On a 10-inch miter saw, I would generally use a 60- or 80-tooth carbide blade.
An 80-tooth blade gives you particularly clean miters if the material has a delicate surface or prefinished coating.
For a 12-inch saw, an 80- to 100-tooth blade provides similar tooth spacing because the larger blade has a greater circumference.
Why Door-Casing Miters Need Clean Cuts
Door trim is commonly joined at approximately 45 degrees around the top corners.
Any tear-out near the miter can create a visible gap or chipped edge.
Even if you fill the joint with caulk or putty, cleaner cuts require less repair and generally look better.
For stain-grade hardwood casing, the quality of the miter becomes even more important because you cannot rely on paintable caulk to disguise imperfections.
What Blade for Baseboard and Floor Molding?
Baseboard can range from thin MDF to thick hardwood profiles.
A fine crosscut blade is still the best general choice.
For ordinary painted MDF or pine baseboard, 60 to 80 teeth on a 10-inch saw works very well.
If you are cutting tall or dense hardwood baseboard, an 80-tooth blade can leave a particularly smooth edge.
What About Shoe Molding and Quarter-Round?
These pieces are small and narrow, so they can be more difficult to control safely.
A fine blade helps because it cuts smoothly without aggressively grabbing the material.
However, workpiece support and hand position become just as important as blade choice.
Never hold a tiny piece with your fingers close to the blade just because the molding is lightweight.
Use clamps or a longer workpiece whenever possible.
Best Blade for MDF Trim
MDF is commonly used for baseboard, casing, crown molding, and decorative trim.
A sharp high-tooth-count carbide blade works best.
MDF does not have natural grain like solid wood, but its dense fiber structure can still produce fuzzy or rough edges when cut with a coarse blade.
It is also abrasive.
The resins and compressed fibers can dull saw teeth more quickly than ordinary softwood.
For a 10-inch miter saw, I would lean toward a 60- to 80-tooth carbide blade, with 80 teeth being particularly useful when surface quality matters.
For a 12-inch saw, 80 to 100 teeth is a strong choice.
MDF Dust Is a Bigger Concern
Cutting MDF creates large quantities of very fine dust.
Use the miter saw’s dust collection system whenever possible.
Good ventilation and appropriate respiratory protection are also important during repeated cutting.
Do not let MDF dust accumulate around the saw motor, fence, or moving parts.
Vacuuming is preferable to blowing large quantities of fine dust into the room.
Best Blade for Hardwood Trim
Hardwood trim such as oak, maple, cherry, or walnut benefits from a sharp high-quality carbide blade.
A fine ATB crosscut blade usually gives excellent results.
Hardwood requires more cutting effort than soft pine, so blade sharpness becomes especially important.
A dull high-tooth blade can burn hardwood rather than cutting it cleanly.
Watch for Burning
If you notice dark burn marks on your trim, the problem may not be tooth count.
Common causes include:
A dull blade, resin buildup, feeding too slowly, saw misalignment, or holding the molding in a twisted position.
Clean and inspect the blade before replacing it simply because you see burning.
A properly sharpened 60-tooth finish blade can cut hardwood beautifully.
Best Blade for Pine and Finger-Jointed Trim
Pine and finger-jointed trim are relatively easy to cut.
A 60-tooth blade on a 10-inch miter saw is often enough to leave a clean edge.
If the trim is prepainted or has a delicate factory finish, an 80-tooth blade may reduce edge chipping further.
Finger-jointed molding can occasionally chip where different pieces meet, especially if the blade is dull.
Cut smoothly and support the trim fully against the fence.
Best Blade for PVC Trim and Molding
PVC baseboard, casing, and quarter-round can generally be cut with a sharp fine-tooth carbide woodworking blade.
The primary challenge is heat.
If you feed too slowly or use a dull blade, friction can soften or melt the plastic.
That can leave a rough edge or cause material to accumulate on the blade.
For PVC, use a fine blade but maintain a smooth, steady feed.
Do not force the cut, but do not pause halfway through unnecessarily either.
A blade designed for plastics or non-ferrous finish materials can also work very well when PVC is a major part of the project.
Can PVC Damage a Wood Blade?
Not normally when using an appropriate carbide blade.
However, melted PVC residue can accumulate on the teeth if heat becomes excessive.
Stop and clean the blade according to the blade manufacturer’s recommendations if buildup appears.
Is a 40-Tooth Blade Good for Trim?
It can cut trim, but it is not my first choice for high-quality finish work.
A 40-tooth 10-inch blade is typically more of a general-purpose or combination blade.
It can leave acceptable cuts in many materials, particularly if it is sharp and the cut edge will be painted.
However, a 60- or 80-tooth blade usually gives cleaner results on casing and molding.
When 40 Teeth May Be Enough
If you are working on inexpensive painted baseboard and the blade is sharp, a 40-tooth blade may be perfectly adequate.
If you are cutting expensive stain-grade hardwood casing where the joint will remain visible, I would choose a finer blade.
The difference becomes more noticeable on delicate profiles and highly visible miters.
Is an 80-Tooth Blade Good for Trim?
Yes. An 80-tooth 10-inch carbide blade is one of the best general options for finish trim.
It produces smooth crosscuts and works particularly well for:
Door casing, baseboards, crown molding, hardwood trim, MDF, and prefinished molding.
The downside is that it can cut somewhat more slowly than a 60-tooth blade.
For ordinary trim work, that speed difference is rarely important.
Is a 100-Tooth Blade Better?
On a 12-inch saw, a 100-tooth blade can be an excellent finish blade.
On a smaller blade, extremely high tooth counts may be unnecessary.
You do not need to chase the highest possible number.
Your goal is a clean edge without excessive friction.
For most trim projects, once you reach a good fine-finish blade range, blade quality matters more than adding another 20 teeth.
Thin-Kerf vs. Full-Kerf Blade for Trim
Kerf is the width of material removed by the blade.
A thin-kerf blade removes less material and requires slightly less power.
That can be helpful on compact or cordless miter saws.
Full-kerf blades are generally stiffer and may resist deflection better on powerful stationary saws.
For thin trim stock, either can work very well.
The key is making sure the blade is compatible with your saw and does not exceed the manufacturer’s specifications.
Does Kerf Affect Miter Accuracy?
Potentially.
A very thin blade can flex if it is forced aggressively through dense hardwood.
That can make a critical miter slightly less consistent.
For standard casing and baseboard, this usually is not a major issue if you use a quality blade and allow the saw to cut at its own pace.
ATB vs. TCG Blade for Molding
The two common tooth styles you may encounter are ATB and TCG.
ATB, or alternate top bevel, is excellent for clean wood crosscuts.
TCG, or triple-chip grind, is often used for abrasive manufactured materials, laminates, plastics, and some non-ferrous materials.
For typical wood casing and baseboard, I prefer ATB.
For large quantities of abrasive composite or plastic trim, a TCG blade may last longer and cut more consistently.
You do not necessarily need a specialized TCG blade for a small room of MDF baseboard.
A quality carbide ATB finish blade will generally handle it well.
Positive vs. Negative Hook Angle
Hook angle describes how aggressively the tooth leans into the workpiece.
For miter saws, blades with a neutral or slightly negative hook angle are often preferred because they tend to cut less aggressively and provide controlled crosscuts.
This can be particularly useful on sliding compound miter saws.
A strongly positive hook angle is more common on ripping blades used in table saws.
If a blade is specifically marketed for miter-saw finish cutting, the manufacturer will typically have chosen a suitable hook angle.
For most homeowners, there is no need to calculate hook angle manually.
Simply choose a quality blade designed specifically for your miter saw and finish-cutting application.
Key Takeaways:
- ATB blades are excellent for wood door trim and floor molding.
- MDF and PVC may also benefit from fine carbide blades, though specialty tooth designs can improve durability.
- Thin-kerf blades work well on lower-powered saws, while full-kerf blades can offer extra stiffness.
What Blade for Crown Molding?
Crown molding is another finish material that benefits from a fine blade.
A 60- to 80-tooth blade on a 10-inch miter saw or an 80- to 100-tooth blade on a 12-inch model works well for most crown.
Because crown often has compound angles, accuracy and blade stability become especially important.
A clean cut is only part of the job.
The molding must also be positioned consistently against the saw fence or cut using the correct bevel and miter settings.
If the saw blade deflects or the molding moves during the cut, even a perfect tooth count cannot produce an accurate joint.
What Blade for Shoe Molding?
Shoe molding is narrow and often delicate.
A fine finish blade leaves a clean edge without tearing the small profile.
An 80-tooth blade can be particularly good for prefinished shoe molding.
Because the workpiece is narrow, use extra caution.
Do not put fingers near the blade simply to hold a 4-inch offcut.
Use a clamp or make the cut while the molding remains long, then trim it to final length safely.
What Blade for Quarter-Round?
Quarter-round can be wood, MDF, or PVC.
The same finish blade used for baseboard is normally appropriate.
A 60- or 80-tooth 10-inch blade works very well.
The biggest challenge is preventing the curved molding from rolling.
Keep both flat surfaces properly referenced against the table and fence.
Do not attempt to balance quarter-round loosely on its curved face.
What Blade for Stain-Grade Trim?
Stain-grade work requires the cleanest edges because imperfections cannot simply disappear under paint and caulk.
For stain-grade hardwood, I would choose a premium high-tooth-count carbide crosscut blade.
An 80-tooth blade on a 10-inch saw is an excellent option.
Make sure the blade is freshly sharpened and the saw is accurately aligned.
A tiny gap in painted baseboard may be easy to fill.
A gap in a natural cherry or oak casing miter is far more noticeable.
What Blade for Painted Trim?
Paint-grade trim gives you a little more flexibility.
A sharp 60-tooth blade often produces more than enough quality for pine and MDF that will be caulked, filled, primed, and painted.
You may still prefer an 80-tooth blade simply because the cuts require less cleanup.
But there is less reason to chase extremely fine edges when small imperfections will be concealed during finishing.
Miter Saw vs. Table Saw for Trim
A miter saw is the primary tool for cutting door trim and floor molding to length.
It excels at crosscuts, miters, and compound angles.
A table saw is more useful for modifying the molding itself, such as ripping a board narrower or creating custom trim stock.
For most baseboard and casing installation, a table saw is optional.
A miter saw plus a coping saw can handle the majority of cuts.
Do You Need a Coping Saw for Floor Molding?
For inside baseboard corners, a coping saw can often produce a better joint than simply mitering both pieces.
One piece of molding is installed square into the corner.
The end of the adjoining piece is cut to follow the profile of the first.
The miter saw creates the initial profile reference, and the coping saw removes the waste behind it.
This method is particularly useful because real walls are rarely exactly 90 degrees.
A coped joint can remain tighter when the corner is slightly out of square.
Which Blade for a Coping Saw?
Use a fine woodworking coping-saw blade appropriate for the molding material.
For ordinary wood trim, a fine blade provides better control around detailed profiles.
The blade should be sharp and properly tensioned.
A coping saw is not used for the initial straight trim cuts; it complements the miter saw.
How to Reduce Splintering When Cutting Trim
Blade choice solves much of the problem, but good technique is equally important.
Make sure the molding rests flat against the saw fence and table.
If it moves during the cut, even the best blade can tear the edge.
Let the blade reach full speed before contacting the trim.
Lower it smoothly instead of slamming through the molding.
Cut With the Finished Face in the Correct Position
On most conventional miter saws, the visible face of flat trim should normally face upward because the blade enters from above.
However, molding shapes vary.
When cutting crown molding in nested position, the face orientation follows how the molding sits against the wall and ceiling.
If you are unsure, make a test cut on scrap.
Use a Sacrificial Fence
For very delicate trim, a sacrificial wooden fence can support the back side of the molding close to the blade.
This reduces tear-out and can be particularly useful for small profiles.
Install auxiliary fences only in a way that does not interfere with the blade guard or saw movement.
Painter’s Tape Can Help
Painter’s tape across the cut line can help support prefinished or fragile surfaces.
It is not necessary for every cut, but it can be useful for brittle veneers or painted finishes.
A sharp blade remains more important than tape.
How to Cut Door Trim Accurately
For standard door casing, start by measuring the reveal around the jamb.
Mark the casing carefully and place it firmly against the miter-saw fence.
For the top corners, the mating pieces are commonly cut with approximately 45-degree miters, although actual jamb and wall geometry can vary.
Do not assume every corner is perfect.
Dry-fit the joint before fastening the casing.
If the tips touch but the back of the miter opens, the angle may need slight adjustment.
A clean blade allows you to make tiny corrective cuts without shredding the trim edge.
How to Cut Baseboard Accurately
Baseboard cuts fall into several categories: straight butt cuts, outside miters, inside copes, and scarf joints.
For straight cuts, set the miter saw to zero degrees.
For outside corners, measure the actual corner rather than assuming it is exactly 90 degrees.
For inside corners, coping is often more forgiving.
Long walls may require a scarf joint between two pieces of molding.
A fine blade helps all these joints fit cleanly.
Why Does My Trim Blade Leave Burn Marks?
Burning usually comes from friction.
The blade may be dull, dirty, or misaligned.
You may also be feeding too slowly through dense hardwood.
Inspect the carbide teeth.
If resin buildup is present, clean the blade using an appropriate blade-cleaning method.
Also check whether the saw fence and blade are correctly aligned.
If the blade rubs sideways against the cut, it can produce heat even when the teeth are still sharp.
Why Does My MDF Edge Look Fuzzy?
A coarse or dull blade is usually responsible.
MDF fibers do not break like natural wood grain.
Instead, a rough blade can tear the compressed fibers and leave a fuzzy edge.
Switch to a sharper fine-tooth blade.
You can also lightly sand the cut if necessary before painting, but ideally the saw should leave a clean enough surface that only minimal finishing is required.
Why Is My Painted Trim Chipping?
Factory-painted trim can chip when the blade is coarse, dull, or cutting in the wrong direction.
A fine ATB blade usually improves the result immediately.
Painter’s tape across the cut can also help.
Let the blade reach full speed and move smoothly through the workpiece.
If the material continues chipping badly, test another blade on a scrap before cutting the remaining trim.
Safety When Cutting Door Trim and Molding
Trim is often narrow and lightweight, which can make it seem harmless.
The saw is not.
Keep your hands outside the manufacturer’s no-hands zone and use clamps when the workpiece becomes too short to hold safely.
Do not reach for an offcut while the blade is still moving.
After completing a cut, release the trigger and allow the blade to stop before raising the head.
Support long molding on stands or another stable surface so it does not fall or lever the workpiece upward during the cut.
Wear eye and hearing protection, and use dust collection where practical.
MDF in particular produces very fine dust, so additional respiratory protection is sensible when making many cuts.
Key Takeaways:
- Clean trim work depends on both blade selection and accurate workpiece support.
- Use a coping saw for many inside baseboard corners rather than relying only on miters.
- Keep hands away from the blade when cutting small molding pieces.
How Often Should You Replace a Trim Saw Blade?
There is no fixed number of cuts.
A high-quality carbide blade can make many hundreds of trim cuts if it is kept clean and avoids nails or other foreign objects.
MDF and composite materials may dull it more quickly than pine.
Watch the cut quality.
If the saw suddenly requires more force, leaves burn marks, creates rough edges, or begins splintering material it previously cut cleanly, inspect the blade.
Sometimes cleaning resin or MDF buildup restores performance.
If the carbide edges are genuinely dull, have the blade professionally sharpened if it is designed to be resharpened, or replace it.
FAQs about What Saw Blade for Door Trim and Floor Molding
What saw blade for door trim and floor molding is best?
A fine-finish carbide-tipped crosscut blade is the best general choice.
For a 10-inch miter saw, use approximately 60 to 80 teeth. For a 12-inch saw, approximately 80 to 100 teeth works well.
Is a 60-tooth blade good for trim?
Yes. A 60-tooth 10-inch blade is an excellent general trim blade and cuts most pine, hardwood, MDF, and finger-jointed molding cleanly.
Is an 80-tooth blade better for trim?
An 80-tooth blade generally produces a slightly finer cut and is especially useful for stain-grade, prefinished, or delicate molding.
It may cut more slowly than a 60-tooth blade.
Can I use a 40-tooth blade for baseboard?
Yes, particularly for paint-grade softwood or MDF if the blade is sharp.
However, a 60- or 80-tooth blade typically leaves a cleaner edge.
What blade should I use for door casing?
Use a fine ATB carbide crosscut blade.
A 60- or 80-tooth blade on a 10-inch miter saw is ideal for most casing.
What blade should I use for MDF baseboard?
Use a sharp carbide blade with a relatively high tooth count.
About 60 to 80 teeth on a 10-inch saw is a good range.
What blade for PVC molding?
A fine carbide blade designed for finish wood or plastics works well.
Use a steady cutting speed to avoid generating enough friction to melt the PVC.
What blade for hardwood baseboard?
Use a high-quality fine crosscut carbide blade.
An 80-tooth 10-inch blade works particularly well for clean stain-grade hardwood cuts.
What blade for quarter-round?
A 60- to 80-tooth finish blade works well for wood or MDF quarter-round.
Use a fine carbide blade for PVC versions too.
What blade for shoe molding?
A fine-finish carbide blade is ideal.
An 80-tooth blade can provide very clean edges on small molding profiles.
What blade for crown molding?
A 60- to 80-tooth 10-inch blade or 80- to 100-tooth 12-inch blade is an excellent choice for most crown molding.
Is ATB good for trim?
Yes. Alternate-top-bevel blades are designed to slice wood fibers cleanly and are excellent for casing, baseboard, and other finish trim.
Is TCG better for MDF?
TCG blades can perform well on abrasive manufactured materials, but a quality ATB carbide blade is more than adequate for most MDF trim work.
Can I use a framing blade for door trim?
You can, but I would not recommend it for visible finish work.
Coarse framing teeth are more likely to leave chipped or rough edges.
Why does my molding splinter when I cut it?
The blade may be dull or too coarse, the molding may not be supported firmly, or you may be moving the saw too aggressively.
Use a sharp fine-tooth blade and make a smooth cut.
Why is my miter saw burning trim?
Common causes include a dull or dirty blade, excessive friction, feeding too slowly, or saw misalignment.
Inspect and clean the blade first.
Is a thin-kerf blade good for molding?
Yes. Thin-kerf finish blades work particularly well on smaller or cordless miter saws because they require less power.
Make sure the blade is compatible with your saw.
Should the finished trim face up on a miter saw?
For most flat casing and baseboard cuts, yes.
A conventional miter saw generally enters the material from the top, so placing the finished face upward usually produces a cleaner visible edge.
Do I need a separate blade for MDF and wood trim?
Not necessarily.
A quality fine-finish carbide blade can cut both successfully.
If you cut very large quantities of MDF, a blade designed for abrasive composite materials may stay sharp longer.
What is the best all-around trim blade?
For a 10-inch miter saw, a quality 60- or 80-tooth carbide ATB finish blade is my preferred all-around option.
Choose 60 teeth for a balance of speed and finish or 80 teeth when the cleanest possible edge is the priority.
Conclusion
So, what saw blade for door trim and floor molding should you use? For most door casing, baseboard, shoe molding, quarter-round, and crown molding, a fine-finish carbide-tipped crosscut blade is the best choice.
On a 10-inch miter saw, a 60- to 80-tooth blade provides an excellent balance of speed and smoothness. I would choose a 60-tooth blade for general everyday trim work and move to an 80-tooth blade when cutting prefinished, stain-grade, or particularly delicate molding.
For a 12-inch miter saw, approximately 80 to 100 teeth gives comparable fine-cutting performance.
Solid wood, MDF, finger-jointed molding, and PVC can all be cut with a quality finish blade, although MDF and composites can dull carbide more quickly. Keep the blade sharp and clean rather than relying solely on a high tooth count.
Avoid using a coarse framing blade when the cut will remain visible. It may cut quickly, but it is much more likely to leave rough fibers or chipped edges.
Also remember that a good blade cannot compensate for poor technique. Keep the molding firmly supported against the table and fence, let the saw reach full speed, make the cut smoothly, and allow the blade to stop before raising the saw head.
For most homeowners and finish carpenters using a 10-inch miter saw, my recommendation is simple: buy a high-quality 60- to 80-tooth carbide ATB finish blade. It will handle nearly all common door trim and floor molding cleanly while remaining useful for many other finish-cutting jobs.