How to Hang a Panel Saw Safely on a Wall
To learn how to hang a panel saw safely, position the vertical panel saw on a solid, level floor with the frame leaning back at the angle specified by its manufacturer, support the upper frame against properly anchored wall blocking, and secure the top of the machine to a structural wall so it cannot tip forward or backward. A full-size vertical panel saw normally should not be literally suspended from the wall with its entire weight hanging from fasteners.
That distinction is important.
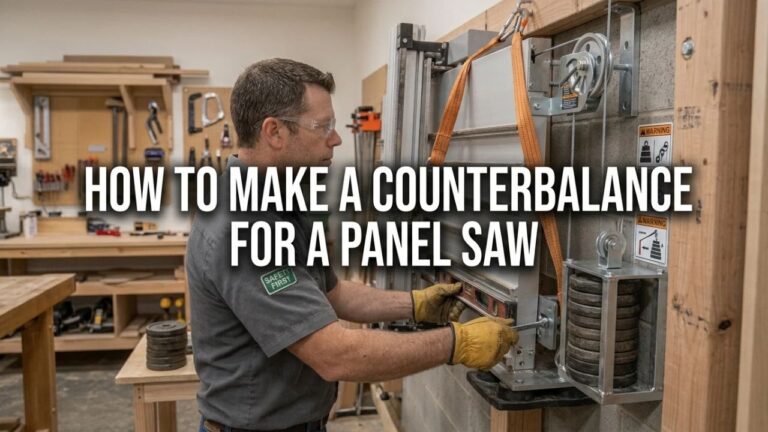
Most vertical panel saws are heavy machines designed to carry their weight through the bottom frame, rollers, feet, or an optional stand. The wall connection serves primarily to stabilize the saw and prevent tipping. Manufacturer instructions for some common commercial panel saws specify a slight backward lean, wall blocking that keeps moving components clear of the wall, and an anti-tip chain or security restraint at the top.
The exact setup varies by model. Some panel saws have integrated stands, some use optional tripod or fixed stands, and others are specifically designed to rest against a solid wall. Therefore, always check the installation manual for your particular saw before drilling holes or choosing anchors.
In this guide, I’ll explain how to hang a panel saw, how to choose a location, how wall blocking works, how much the saw should lean, how to anchor it safely, and how to check alignment before making your first cut.
What Does “Hanging” a Panel Saw Actually Mean?
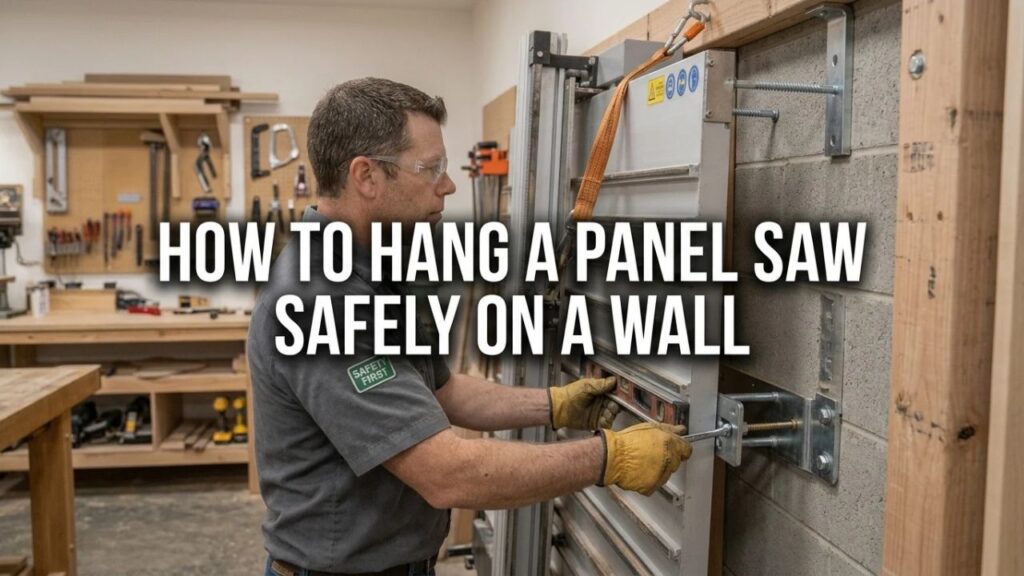
When people talk about hanging a panel saw, they usually mean installing a vertical panel saw against a wall.
Unlike a table saw, which supports sheet goods horizontally, a vertical panel saw holds plywood, MDF, melamine, plastic sheets, or other panels in an upright or slightly tilted position.
The saw carriage moves along guide rails to make vertical crosscuts, while many designs also allow the saw head to rotate for horizontal rip cuts.
Because the machine is tall, stability matters.
The Saw Should Normally Stand on the Floor
Do not treat a full-size commercial panel saw like a wall cabinet.
The bottom of the saw typically remains supported by the floor, its roller frame, feet, or manufacturer-approved stand.
The wall prevents the upper frame from moving excessively or tipping.
This arrangement also makes loading large sheets easier because their weight can be supported by the saw’s lower rollers rather than by a wall-mounted structure.
Wall Anchoring Is Primarily an Anti-Tip Measure
A properly installed restraint keeps the saw stable if someone accidentally pushes it, loads a large panel awkwardly, or places force against the frame.
It should not be used to compensate for an unstable floor or an incorrectly assembled stand.
Key Takeaways:
- A vertical panel saw normally rests on the floor rather than hanging entirely from the wall.
- Wall attachment is mainly for stability and tip prevention.
- Use the exact installation instructions for your particular panel saw whenever available.
Can You Mount a Panel Saw Directly to Drywall?
Not safely if the drywall itself is expected to support the machine.
Drywall is a finish material, not a structural anchoring surface for a large industrial saw.
Any wall restraint should connect to structural material behind or within the wall, such as wood studs, properly designed steel framing, masonry, concrete, or manufacturer-approved structural backing.
Why Drywall Anchors Are Not Enough
Small plastic or toggle anchors may be appropriate for lightweight household items, but a tall panel saw can create significant leverage at the top of the frame.
Even if the wall restraint normally experiences little force, it needs to remain secure when the machine is pushed or loaded unexpectedly.
Anchor the blocking or restraint to structure, not merely to the wall covering.
Choose the Right Location Before Hanging the Saw
Location affects both safety and accuracy.
A panel saw needs enough space for the frame itself, the material being loaded, the operator, and the full travel of the saw carriage.
Leave Enough Side Clearance
A vertical saw may be compact from front to back, but ripping long panels requires considerable horizontal clearance.
If you commonly cut 8-foot sheets, make sure you can load, position, and remove them without hitting a wall, workbench, shelving unit, or another machine.
Longer panels require even more space.
Leave Room in Front
The operator needs enough room to stand comfortably and move sheet material.
Do not install the saw directly in a narrow traffic aisle.
The working area should remain clear enough that another person cannot easily bump the operator while a cut is in progress.
Consider the Power Supply
Position the saw where its electrical requirements can be met properly.
Avoid routing an extension cord through a busy walkway simply because the machine was installed too far from an outlet.
Industrial panel saws can have substantial electrical requirements, so follow the manufacturer’s circuit recommendations.
Plan Dust Collection
If you use a dust hose or vacuum system, account for its path before positioning the machine.
The hose must be able to move without interfering with the saw carriage, counterweight, material, or operator.
This becomes especially important when determining how far the upper frame needs to sit away from the wall.
Check the Floor
A stable panel saw starts with a stable floor.
Concrete is ideal for many permanent shop installations, but other structural floors may also work when appropriate for the machine.
The important point is that the surface must support the machine and remain reasonably level.
Avoid an Unstable Base
If one side rocks because of an uneven floor, do not simply pull the top tightly against the wall and expect the wall restraint to straighten the machine.
Correct the base first using the manufacturer’s leveling procedure.
A twisted frame can make accurate squaring more difficult.
Consider Floor Anchoring When Specified
Some panel saw designs can or should be anchored to the floor, wall, or structural post.
If your manufacturer’s manual calls for floor anchors, use the specified method.
Do not improvise simply because another panel saw model uses a wall chain instead.
Assemble the Saw Before Final Wall Positioning
Complete the main frame assembly according to the manufacturer before permanently securing the machine.
Depending on the model, this may include installing the motor carriage, rollers, counterbalance system, frame extensions, guards, dust components, and stand.
Keep the tool unplugged while assembling and adjusting it.
Use a Helper
Full-size panel saw frames can be large, tall, and heavy.
Do not attempt to lift or tip a large machine into position alone.
One person can guide the frame while another controls its balance and checks clearance.
For very large industrial models, mechanical lifting equipment or professional installation may be appropriate.
Determine the Correct Back-Lean Angle
Vertical panel saws are usually not perfectly vertical.
Many are designed to lean slightly backward.
This allows sheet material to remain against the frame and rollers through gravity instead of falling forward toward the operator.
A Common Range Is Around 10 to 15 Degrees
Some commercial vertical panel saw manufacturers specify approximately a 10- to 15-degree backward lean, with certain models calling for approximately 15 degrees.
That is a useful reference, but it is not a universal specification.
Use the angle specified for your saw.
Why the Angle Matters
Too little lean may make panels feel unstable.
Too much lean can alter how material rests on the frame and may take up unnecessary floor space.
It can also interfere with the intended geometry of the carriage or support system.
The manufacturer designed the stand and frame around a particular operating angle.
How Far Should a Panel Saw Be From the Wall?
The distance depends on frame height and required back angle.
On some full-size commercial panel saw installations using roughly a 15-degree lean, the front of the guide tubes or lower frame can end up around 30 inches away from the supporting wall.
Do not treat 30 inches as a universal measurement.
A smaller saw, different frame height, integrated stand, or different lean angle can require another distance.
Let the Angle Determine the Footprint
It is usually better to set the specified frame angle and then observe where the base naturally lands than to choose an arbitrary wall-to-floor distance first.
Make sure the base remains fully supported.
Install Wall Blocking
If the frame is designed to rest toward a wall, blocking may be needed behind its upper corners.
Blocking is simply structural material attached firmly to the wall that provides a solid contact surface for the saw frame.
Why Blocking Is Necessary
The back of a panel saw may contain components that project beyond the frame.
Examples can include:
Counterweight or counterbalance housings.
Pulley assemblies.
Dust-collection components.
Hose guides.
Motor or cable components.
If the frame is leaned directly against a flat wall, these parts may contact the wall before the actual structural frame does.
Proper blocking moves the frame outward enough to maintain clearance.
Where Should the Blocking Go?
Many designs support the upper left and right areas of the machine frame.
The exact contact points should come from your owner’s manual.
Do not place a wooden block against a moving cable, pulley, counterweight enclosure, hose roller, or guide component simply because it is convenient.
Anchor Blocking to Structure
If you have a wood-framed wall, locate the studs and attach the blocking securely to them.
If the wall is masonry or concrete, use anchors appropriate for that material and load.
If you have metal studs, make sure the installation method is actually capable of supporting the restraint loads rather than assuming ordinary drywall fasteners are sufficient.
Key Takeaways:
- Set the manufacturer’s specified lean angle before deciding the final wall clearance.
- Blocking keeps the structural frame supported while leaving moving components clear.
- Fasten blocking into structural framing or masonry, not drywall alone.
How to Hang a Panel Saw Step by Step
Once the location, frame, and blocking are ready, you can place and secure the saw.
Step 1: Unplug the Panel Saw
Disconnect electrical power before positioning, adjusting, or working around the saw carriage.
Lock or secure movable components if the manufacturer provides a procedure for doing so.
You do not want the carriage unexpectedly sliding while the frame is being tilted.
Step 2: Get a Helper
Have at least one capable assistant control the opposite side of the machine.
Large commercial saws may need more people or lifting equipment.
Move slowly.
Step 3: Move the Saw Against the Installation Wall
Bring the saw into its approximate operating location.
Make sure the bottom frame is sitting properly on the floor or stand.
Keep the saw controlled while establishing the backward lean.
Step 4: Position the Upper Frame on the Blocking
Lean the upper frame toward the wall until the designated structural portions rest against or align with the blocking.
Check the back of the saw.
The counterweight, pulleys, cables, dust equipment, and other components should remain clear.
Nothing should be crushed between the frame and wall.
Step 5: Verify the Back Angle
Measure the saw’s angle or use the manufacturer’s specified setup dimensions.
For machines designed around approximately 15 degrees, confirm that you are close to that value rather than merely making the saw “look vertical.”
A digital angle gauge can make this easy.
Step 6: Check the Base Position
Make sure both sides of the machine are stable.
The lower rollers or support feet should sit where the manufacturer intended.
Do not leave one side floating or allow the frame to rock.
Step 7: Secure the Top of the Saw
Attach the upper frame to the structural wall using the manufacturer-specified restraint.
On some panel saws designed to lean against a wall, manufacturers call for a lightweight chain or security rope connecting the upper saw frame to the supporting structure.
This is primarily an anti-tip restraint.
Choose structural attachment points.
The restraint should prevent the saw from being pushed away from the wall but should not distort the frame.
Step 8: Do Not Use Packing Banding as a Permanent Restraint
Thin shipping or packaging banding is not a substitute for a proper safety restraint.
Some panel-saw manufacturers specifically warn against using banding to secure the machine to a wall.
Use the approved chain, cable, rope, bracket, stand, or anchoring system.
Step 9: Tighten and Inspect Everything
Check all stand bolts, blocking fasteners, wall anchors, and anti-tip connections.
The machine should feel stable when gently pushed at the frame.
Do not test stability by violently rocking it.
If movement is visible at the wall blocking or anchors, correct the installation before using the saw.
Should You Bolt the Panel Saw Directly to the Wall?
Only if the saw manufacturer calls for that method.
Do not drill holes through the frame and attach it directly to wall studs simply because it seems stronger.
A panel saw frame is part of the machine’s alignment system.
Drilling or pulling the frame tightly against an uneven wall can distort it and affect accuracy.
Many designs deliberately use blocking and a flexible anti-tip restraint rather than rigidly bolting every part of the upper frame to the wall.
Never Modify the Structural Frame Without Approval
Drilling new mounting holes can weaken components, interfere with carriage travel, void warranty coverage, or change the saw geometry.
Use existing mounting points or approved mounting hardware.
What if the Panel Saw Has a Stand?
If your saw includes a manufacturer-designed stand, follow the stand instructions instead of creating a wall mount from scratch.
Some stands are fixed.
Others fold for transportation.
Large industrial models may have fully integrated support frames.
Freestanding Does Not Mean You Can Put It Anywhere
A freestanding panel saw still needs a stable operating area where it cannot be accidentally tipped.
Keep it away from forklift routes, doors, busy aisles, and areas where someone could strike the frame with long stock.
If the manual requires floor anchoring, secure it accordingly.
Manufacturer Stand vs. Homemade Stand
A carefully engineered homemade stand can work for certain DIY panel saw designs, but it must account for the machine’s weight, center of gravity, panel loading forces, and operating angle.
For a commercial machine, the manufacturer’s stand is usually the safer choice.
Check the Panel Saw for Square After Hanging It
Mounting the machine is not the final step.
You need to verify cutting alignment.
Moving or leaning the frame into a new position can reveal alignment problems even if the machine was correctly adjusted previously.
Check the Material Support Rollers
The lower support rollers should provide a consistent reference for the sheet.
If one support is significantly higher or lower, a panel may not sit square.
Follow the machine’s procedure for roller adjustment rather than randomly changing individual components.
Check the Carriage Travel
With the saw unplugged, move the carriage along its full travel.
It should move smoothly without binding.
Make sure wall blocking, hoses, cables, or restraints do not interfere.
Check Vertical Cut Alignment
Use a straight, square test panel.
Make a test cut following the normal operating procedure and verify squareness with an accurate framing square or diagonal measurement method.
If the cut is out of square, use the manufacturer’s adjustment procedure.
Do not try to correct cutting accuracy by twisting the wall-mounted frame.
Check the Rip Orientation
If the motor rotates for horizontal cuts, make sure it locks correctly in both positions.
The carriage, blade guard, and material supports must all operate freely.
Make Sure the Counterbalance Is Clear
Many vertical panel saws use a counterweight or spring system to help control the saw carriage.
This system may run behind the frame.
Wall installation must not obstruct it.
Why Clearance Matters
A counterweight may move whenever the saw carriage moves.
If the counterweight hits wall blocking, a dust hose, electrical conduit, or another obstruction, carriage movement can become unpredictable.
Before applying power, manually check full carriage travel according to the manufacturer’s procedure.
Plan Electrical and Dust Connections After Mounting
Once the machine is securely positioned, arrange utilities so they do not create new hazards.
Power Cord
Keep the cord out of the blade path, carriage path, and panel-loading zone.
Protect it from sharp sheet edges.
Do not place the plug connection where a sheet of plywood can repeatedly strike it.
Dust Hose
A moving carriage requires a dust hose with enough freedom to follow it.
At the same time, excess hose should not hang where it can catch on the sheet material.
Use the routing system supplied with the saw when available.
How to Load Material After the Saw Is Hung
A correctly mounted saw should allow panels to rest naturally against the support frame.
Slide the sheet onto the lower material rollers rather than lifting the entire panel into position when the machine design permits it.
Keep your fingers away from pinch points between sheet goods and rollers.
Support Long Panels
Although a vertical saw handles full sheets efficiently, very long material may extend well past the frame.
Use frame extensions or suitable support equipment when the manufacturer recommends it.
Do not rely on the operator to hold an unsupported heavy sheet while simultaneously running the saw.
Common Panel Saw Hanging Mistakes
A major mistake is fastening the machine to drywall without locating structural support.
Another is placing the frame perfectly vertical when the saw was designed to lean backward.
Some installers push the machine too close to the wall and accidentally interfere with its counterbalance or dust system.
Another common problem is treating the anti-tip chain as the main structural support and leaving the machine base unstable.
The base should remain properly supported.
Using packaging banding as a permanent tie is another bad shortcut.
Finally, some users begin making cuts immediately after installation without checking alignment.
Even a secure machine can cut out of square.
Can You Hang a DIY Panel Saw on a Wall?
Yes, many shop-built panel saw designs intentionally attach to or lean against a wall.
However, a homemade machine does not come with a manufacturer’s engineered installation method, so additional judgment is required.
The frame needs to be rigid enough to maintain straight guide rails.
The wall connection must handle the machine’s weight distribution and cutting loads.
The carriage must move smoothly without lifting or twisting the frame.
And the sheet support needs to remain square to the saw travel.
Avoid Supporting Everything From One Fastener
Distribute structural attachment across multiple framing points.
A tall saw creates leverage.
Even if the machine itself is relatively light, loading a full sheet can create significant forces.
For permanent DIY installations, attaching a substantial horizontal ledger or mounting frame across multiple wall studs can provide a more reliable structural foundation than a few isolated drywall anchors.
How High Should You Hang a Panel Saw?
A commercial vertical panel saw usually determines its own height because the bottom frame sits on the floor.
You typically do not choose an arbitrary mounting height.
This is another reason “hang” is somewhat misleading.
For a DIY wall-mounted panel saw, the cutting height should allow the material-support rail to remain easy to load while still providing enough travel for the largest sheets you intend to crosscut.
Ergonomics, ceiling height, and blade carriage travel all need consideration.
Does a Panel Saw Need to Be Perfectly Level?
The floor support and material reference surfaces need to be properly aligned according to the machine’s specifications, but the overall frame may intentionally lean backward.
“Level” and “vertical” therefore mean different things in this context.
The bottom material support should create a consistent reference.
The carriage guide system should remain straight.
The blade needs to travel square to the material support when making crosscuts.
The complete frame itself may still lean 10 to 15 degrees toward the wall.
How Much Space Does a Wall-Mounted Panel Saw Save?
A vertical panel saw can save a substantial amount of working-floor area compared with cutting full sheets flat on a table saw.
A table saw may require roughly a full sheet length in front of the blade plus another full sheet length behind it.
A vertical panel saw keeps the sheet upright, so its permanent footprint can be much shallower.
You still need adequate side clearance for loading and ripping long material, though.
Do not install one in a tiny corner and assume the vertical orientation eliminates all clearance requirements.
Safety Checks Before the First Cut
Before using the saw, make sure the frame cannot tip.
Confirm the wall restraint is secure.
Make sure all guards are fitted.
Inspect the blade and verify correct installation.
Check carriage locks and stops.
Confirm that the counterbalance works properly.
Make sure nothing behind the frame interferes with movement.
Connect appropriate dust collection.
Finally, perform a test cut on scrap material before processing expensive sheet goods.
Key Takeaways:
- Wall mounting is only complete after the saw is stable, unobstructed, and aligned.
- Check carriage travel and counterbalance clearance before applying power.
- Make a square test cut after installation rather than assuming the saw retained perfect alignment.
FAQs about How to Hang a Panel Saw
How do you hang a panel saw?
Place the vertical panel saw on a stable floor, set the manufacturer’s specified backward lean, support the upper frame against structurally anchored wall blocking, and attach the top to the wall using the approved anti-tip restraint.
Can a panel saw be mounted to a wall?
Yes. Many vertical panel saws can be operated against a solid wall when they do not use a freestanding stand.
Follow the manufacturer’s installation method.
Does the wall support the entire weight of a panel saw?
Normally no.
Most commercial vertical panel saws carry their main weight through the lower frame, rollers, feet, or stand. The wall restraint primarily prevents tipping.
Can I hang a panel saw from drywall?
Do not depend on drywall itself.
Attach mounting blocks and restraints to wall studs, masonry, concrete, or another structural support.
How far should a panel saw lean back?
Many commercial vertical panel saws use approximately a 10- to 15-degree backward lean, but the exact angle is model-specific.
Check your owner’s manual.
How far should a panel saw sit from the wall?
It depends on frame height and lean angle. Some full-size machines at approximately 15 degrees place the lower front frame around 30 inches from the wall, but this is not a universal dimension.
Why does a panel saw lean backward?
The lean allows gravity to keep sheet material resting naturally against the frame and rollers instead of falling toward the operator.
Do I need wall blocking behind a panel saw?
Often, yes.
Blocking allows the structural frame to contact the wall while leaving clearance for pulleys, counterweights, dust hoses, and other rear components.
What kind of wood should I use for wall blocking?
Use sound structural lumber or another appropriate structural material sized for the installation.
The exact dimensions depend on the saw and wall construction.
The blocking itself must be securely anchored to the wall structure.
Can I use drywall anchors for a panel saw?
Ordinary drywall anchors are not an appropriate structural attachment for a large commercial panel saw.
Connect to structural framing or masonry.
Should I bolt the panel saw directly to wall studs?
Only if the saw manufacturer specifies rigid wall bolting.
Many machines instead use blocking and an anti-tip chain or restraint.
Can I use a chain to secure a panel saw?
Some manufacturers specifically use a lightweight chain or security rope as an upper anti-tip restraint for wall-supported installations.
Attach it to structural points and follow your machine’s instructions.
Can I use metal packaging banding?
It is not recommended. Some panel-saw manufacturers specifically warn against using banding as the wall restraint.
Should I anchor the panel saw to the floor?
Some models may require or permit floor anchoring.
Follow the exact manufacturer’s instructions for your saw and stand.
Can a panel saw be freestanding?
Yes, if it has an approved fixed, folding, tripod, or integrated stand designed for that machine.
Do I need to square the saw after mounting it?
Yes.
Check carriage alignment and make a test cut to verify that the blade travels square to the material support.
Why is my panel saw cutting out of square after mounting?
Possible causes include a twisted frame, uneven support rollers, incorrect carriage alignment, improper saw-head adjustment, or an unstable installation.
Follow the manufacturer’s squaring procedure.
Can one person install a panel saw?
Small DIY saws may be manageable, but full-size commercial vertical panel saws should generally be positioned with at least one helper or suitable lifting equipment.
Can the panel saw touch the wall?
The designated frame areas may contact wall blocking, but moving rear components such as counterweights, pulleys, and dust equipment need adequate clearance.
Where should I install a panel saw in my shop?
Choose a stable wall with structural anchoring points, adequate side and front clearance, a suitable electrical supply, room for dust collection, and no heavy traffic through the cutting area.
Can I build my own wall-mounted panel saw?
Yes, but the wall structure, guide rails, carriage, sheet support, blade guarding, and anti-tip design must all be engineered carefully for safe and accurate operation.
Conclusion
How to hang a panel saw safely starts with understanding that a full-size vertical panel saw usually is not literally suspended from the wall. The machine’s main weight should normally remain supported by its lower frame, rollers, feet, or approved stand, while the wall connection stabilizes the upper frame and prevents tipping.
Choose a solid, level location with enough room for sheet loading, carriage movement, ripping long panels, electrical service, and dust collection.
If your saw is designed to operate against a wall, install structural blocking at the manufacturer-specified upper frame locations. The blocking should keep pulleys, counterweights, cables, and dust components from contacting the wall.
Set the correct backward lean. Many commercial machines operate around 10 to 15 degrees from vertical, but your model’s specification should determine the actual angle.
Once the frame is properly positioned, secure its upper section to structural wall framing using the approved chain, cable, rope, bracket, or other anti-tip system. Never rely on drywall alone, and do not substitute packaging banding for a proper restraint.
After mounting, move the unplugged carriage through its complete travel, verify counterbalance clearance, check all fasteners, and confirm that the machine is stable.
Finally, check the saw for square and make a test cut before beginning regular work.
A properly hung panel saw should feel solid, allow panels to sit naturally against the frame, and remain stable without using the wall connection to carry the entire machine. That combination gives you the space-saving advantage of a vertical saw while maintaining the alignment and safety needed for accurate sheet-goods cutting.