How to Cut Laminate Flooring With a Circular Saw Safely
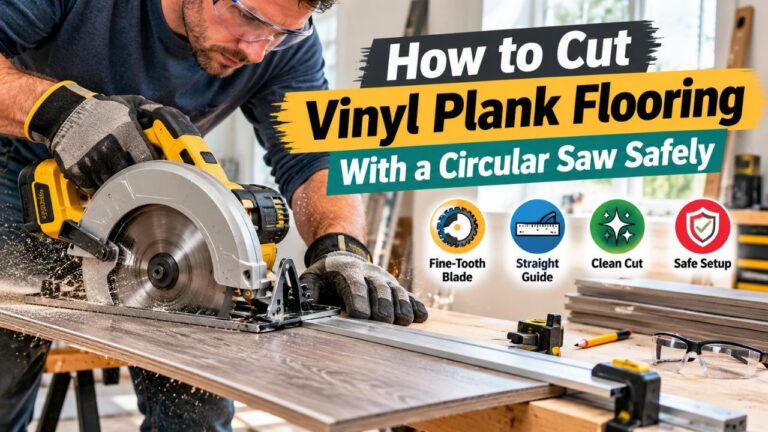
To learn how to cut laminate flooring with a circular saw, mark the cut accurately, place the plank with the finished face down, install a fine-tooth carbide blade, set the blade slightly deeper than the flooring, support the plank securely, and guide the saw steadily along the cut line without forcing it. For the cleanest edge, use a sharp blade with a high tooth count and control both sides of the plank so they cannot move as the cut finishes.
A circular saw is one of the fastest tools for cutting laminate flooring, particularly when you need to make straight crosscuts or long rip cuts. It works well for shortening planks at the end of a row, trimming the width of the first or last row, and cutting flooring around straight boundaries.
Laminate flooring can be surprisingly hard on saw blades. Its wear layer and dense fiberboard core are more abrasive than ordinary softwood, and a dull or coarse blade can leave chipped edges. The fine dust produced during cutting is another reason proper setup and personal protection matter.
The good news is that you do not need a specialty flooring saw for every laminate project. With the correct blade and technique, a standard circular saw can produce accurate cuts that are easily hidden beneath baseboards, quarter-round, or transition trim.
In this guide, I’ll explain how to cut laminate flooring with a circular saw step by step, which blade works best, which side of the plank should face up or down, how to prevent chipping, how to make rip and crosscuts, and which mistakes to avoid.
Can You Cut Laminate Flooring With a Circular Saw?
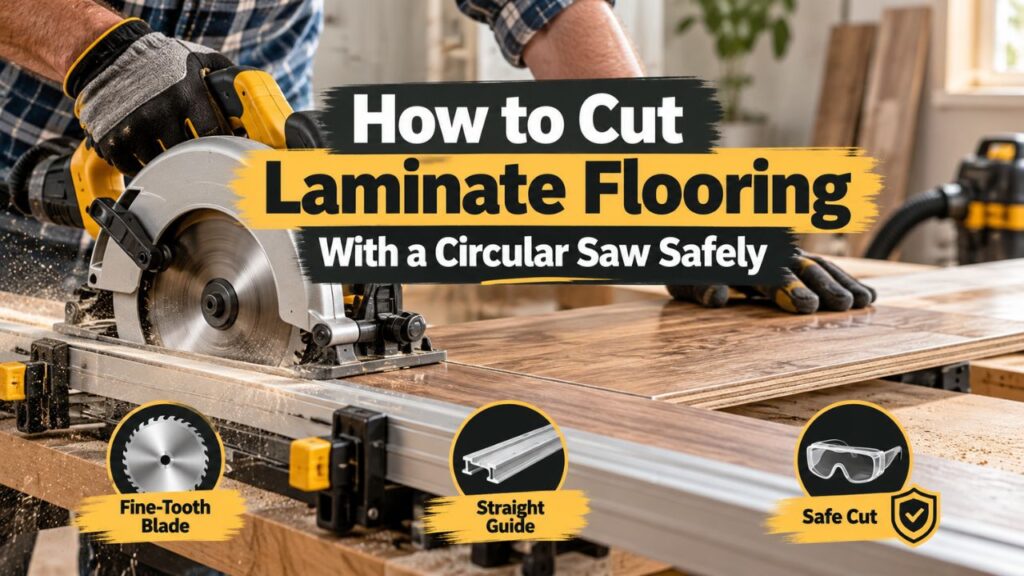
Yes. A circular saw is an excellent choice for many straight cuts in laminate flooring.
It is particularly useful when you have a large number of planks to shorten or need to rip long boards narrower.
Compared with a hand saw, it works much faster. Compared with a jigsaw, it is generally easier to keep straight over long cuts.
A circular saw is best suited to straight lines, however.
If you need to cut an irregular shape around a door frame, pipe, vent, or curved obstacle, a jigsaw or oscillating multi-tool may be easier to control.
For most flooring installations, I would use a circular saw for the straight cuts and keep a jigsaw available for notches and irregular shapes.
What Cuts Can a Circular Saw Make?
A circular saw works well for both major types of laminate cuts.
A crosscut goes across the width of a plank and makes it shorter.
A rip cut travels along the length of a plank and makes it narrower.
Crosscuts are common at the end of each flooring row. Rip cuts are commonly needed along the first and final rows where the flooring width needs to be adjusted to fit the room.
Key Takeaways:
- A circular saw works very well for straight laminate cuts.
- It can make both crosscuts and long rip cuts.
- A jigsaw is usually better for curves and complicated notches.
- A sharp fine-tooth blade is important because laminate is abrasive.
What Circular Saw Blade Is Best for Laminate Flooring?
Blade choice has a major effect on cut quality.
I recommend a fine-tooth carbide-tipped blade designed for clean cuts in plywood, laminate, melamine, or finish materials.
For a typical 7 1/4-inch circular saw, a blade with approximately 40 to 60 teeth is a useful starting point. A 60-tooth finish blade can provide an especially clean edge when the blade is sharp and the saw is properly guided.
A very coarse framing blade may technically cut laminate, but it is not my preferred option.
A framing blade commonly has relatively few large teeth designed to cut construction lumber quickly. Those aggressive teeth can leave the decorative laminate layer more chipped than a fine-finish blade.
Why Carbide Teeth Matter
Laminate flooring contains a hard wear surface over a dense wood-fiber core.
That combination can dull ordinary steel teeth quickly.
Carbide-tipped blades resist wear better and are therefore a much more practical choice when cutting multiple planks.
Even carbide eventually becomes dull, especially during a large flooring job.
If the cut quality starts deteriorating, the saw requires more force than before, or the blade begins burning the material, inspect the blade rather than immediately blaming your technique.
Do You Need a Special Laminate Blade?
Not necessarily.
There are blades marketed specifically for laminate and composite flooring, and they can perform very well.
However, a quality fine-tooth carbide blade designed for laminate, melamine, plywood, or finish cutting is often sufficient.
The important specifications are tooth geometry, tooth count, blade quality, and compatibility with your circular saw.
Always use the correct blade diameter and arbor size specified by the saw manufacturer.
Which Side of Laminate Flooring Should Face Up When Cutting?
With a conventional handheld circular saw, I recommend placing the finished decorative side face down whenever practical.
The reason is the direction in which the blade teeth move through the material.
On a standard circular saw, the blade enters the material from the underside and exits through the top.
Chipping is often more noticeable where the teeth exit.
By placing the attractive finished face downward, you put the cleaner side of the cut where it matters most.
Is Face Down Always Necessary?
Not always.
A very sharp fine-tooth blade can produce an acceptable edge on both faces, particularly when the cut will eventually be hidden under trim.
Sometimes the plank layout also makes it easier to measure and mark from the finished side.
In those cases, use painter’s tape or transfer the measurement carefully to the underside before cutting.
For visible cuts, however, finished-side-down is my preferred setup when using a standard circular saw.
How to Cut Laminate Flooring With a Circular Saw Step by Step
A clean cut depends more on preparation than speed.
Before starting, make sure you understand exactly which portion of the board is waste.
Laminate planks often have tongue-and-groove or click-lock edges, and cutting the wrong end or side can make the plank unusable.
1. Measure the Required Plank Length
Measure the space where the plank will be installed.
Remember that floating laminate flooring normally requires an expansion gap around walls and other fixed objects. Use the flooring manufacturer’s specified clearance rather than cutting the plank tightly against the wall.
Transfer the required length to the plank.
Measure twice before cutting.
When working through multiple rows, it is surprisingly easy to cut from the wrong end and remove the locking profile you needed.
2. Mark the Cut Line Clearly
Use a pencil and straightedge or square to create an accurate line.
For a crosscut, a speed square is convenient because it establishes a 90-degree line quickly.
For a rip cut, mark the required width at several points along the plank and connect those marks with a long straightedge.
If the finished surface is facing down during cutting, transfer your measurements to the backside of the plank.
3. Apply Painter’s Tape if Chipping Is a Concern
Painter’s tape across the cut line can help support the decorative surface and may reduce small chips.
Place the tape over the cut area, remark the line on top if necessary, and cut through both the tape and plank.
Do not expect tape to compensate for a badly dull or inappropriate blade.
Think of it as additional protection rather than a substitute for proper blade selection.
4. Support the Laminate Plank
Place the plank on a stable work surface.
A pair of sawhorses can work well, but the plank needs enough support that it does not flex dramatically.
One of the safest methods is to place the flooring on a sacrificial sheet of rigid foam insulation or another appropriate cutting support so the circular saw can pass through the plank without the offcut dropping unexpectedly.
Whatever method you use, make sure the blade will not contact the workbench, concrete floor, metal sawhorse, or other object underneath.
5. Set the Circular Saw Blade Depth
Adjust the saw so the blade extends only slightly below the laminate flooring.
Approximately 1/8 to 1/4 inch below the plank is usually enough for a straightforward cut.
There is normally no reason to expose several inches of blade underneath a thin flooring plank.
A reasonable blade depth improves control and reduces unnecessary exposed blade.
6. Position the Finished Face Down
Place the decorative surface toward the support and the underside facing you.
Double-check the location of the tongue and groove before committing to the cut.
It is easy to accidentally mirror a measurement when flipping the board.
7. Align the Circular Saw
The edge of the saw’s base plate is not necessarily the cutting line.
Circular saws typically have blade-location marks or notches on the shoe.
Position the saw so the blade itself will cut on the waste side of your pencil line.
Remember that the blade removes material equal to the width of its kerf.
If you center the blade on an important measurement line, the finished board can end up slightly shorter or narrower than intended.
8. Start the Saw Before Entering the Flooring
Hold the saw securely with the blade clear of the plank.
Start the motor and allow the blade to reach full speed.
Then move the saw forward into the flooring.
Do not start the saw while the teeth are already pressed against the laminate.
9. Guide the Saw Smoothly Through the Cut
Move at a steady rate.
Do not push hard.
A sharp blade should cut the flooring without excessive force.
Keep the saw shoe flat against the material and maintain a consistent direction.
If you are making a long rip cut, use a straightedge guide or saw guide rather than trying to follow a pencil line freehand over several feet.
10. Support the Offcut as the Cut Finishes
The waste piece should not drop, twist, or pinch the blade near the end of the cut.
Support it without placing your hand in the blade path.
Complete the cut at the same steady feed rate rather than rushing through the final inch.
Release the trigger after the blade clears the workpiece and allow the blade to stop before setting the saw down.
Key Takeaways:
- Measure carefully and identify the waste side before cutting.
- Place the finished face down for cleaner results with a conventional circular saw.
- Expose only enough blade to pass slightly through the flooring.
- Start at full blade speed and feed the saw steadily without forcing it.
How to Make a Clean Crosscut in Laminate Flooring
Crosscuts are the most common circular-saw cuts during laminate installation.
They shorten a plank to fit between the previous board and the wall.
The easiest way to improve accuracy is to use a square as a guide.
Mark the required length, position a speed square or straightedge so the saw shoe can run against it, and clamp the guide if necessary.
This prevents the saw from wandering away from the line.
If the cut edge will disappear underneath baseboard or quarter-round, tiny cosmetic chips are usually irrelevant as long as the plank is structurally intact and the correct expansion gap remains.
That does not mean poor technique is acceptable, but it means you do not need cabinet-grade perfection on every hidden cut.
How to Rip Laminate Flooring With a Circular Saw
A rip cut is more demanding because the saw must travel along the length of the plank.
This is commonly required when the final row next to a wall is too narrow for a full-width board.
Start by measuring the gap between the previously installed row and the wall at several points.
Walls are not always perfectly straight.
Subtract the expansion clearance specified for the flooring.
Transfer those measurements to the plank.
Use a Straightedge Guide
For a long rip, I strongly recommend using a guide.
A clamped straight board, level, factory-edge plywood strip, or compatible circular-saw guide can work.
Measure the distance between the blade and the edge of the saw shoe so you can position the guide correctly.
Then keep the shoe firmly against the guide throughout the cut.
Trying to freehand a long rip cut often creates a wavy edge.
Even if the edge is hidden beneath baseboard, excessive variation can interfere with the required expansion spacing or make installation unnecessarily difficult.
Watch the Locking Edge
The final row normally needs one specific click-lock profile preserved so it can connect to the previous row.
Make sure you rip material from the correct side of the plank.
If you remove the required tongue or groove, the plank may no longer lock into the floor.
How to Prevent Chipping When Cutting Laminate
Laminate chipping is largely a combination of blade quality, blade direction, and cutting technique.
The first improvement should always be a sharp fine-tooth blade.
Next, orient the finished face appropriately.
Painter’s tape can provide additional surface support.
A steady feed rate also matters.
If you feed too quickly, the teeth hit the surface aggressively. If you move extremely slowly with a dull blade, excessive heat can also degrade the edge.
Score the Cut Line for Extra-Clean Work
For a particularly visible edge, you can lightly score the decorative surface along the cut line with a sharp utility knife and straightedge.
This creates a controlled break line in the surface layer.
Be careful with this technique because utility knives can slip, and scoring is unnecessary for most cuts that will be hidden.
If you use it, keep your hands out of the blade path and make several light passes rather than forcing the knife deeply in one stroke.
Use a Zero-Clearance Support Concept
Supporting the flooring immediately beside the cut reduces vibration.
The plank should not be bouncing while the blade moves through it.
A rigid sacrificial backing surface can help support the laminate fibers near the cut and improve control.
How to Cut Laminate Flooring Without a Circular Saw Chipping the Top
If you must cut with the finished face up, chipping control becomes more important.
Perhaps the line is easier to see from the top, or the plank shape makes flipping inconvenient.
In that case, use the finest suitable blade you have, apply painter’s tape, support the plank fully, and use a guide to keep the cut smooth.
You may also score the surface where appropriate.
However, if there is no strong reason to keep the decorative surface facing up, turning it face down is usually the simpler solution.
How to Cut Laminate Flooring Around Doorways
A circular saw is useful for the straight portions of doorway cuts, but it cannot easily make a clean inside corner.
If the plank needs an L-shaped or U-shaped notch, mark the complete shape first.
You can use the circular saw for accessible straight sections, stopping before the blade overcuts beyond the corner.
Then finish the corner with a jigsaw, oscillating multi-tool, or hand saw.
Do not force the circular blade farther simply to complete the corner. Because a circular blade is round, its hidden lower portion extends beyond the point where the blade appears to meet the top surface.
This can create a significant unwanted overcut.
For complicated door-jamb fitting, a jigsaw is often the more practical tool for the flooring itself.
How to Cut the First and Last Rows
The first and final flooring rows frequently require rip cuts because room width rarely works out to an exact number of full planks.
Planning before installation helps.
Measure the total room width and determine approximately how wide the first and last rows will be.
A very narrow final strip can be difficult to install and may look unattractive.
Depending on the flooring manufacturer’s layout recommendations, you may choose to rip the first row narrower so the last row is wider.
A circular saw with a straight guide is excellent for these long rip cuts.
Cutting Laminate Flooring Lengthwise Without Wandering
The key is not attempting to steer the saw by eye.
Even experienced users can drift during a long narrow rip.
Clamp a guide parallel to your intended line.
Before turning on the saw, make a dry pass with the saw unplugged to confirm that the blade will follow the correct side of the mark and that the motor housing will not hit a clamp.
Then make the cut in one steady motion.
Avoid stopping halfway unless necessary.
Restarting inside an existing kerf can sometimes leave a small step or burn mark.
How to Support Laminate Flooring While Cutting
Poor support can turn an easy cut into a dangerous one.
Laminate planks are relatively thin and can flex.
If one side of the cut is unsupported, the piece can bend downward as you approach the end.
That movement can pinch the blade.
Blade pinching can contribute to kickback.
Support both the main workpiece and waste side while still leaving an unobstructed path for the blade.
A large sacrificial foam sheet underneath the work is especially convenient because the blade can cut slightly into the foam without the plank collapsing.
Key Takeaways:
- Long rip cuts are much easier with a straightedge guide.
- Keep the locking profile you need when narrowing a plank.
- Good support reduces vibration and blade pinching.
- Avoid allowing the offcut to fall while the blade is still inside the flooring.
Circular Saw Safety When Cutting Laminate Flooring
A circular saw is powerful enough to cause severe injury, so the flooring cut should be set up before the trigger is touched.
Wear eye protection.
Laminate produces very fine dust, so appropriate respiratory protection is also important. Whenever practical, cut outdoors or use effective dust extraction.
Hearing protection is appropriate when making repeated power-saw cuts.
Keep both hands where the saw manufacturer intends them to be during operation.
Never place a hand underneath the workpiece to support it while cutting.
Watch the Power Cord
With a corded circular saw, route the cord behind you and away from the cutting path.
Do not allow it to cross underneath the plank.
For a cordless saw, make sure the battery is adequately charged before beginning a precision cut. A saw slowing unexpectedly midway through dense material can make control more difficult.
Do Not Disable the Blade Guard
The lower blade guard should move freely and return automatically.
Do not tie it open or otherwise defeat its safety function.
Before each work session, check that the guard closes properly.
Avoid Kickback
Kickback can occur when the blade becomes pinched or the saw is twisted in the cut.
Support the workpiece so the kerf does not close around the blade.
Maintain a straight cutting path and do not force the saw sideways.
If the blade binds, release the trigger and hold the saw steady until the blade stops. Do not pull a spinning blade backward out of the material.
Laminate Flooring Dust and Why It Matters
Cutting laminate creates fine airborne dust from the dense fiberboard core and surface materials.
This is not something I would intentionally breathe.
Use suitable respiratory protection and good ventilation.
Cutting outside can make cleanup considerably easier, but consider where the dust will travel.
If you are working indoors, connect dust collection when your circular saw supports it and vacuum the work area frequently.
Do not use your hands to brush piles of fine dust toward a running saw.
Stop the tool before cleaning around the work surface.
Can You Use a 24-Tooth Blade for Laminate Flooring?
It will cut the material, but I would not choose it when a cleaner blade is available.
A 24-tooth blade is commonly designed for fast construction cuts.
It removes material quickly but is more likely to leave noticeable chipping in a brittle laminated surface.
For flooring, a 40- to 60-tooth carbide blade is generally a better balance between cutting speed and edge quality.
If all of your cut edges will be hidden, a coarser blade may still get the job done, but you should expect a rougher result.
Is a 60-Tooth Blade Good for Laminate Flooring?
Yes. A sharp 60-tooth carbide finish blade is one of my preferred choices for a standard 7 1/4-inch circular saw cutting laminate flooring.
It provides many small cutting edges and generally leaves a cleaner surface than a coarse framing blade.
However, more teeth are not automatically better without limit.
Extremely fine blades can produce more heat if you feed too slowly or if the blade becomes dull.
Use a blade specifically rated for your saw and appropriate for composite or finish materials.
Circular Saw vs. Jigsaw for Laminate Flooring
A circular saw and jigsaw complement each other.
The circular saw is better for long, straight cuts.
The jigsaw is better for irregular shapes.
| Cutting Task | Circular Saw | Jigsaw |
| Straight crosscut | Excellent | Good |
| Long rip cut | Excellent with guide | Fair |
| Curved cut | Poor | Excellent |
| Pipe notch | Poor | Excellent |
| Doorway notch | Limited | Excellent |
| Fast repeated cuts | Excellent | Slower |
| Very narrow detailed cut | Limited | Better |
For a complete laminate flooring installation, having both tools is convenient.
If I could choose only one for straight plank sizing, I would choose the circular saw.
Circular Saw vs. Miter Saw for Laminate Flooring
A miter saw is extremely convenient for repeated crosscuts.
Set the plank against the fence, align your mark, and lower the blade through the flooring.
For installing a large room, this can be faster than positioning a circular saw for every end cut.
The limitation is rip cutting.
A miter saw cannot rip a full plank lengthwise.
A circular saw therefore provides more versatility if you need one power saw for both crosscuts and long rips.
Circular Saw vs. Flooring Cutter
A manual laminate flooring cutter can be extremely convenient because it produces very little airborne dust and does not require electricity.
It is excellent for routine crosscuts on compatible flooring.
However, flooring cutters have limitations on plank thickness, material type, and cut style.
They are also less useful for long rips and unusual cuts.
For a DIY installation, a circular saw remains one of the most versatile tools because you may already own one and it handles a wide range of plank dimensions.
Common Mistakes When Cutting Laminate Flooring With a Circular Saw
One of the most common mistakes is using a dull framing blade.
The saw may still get through the flooring, but excessive chipping and roughness can make the work look careless.
Another mistake is forgetting about blade kerf.
If you cut directly down the center of your measurement line, you may remove part of the finished dimension.
Support is another frequent problem. Letting the waste piece hang in the air can pinch the blade as the cut progresses.
Cutting too fast can create rough edges, while forcing a dull blade increases heat and reduces control.
It is also easy to forget which edge contains the locking profile you need. Before every cut, identify the waste section and make sure the correct tongue or groove remains on the finished plank.
Finally, do not eliminate the flooring expansion gap just because you can make an extremely precise cut. Floating floors need the clearance specified by the manufacturer so they can respond to normal dimensional changes.
How to Make Cutting Faster During a Large Installation
Efficiency comes from organization rather than rushing the saw.
Set up a dedicated cutting station near the room but far enough away that dust does not cover the installation area.
Keep your square, pencil, tape measure, straightedge, and saw together.
When possible, measure several planks before walking to the saw.
Label complicated pieces so you remember their orientation.
For repeated cuts of the same length, a stop or consistent measuring system can save time, provided every plank truly requires the same dimension.
The goal is to reduce unnecessary measuring and walking while keeping the actual sawing process controlled.
FAQs about How to Cut Laminate Flooring With a Circular Saw
Can you cut laminate flooring with a circular saw?
Yes. A circular saw is an excellent tool for straight crosscuts and rip cuts in laminate flooring when fitted with an appropriate fine-tooth carbide blade.
What blade should I use to cut laminate flooring with a circular saw?
A fine-tooth carbide blade intended for laminate, melamine, plywood, or finish cutting is a good choice. For a typical 7 1/4-inch saw, approximately 40–60 teeth works well for many flooring jobs.
Is a 60-tooth circular saw blade good for laminate?
Yes. A sharp 60-tooth carbide blade generally produces a clean edge and is an excellent choice for laminate flooring.
Which side of laminate flooring should face up when using a circular saw?
With a conventional handheld circular saw, I normally place the finished decorative face down because blade exit can cause more chipping on the upper surface.
How do you cut laminate flooring without chipping it?
Use a sharp fine-tooth blade, place the finished surface down, support the plank well, maintain a steady feed rate, and consider using painter’s tape or scoring for particularly visible cuts.
Can I use a 24-tooth blade for laminate flooring?
It can cut laminate, but it is more likely to chip the finished surface than a 40- to 60-tooth finish blade. I would use a finer blade when available.
How deep should I set the circular saw blade?
Set it so the teeth extend only slightly below the flooring, generally around 1/8 to 1/4 inch beyond the bottom of the plank.
Can I rip laminate flooring lengthwise with a circular saw?
Yes. Use a straightedge guide to keep the long cut accurate and make sure you remove material from the correct edge so the necessary locking profile remains.
Do I need painter’s tape when cutting laminate?
No, but it can help reduce small chips. A sharp appropriate blade and correct plank orientation make a larger difference.
Can I cut laminate flooring face up?
Yes, but the finished surface may be more prone to chipping with a conventional circular saw. Use a fine blade, tape, proper support, and careful technique if the face must remain up.
Can I cut laminate flooring with a jigsaw instead?
Yes. A jigsaw is especially useful for curves, vents, pipes, and irregular notches. A circular saw is usually faster and straighter for long cuts.
Is a miter saw better than a circular saw for laminate flooring?
A miter saw is very convenient for repeated crosscuts. A circular saw is more versatile because it can also make long rip cuts.
How do I cut the last row of laminate flooring?
Measure the remaining width at several points, subtract the manufacturer’s required expansion gap, mark the plank, and make a lengthwise rip cut using a straight guide.
Why does my laminate chip when I cut it?
Common causes include a coarse or dull blade, placing the decorative surface on the wrong side for the saw’s cutting direction, poor support, excessive feed speed, or vibration.
Should I cut laminate flooring indoors?
You can, but laminate cutting produces fine dust. Cutting outdoors or using effective dust collection is preferable when practical, along with suitable eye, hearing, and respiratory protection.
Conclusion
The key to how to cut laminate flooring with a circular saw is using the right blade, supporting the plank correctly, and making a controlled cut rather than trying to force the saw through the material.
For most installations, I recommend a sharp 40- to 60-tooth carbide blade, with a 60-tooth finish blade being an especially good option when clean edges are important.
Place the laminate with its finished decorative surface face down when using a conventional handheld circular saw. This keeps the cleaner side of the blade action where it is most visible. Painter’s tape can provide additional protection when chipping is a concern.
Set the blade only slightly deeper than the plank, support both sides of the cut, allow the motor to reach full speed, and move the saw steadily through the flooring.
For crosscuts, a square or straight guide makes accuracy much easier. For long rip cuts, I strongly recommend clamping a straightedge and guiding the saw shoe against it rather than attempting to follow a line freehand.
A circular saw is not the perfect tool for every flooring cut. Keep a jigsaw or oscillating tool available for curves, doorways, pipes, and complicated notches.
Most importantly, wear appropriate eye and respiratory protection, control laminate dust, keep your hands away from the blade path, and never allow the offcut to pinch the blade.
With those basics in place, a circular saw is one of the fastest and most versatile tools for cutting laminate flooring cleanly and accurately throughout an installation.