How to Cut Laminate Flooring Lengthwise Without a Saw Safely
The best way to learn how to cut laminate flooring lengthwise without a saw is to use a manual laminate flooring cutter that specifically supports rip cuts. A compatible flooring cutter can shear through many laminate planks without electricity, sawdust, or a conventional saw. However, not every flooring cutter can make long lengthwise cuts, and standard HDF-core laminate generally should not be treated like flexible vinyl that can simply be scored with a utility knife and snapped.
A lengthwise cut, also called a rip cut, is usually needed along the first or last row of flooring, beside an uneven wall, around cabinets, or whenever a full-width plank will not fit. The challenge is keeping that long cut straight while preserving enough of the click-lock edge to install the plank correctly.
Manufacturers commonly expect laminate planks to be cut during installation. Pergo, for example, offers a manual laminate cutter designed to cut laminate without electricity or airborne cutting dust, and its technical information specifically lists lengthwise cutting as possible.
In this guide, I’ll explain the best no-saw method, how to make an accurate lengthwise cut with a manual flooring cutter, when a utility knife can and cannot work, how to handle the first and last rows, how to account for wall irregularities and expansion space, and what to do if your cutter cannot rip an entire plank.
How to Cut Laminate Flooring Lengthwise Without a Saw
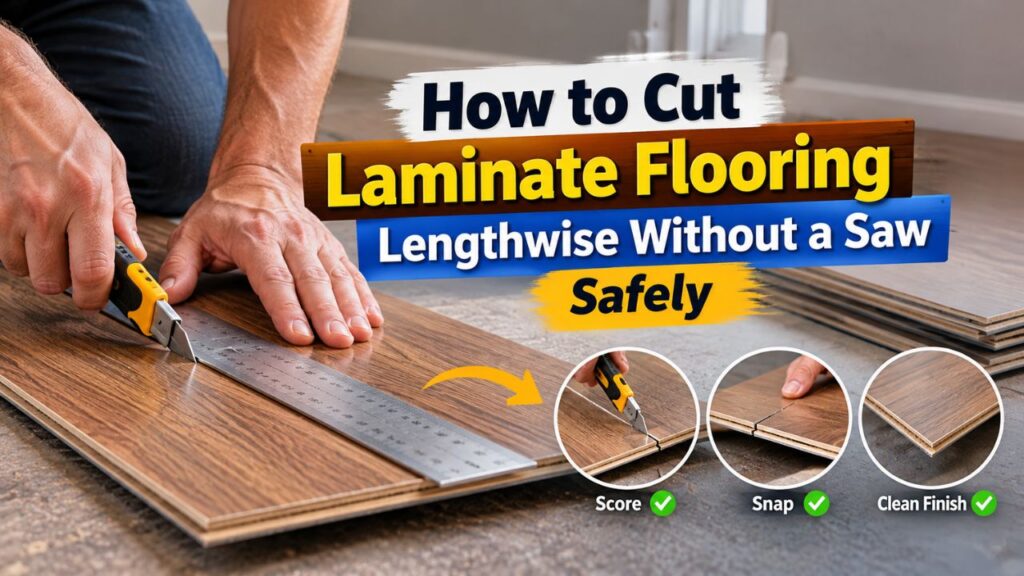
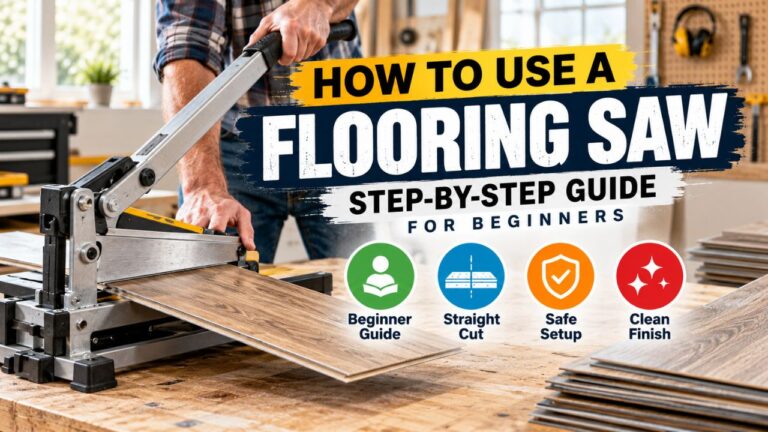
For most rigid laminate flooring, the practical no-saw method is a manual laminate or multi-floor cutter rated for your plank’s thickness and capable of lengthwise cutting.
This type of tool works by using a long handle to force a hardened blade through the plank. Instead of a rotating blade removing material as sawdust, the cutter shears through the flooring.
That makes it useful when you want to work indoors without the noise and dust produced by many power saws.
The basic process is:
- Measure the width you need.
- Transfer the cut line to the laminate plank.
- Verify which side of the plank must retain its tongue or groove.
- Position the plank in a compatible manual flooring cutter.
- Align the cutting blade precisely with your mark.
- Work along the plank until the full lengthwise cut is complete.
- Test-fit the plank before installing it permanently.
The important limitation is compatibility. Some flooring cutters are designed primarily for crosscuts, while others can perform long rip cuts. Always check the tool’s instructions before buying or renting one.
Best No-Saw Options Compared
| Method | Works for Standard Laminate? | Good for Long Rip Cuts? | My Recommendation |
| Lengthwise-capable laminate cutter | Yes, when rated for the plank | Yes | Best option |
| Multi-floor guillotine cutter | Depends on design | Some models | Good if rip cutting is supported |
| Utility knife and snap | Usually not for HDF laminate | Poor | Avoid unless flooring manufacturer allows it |
| Router with straight bit | Technically yes | Yes | Possible, but dusty and more complicated |
| Chisel | Only for tiny adjustments | No | Not for full rip cuts |
| Aviation snips | No | No | Not suitable |
| Oscillating tool | Can cut laminate | Technically a powered cutting blade | Not truly a saw-free approach |
For someone specifically trying to avoid a saw, I recommend a proper manual flooring cutter rather than trying to improvise with a knife or chisel.
Why Laminate Flooring Is Hard to Cut With a Utility Knife
The word “laminate” causes confusion because several flooring products look similar but have very different cores.
Traditional laminate flooring commonly uses a dense fiberboard core with a decorative layer and wear surface on top. That rigid core behaves much more like engineered wood sheet material than flexible vinyl.
A utility knife can score the decorative surface, but it usually cannot cut deeply enough through a typical rigid laminate plank to create a clean, controlled snap.
Trying to bend the plank after scoring can produce a jagged break, damage the click-lock edge, or crack the wear layer beyond the intended line.
That technique is much better suited to certain types of thin vinyl flooring when the manufacturer specifically permits scoring and snapping.
Laminate vs. Vinyl Plank Matters
Luxury vinyl plank, often called LVP, is not the same as traditional laminate.
Some vinyl planks can be scored repeatedly with a knife and snapped along the line because their core is relatively flexible.
A rigid HDF-core laminate plank is substantially harder and more brittle.
If you are unsure which flooring you have, check the packaging or installation instructions before trying the score-and-snap method.
Key Takeaways:
- A manual laminate cutter is the best true saw-free option for most rigid laminate.
- Do not assume laminate can be scored and snapped simply because some vinyl planks can.
- Verify that the cutter supports long rip cuts and your plank thickness.
Why You Might Need to Cut Laminate Lengthwise
Most laminate installations require more than shortening plank ends.
Rooms are rarely an exact multiple of the plank width. Eventually, you usually reach a wall where a full-width plank cannot fit.
That final row must therefore be narrowed along its entire length.
You may also decide to rip the first row so the final row does not become excessively narrow.
This is an important planning step.
If you start with full-width planks without measuring the room, you could reach the opposite wall and discover that the last row needs to be an awkwardly thin strip.
Some installation guidance recommends calculating the first and last rows before installation so narrow edge rows can be distributed more evenly. Home Depot, for example, advises planning both edges if the calculated final row would be very narrow.
Lengthwise cutting is also useful when a wall is not perfectly straight.
A rip cut does not always need to be parallel with the factory edge. If the wall gradually moves inward or outward, you may need to transfer that irregular shape onto the plank.
Measure Before You Cut
Accuracy starts before the flooring ever reaches the cutter.
Measure the gap between the installed flooring and the wall at several locations along the plank.
Do not assume the wall is straight.
A wall may vary by 1/4 inch or more over several feet, especially in older houses.
You also need to account for the expansion space specified by the flooring manufacturer.
Floating laminate floors should not normally be jammed tightly against fixed walls, cabinets, pipes, columns, or other vertical surfaces. The exact required perimeter gap varies by product, so follow the installation instructions supplied with your flooring rather than relying on one universal measurement. Different published installation guides use different minimum gaps, which reinforces the need to follow your specific product.
A Simple Measurement Example
Suppose the space from the installed plank to the wall measures 4 inches.
If your flooring instructions require a 3/8-inch perimeter gap, the finished plank width at that point would be:
4 inches − 3/8 inch = 3 5/8 inches
Repeat that measurement at the other end of the plank.
If you measure 3 7/8 inches there, your cut line should taper rather than remain perfectly parallel.
That is why measuring both ends—and sometimes the middle—is worthwhile.
Which Edge of the Laminate Should You Cut?
Before marking anything, determine which click-lock edge must remain.
Laminate flooring normally has a tongue-and-groove or proprietary locking profile along its edges.
If you accidentally remove the edge needed to connect with the previous row, the plank may become unusable.
For a typical last-row installation, you normally preserve the locking edge that connects to the previous plank and remove material from the wall-facing side.
For a first-row rip cut, the required edge depends on the direction of your installation system.
Always dry-fit a plank before cutting if you are uncertain.
Place it in its intended orientation and identify which edge engages with the adjoining row. Mark the wall side with painter’s tape or pencil so you do not accidentally cut the wrong side.
Pro Tip: Before cutting an entire row, practice on an offcut. Confirm that your cutter produces a clean edge and that you understand which side of the plank must stay intact.
How to Mark a Straight Lengthwise Cut
For a parallel rip cut, measure from the edge that must remain intact.
Make a mark near each end of the plank.
If both measurements are identical, connect the marks with a long straightedge.
A level, straight board, metal ruler, drywall square, or flooring straightedge can work.
Do not rely on visually following the decorative grain.
Laminate wood patterns often contain intentionally irregular grain lines that are not parallel to the plank edge.
Marking a Tapered Cut
If the wall is crooked, take measurements at the beginning and end of the plank and at one or more intermediate points.
Subtract the required expansion gap from each measurement.
Transfer those dimensions to the plank and connect the points smoothly.
This creates a line that follows the wall while maintaining the necessary gap.
For very irregular walls, scribing is even better.
How to Scribe Laminate Flooring to an Uneven Wall
Scribing transfers the actual shape of a wall onto the plank.
Place the laminate plank where it will eventually sit, overlapping the installed flooring as needed.
Use a compass or scribing tool set to the required offset.
Run the reference side of the tool along the wall while the pencil transfers the wall profile to the plank.
The resulting line follows bumps, curves, and irregularities more accurately than measuring only the two ends.
Remember that the final position still needs the manufacturer’s required expansion space.
If your scribing method directly copies the wall profile, adjust the offset accordingly.
Once marked, use the flooring cutter to remove material gradually along the line.
A straight manual cutter is easiest with straight or gently tapered cuts. Very complex curves are much harder to produce without a saw or another powered cutting tool.
How to Use a Manual Laminate Cutter for a Lengthwise Cut
A crosscut requires only one action across the width of the plank. A rip cut is different because the cut can extend several feet.
Whether your cutter can make that cut depends on its design.
Pergo’s professional laminate cutter, for example, specifically lists lengthwise cutting among its capabilities.
If your cutter supports the procedure, use the following approach.
1. Support the Entire Plank
Long laminate planks can flex while you work.
Support the free end with a stable surface or the support supplied with the cutter.
Keep the plank level.
If it hangs downward significantly, the cut can become harder to control.
2. Align the First Part of the Cut
Position the blade directly on your marked line.
Make sure the decorative face is oriented according to the cutter manufacturer’s instructions.
Unlike a saw, a flooring cutter may compress the edge slightly as it shears through the plank. This is normally acceptable when the cut edge will be hidden by baseboard or quarter-round.
3. Make the First Cut Slowly
Operate the lever smoothly rather than slamming it downward.
Let the tool’s mechanical advantage do the work.
Keep your fingers completely outside the cutter’s blade path.
4. Advance the Plank
After the first section is cut, reposition the plank so the next portion of the line aligns with the blade.
Continue along the length.
The previous cut should guide your placement, but continue checking against the marked line.
5. Keep the Waste Side Supported
A long narrow strip can break prematurely if it is allowed to hang unsupported.
Support both sides until the cut is nearly finished.
6. Inspect the Edge
Minor roughness on a wall-facing cut is usually harmless because trim will cover it.
However, remove loose fibers or high spots that could prevent the plank from maintaining the required expansion space.
Do not aggressively sand the locking edge.
7. Test-Fit Before Installation
Put the plank in position without forcing it into place.
Check the gap along the entire wall.
If one section is too wide, mark the interference point and trim only the amount necessary.
Can Every Laminate Cutter Rip Planks Lengthwise?
No.
This is one of the most important limitations of the no-saw method.
Some manual cutters have a blade and frame arrangement intended primarily for cutting across the width of the plank.
They may be excellent for shortening boards but awkward or physically incapable of feeding a long plank through for a rip cut.
Other models explicitly support lengthwise cutting.
Before renting or buying a cutter, check:
the maximum plank thickness, cutting width, maximum material type, and whether the manufacturer permits rip or lengthwise cuts.
Do not assume that a product called a “laminate cutter” can make every type of laminate cut.
Even flooring compatibility can vary. Some flooring manufacturers recommend conventional fine-tooth saws for particular laminate products rather than manual cutters, so the flooring instructions should take priority over generic cutting advice.
What If Your Flooring Cutter Cannot Make Lengthwise Cuts?
You have fewer good saw-free choices.
The first option is to rent or borrow a cutter specifically designed for rip cutting. For a full-room flooring installation, this is usually the cleanest solution.
A router fitted with an appropriate straight-cutting bit and guide can technically make a lengthwise cut without being a saw. However, I would not choose it simply to avoid using a saw.
Routing laminate creates fine dust, requires secure clamping, and can chip the decorative layer if the setup is poor. You also need to protect the subfloor and maintain a reliable straight guide.
For most DIY installers, a compatible manual flooring cutter is easier and safer.
Can You Use a Chisel?
A sharp chisel can remove tiny amounts from a hidden cut edge, but it is not a reasonable tool for ripping a full laminate plank.
The core can crumble or split unpredictably.
Use a chisel only for very small corrections when appropriate—not for creating the original long cut.
Can You Use a Utility Knife Repeatedly?
For standard thick laminate, I would avoid it.
Scoring dozens of times may eventually weaken the wear surface and part of the core, but the resulting break can still be uncontrolled.
You also increase the risk of the knife slipping during repeated heavy passes.
Use that approach only if the flooring manufacturer specifically states that its product can be scored and snapped.
Key Takeaways:
- Not every manual flooring cutter can make rip cuts.
- Check both flooring and cutter instructions before starting.
- If your cutter cannot rip laminate, renting a compatible cutter is better than improvising with a knife or chisel.
Cutting the First Row Lengthwise
You may need to rip the first row when planning the floor layout.
Measure the room width before installation and calculate how much space the final row would occupy.
If the calculation leaves an extremely narrow final strip, reducing the width of the first row can produce a more balanced layout.
This also avoids an awkward last row that is difficult to lock into place.
When cutting the first row, make sure you remove the correct edge.
The side that connects to the next row must retain the locking profile required by your flooring system.
Also remember that the starting wall may not be straight.
If necessary, scribe the first row to follow the wall while maintaining the expansion space.
A carefully prepared first row makes the rest of the installation substantially easier because every following row references it.
Cutting the Last Row Lengthwise
The last row is the most common place where a lengthwise cut is required.
Do not simply measure one point and rip every board to the same width.
Check the distance to the wall along the entire row.
If the wall moves inward, a uniformly wide plank can become too tight in one section.
If it moves outward, you may create an unnecessarily large gap.
A convenient technique is to place a full-width plank directly over the previous installed row and use another plank or scribing block to transfer the wall profile.
The exact technique depends on the click system and working space.
Pergo’s installation guidance specifically recommends planning the number of full rows in advance and making sure the final row remains practical to install.
How to Prevent Chipping Along the Cut
Manual laminate cutters do not create the same cut surface as fine-tooth saws.
They shear the material.
A small amount of crushing or roughness can occur on the waste-facing edge depending on the cutter and flooring construction.
Fortunately, first- and last-row rip cuts usually end beneath baseboard, shoe molding, quarter-round, or another finishing element.
Still, you can improve the result.
Use a sharp, well-maintained cutter. Support the plank fully and align it carefully before operating the lever. Do not twist the plank while the blade is passing through it.
If the cutter starts breaking large pieces from the decorative layer, stop and test it on scrap material.
The tool may not be compatible with your particular laminate.
Do You Need to Cut the Expansion Gap Perfectly Straight?
Not necessarily.
The visible priority is that the installed plank remains straight relative to the rest of the floor.
The wall-facing cut will normally be hidden by trim.
If the wall itself is uneven, your cut may need to be equally uneven.
What matters is maintaining sufficient clearance so the floating floor is not pinned against the wall.
Do not intentionally make the gap enormous just because trim will hide it.
Baseboard or quarter-round needs enough overlap to cover the edge properly.
Can You Use a Flooring Cutter Indoors?
One of the biggest advantages of a manual cutter is indoor use.
Because it shears rather than sands away the core with a spinning blade, it can produce far less airborne cutting dust than conventional sawing. Pergo specifically describes its manual cutter as a no-electricity, dust-free cutting option for compatible flooring.
You will still create offcuts and small debris, so keep the work area clean.
A clean subfloor is particularly important with floating laminate because small pieces underneath the planks can create raised spots or noise.
Safety When Cutting Laminate Without a Saw
A manual cutter looks less intimidating than a circular or table saw, but its blade can still cause serious injury.
Keep your hands away from the cutting area and use the cutter only on a stable floor or work surface.
Never hold a narrow waste strip directly beside the blade while pulling down the handle.
Support it farther away.
Wear eye protection because small pieces of laminate can break loose during a cut.
Gloves can protect your hands while handling rough cut edges, but they are not a substitute for keeping your fingers away from the blade.
Also keep the long lever controlled throughout the stroke. Do not allow it to fall unexpectedly.
Common Mistakes to Avoid
The most common mistake is confusing laminate with vinyl and trying to score and snap a rigid HDF-core plank.
Another is purchasing a flooring cutter without checking whether it can make lengthwise cuts.
It is also easy to cut off the wrong locking edge. Before every rip cut, place the plank in its intended orientation and identify which side needs to remain.
Poor measuring is another major source of wasted boards. Measure the wall at several points rather than assuming it is perfectly parallel to the installed floor.
Finally, do not forget the perimeter expansion space. A beautiful cut that fits tightly against the drywall is still incorrect if the flooring system requires room to move.
Is Cutting Laminate Without a Saw Worth It?
For the right project, yes.
A manual cutter is especially attractive when you are working in an occupied house and want to minimize dust and noise.
There is no power cord, no rotating blade, and no need to repeatedly walk outside to make cuts.
For straightforward straight cuts, the process can be very efficient.
The limitation is versatility.
A saw, particularly a jigsaw, can make curved cuts around pipes, corners, vents, and irregular obstacles much more easily. Manufacturer installation guidance commonly includes saws because some cuts are difficult to perform with a simple shearing cutter.
So, if your entire goal is to make one long straight rip without owning a saw, a manual cutter is excellent.
If you are installing an entire room with numerous complex obstacles, completely avoiding saw-type tools may make the project harder than necessary.
FAQs about How to Cut Laminate Flooring Lengthwise Without a Saw
Can you cut laminate flooring without a saw?
Yes. A manual laminate flooring cutter can cut many laminate products without electricity or a saw. Make sure the cutter is rated for your flooring thickness and supports the type of cut you need.
What is the best way to cut laminate flooring lengthwise without a saw?
Use a manual laminate cutter that specifically permits lengthwise or rip cutting. Measure carefully, mark the line, preserve the necessary locking edge, and work progressively along the plank.
Can you score and snap laminate flooring?
Usually not with conventional HDF-core laminate. Score-and-snap methods are more commonly associated with certain vinyl flooring products. Follow your laminate manufacturer’s cutting instructions.
Can I cut laminate with a utility knife?
A knife is useful for marking, trimming some underlayment, and cutting certain flexible flooring products, but it is generally not the right tool for cutting through standard rigid laminate planks.
Can a laminate cutter cut lengthwise?
Some can. Other manual cutters are primarily designed for crosscuts. Check the manufacturer’s specifications for explicit rip-cut or lengthwise-cut capability.
Can I use a vinyl flooring cutter for laminate?
Only if the cutter manufacturer specifically lists your type and thickness of laminate as compatible. Some multi-floor cutters handle both products, while others are intended only for softer vinyl.
How do you cut the last row of laminate flooring?
Measure the space between the previous row and wall at several points, subtract the required expansion clearance, transfer those measurements to the plank, and rip it lengthwise. Test-fit before locking the plank into place.
Should I cut the first row of laminate flooring?
Sometimes. If starting with full-width boards would leave an extremely narrow final row, ripping some width from the first row can create a more balanced installation.
What side of laminate should I cut off?
Cut the wall-facing side while preserving the locking edge needed to connect the plank to the adjacent row. The exact edge depends on your particular click-lock system.
How do you cut laminate along a crooked wall?
Scribe the wall profile onto the plank or take measurements at several locations. Maintain the flooring manufacturer’s specified expansion space rather than fitting the laminate tightly to the wall.
Does a manual laminate cutter create a clean cut?
A good compatible cutter can produce a clean practical installation cut, though the sheared edge may not look identical to a fine saw cut. Wall-facing rip cuts are normally concealed by trim.
Can I use a chisel to cut laminate flooring?
A chisel may be useful for tiny adjustments, but it is not suitable for making a full-length rip cut. The laminate core can fracture unpredictably.
Can I use a router instead of a saw?
Technically, yes. A router with the right straight bit and guide can rip laminate, but it creates dust and requires more setup. For a simple saw-free cut, I recommend a manual flooring cutter instead.
How much expansion gap should I leave?
The exact gap depends on the flooring manufacturer and installation conditions. Many products require a perimeter gap around fixed vertical surfaces, but you should follow the dimensions specified for your exact laminate rather than assuming one universal measurement.
Will baseboard hide the cut edge?
Usually, yes, provided the perimeter gap and cut are within the coverage of the baseboard or other specified trim. Plan the trim before cutting so you do not leave an exposed gap.
Conclusion
If you need to know how to cut laminate flooring lengthwise without a saw, the most practical solution is a manual laminate flooring cutter that is specifically designed to make lengthwise cuts.
That method lets you rip first- or last-row planks without a circular saw, table saw, jigsaw, or handsaw. It is quiet, does not require electricity, and can dramatically reduce the airborne cutting dust associated with power-saw work.
I would avoid trying to score and snap standard rigid laminate with a utility knife unless your particular flooring manufacturer explicitly approves that technique. Traditional laminate generally has a dense rigid core, so it does not behave like many flexible vinyl planks.
For the best result, measure the wall at several points, account for the required expansion gap, identify which click-lock edge must remain, and mark the complete rip line before cutting. If the wall is irregular, scribe its shape onto the plank rather than assuming a perfectly straight cut will fit.
Most importantly, verify the cutter before starting. Some manual flooring cutters can make both crosscuts and long rip cuts, while others cannot. A cutter that explicitly supports lengthwise cutting is the tool I would choose if the goal is to make a clean laminate flooring rip cut while completely avoiding a saw.