How to Cut Vinyl Plank Flooring With a Circular Saw Safely
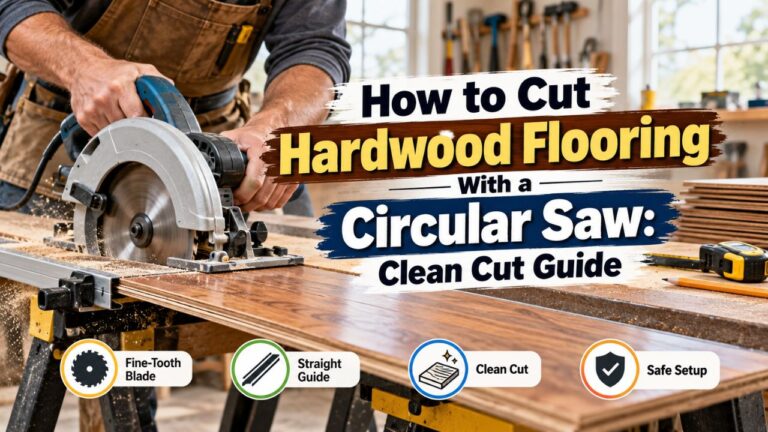
If you want to know how to cut vinyl plank flooring with a circular saw, use a fine-tooth carbide blade rated for laminate, plywood, or plastic, mark the cut accurately, support and clamp the plank, set the blade only slightly deeper than the flooring, and guide the saw steadily along the cut line. A circular saw works especially well for straight crosscuts and long lengthwise rip cuts on rigid-core vinyl plank flooring.
The most important details are blade selection and plank orientation. A coarse framing blade can chip the decorative wear layer and leave a rough edge. With a conventional handheld circular saw, placing the decorative face down often gives the cleaner visible edge because of the direction the blade travels through the material. However, vinyl flooring constructions vary, so I recommend making a test cut on an offcut before cutting the actual plank.
You should also identify what type of vinyl flooring you have. Flexible luxury vinyl plank can often be scored and snapped with a utility knife, while thicker rigid-core products such as SPC or WPC are often easier to cut with a saw for long rips, narrow strips, and more complicated straight cuts.
In this guide, I’ll explain the right circular saw blade, which side of the vinyl plank should face up, how to measure and make crosscuts and rip cuts, how to prevent chipping, how to control dust, and what mistakes to avoid when installing vinyl plank flooring.
Can You Cut Vinyl Plank Flooring With a Circular Saw?
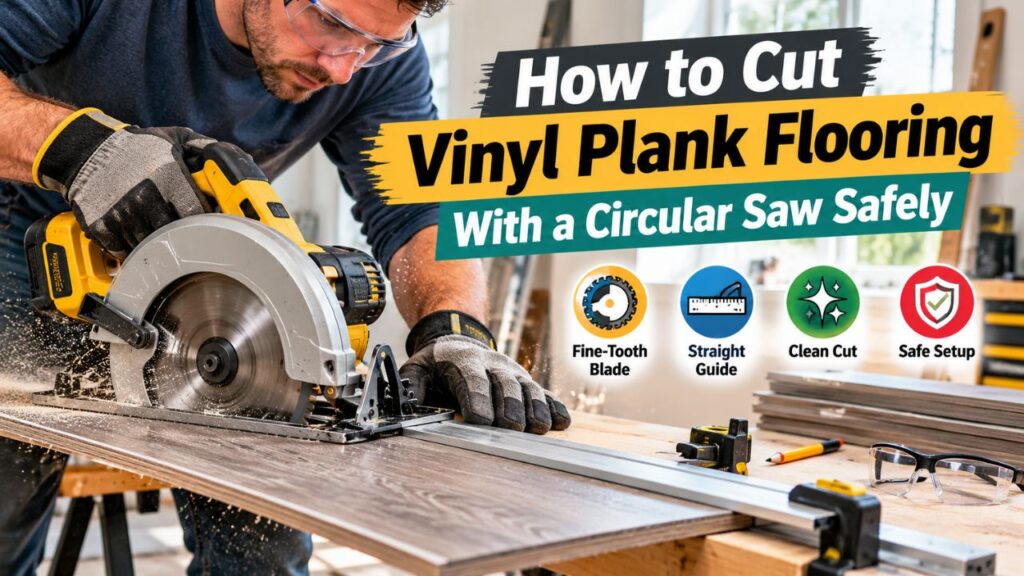
Yes. A circular saw is a practical tool for cutting many types of vinyl plank flooring, especially rigid products.
It works particularly well when you need a long, straight cut. For example, the first or last row of a floating floor often has to be ripped lengthwise because a full-width plank will not fit between the previous row and the wall.
A circular saw is also useful when several planks need straight crosscuts.
However, it is not automatically the best tool for every vinyl flooring cut.
Some flexible vinyl products can be scored with a utility knife and snapped, which produces much less dust and noise. A flooring cutter can also be faster for repeated straight cuts.
A circular saw becomes especially useful when the flooring has a relatively rigid core that is difficult to score and snap cleanly.
What Types of Vinyl Flooring Can a Circular Saw Cut?
The general term “vinyl plank flooring” includes several constructions.
Flexible LVP is relatively thin and bendable. Many products can be scored and snapped.
WPC, or wood-plastic composite flooring, has a thicker rigid core.
SPC, or stone-plastic composite flooring, is usually even denser and more rigid.
A circular saw can cut all of these when the flooring manufacturer permits saw cutting, but the blade and technique become more important on hard rigid-core products.
SPC in particular can create substantial fine debris when cut with a power saw, so controlling dust and wearing the appropriate protective equipment is important.
Key Takeaways:
- A circular saw is excellent for straight crosscuts and long rip cuts in vinyl plank flooring.
- Flexible LVP may be easier to score and snap, while rigid SPC and WPC often benefit more from saw cutting.
- Always check the flooring manufacturer’s cutting instructions before selecting a method.
What Circular Saw Blade Should You Use for Vinyl Plank Flooring?
The blade makes a major difference in cut quality.
I would avoid using a coarse construction or framing blade if you want a clean edge.
A typical framing blade has relatively few large teeth. It is designed to cut dimensional lumber quickly rather than leave a fine finished edge in a layered flooring product.
For vinyl plank flooring, choose a fine-tooth carbide-tipped blade.
For a common 7-1/4-inch circular saw, a blade in roughly the 40- to 60-tooth range is a practical starting point for many flooring products. A blade specifically labeled for laminate, plywood, finish work, or plastics can provide an even cleaner result.
The exact blade should be compatible with your circular saw’s arbor size, maximum RPM, and blade diameter.
Best Blade Choices
| Blade Type | Vinyl Plank Performance | Best Use |
| 18–24 tooth framing blade | Rough; greater chipping risk | Not recommended for finish cuts |
| 40 tooth carbide blade | Good | General vinyl plank cutting |
| 60 tooth finish blade | Very good | Clean crosscuts and rip cuts |
| Laminate/plastic blade | Excellent when compatible | Rigid-core flooring and finish cuts |
| Abrasive blade | Poor choice | Avoid for vinyl flooring |
More teeth generally create a smoother edge, but there is a practical limit. The blade must still clear material effectively without generating unnecessary heat.
Does the Blade Need to Be New?
It does not need to be brand new, but it should be sharp and undamaged.
A dull blade creates more friction and requires more force. That increases the chances of a rough edge, melting, chipping, or the saw wandering away from the line.
If your existing blade has spent months cutting construction lumber, I would install a sharp finish blade before starting an entire flooring project.
Can You Use a Wood Blade?
Yes, provided it is the right type.
A fine-tooth carbide woodworking blade can cut many vinyl plank products very effectively.
What I would avoid is assuming that any wood blade will work equally well. A 24-tooth framing blade and a 60-tooth finish blade may both technically cut wood, but they produce very different results on vinyl flooring.
Should Vinyl Plank Flooring Face Up or Down When Cutting?
With a standard handheld circular saw, I generally start by placing the decorative surface face down.
The reason is the direction in which a conventional circular-saw blade cuts through the workpiece. The blade normally produces its cleaner edge on the side where the teeth enter the material, while more chipping can occur where the teeth exit.
With a handheld circular saw, that often makes the bottom face cleaner.
If the decorative surface is placed down, the finished visible surface is more likely to have a clean edge.
However, do not treat this as an absolute rule for every flooring product.
Rigid-core vinyl constructions vary, and different blades can produce different results. Some flooring manufacturers specifically advise making a test cut to determine whether face-up or face-down cutting gives the cleanest result.
Make a Test Cut First
Take an offcut from the flooring.
Make one cut with the decorative side facing down.
Then make another with the decorative side facing up.
Compare the two edges.
Whichever orientation produces the cleaner decorative face should be used for the remaining cuts.
This five-minute test can save multiple full planks.
Key Takeaways:
- Use a fine-tooth carbide blade rather than a coarse framing blade.
- Decorative-side-down is a good starting point with a conventional circular saw, but test your flooring first.
- A sharp blade usually produces a cleaner cut with less effort and less edge damage.
Tools You Need to Cut Vinyl Plank Flooring With a Circular Saw
You do not need a complicated setup.
Along with the circular saw and proper blade, you need a tape measure, pencil or fine marker, straightedge or square, clamps, and a stable cutting surface.
For long rip cuts, a saw guide or straight board clamped to the plank makes it much easier to maintain a straight line.
Eye protection is important whenever you operate the saw. Hearing protection is also appropriate, particularly when making many cuts.
Power cutting can generate fine vinyl and core dust, so follow the flooring and power-tool manufacturers’ respiratory-protection and dust-control recommendations.
A shop vacuum connected to the saw’s dust port, when the saw supports one, can reduce debris substantially.
How to Cut Vinyl Plank Flooring With a Circular Saw Step by Step
The technique is straightforward, but rushing measurements or failing to support the plank can ruin otherwise good flooring.
1. Confirm the Correct Plank Orientation
Before measuring, place the plank approximately where it will be installed.
Identify its tongue, groove, or click-lock edges.
This is important because cutting off the wrong edge may remove the locking profile needed to attach the plank to the neighboring row.
Mark the waste side clearly.
I often recommend putting a large X on the waste portion so there is no confusion once you move to the cutting area.
2. Measure the Required Cut
Measure the available space carefully.
For an end cut, measure from the installed plank to the wall or obstruction while accounting for the expansion gap required by your flooring manufacturer.
For a rip cut, take measurements at more than one point.
Walls are not always perfectly straight.
If one end measures 4-1/4 inches and the other measures 4 inches, cutting the entire plank at 4-1/4 inches may leave it too tight against the wall.
3. Mark the Cut Line
Use a framing square for crosscuts.
For long rip cuts, mark both ends and connect the points with a straightedge.
If the cut tapers because the wall is crooked, mark several reference points and connect them carefully.
Make the line visible enough to follow without creating an excessively thick mark that makes the exact cut position ambiguous.
4. Support the Vinyl Plank
Never attempt to hold a loose plank in one hand and operate a circular saw with the other.
Place the flooring on a stable workbench, sawhorses with sacrificial support, or rigid foam insulation laid on a stable surface.
The cut needs support so the plank does not flex, chatter, or break unexpectedly.
A sheet of rigid foam underneath the plank is particularly convenient because the circular saw blade can extend slightly into the foam without damaging a workbench.
5. Clamp the Plank
Clamp the plank securely without crushing the click-lock profile.
Position the clamps away from the circular saw’s motor housing and base plate so they do not block the cut.
If you are using a straightedge guide, clamp that as well.
Before starting the saw, slide it along the planned path with the saw unplugged or battery removed to make sure nothing interferes with the motor or blade guard.
6. Set the Circular Saw Blade Depth
Do not leave the blade at maximum depth.
Set it so the teeth extend only slightly below the vinyl plank and its support arrangement.
Approximately 1/8 inch beyond the bottom of the plank is a useful general target when your saw and support system allow it.
Shallow blade exposure improves control and reduces the amount of unnecessary blade below the material.
Always adjust blade depth with the saw disconnected from power or its battery removed.
7. Align the Blade With the Waste Side
Remember that a circular saw removes a strip of material equal to the blade’s kerf.
Do not center the blade directly on the dimension you need to preserve unless you have accounted for that kerf.
Position the blade on the waste side of your marked line.
This keeps the finished piece at the intended dimension.
8. Start the Saw Before Entering the Plank
Place the saw base firmly on the flooring without allowing the teeth to contact it.
Start the saw and let the blade reach full operating speed.
Then move forward smoothly.
Do not force the blade.
A sharp fine-tooth blade should cut the plank with relatively little pressure.
9. Maintain a Steady Feed Rate
Move consistently along the line.
Going too quickly can make the saw wander or chip the flooring.
Moving unnecessarily slowly can generate extra heat and friction.
For long cuts, focus on keeping the front edge of the saw base aligned with the guide rather than staring directly at the blade.
Keep both hands on the tool where the manufacturer intends.
10. Let the Blade Stop Before Setting the Saw Down
Finish the cut and move the saw clear of the material.
Release the trigger.
Wait until the blade has completely stopped before placing the saw down.
Then inspect the cut edge.
11. Test-Fit the Plank
Do not immediately lock the plank permanently into the floor.
Place it in position and verify the size.
Make sure the required expansion space remains along the wall or other fixed object.
A small rough area on a wall-facing cut may be hidden by baseboard or quarter-round, but a high spot can interfere with proper clearance.
How to Make a Straight Crosscut With a Circular Saw
Crosscuts shorten the plank.
They are common at the end of almost every flooring row.
Because vinyl planks are relatively narrow, you can use a framing square as a cutting guide if its size and the saw geometry allow it.
Mark the cut at the required length, place the decorative side in the orientation established by your test cut, and position the square accurately.
A clamped straightedge guide is even more reliable.
If you will be making dozens of identical straight crosscuts, a miter saw or flooring cutter may be faster. But if a circular saw is the tool you already own, it can produce excellent results.
How to Rip Vinyl Plank Flooring Lengthwise With a Circular Saw
Long rip cuts are where the circular saw becomes especially useful.
You commonly need a rip cut for the first or last row.
Begin by measuring the required plank width at both ends.
If the measurements differ, the wall is not parallel to the flooring and the cut needs to taper.
Mark the measurements and connect them with a straight line.
For the cleanest and straightest result, clamp a guide to the plank.
Calculate the Guide Offset
The circular saw blade does not sit directly against the edge of the saw’s base plate.
Measure the distance from the blade to the edge of the base that will ride against your straightedge.
Suppose that distance is 1-1/2 inches.
If your desired cut line is 3 inches from the plank edge, position the guide 1-1/2 inches away from that cut line on the appropriate side.
Before cutting the actual plank, test this setup on scrap.
Once you have the offset correct, long rip cuts become much more predictable.
What if the Last Row Is Very Narrow?
A circular saw can cut a narrow strip, but supporting the plank becomes more important.
Do not let a 1-inch strip hang unsupported next to the blade.
Place the entire plank on sacrificial foam or another suitable surface so both the finished piece and waste remain supported.
If your layout would leave an extremely narrow final row, consider whether the first row should have been reduced in width as well. Planning the first and last rows before installation generally produces a better-balanced floor.
How to Prevent Chipping When Cutting Vinyl Plank Flooring
Most chipping problems come from the blade, plank orientation, or cutting technique.
A sharp fine-tooth blade is the first defense.
Supporting the plank properly is the second.
If the material vibrates as the blade cuts, the decorative layer can fracture around the edge.
Use Painter’s Tape if Necessary
For flooring that chips easily, placing painter’s tape along the cut line may help keep the surface layer supported and make the mark easier to see.
Do not depend on tape to compensate for a dull or unsuitable blade.
Avoid Excessive Feed Pressure
Do not shove the saw through the plank.
Excessive pressure can flex the blade, widen the cut, and break the decorative surface.
Let the blade teeth remove the material.
Keep the Plank Stable
If the plank moves halfway through the cut, even the best blade may leave a poor edge.
Clamp it securely and support the waste section.
Test Both Face Orientations
This is one of the simplest ways to improve the finish.
If face-down cutting produces small chips, make a scrap cut with the face up.
Use whichever arrangement works better with your specific blade and flooring.
How to Cut Around Corners, Door Frames, and Pipes
A circular saw excels at straight cuts but is not ideal for every shape.
If a plank needs an L-shaped notch around a cabinet, door jamb, or corner, you can sometimes use the circular saw for the long straight portion of the cut and complete the inside corner with a jigsaw or oscillating multi-tool.
Do not deliberately overcut far past an inside corner just to make the circular blade reach it.
That creates a visible slit or weakens the plank.
For pipes, curved cuts, and detailed notches, I prefer a jigsaw, hole saw, or other tool appropriate for the shape.
The circular saw should remain your straight-cutting tool.
Circular Saw vs. Utility Knife for Vinyl Plank Flooring
Both methods have a place.
A utility knife produces almost no powered cutting dust, is quiet, and requires little equipment. For flexible vinyl products that are designed to be scored and snapped, it is often faster than setting up a power saw.
A circular saw is better for rigid flooring that resists snapping and for long rip cuts where maintaining an accurate straight line is important.
| Task | Circular Saw | Utility Knife |
| Straight crosscut | Excellent | Excellent on score-and-snap flooring |
| Long rip cut | Excellent | Difficult on rigid plank |
| SPC rigid core | Very good | Product dependent |
| Flexible LVP | Works, but often unnecessary | Usually convenient |
| Curved cut | Poor | Limited |
| Dust generation | Higher | Very low |
| Noise | High | Minimal |
| Long straight accuracy | Excellent with guide | More difficult |
If a plank scores and snaps cleanly according to its installation instructions, I would use the knife for basic crosscuts and save the circular saw for long rips and cuts that cannot be snapped conveniently.
Key Takeaways:
- Support and clamp the plank before cutting.
- Keep the blade kerf on the waste side of the line.
- A straightedge guide is the easiest way to produce accurate long rip cuts.
- Use a jigsaw or another suitable tool for curves and inside corners rather than forcing a circular saw to do everything.
How Much Expansion Gap Should You Leave?
Do not cut vinyl flooring tightly against walls or other permanent vertical objects unless the flooring system specifically calls for that installation.
Floating vinyl plank flooring generally needs a perimeter expansion space.
The exact dimension varies by manufacturer, flooring construction, room size, and installation conditions.
Common requirements may be around 1/4 to 3/8 inch, but the instructions for your exact flooring product should determine the gap.
This matters when measuring every perimeter cut.
Suppose the distance from the previous installed row to the wall is 4 inches and the manufacturer requires a 3/8-inch gap.
Your plank should not simply be ripped to 4 inches.
You need to subtract the required clearance.
Baseboard or quarter-round normally conceals the perimeter space after installation.
How to Control Dust When Cutting Vinyl Flooring
Power-saw cutting creates substantially more debris than scoring and snapping.
Rigid-core products can produce especially fine dust and small particles.
I prefer making repeated cuts outdoors or in a designated cutting area rather than directly over newly installed flooring.
If your circular saw has a vacuum port, connect a compatible dust extractor or shop vacuum when appropriate.
Wear eye protection and follow the saw and flooring manufacturers’ recommendations for respiratory protection.
Clean debris from the subfloor before installing the next plank.
Even small chips left underneath a floating floor can create a raised point, noise, or movement later.
Don’t Blow Dust Around With Compressed Air
Using compressed air may simply redistribute fine dust throughout the room.
Vacuuming is generally a cleaner approach.
If you are cutting indoors, isolate the work area as much as practical and avoid allowing debris to spread into HVAC returns or occupied areas.
Safety Tips for Using a Circular Saw on Vinyl Plank Flooring
Circular saws deserve the same precautions whether you are cutting a thick board or a relatively thin vinyl plank.
Always keep the blade guard functioning properly.
Never pin or hold it open.
Keep both hands in the intended operating positions and keep fingers away from the cut line.
Make blade changes and depth adjustments only when the saw is disconnected from power or the battery has been removed.
Support the plank so it cannot pinch the blade.
The waste piece should be free to separate without trapping the blade between two supports.
A pinched circular-saw blade can kick the saw backward unexpectedly.
Also keep the power cord out of the cutting path when using a corded saw.
Important Tip: Never make a circular-saw cut while holding the vinyl plank across your knee, balancing it on a bucket, or supporting it with one hand. Thin flooring still needs a stable work surface.
Common Mistakes When Cutting Vinyl Planks With a Circular Saw
One of the most common mistakes is using the same coarse framing blade already installed on the saw.
It may cut the plank, but the finished edge can be unnecessarily rough.
Another mistake is forgetting which click-lock edge needs to remain. Once the tongue or groove required for the next row has been removed, the plank may no longer be usable in that position.
Cutting directly on the finished floor is another poor choice. One incorrect blade-depth setting can damage the flooring underneath.
Some DIY installers also set the blade far deeper than necessary. A shallow, properly adjusted blade is easier to control.
Measuring the wall at only one point can create problems on long rip cuts because rooms are rarely perfectly square.
Finally, do not forget the saw kerf. If the blade runs on the wrong side of your line, the finished plank can end up slightly narrower than intended.
Should You Buy a Circular Saw Just for Vinyl Flooring?
If you already own a circular saw, it is an excellent tool to use for vinyl plank installation.
If you do not own one, whether it is worth buying depends on your flooring and the number of difficult cuts.
For flexible vinyl that scores and snaps easily, you may complete most of the installation with a utility knife, square, and jigsaw for unusual shapes.
For thick rigid-core flooring or rooms requiring many long rip cuts, a circular saw becomes much more useful.
A manual flooring cutter is another option for people who want less noise and dust.
If I were installing rigid-core flooring throughout several rooms, I would want access to both a straight-cutting saw and a jigsaw or oscillating tool. That combination handles nearly every cut you are likely to encounter.
FAQs about How to Cut Vinyl Plank Flooring With a Circular Saw
Can you use a circular saw to cut vinyl plank flooring?
Yes. A circular saw works very well for straight cuts in many vinyl plank products, particularly rigid-core SPC and WPC. Verify that saw cutting is permitted by your flooring manufacturer.
What blade should I use to cut vinyl plank flooring?
Use a sharp fine-tooth carbide blade. For a 7-1/4-inch circular saw, roughly 40 to 60 teeth is a useful general range, with finish, laminate, or plastic-cutting blades often providing the cleanest edge.
Should vinyl plank flooring face up or down when using a circular saw?
I generally start with the decorative face down when using a conventional handheld circular saw. However, make test cuts both ways because flooring construction and blade design can change which orientation produces the cleanest edge.
Can I use a 24-tooth blade to cut vinyl plank?
It can physically cut the plank, but a coarse 24-tooth blade is more likely to leave a rough or chipped edge. A finer finish blade is usually the better choice.
Can you cut SPC flooring with a circular saw?
Yes. A circular saw is particularly useful for rigid SPC planks, especially when making long rip cuts. Use a suitable fine-tooth blade and control the fine cutting dust.
Can you cut luxury vinyl plank with a circular saw?
Yes. However, many flexible LVP products can also be scored and snapped with a utility knife, which may be quicker for simple crosscuts.
How do you cut vinyl plank flooring lengthwise?
Measure the required width at several points, mark the rip line, clamp a straightedge guide to the plank, and run the circular saw along the guide while keeping the blade on the waste side.
How do you prevent vinyl plank from chipping?
Use a sharp fine-tooth blade, support the entire plank, clamp it securely, maintain a steady feed rate, and determine whether face-up or face-down cutting gives the cleanest edge on your flooring.
Can you cut vinyl plank flooring indoors?
You can, but power-saw cutting creates dust and debris. Use appropriate dust extraction, eye protection, and respiratory protection as required. For repeated cuts, I prefer a separate cutting area.
How deep should the circular saw blade be?
Set the blade only slightly deeper than the flooring. About 1/8 inch beyond the bottom of the plank is a useful general target when the setup allows it.
Can I cut vinyl plank flooring on the floor?
Do not cut directly over installed flooring or a finished surface. Use a workbench, sawhorses with sacrificial support, or rigid foam so the blade can safely extend below the plank.
Is a circular saw or jigsaw better for vinyl plank flooring?
A circular saw is better for long straight cuts. A jigsaw is better for notches, curves, corners, and cuts around obstacles. Many installations benefit from having both available.
Is a circular saw better than a utility knife for vinyl flooring?
For rigid-core flooring and long rip cuts, usually yes. For flexible vinyl designed to score and snap, a utility knife is quieter, cleaner, and often faster.
Can a circular saw melt vinyl flooring?
Excessive heat from a dull blade, inappropriate blade, or extremely slow cutting can soften some vinyl material. A sharp fine-tooth blade and steady feed rate reduce this risk.
Do I need to account for the blade kerf?
Yes. Keep the blade on the waste side of your marked line so the material removed by the blade does not reduce the finished plank dimension.
How do you cut a crooked last row of vinyl plank flooring?
Measure the gap at several points or scribe the wall profile onto the plank. Mark a tapered line while accounting for the required expansion gap, then follow that line with a guided circular saw.
Conclusion
Learning how to cut vinyl plank flooring with a circular saw is straightforward once you combine the right blade with proper measuring, support, and cutting technique.
For most rigid-core flooring, I recommend a sharp fine-tooth carbide blade, typically around 40 to 60 teeth on a standard 7-1/4-inch circular saw. A finish, laminate, or compatible plastic-cutting blade is preferable to a coarse framing blade when you want a clean edge.
Start by testing the plank orientation on scrap. Decorative-side-down is often a good starting point with a handheld circular saw, but the cleanest orientation can vary with the flooring and blade.
Measure every cut carefully, preserve the click-lock edge you need, allow for the manufacturer’s required expansion space, support and clamp the plank, and set the blade only slightly deeper than the flooring. For long rip cuts, I strongly recommend using a clamped straightedge guide instead of trying to follow a pencil line freehand.
A circular saw is best reserved for straight work. Use a jigsaw, hole saw, or another appropriate tool for curves, pipe openings, and detailed notches.
For flexible LVP that is designed to score and snap, you may not need a circular saw for every cut. But for SPC, WPC, long first- and last-row cuts, and other rigid vinyl planks, a properly set up circular saw is one of the fastest and most accurate tools you can use.