How to Cut Pergo Flooring With a Table Saw: Step-by-Step Guide
If you want to know how to cut Pergo flooring with a table saw, use a sharp fine-tooth carbide blade, set the rip fence to your required width, place the finished surface facing up, and feed the plank steadily through the blade while keeping it firmly against the fence. A table saw is especially useful for long, straight rip cuts, such as narrowing Pergo planks for the first or last row of a flooring installation.
The most important details are blade selection, plank orientation, accurate measuring, and safe feeding technique. Pergo flooring can have a hard, abrasive wear layer over a dense core, so a coarse construction blade can chip the decorative surface and dull quickly.
You should also identify exactly which Pergo product you have. Pergo flooring can include laminate and other rigid flooring products, and the recommended cutting methods can vary. Always check the installation instructions supplied with your particular flooring before choosing a blade or cutting method.
A table saw is not necessarily the best tool for every flooring cut. It excels at ripping planks lengthwise and making straight cuts, while a miter saw is usually more convenient for repetitive crosscuts and a jigsaw is better for curves and notches.
In this guide, I’ll explain how to cut Pergo flooring with a table saw step by step, which blade to use, which side should face up, how to prevent chipping, how to rip narrow pieces safely, and when another cutting tool makes more sense.
Can You Cut Pergo Flooring With a Table Saw?
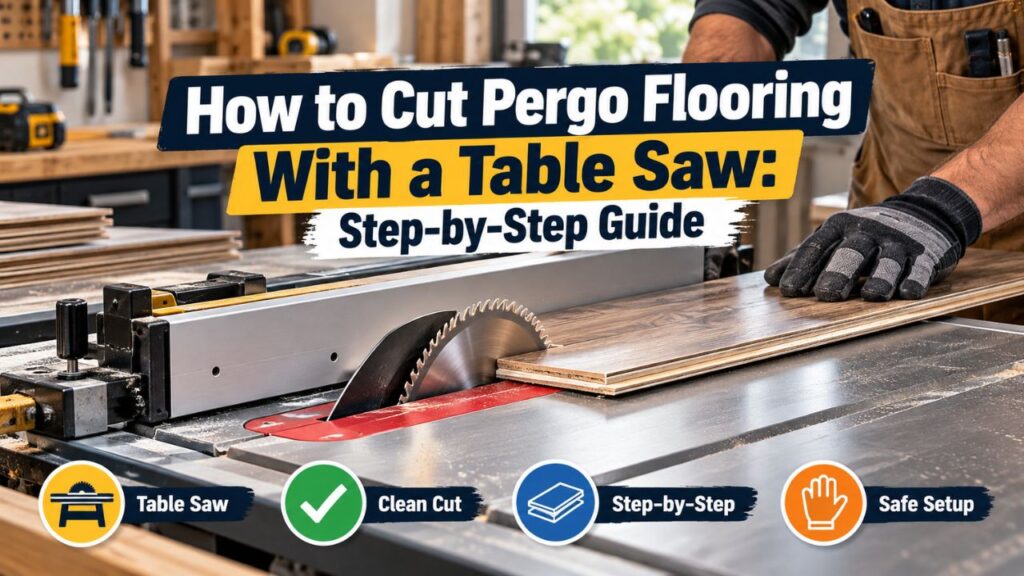
Yes. A table saw can cut Pergo flooring very effectively, particularly when you need long, straight rip cuts.
This is one of the most common situations during installation. When you reach the last row of a room, the remaining space may be narrower than a full plank. You then need to remove a strip along the entire length of each plank.
That is exactly the type of cut a table saw handles well.
A table saw can also make crosscuts, but it requires the correct crosscut setup. For quickly shortening dozens of flooring planks, a miter saw is generally more convenient.
Here is a simple comparison.
| Cutting Job | Table Saw Suitability | Better Alternative When Applicable |
| Long rip cut | Excellent | Circular saw with guide |
| Narrowing final row | Excellent | Jigsaw or circular saw |
| Straight crosscut | Good with proper setup | Miter saw |
| Repeated crosscuts | Possible but less convenient | Miter saw |
| Angled crosscut | Good with miter gauge/sled | Miter saw |
| Curved cut | Not suitable | Jigsaw |
| Pipe cutout | Not suitable | Jigsaw or hole saw |
| Irregular doorway notch | Limited | Jigsaw |
For most flooring installers, the table saw becomes especially valuable when the first or last row needs to be ripped to a consistent width.
Key Takeaways:
- A table saw is one of the best tools for long, straight rip cuts in Pergo flooring.
- A miter saw is usually faster for repeated end cuts, while a jigsaw is better for curves and notches.
- Confirm the cutting recommendations for your specific Pergo flooring product before starting.
What Table Saw Blade Should You Use for Pergo Flooring?
The blade is one of the biggest factors affecting cut quality.
I recommend using a sharp carbide-tipped fine-finish blade designed for laminate, melamine, composite panels, or fine woodworking.
For a typical 10-inch table saw, a blade in roughly the 60-tooth to 80-tooth range is a practical choice for clean laminate cuts.
The exact tooth count is less important than the blade design and sharpness.
A quality 60-tooth blade intended for laminates may perform better than an inexpensive 80-tooth blade designed for a different purpose.
Why a Coarse Blade Is Not Ideal
A 24-tooth framing or ripping blade is designed to remove material quickly.
That is useful when ripping construction lumber, but Pergo flooring has a decorative surface that can chip.
Large aggressive teeth can tear small pieces from the wear layer around the cut.
A finer blade removes smaller amounts of material with each tooth and usually produces a smoother edge.
Consider a Laminate or Melamine Blade
If you have a large flooring project, a blade designed specifically for laminate or melamine is worth considering.
These blades are intended to reduce chipping on hard-faced composite panels.
Some use a triple-chip grind, or TCG, tooth geometry. This style can perform well on abrasive materials and manufactured panels.
You do not necessarily need a specialty blade for a few cuts, but it can improve blade life and edge quality during a full installation.
Use Carbide-Tipped Teeth
Laminate flooring is harder on blades than ordinary softwood.
The wear layer is specifically engineered to resist abrasion during years of foot traffic, and the dense core also puts significant wear on cutting edges.
Carbide-tipped blades maintain their edge much longer than ordinary steel teeth.
Even carbide eventually dulls, however.
If the saw begins requiring noticeably more force or the cuts become increasingly chipped, inspect the blade before continuing.
Which Side of Pergo Flooring Faces Up on a Table Saw?
For a conventional table saw setup, the finished decorative surface should generally face upward.
The teeth at the front of a properly rotating table-saw blade enter the plank from the top and move downward into the material.
This normally produces a cleaner edge on the top surface than on the bottom where the teeth exit.
Keeping the decorative face upward therefore helps minimize visible chipping.
However, make a test cut on a scrap piece before cutting your actual flooring.
Blade design, flooring construction, and product-specific instructions can affect the result.
Why Tool Type Changes Plank Orientation
You may have seen instructions recommending that laminate flooring be cut finished-side down.
That can be correct with some other saws.
For example, a conventional handheld circular saw generally produces its cleanest edge on the underside of the workpiece, so installers commonly place the decorative surface facing down.
With a table saw or standard miter saw, the finished side is commonly positioned upward.
The important rule is to consider where the teeth enter the decorative surface, rather than following one face-up or face-down rule for every saw.
What You Need Before Cutting Pergo Flooring
A table saw setup for flooring should be simple and organized.
You need the table saw fitted with an appropriate blade, a tape measure, pencil, and straightedge or square.
A push stick or push block is essential when the remaining material puts your hands too close to the blade.
Long flooring planks may also require an outfeed support or roller stand so the far end does not drop as it leaves the saw table.
Eye and hearing protection are important, and dust control deserves particular attention.
Cutting laminate and composite flooring can generate substantial fine dust. Use the saw’s dust-collection system when available and appropriate respiratory protection for the dust being produced.
How to Cut Pergo Flooring With a Table Saw Step by Step
The following method is intended primarily for a rip cut, which means cutting along the length of the plank.
That is the most useful table-saw application during a Pergo flooring installation.
1. Measure the Space for the Plank
Measure the remaining distance between the installed flooring and the wall.
Do not cut the plank exactly to that measurement.
Pergo and other floating floors generally require an expansion space around fixed objects and perimeter walls.
The required gap depends on the exact flooring product and installation conditions, so follow your product’s instructions rather than assuming a universal dimension.
Subtract the required expansion space before determining the finished plank width.
Take measurements at several locations along the wall.
Walls are often not perfectly straight.
If the available space changes from one end of the room to the other, you may need to mark a tapered cut rather than setting the fence for one uniform width.
A table saw is excellent for a straight rip, but a jigsaw or guided circular saw may be easier for a significant taper.
2. Mark the Waste Side
Transfer your measurement to the plank and clearly identify which portion will be discarded.
This sounds simple, but flooring planks have locking edges that matter.
Cutting the wrong edge from the plank can remove the tongue or groove you needed to connect it to the previous row.
Before cutting, look at how the plank must lock into the installed flooring and make sure you are trimming the correct side.
3. Set the Rip Fence
Measure from the saw blade to the rip fence according to the width of the piece you need.
Lock the fence securely.
Do not rely solely on the measurement scale built into the saw until you have verified that it is accurately calibrated.
For important cuts, use a tape measure to confirm the distance between the fence and the appropriate side of the blade.
Remember that the blade itself removes material equal to the width of its kerf.
Position the plank so the waste ends up on the intended side of the cut.
4. Set the Blade Height
Raise the blade only enough to cut completely through the flooring.
For typical flooring, having the teeth project roughly 1/8 to 1/4 inch above the top surface is a common practical setup, provided it is compatible with your saw and blade manufacturer’s instructions.
Avoid unnecessarily raising several inches of exposed blade above a thin flooring plank.
The blade still needs enough exposure for its tooth geometry and gullets to work correctly, so follow the recommendations for your particular saw and blade.
5. Keep the Riving Knife Installed
Use the table saw’s riving knife or splitter when the cutting operation permits it.
The riving knife helps keep the freshly cut material from closing around the rear of the blade, reducing an important source of kickback.
Do not remove a safety feature simply because the flooring is thin.
Keep blade guards and anti-kickback components installed whenever your saw and cutting operation allow them to be used correctly.
6. Position the Pergo Plank Finished-Side Up
Place the plank flat on the table with its decorative face upward unless your flooring instructions or test cut indicate another orientation is preferable.
Make sure the edge being referenced is straight and can ride smoothly against the fence.
The plank should sit flat rather than rocking over debris.
Clean sawdust and small offcuts from the table before starting.
7. Support Long Planks
Pergo flooring planks can extend well beyond a compact table saw.
The unsupported end may drop as you begin or finish the cut.
That can twist the material against the blade.
Use an outfeed table, roller stand, or another stable support positioned at the correct height.
The support should assist the plank without pushing it sideways or interfering with your feed path.
8. Start the Saw Before Feeding the Plank
Turn on the saw and allow the blade to reach full operating speed.
Do not place the plank into a stationary blade and then start the motor.
Stand slightly to the side of the direct blade path rather than directly behind the workpiece.
9. Feed the Plank Smoothly
Begin pushing the flooring through the blade while keeping the reference edge firmly against the fence.
Use steady forward pressure.
Do not force the plank faster than the blade can cut.
At the same time, do not move so slowly that the blade spends excessive time rubbing one area and generating heat.
The correct feed rate should feel controlled and continuous.
10. Use a Push Stick as the Cut Finishes
As your hands approach the blade area, switch to an appropriate push stick or push block.
Never reach across or over the blade.
Keep control of the piece between the fence and blade until it has safely passed the cutting area.
Do not reach behind a running blade to pull the plank through from the back.
Feed from the front.
11. Let the Cut Pieces Clear the Blade
Once the flooring has passed completely through the saw, continue moving it forward until it clears the blade and riving knife.
Do not turn the piece sideways while it is still contacting the spinning blade.
Turn off the saw and allow the blade to stop before removing small scraps near the cutting area.
12. Test the Plank Before Cutting the Rest
Take the first ripped plank to the installation area and confirm the fit.
Make sure the expansion space is correct and the locking edge remains usable.
If several planks in the final row need exactly the same width, you can then use the same fence setting for the remaining pieces.
Key Takeaways:
- Measure the wall in several places and preserve the correct locking edge when marking the plank.
- Use the rip fence, riving knife, proper support, and a push stick rather than guiding narrow flooring close to the blade by hand.
- Test the first cut before ripping every plank for the row.
How to Prevent Chipping When Cutting Pergo Flooring
Chipping is most noticeable along the decorative wear surface.
A few changes can usually reduce it substantially.
The first thing I would check is the blade.
A sharp fine-tooth carbide blade produces much cleaner results than a dull general-purpose blade.
Keep the decorative surface upward during a normal table-saw cut so the teeth enter the finished surface first.
A zero-clearance throat plate can also provide additional support immediately beside the blade, reducing unsupported material around the cut.
Painter’s Tape Can Help
For a particularly visible cut, painter’s tape placed over the cut line can sometimes reduce small chips.
Mark your line over the tape and cut normally.
This technique is more useful when making freehand or crosscuts than when using a fence for repetitive rip cuts, but it can still be helpful on chip-prone material.
Avoid Excessive Feed Pressure
Pushing hard against a dull blade is one of the fastest ways to create rough edges.
If the plank becomes increasingly difficult to feed, stop and inspect the blade.
Do not compensate by forcing the flooring through harder.
Keep the Fence Parallel
A fence that is misaligned relative to the blade can pinch material between the blade and fence.
Besides creating poor cuts and burn marks, that condition can increase kickback risk.
Make sure the saw is correctly adjusted before processing flooring.
How to Rip the Last Row of Pergo Flooring
The final row is where a table saw becomes especially useful.
Measure from the edge of the previous installed row to the wall at several locations.
Subtract the required expansion gap.
If the wall is reasonably straight, choose the appropriate width and set your table-saw fence accordingly.
If the wall varies slightly, you can often use the narrowest required dimension while ensuring your trim will cover the resulting expansion space.
For a wall with a significant curve or angle, however, a simple straight rip may leave a poor fit.
In that situation, transfer the wall profile to the plank and use a jigsaw or another suitable tool to follow the irregular line.
Remember Which Edge You Need
Before ripping the final row, determine which locking edge must remain.
The plank needs to connect to the previous row.
Removing the wrong side can eliminate the locking profile and leave the plank unusable.
Mark the waste section clearly before walking over to the saw.
How to Make Narrow Rip Cuts Safely
The narrower the required flooring strip becomes, the more carefully you need to plan the cut.
Never guide a narrow strip between the blade and fence with your fingers close to the blade.
Use a proper push stick or push block designed for your table saw.
If the required cut would create a setup that cannot be safely controlled with your equipment, choose another method.
A jigsaw or guided circular saw may be safer for an unusual narrow or tapered final piece.
The goal is not to prove that every possible flooring cut can be made on the table saw.
Use the method that gives you safe control over the workpiece.
Can You Crosscut Pergo Flooring on a Table Saw?
Yes, but you should use a miter gauge or crosscut sled, not the rip fence as your primary guide.
A common table-saw mistake is placing a plank sideways against the rip fence and pushing it through the blade.
That setup can trap the cutoff between the fence and blade and create a serious kickback hazard.
For a crosscut, support and guide the plank with the miter gauge or a properly designed crosscut sled.
If you need repeated identical lengths, a stop block can be arranged so the stock clears the stop before it reaches the blade.
For a whole flooring installation, however, I would normally use a miter saw for crosscuts because it is faster and more convenient.
Can You Cut Pergo at an Angle With a Table Saw?
Yes.
For an angled crosscut, use the saw’s miter gauge or a crosscut sled designed to handle the angle safely.
Do not attempt an angled crosscut by twisting the flooring between the rip fence and blade.
For a long angled rip or taper, you need a proper tapering method or another tool.
A jigsaw, track saw, or guided circular saw is often easier for one unusual tapered flooring piece.
Table Saw vs. Miter Saw for Pergo Flooring
The two tools complement each other.
A miter saw is usually the better option for cutting planks shorter.
Place a plank against the fence, make the crosscut, and return to installation.
A table saw becomes the better tool when the plank needs to be narrower.
If I were installing a room of Pergo flooring and had both tools available, I would use the miter saw for end cuts and the table saw for first- and last-row rip cuts.
That approach takes advantage of what each machine does best.
Table Saw vs. Circular Saw for Pergo Flooring
A circular saw is more portable.
With a straightedge or guide, it can make accurate rip cuts without requiring a large stationary saw.
That makes it particularly useful for DIY installers who do not own a table saw.
A table saw is faster when you need several planks ripped to exactly the same width.
Set the fence once, then process each plank consistently.
For only one or two rips, setting up a circular saw guide may be perfectly adequate.
Table Saw vs. Jigsaw for Pergo Flooring
These tools perform completely different jobs.
Use the table saw for straight lines.
Use the jigsaw when the cut changes direction.
Examples include fitting flooring around door frames, floor vents, columns, cabinets, and plumbing pipes.
Trying to create those shapes with a table saw can lead to unsafe plunge-style or incomplete cuts.
A jigsaw is the better choice.
What About Pergo Vinyl or Other Rigid Pergo Flooring?
Before taking a plank to the table saw, identify the actual flooring material.
Pergo is a brand rather than one single flooring construction.
If your product is a laminate plank with a wood-fiber core, table-saw cutting is a normal and practical approach.
Some rigid vinyl flooring can also be cut with saws, but certain products may be designed to be scored and snapped for straightforward cuts.
Using a saw on vinyl can also create plastic dust or small chips.
The product installation instructions should determine your method.
I would not automatically apply laminate cutting instructions to every Pergo product simply because the brand name is the same.
Dust and Safety When Cutting Pergo
Cutting flooring indoors can create much more dust than many people expect.
Whenever practical, set up your table saw outside or in a well-ventilated work area rather than filling the installation room with fine dust.
Connect appropriate dust extraction to the saw.
Wear eye protection and hearing protection.
Use respiratory protection appropriate for the material and dust exposure.
Do not disable guards simply to make the flooring easier to handle.
Watch for Kickback
Kickback occurs when the saw blade catches or pinches the workpiece and throws it back toward the operator.
Keeping the fence properly aligned, using the riving knife, maintaining steady control, and avoiding twisting the plank all help reduce this risk.
Stand out of the direct line behind the blade when possible.
Do Not Use Your Hands as a Push Stick
A flooring plank may seem too thin or lightweight to be dangerous, but the saw does not care how heavy the material is.
As the end of the plank approaches the blade, use appropriate pushing devices.
Never Clear Scraps With the Blade Running
Small laminate strips can collect around the insert or fence.
Turn off the saw and wait for the blade to stop before clearing them.
Key Takeaways:
- Use the table saw primarily for straight rips and use the correct crosscut equipment if cutting across a plank.
- Keep the riving knife and other applicable safety systems installed and use push devices for narrow cuts.
- Control flooring dust and never clear small offcuts near a moving blade.
Common Mistakes When Cutting Pergo With a Table Saw
Using the wrong blade is one of the most common mistakes.
A coarse framing blade may cut quickly, but the finished edge can look rough.
Another mistake is forgetting which locking edge needs to remain after the cut. Always check plank orientation before ripping.
Installing the final row without allowing the required expansion gap is also a problem. The flooring needs the space specified by its manufacturer to move with environmental changes.
An incorrectly positioned rip fence can result in every plank being the wrong width, so test the first plank before cutting the rest.
Finally, never use the rip fence incorrectly for a conventional crosscut. A table saw requires different guiding methods for ripping and crosscutting.
FAQs About How to Cut Pergo Flooring With a Table Saw
Can you cut Pergo flooring with a table saw?
Yes. A table saw works particularly well for long straight rip cuts, such as narrowing Pergo planks for the final row of a room.
What blade is best for cutting Pergo flooring?
A sharp carbide-tipped fine-finish blade designed for laminate, melamine, or composite panels is a good choice. For a typical 10-inch table saw, approximately 60–80 teeth is a practical range.
Should Pergo flooring face up or down on a table saw?
For a conventional table saw, the finished decorative surface generally faces upward because the blade enters through the top surface. Verify this with your specific flooring instructions and a test cut.
Can I use a 40-tooth table saw blade on Pergo?
It may cut the flooring, but a finer blade generally produces less chipping. If finish quality matters, I would choose a blade intended for laminate or fine panel cutting.
Is an 80-tooth blade good for laminate flooring?
Yes. An appropriate 80-tooth carbide blade can produce very clean laminate cuts when it is compatible with the saw and material.
Can I rip Pergo flooring lengthwise?
Yes. Long rip cuts are one of the main reasons to use a table saw for flooring.
How do I cut the last row of Pergo flooring?
Measure the remaining space at several points, subtract the required expansion gap, preserve the locking edge you need, and rip the opposite side to width.
Can I use a table saw for Pergo crosscuts?
Yes, provided you use a miter gauge or crosscut sled correctly. A miter saw is normally more convenient for repeated crosscuts.
Can I use the table saw fence when crosscutting flooring?
Do not trap a crosscut workpiece between the blade and rip fence. Use a miter gauge or crosscut sled and follow safe table-saw crosscutting practices.
How do I stop Pergo flooring from chipping?
Use a sharp fine-tooth blade, keep the decorative face in the correct orientation, maintain steady feed pressure, and use a zero-clearance insert when appropriate.
Why is my Pergo flooring burning while I cut it?
A dull or dirty blade, slow feeding, misaligned fence, or excessive friction can cause burning. Stop and correct the problem rather than forcing the plank through.
Can I cut multiple Pergo planks at once on a table saw?
I recommend cutting them individually unless you have a specific safe setup designed for stacked material. Individual cuts provide better control and reduce the chance of pieces shifting.
Can I use a table saw for curved Pergo cuts?
No. Use a jigsaw for curves, notches, and irregular shapes.
Can I cut Pergo around pipes with a table saw?
A table saw is not appropriate for circular pipe cutouts. A hole saw, drill, and/or jigsaw is normally more suitable.
Should I use a push stick when cutting flooring?
Yes whenever the width of the workpiece or your saw manufacturer’s instructions require one. Your hands should remain safely away from the blade.
How high should the table saw blade be for laminate flooring?
Raise it only enough to cut safely through the plank. Roughly 1/8 to 1/4 inch of tooth projection above thin flooring is a common practical setup, but follow your saw and blade manufacturer’s guidance.
Do I need a riving knife for cutting Pergo?
Use the riving knife whenever the saw and cutting operation allow it. It helps reduce the chance that the material will close around the back of the blade and contribute to kickback.
Is a table saw better than a miter saw for Pergo?
For long rip cuts, yes. For shortening planks with repeated crosscuts, a miter saw is generally more convenient.
Is a table saw better than a jigsaw for Pergo?
For straight cuts, yes. A jigsaw is better for curves, notches, and unusual shapes.
Can all Pergo flooring products be cut the same way?
No. Pergo offers flooring with different constructions. Check the installation instructions for your exact product before assuming the same cutting method applies.
Conclusion
Learning how to cut Pergo flooring with a table saw is especially useful when you reach the first or last row of an installation and need long, accurate rip cuts.
For most laminate-style Pergo flooring, I recommend a sharp fine-tooth carbide blade, preferably one designed for laminate, melamine, or similar composite panels. A 60- to 80-tooth blade is a useful starting range for many 10-inch table saws, although blade design matters more than tooth count alone.
Position the decorative surface upward for a typical table-saw cut unless your flooring manufacturer recommends otherwise. Measure carefully, preserve the locking edge you need, account for the specified expansion gap, and test the first plank before ripping the entire row.
Keep the plank flat against the table and rip fence, support long pieces, use the riving knife, and switch to a push stick or push block before your hands approach the blade. Smooth, steady feeding will usually produce a cleaner result than forcing the flooring through quickly.
I would use the table saw primarily for straight lengthwise cuts. For repetitive crosscuts, a miter saw is more convenient, while a jigsaw is the better choice for pipes, corners, curves, and irregular notches.
Most importantly, verify which Pergo flooring product you have before cutting. Once you combine the correct blade, accurate fence setup, finished-side orientation, and safe feed technique, a table saw can produce fast, consistent, clean Pergo flooring cuts throughout the installation.