How to Adjust a Panel Saw for Square, Accurate Cuts
If you want to know how to adjust a panel saw, start by disconnecting power, cleaning the machine, and determining exactly which part of the cut is inaccurate. Then check the blade alignment, blade-to-panel angle, guide rails, material rollers or fence, carriage movement, and measuring scales—in that order. Make only small adjustments and verify each change with a test cut before moving to the next setting.
On a vertical panel saw, accurate cutting depends on several components working together. The blade must travel parallel with the carriage guides, the guides must be square to the material-support rollers or fence, and the panel itself must sit against a straight, stable reference surface. If any one of those relationships changes, a cut can become out of square even though the saw blade looks perfectly straight.
The exact adjustment procedure varies considerably between manufacturers. Some panel saws have field-adjustable guide-rail brackets and rollers, while others use factory-indexed alignment systems that manufacturers specifically recommend owners not disturb. Therefore, this guide explains the general adjustment sequence rather than telling you to loosen a particular bolt that may perform a completely different function on your machine.
This guide focuses primarily on vertical panel saws, the type commonly used to crosscut and rip full sheets of plywood, MDF, melamine, laminate, and similar panel products. Horizontal beam saws and sliding-table panel saws use different calibration procedures and should be adjusted according to their specific service documentation.
In this guide, I’ll explain how to diagnose an inaccurate panel saw, square the cutting path, adjust the blade and guides, calibrate rulers and stops, and determine when an alignment problem should be handled by the manufacturer or a qualified service technician.
What Does Adjusting a Panel Saw Mean?
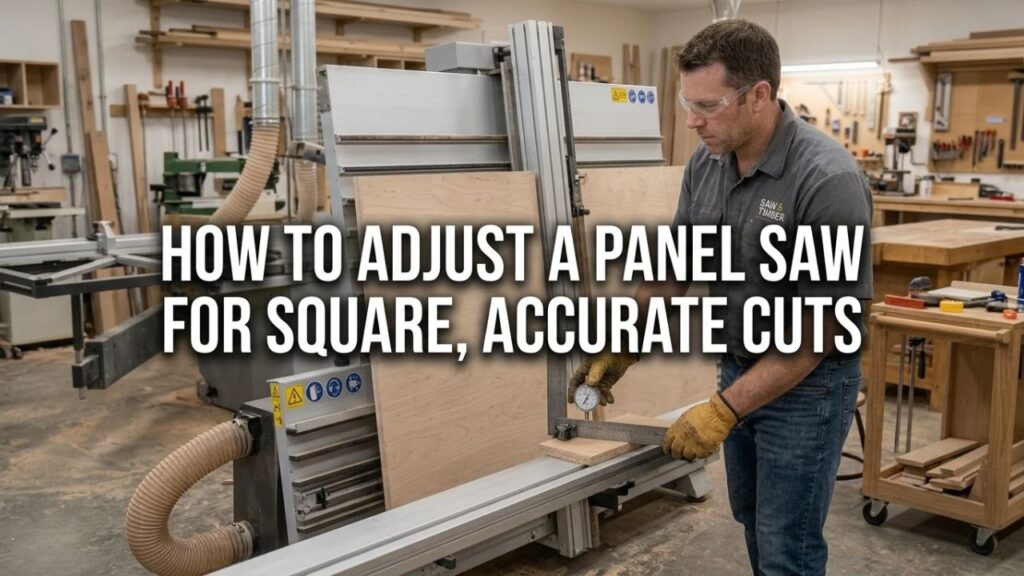
Adjusting a panel saw can mean several different things.
You might need to correct:
- A vertical cut that is not 90 degrees to the bottom edge
- A blade that heels or burns one side of the cut
- A cut that is beveled through the thickness of the panel
- A measuring ruler or stop that gives the wrong finished dimension
- A carriage that has excessive play or does not move smoothly
These problems have different causes.
For example, adjusting the measuring tape will not correct a saw that cuts a parallelogram instead of a rectangle. Likewise, moving the guide rails will not solve inaccurate dimensions if the geometry is square but the ruler pointer is simply calibrated incorrectly.
Common Panel Saw Problems and Likely Causes
| Symptom | Likely Area to Check |
| Vertical cut not square to bottom edge | Guide rails vs. material rollers/fence |
| Burn marks on one side | Blade parallelism or dull blade |
| Kerf wider than expected | Blade heeling, blade runout, or damaged blade |
| Cut beveled through panel thickness | Blade perpendicularity to panel face |
| Dimensions consistently off by same amount | Ruler, indicator, stop, or kerf calibration |
| Accuracy changes along machine width | Roller/fence alignment |
| Carriage moves sideways | Bearings, guides, or carriage adjustment |
| Carriage sticks | Dirty/damaged guides or excessive bearing preload |
| Chipping only | Blade/scorer condition rather than basic squareness |
Diagnosing the symptom first prevents you from changing adjustments that were already correct.
The Correct Order for Panel Saw Alignment
Although designs vary, a useful general alignment sequence is:
1. Verify blade condition and mounting.
2. Check that the blade travels parallel with the carriage guides.
3. Check that the blade is perpendicular to the face of the panel.
4. Square the guide system to the material-support rollers or fence.
5. Verify roller or fence alignment if the manufacturer permits field adjustment.
6. Calibrate rulers, indicators, and stops.
7. Make test cuts and fine-tune.
This order matters.
For example, if you calibrate the crosscut ruler first and then change the blade alignment, the ruler may need to be calibrated again.
Key Takeaways:
- Diagnose the type of error before adjusting anything.
- Establish mechanical alignment before calibrating rulers and stops.
- Make only small changes and test the saw after each adjustment.
Safety Before Adjusting a Panel Saw
Panel saw alignment requires working close to the blade, guides, carriage, and adjustment hardware.
Disconnect the saw from its power source before performing mechanical adjustments.
In a commercial shop, follow the required lockout/tagout procedure so another person cannot energize the machine while you are working on it.
Wait until the blade has stopped completely.
Never perform blade-alignment checks with the motor running.
Keep guards installed except where the manufacturer’s adjustment procedure specifically requires temporary removal. Reinstall every guard before testing the machine under power.
Wear eye protection during test cutting and hearing protection when operating the saw.
Don’t Adjust a Damaged Machine
If the frame is visibly bent, guide tubes are dented, roller assemblies are damaged, or the carriage has suffered an impact, normal calibration may not solve the problem.
A damaged structural component may need replacement before accurate alignment is possible.
Clean the Panel Saw Before Adjusting It
Sawdust can create surprisingly large alignment errors when trapped between reference surfaces.
Before reaching for adjustment tools, clean:
The guide rails or tubes, carriage bearings, material rollers, fence surfaces, blade area, stops, and measuring indicators.
A piece of compacted sawdust on one roller can cause a panel to sit differently from one end of the machine to the other.
Dust on guide tubes can also make the carriage feel tight or inconsistent.
Use the cleaning procedure recommended by the saw manufacturer.
Avoid applying random oils or lubricants to guide surfaces because some bearing systems are designed to operate dry and oily surfaces can attract additional dust.
Check the Saw Blade Before Changing Alignment
An alignment procedure is only meaningful if the blade itself is in good condition.
Unplug the saw and inspect the blade.
Look for:
Missing carbide teeth, bent teeth, heavy pitch buildup, a distorted blade plate, damaged arbor surfaces, or excessive wear.
A warped blade can mimic an alignment problem.
Likewise, a dull blade can produce heat and burn marks even when the saw is perfectly aligned.
Verify the Blade Is Properly Mounted
Make sure the blade is seated correctly against the arbor flange and that the blade hardware is correctly tightened.
Debris trapped between the blade and flange can introduce runout.
If the saw began cutting inaccurately immediately after a blade change, inspect the blade installation before changing the machine’s alignment.
Also confirm that the replacement blade has the correct diameter, arbor size, rotation direction, and operating-speed rating.
How to Check Whether a Panel Saw Is Cutting Square
Before adjusting the machine, establish how far it is actually out of square.
Use a known-accurate large framing square, machinist’s square, or purpose-made panel-saw alignment tool.
Small squares are less useful on a full-size panel saw because a tiny angular error that is almost invisible over 12 inches becomes much larger across a 4-foot sheet.
Make a Test Crosscut
Place a flat piece of sheet material on the rollers.
Make a normal vertical crosscut.
Then check the freshly cut edge against a known-square reference edge.
Measure near both ends.
If the cut begins correctly but gradually moves away from the square, the cutting path is not perpendicular to the panel-support reference.
Use a Large Alignment Tool
Professional panel saws may use a large squaring fixture that references both the material rollers and guide system.
A large 3-4-5 triangle is a useful way to establish a true 90-degree reference.
Because:
3² + 4² = 5²
a triangle measuring 3 feet on one leg, 4 feet on the other, and 5 feet diagonally forms a right angle.
A larger reference makes small alignment errors easier to see.
How to Adjust the Blade Parallel to the Guide Rails
This adjustment addresses blade heeling.
The saw blade should move through the material in exactly the same direction as the carriage travels.
If the blade points slightly left or right relative to the guides, the front teeth may make the primary cut while the rear of the blade rubs one side afterward.
Symptoms can include:
Burn marks, a wider kerf, increased resistance, poor edge quality, and excessive blade heat.
How to Check Blade Parallelism
Disconnect power.
Position the saw for a normal vertical crosscut.
Use a reliable straight reference or the alignment fixture specified for your machine.
Check the blade plate relative to the carriage’s line of travel.
Be careful when referencing carbide-tipped blades because the carbide teeth usually protrude beyond the blade plate.
When measuring from individual teeth, mark one tooth and use that same tooth in different positions. This helps prevent blade runout from being mistaken for an alignment error.
Adjust in Very Small Amounts
How the motor or saw carriage is rotated differs by machine.
Some panel saws allow slight rotation of the motor mount or indexing assembly.
Others use factory-set components.
If your manual provides a blade-parallelism adjustment, loosen only the specified fasteners enough to permit movement.
Rotate the saw assembly by a tiny amount.
Retighten the hardware and check again.
A small angular movement at the motor can produce a noticeable difference across a long cut.
Don’t Use Burn Marks Alone as Proof
A misaligned blade can burn material, but so can:
A dull blade, dirty blade, excessively slow feed, inappropriate blade type, or internal stress in the workpiece.
Confirm the geometry before moving the motor.
Adjust the Blade Perpendicular to the Panel Face
Blade parallelism and blade perpendicularity are different adjustments.
Parallelism determines whether the blade points in the direction the carriage travels.
Perpendicularity determines whether the blade cuts at 90 degrees through the thickness of the panel.
If perpendicularity is wrong, a thick panel can have a slightly beveled cut edge even though the cut looks square when viewed from the front.
Check With a Square
Disconnect power.
Place a reliable square against the panel-support plane and the blade plate.
Avoid referencing directly against protruding carbide teeth if they interfere with the square.
The blade should be at 90 degrees to the panel face unless you intentionally set the machine for a bevel operation.
Adjust the Motor Angle Only as Specified
Some saws have adjustment screws, motor-mount bolts, or factory stops that control this angle.
Loosen the locking hardware, make a very small correction, and retighten.
Then recheck.
If the model has a fixed factory perpendicularity setting with no user adjustment, do not create your own by slotting holes or modifying the mount.
How to Square the Guide Rails to the Material Rollers
This is usually the most important adjustment when a vertical panel saw consistently makes crosscuts that are not 90 degrees.
The bottom rollers or material fence establish the horizontal reference.
The vertical guide rails establish the carriage travel.
These references need to be perpendicular.
Check the Relationship First
Place your large square or alignment fixture against the roller reference.
Slowly move the unplugged saw carriage down its guides.
Use the blade or another manufacturer-specified carriage reference to determine whether the carriage maintains the same relationship with the vertical leg of the square from top to bottom.
If the distance changes, the guides are not square to the rollers.
Adjustment Method Depends Heavily on Brand
This is where you should resist the temptation to follow a generic bolt-loosening procedure.
On some Safety Speed designs, guide-track brackets can be shifted slightly for alignment.
On certain Saw Trax models, the guide system uses an indexed Accu-Square arrangement that is factory set and locked. Saw Trax advises contacting the manufacturer before attempting realignment, and some of its guide brackets are intentionally non-adjustable.
Other panel saw manufacturers use their own arrangements.
Therefore:
Determine which component your manufacturer intends to be moved before loosening anything.
Move the Adjustable End Only
If the manufacturer permits guide adjustment, usually only one end of the guide structure is moved.
The opposite end establishes the fixed reference.
Make a tiny change, tighten the bracket, and measure again.
Do not strike a precision guide tube directly with a hammer.
If your manufacturer specifies using a dead-blow mallet to reposition a bracket, strike only the designated bracket—not the guide rail or tube itself.
Key Takeaways:
- Blade parallelism controls heeling; guide squareness controls whether the crosscut is truly 90 degrees.
- Blade perpendicularity is a separate adjustment affecting the cut through the panel’s thickness.
- Never assume your panel saw uses the same guide-adjustment system as another brand.
Check the Material Rollers or Fence
For a sheet to cut square, the panel must sit against a straight horizontal reference.
If one material-support roller is higher or lower than the others, a large sheet may tilt slightly.
That can create inconsistent cuts even if the carriage travels perfectly square.
Use a Long Straightedge
Place a known-straight reference across the support rollers.
Look for gaps between the straightedge and individual rollers.
The panel should be supported consistently along the reference line.
Full-size panel saws may have a very long roller bed, so a short 24-inch level cannot adequately verify the entire machine.
Don’t Adjust Rollers Without Checking the Manual
Some panel saws have individually adjustable roller hubs.
Others deliberately use fixed roller positions and should not require routine adjustment.
On some professional saws, the manufacturer recommends contacting technical service before altering material rollers because changing one roller can affect the geometry of the entire support system.
If roller alignment is outside specification, follow the model-specific procedure.
Adjust the Carriage Bearings or Guides
The saw carriage should move smoothly up and down without noticeable side-to-side play.
Too much clearance can allow the blade to wander during a cut.
Too little clearance can make the carriage bind and encourage the operator to pull unevenly.
Check for Play With the Power Disconnected
Move the carriage to several positions along the guides.
Gently check for unwanted lateral movement.
You are looking for movement between the carriage and guide system, not normal flexibility in handles or accessories.
Then move the carriage through its full travel.
It should feel smooth and consistent.
Clean Before Tightening Anything
A carriage that becomes difficult to move may simply have dust or debris on its guide rails.
Clean the system first.
If adjustment is still required, follow the bearing-preload procedure for the specific panel saw.
Do not overtighten carriage bearings merely to eliminate every sensation of movement.
Excessive preload can damage bearings or make the machine difficult to operate accurately.
Calibrate the Crosscut Measuring Scale
Once the saw is mechanically square, check the crosscut ruler, measuring tape, or stop system.
A scale can be wrong even though the cut is perfectly square.
For example, you might set the stop to 24 inches and consistently receive a 23-15/16-inch panel.
That is a calibration problem rather than a squareness problem.
Use an Actual Cut for Final Calibration
Set the stop to a convenient dimension.
Make a cut from stable material.
Measure the finished workpiece with an accurate tape or steel rule.
Compare that dimension with the scale.
If the difference is consistent, reposition the scale indicator or stop according to the manufacturer’s instructions.
Repeat the cut to verify.
Why Blade Changes Can Affect Measurement
Different blades can have different kerf widths.
Depending on how a panel saw’s rulers and stops reference the blade, changing blade types may require recalibration of some measuring indicators.
If dimensions became inaccurate immediately after installing another blade, check the ruler calibration rather than immediately changing the machine geometry.
Adjust the Rip-Cut Height Indicator
When a vertical panel saw is rotated into its horizontal rip position, a vertical ruler often indicates the distance from the material-support rollers or auxiliary fence to the blade.
That indicator needs calibration too.
Position the blade at a known height.
Measure the actual distance carefully.
Then compare it with the ruler or pointer.
If they do not match, move the indicator—not the mechanical saw alignment—unless other tests show the saw geometry itself is wrong.
Make a test rip after adjustment.
Adjust Stops and Fences
Optional stop bars, quick stops, digital measuring systems, and midway fences can introduce their own errors.
Check each accessory independently.
For example, if the main machine cuts accurately from a tape measure but every piece cut against the quick stop is 1/8 inch short, the problem is probably the stop calibration.
Do not realign the entire panel saw to compensate for one accessory.
Keep Stop Faces Square
The face of a stop should contact the material predictably.
A bent or loose stop can change the dimension depending on where the panel touches it.
Tighten mounting hardware and verify that the stop itself has not been damaged.
Adjust the Kerf Spreader if Your Saw Has One
Some vertical panel saws use a kerf spreader during horizontal rip cuts.
Its purpose is to support the upper portion of the workpiece and help prevent the material from closing onto or pinching the blade.
The spreader should be aligned with the blade and positioned at the correct height.
It should not push the panel away from its natural path.
If it sits too high, low, or sideways, it can interfere with smooth feeding.
Follow the manufacturer’s procedure and always use the spreader when the saw design requires it for ripping.
What About a Scoring Unit?
Professional panel saws used for melamine, laminated particleboard, and other coated sheet goods may have a scoring unit.
The scorer creates a shallow preliminary cut so the main blade can cut without pulling large chips from the finished surface.
A scoring system requires its own alignment.
Generally, its scoring path needs to correspond precisely with the main blade kerf.
If it is too far left or right, you may see a step along one side of the finished cut.
If it is too narrow, the main blade can still chip the coating.
If it is excessively wide or deep, the finished edge may show an unnecessary score line.
Because scoring systems differ significantly, use the manufacturer’s specified width and depth adjustment rather than a universal setting.
How to Make a Final Test Cut
After alignment, use a reasonably large, flat panel.
A warped scrap panel is a poor calibration reference.
Place a factory edge or verified straight edge firmly against the support rollers.
Make a vertical crosscut.
Then evaluate:
The 90-degree angle, edge straightness, dimensions, burn marks, chipping, and consistency from top to bottom.
If everything is correct, make a second cut at a different part of the machine.
This helps verify that the support system remains consistent across its working width.
Measure Diagonals on a Rectangular Test Piece
If you cut a rectangular panel, measure diagonally from corner to opposite corner in both directions.
A truly rectangular piece should have equal diagonal measurements, assuming opposite sides are equal in length.
Different diagonals indicate that the panel is not square.
This is an excellent final confirmation because it evaluates the complete geometry of the finished workpiece rather than only one corner.
Signs Your Panel Saw Is Out of Adjustment
A panel saw may need inspection if you notice:
Cuts that consistently drift from square, burning on only one side of a crosscut, material binding during an otherwise normal cut, measurements that are no longer repeatable, unusual carriage movement, or panels that do not sit evenly across the rollers.
However, not every poor cut is an adjustment issue.
Check basic causes first.
A dull blade, wrong blade for the material, warped sheet, loose workpiece, excessive feed pressure, dirty rollers, or damaged blade can all reduce cut quality without requiring mechanical realignment.
How Often Should You Adjust a Panel Saw?
A properly installed professional panel saw should not require frequent complete realignment.
Manufacturers commonly set the machine accurately at the factory, and some designs use alignment systems specifically intended to remain fixed.
Frequent loss of squareness can indicate another problem, such as:
A loose mounting bracket, machine impact, damaged roller, worn carriage component, improperly installed replacement motor, or unstable saw frame.
Measuring scales and stops may need occasional calibration more often than the basic machine geometry.
Check Accuracy Rather Than Following a Calendar
Instead of realigning the saw every six months regardless of performance, periodically make a known-square test cut.
If it remains within the accuracy required for your work, leave the mechanical geometry alone.
Unnecessary adjustments can make a properly aligned saw worse.
Key Takeaways:
- Panel saws should normally hold their mechanical alignment for long periods.
- Test accuracy before assuming realignment is necessary.
- Rulers and stops may need recalibration even when the underlying saw geometry remains correct.
Should a Panel Saw Frame Be Perfectly Vertical?
Not necessarily.
Many vertical panel saws are intentionally designed with the frame leaning slightly backward so the sheet material remains against the support structure.
Therefore, do not automatically place a level against the frame and force it to stand at exactly 90 degrees to the floor.
Install the frame according to the manufacturer’s wall-mount, stand, or floor requirements.
What matters for cutting accuracy is the relationship between the machine’s cutting guides, material supports, and blade.
A twisted or improperly supported frame can create accuracy problems, but the intended rearward lean itself is not necessarily an error.
When Should You Call the Manufacturer?
Contact the panel saw manufacturer or an experienced service technician when:
The guide tubes are visibly bent, material rollers require complex realignment, the machine has suffered a major impact, structural frame components are damaged, a factory-indexed alignment system appears to have shifted, or the saw remains inaccurate after the normal calibration checks.
This is particularly important on machines whose alignment components are intentionally locked at the factory.
Do not alter factory mounting holes or grind brackets simply to obtain additional adjustment.
The apparent alignment problem may actually come from another component.
FAQs About How to Adjust a Panel Saw
How do you adjust a panel saw?
Disconnect power, inspect and clean the machine, verify blade condition, check blade parallelism, blade perpendicularity, guide-to-roller squareness, carriage movement, and then calibrate the rulers and stops.
How do I make my panel saw cut square?
Check that the vertical carriage guides are exactly perpendicular to the material-support rollers or fence. Use a large accurate square or alignment fixture and follow the manufacturer’s guide-adjustment procedure.
Why is my panel saw cutting out of square?
Common causes include guide misalignment, uneven material-support rollers, carriage play, a damaged frame, or a panel that is not seated firmly against its reference surface.
Why does my panel saw burn one side of the cut?
The blade may be heeling rather than running parallel to the carriage guides. A dull or dirty blade and improper feed rate can also cause burning.
What does blade heeling mean?
It means the blade is angled slightly relative to the direction of travel, causing the back of the blade to rub one side of the kerf.
How do I know if my blade is parallel?
With power disconnected, compare the blade plate or a marked reference tooth with a known straight alignment reference along the direction of carriage travel.
How do I adjust panel saw rollers?
Procedures vary by model. Some rollers are adjustable, while others are factory fixed. Do not alter them without consulting your machine’s service instructions.
Should all panel saw rollers be level with each other?
The material-support rollers should form the straight reference intended by the manufacturer so the panel does not tilt or rock during cutting.
Why is my panel saw measurement wrong even though the cut is square?
The mechanical alignment may be correct while the ruler, pointer, stop, or digital measuring system is out of calibration.
Do I need to recalibrate after changing the blade?
You may need to verify rulers or measurement indicators because different blades can have different kerf widths and positioning characteristics.
How tight should the panel saw carriage be?
It should travel smoothly with minimal unwanted side play. Excessive bearing preload can make the carriage bind, so follow the manufacturer’s adjustment procedure.
Can I use a framing square to adjust a panel saw?
Yes, if it is known to be accurate and large enough to reveal the error. A purpose-built large alignment fixture can provide greater precision across a full-size saw.
How do I test a panel saw after adjustment?
Make a large crosscut, check the cut with an accurate square, verify its finished dimension, and measure both diagonals of a rectangular test panel.
Should I adjust a Saw Trax panel saw myself?
Saw Trax uses factory-indexed alignment systems on many models and recommends contacting the company before attempting significant realignment.
How often should a panel saw be squared?
A quality machine should not require frequent squaring. Check accuracy periodically and adjust only when test cuts show a measurable problem.
Conclusion
Learning how to adjust a panel saw begins with understanding that several separate adjustments determine cutting accuracy.
Do not start by randomly moving guide rails or rollers.
First disconnect power, clean the machine, inspect the saw blade, and make a test cut that tells you what is actually wrong.
If the blade burns one side of the cut or produces an unusually wide kerf, check whether the blade is parallel to the carriage guides. If the cut is beveled through the panel’s thickness, check blade perpendicularity. If the vertical crosscut is not 90 degrees to the panel’s bottom edge, check the relationship between the guide system and material-support rollers or fence.
Only after those mechanical relationships are correct should you calibrate the crosscut rulers, rip-height indicators, stop bars, or digital measuring systems.
Remember that panel saw designs differ substantially. Some manufacturers provide field adjustments for guide brackets and rollers, while others intentionally lock these components at the factory. Always identify the adjustment system used on your particular saw before loosening structural hardware.
After every change, retighten the appropriate fasteners and make a test cut. Use a large accurate square and, when possible, check the diagonals of a rectangular test panel to verify that the entire machine is cutting square.
If the frame is damaged, the guide tubes are bent, the rollers have shifted significantly, or a factory-locked alignment system is no longer accurate, contact the manufacturer rather than trying to compensate with increasingly large adjustments.
The most important rule is simple: adjust the panel saw systematically—blade first, guides second, material supports third, and measuring scales last. Following that sequence makes it much easier to achieve straight, square, repeatable cuts without disturbing parts of the machine that were already correctly aligned.