How to Cut Panels on a Table Saw Safely and Accurately
To learn how to cut panels on a table saw safely, support the entire sheet, use the rip fence only for cuts parallel to an existing straight edge, set the blade just above the panel, and feed the material smoothly while keeping it flat against the table and fence. For very large or heavy panels, it is often safer to break the sheet into smaller pieces first with a circular saw and straightedge before making final table-saw cuts.
A table saw can make extremely straight, repeatable cuts in plywood, MDF, particleboard, melamine, and other sheet goods. The challenge is not usually the blade’s ability to cut the material. The challenge is controlling a large panel safely enough that it does not twist, bind, tip off the table, or push sideways against the blade.
A full 4 × 8-foot sheet can be awkward even for an experienced woodworker, particularly on a portable or contractor-style table saw with a relatively small tabletop. Good infeed, outfeed, and side support are therefore just as important as the saw itself.
It is also important to understand when to use the rip fence and when not to. Long cuts parallel to the panel edge are generally made with the fence. Crosscuts across a wide panel require a different setup, such as a properly supported crosscut sled or another cutting method. You should never trap a panel between the rip fence and a miter gauge during a crosscut.
In this guide, I’ll explain how to cut panels on a table saw, how to support large sheets, which blade to use, how to avoid kickback, and when a circular saw or track saw is actually the better tool.
How to Cut Panels on a Table Saw
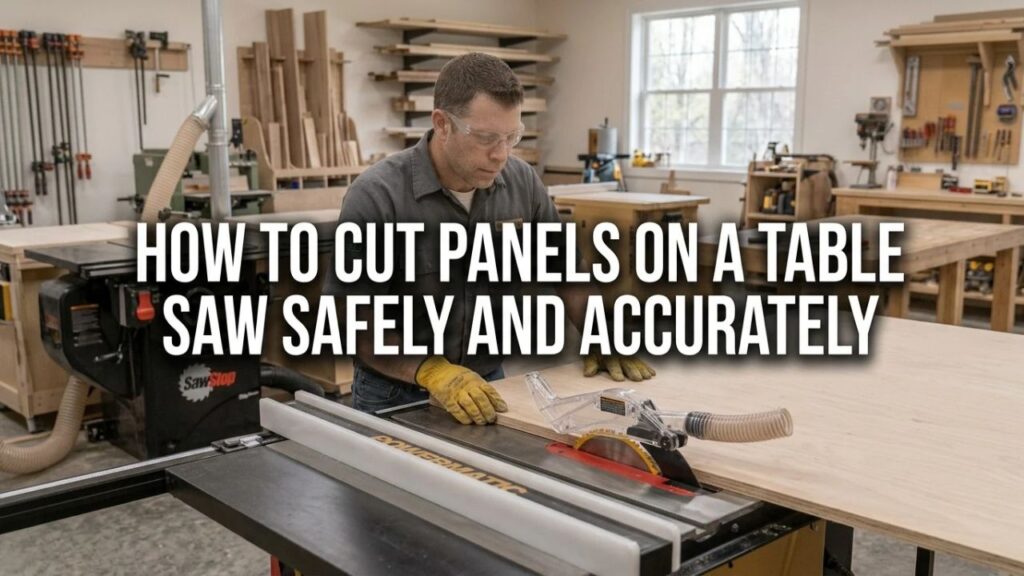
Start by determining what type of cut you need.
If you are cutting along the length of a panel to make it narrower, that is a rip cut.
For a rip cut, the table saw fence provides the reference.
Measure from the blade to the fence and lock the fence securely.
Place the panel on the table with a straight factory edge or previously straightened edge against the fence.
Support the sheet before the cut, beside the saw if necessary, and behind the saw so it cannot drop as it exits the blade.
Start the saw and allow the blade to reach full speed.
Feed the panel forward smoothly while maintaining light, consistent contact against the fence.
Do not force the sheet sideways into the fence.
Your main job is to keep the panel flat, stable, and moving in a straight line.
Continue feeding until the entire workpiece and your hands are safely past the cutting operation.
Do not reach over or behind the spinning blade to pull the workpiece through.
Key Takeaways:
- Fully support large panels before cutting.
- Use the fence for straight rip cuts parallel to a panel edge.
- Keep the material flat and feed smoothly.
- Never reach behind a running blade to pull a sheet through.
Is a Table Saw Good for Cutting Panels?
Yes, especially when the panel is already manageable in size.
A properly set up table saw produces straight edges and highly repeatable dimensions.
It is excellent for cabinet parts, shelving, furniture panels, wall panels, and plywood strips.
However, a table saw is not automatically the best tool for breaking down a full sheet.
The Main Problem Is Panel Size
A 4 × 8-foot panel may weigh enough that one person cannot control it safely on a small table saw.
Before the cut, much of the sheet hangs off the front of the saw.
During the cut, its center of gravity shifts.
After the cut, large pieces need support behind and beside the machine.
If the panel drops or rotates while part of it is still touching the blade, the blade can bind and kick the workpiece backward.
For large sheets, a circular saw or track saw often provides a safer first cut because the sheet remains stationary while the tool moves.
You can then bring smaller pieces to the table saw for final sizing.
What Types of Panels Can You Cut on a Table Saw?
A table saw can cut most common woodworking sheet materials when fitted with the correct blade.
Plywood
Plywood cuts well on a table saw.
For cabinet-grade plywood or veneered panels, use a fine-tooth blade to reduce face veneer splintering.
MDF
MDF also cuts very cleanly.
However, it creates a large amount of extremely fine dust.
Good dust extraction and respiratory protection are particularly important.
Particleboard
Particleboard can be cut with a carbide blade.
Because the material is abrasive and prone to edge chipping, a sharp blade improves results.
Melamine
Melamine-coated panels require special attention because the brittle surface can chip along the cut.
A high-tooth-count blade, zero-clearance insert, slow controlled feed, and properly aligned saw can significantly improve edge quality.
OSB
Oriented strand board is easy to cut but usually does not require the same finish quality as cabinet plywood.
A general-purpose carbide blade is normally sufficient.
What Table Saw Blade Is Best for Panels?
The best blade depends on the panel material and desired finish.
For clean plywood and veneered sheet goods, a fine-tooth carbide blade is generally preferable.
A typical 10-inch table saw may use a blade in the 60- to 80-tooth range for particularly clean crosscuts and sheet goods.
For general plywood ripping and mixed shop work, a good 40- to 50-tooth combination blade can also work well.
More Teeth Are Not Always Better
A high tooth count usually gives a cleaner edge, but it also clears chips more slowly.
For long heavy rip cuts in thick material, an excessively fine blade may run hotter and require slower feeding.
The goal is to choose a blade appropriate for both material thickness and cut direction.
Use a Sharp Blade
A dull blade increases feed pressure.
That encourages the operator to push harder, which can make panel control less predictable.
It can also increase burning, tear-out, and kickback risk.
How High Should the Table Saw Blade Be for Panels?
Set the blade only high enough for the teeth to clear the top surface of the panel.
A common approach is to expose roughly one tooth above the material.
You do not need several inches of blade protruding above a 3/4-inch panel.
Keeping blade exposure modest reduces the amount of exposed cutting edge while still allowing efficient cutting.
Always follow the saw and blade manufacturer’s guidance.
Which Side of Plywood Faces Up on a Table Saw?
On a conventional table saw, the blade rotates so the teeth enter the workpiece from the top and exit underneath.
That means the top face often receives the cleaner edge, while more splintering may occur on the underside.
For plywood with one important finished face, placing that finished face upward can therefore improve appearance.
However, blade design, veneer quality, zero-clearance support, and feed rate all affect the result.
Always make a test cut if the finish surface matters.
How to Support a Large Panel on a Table Saw
Support is one of the most important parts of panel cutting.
The sheet should not be allowed to tip before, during, or immediately after the cut.
Infeed Support
Large sheets extend well in front of the saw before you begin.
An infeed table, roller stand, or temporary support surface can help hold the weight.
The support should be slightly below or level with the saw table so it does not lift the panel and change its angle.
Outfeed Support
Outfeed support is even more important.
As you push the panel through, most of its weight eventually moves behind the blade.
If the rear of the sheet drops, the panel can pivot upward or sideways at the blade.
A solid outfeed table is preferable to a narrow roller because it supports the sheet over a much wider area.
Side Support
A wide panel may also hang significantly off the left side of the saw.
Side tables or stable support stands can prevent the sheet from sagging or tipping.
The goal is for the panel to move across the saw almost as though it were resting on one large continuous table.
Key Takeaways:
- Infeed support controls the sheet before the cut.
- Outfeed support prevents the panel from dropping after the blade.
- Wide sheets may also need side support.
- Support surfaces should not lift or steer the workpiece.
How to Rip a Panel on a Table Saw
Ripping means cutting parallel to the panel’s length or to a straight reference edge.
Set the rip fence to the desired width.
Measure carefully and account for which side of the blade contains the finished piece.
Lock the fence.
Place the straightest panel edge against it.
If the edge is not straight, do not expect the fence to create a straight cut automatically.
The workpiece follows whatever edge is touching the fence.
Feed From the Reference Edge
Maintain contact between the panel and fence at the area before the blade.
Do not push the trailing end sideways in an attempt to force the entire sheet against the fence.
That can rotate the panel into the blade.
Keep pressure controlled and forward.
Use Push Tools When Necessary
For narrow final cuts, keep your hands away from the blade and use appropriate push sticks, push blocks, or other safety devices.
Large panels themselves provide plenty of hand clearance early in the cut, but that can change dramatically as the offcut separates.
Plan where your hands will go before starting.
How to Crosscut a Panel on a Table Saw
Crosscutting a large panel is more difficult than ripping it because the dimension between the blade and fence may not provide the correct reference.
For small or medium panels, a large crosscut sled can provide excellent support and accuracy.
For full sheets, a table saw may not be the best option.
Do Not Use the Rip Fence and Miter Gauge Together Improperly
A dangerous setup occurs when the panel is guided by a miter gauge while its cut-off section is trapped between the blade and rip fence.
The offcut can become pinched and kicked backward.
If a stop block is used with a crosscut setup, it must be configured so the workpiece clears the stop before entering the blade, unless the jig is specifically designed otherwise.
Large Crosscuts Are Often Better With a Track Saw
When cutting 48 inches across a large sheet, a track saw or circular saw with a guide keeps the panel stationary.
That can be much easier to control.
After rough crosscutting, you can trim the smaller panel precisely on the table saw if required.
Should You Cut a Full 4 × 8 Panel on a Table Saw?
You can, provided the saw has sufficient capacity and the sheet is fully supported.
But capability and practicality are different things.
A large cabinet saw with a wide extension table, substantial outfeed table, and enough shop space can handle full sheets much better than a compact jobsite table saw.
For one person working on a small saw, breaking down the sheet first is often safer.
A Good Two-Stage Method
Place the full sheet on rigid foam or another appropriate sacrificial surface.
Use a circular saw or track saw with a straight guide to cut it slightly oversized.
Then move the smaller pieces to the table saw.
Trim them to exact final dimensions using the fence or crosscut sled.
This combines safe material handling with table-saw accuracy.
How to Get a Straight Cut on a Panel
A table saw cut is only as straight as the reference system.
The fence must be straight and correctly aligned.
The panel edge against the fence must also be straight.
The blade should not wobble.
The workpiece must remain flat throughout the cut.
Check Fence Alignment
A fence that points toward the blade at the outfeed end can pinch the workpiece.
A fence that is badly misaligned in the opposite direction can also reduce accuracy.
Set and maintain the fence according to your saw manufacturer’s alignment procedure.
Check the Panel Edge
Factory plywood edges are often straight enough for ordinary ripping, but not always.
If the reference edge is damaged or visibly bowed, establish a straight edge first using a track saw, circular saw guide, or straight-line ripping jig.
How to Prevent Tear-Out on Plywood Panels
Use a sharp fine-tooth blade.
Place the finished face on the side that receives the cleanest cut from your saw setup.
A zero-clearance throat plate can also support the fibers immediately adjacent to the blade and reduce splintering.
Painter’s Tape Can Help
Applying painter’s tape over the cut line may reduce minor surface splintering on some veneers.
It is not a substitute for a sharp blade, but it can help on delicate surfaces.
Score the Cut Line
For very fragile veneers, lightly scoring the cut line with a sharp knife can help separate surface fibers before the saw blade reaches them.
Use care so the scoring line remains exactly where the finished edge should be.
How to Cut Melamine Panels Without Chipping
Melamine is more challenging because its surface coating is brittle.
A high-quality fine-tooth blade is important.
A zero-clearance insert can reduce bottom-side breakout.
The saw should also be well aligned because lateral blade movement increases chipping.
Feed at a smooth, moderate rate.
Do not stop repeatedly with the blade buried in the panel.
Scoring Blades
Industrial sliding panel saws sometimes use a small scoring blade ahead of the main blade.
It makes a shallow cut in the lower surface before the main blade passes through.
Most ordinary table saws do not have this feature.
When using a conventional table saw, blade quality and zero-clearance support become especially important.
How to Cut MDF Panels on a Table Saw
MDF cuts easily but produces very fine dust.
Connect effective dust extraction if the saw supports it.
Wear appropriate respiratory protection and eye protection.
Because MDF has no grain direction, tear-out is usually minimal.
A sharp carbide blade produces a smooth edge.
Support MDF Carefully
Large MDF sheets can be heavier than plywood.
A full sheet may be difficult for one person to control even if the saw itself has enough ripping capacity.
Break large sheets down before final sizing when necessary.
How to Avoid Kickback When Cutting Panels
Kickback occurs when the workpiece is caught or pinched by the blade and thrown toward the operator.
Large panels can create substantial forces because they provide a large lever arm.
Keep the Riving Knife Installed
A properly aligned riving knife helps prevent the kerf from closing around the back of the blade.
Use it whenever the operation allows.
Do not remove it merely to make panel cutting seem easier.
Do Not Twist the Panel
Once the cut begins, maintain a straight feed path.
Do not rotate the sheet to correct a measurement while it is contacting the blade.
If the panel becomes unstable, stop the operation safely rather than trying to force it back into position.
Maintain Support
A sheet that falls off the back or side of the table can twist against the blade.
Good support directly reduces this risk.
Stand Out of the Direct Kickback Path
Do not position your torso directly behind the blade and workpiece.
Stand in a stable position that allows control while keeping you out of the most likely path of a kicked-back piece.
Should Someone Help You Cut Large Panels?
A helper can be useful, but only if both people understand their roles.
The operator at the saw controls the feed and alignment.
The helper should support the weight without pulling or steering the panel.
Never Let the Helper Pull
If someone behind the saw pulls the sheet, the panel may twist against the fence or blade.
The helper’s job is support, not propulsion.
Clear communication before starting is essential.
For many full-sheet cuts, using stationary support tables may be safer than relying on another person.
Key Takeaways:
- The operator should control feed direction.
- A helper should support, not pull or steer.
- Keep the riving knife in place whenever possible.
- Avoid standing directly in the kickback path.
How to Measure Panel Cuts Accurately
Measure the desired finished width and set the fence carefully.
Use the fence scale only after confirming it is calibrated.
For precision cabinet work, measuring directly from the blade to fence can provide additional confidence.
Measure to the Correct Part of the Blade
The blade kerf removes material.
If you are using a marked line rather than the fence, decide which side of the line is waste.
Cut on the waste side so the finished piece retains its intended dimension.
Make a Test Cut
For repeated parts, cut one sample first.
Measure it with an accurate tape, rule, or caliper as appropriate.
Once the setup is correct, produce the remaining parts without moving the fence.
This gives much more consistent results than measuring each piece independently.
What If the Panel Is Wider Than the Fence Capacity?
Do not improvise an unstable fence extension just to gain a few inches.
If the desired rip width exceeds the table saw’s rated capacity, use another cutting method.
A track saw or circular saw with a straightedge is a good option.
You can also cut the panel down to a manageable width first, then make final cuts on the table saw.
Table Saw vs. Circular Saw for Cutting Panels
The table saw is excellent for repeatable parallel cuts.
A circular saw is easier to bring to a large stationary sheet.
For full panels, the circular saw is often better for initial breakdown.
For final dimensioning, the table saw often provides better repeatability.
Table Saw vs. Track Saw for Panels
A track saw is particularly well suited to sheet goods.
You place the track directly on the panel and move the saw through the cut.
The panel can remain fully supported on a workbench or foam sheet.
This makes handling full sheets much easier.
A table saw becomes more efficient when you need many identical narrow strips or repeated cabinet parts.
Many woodworking shops use both tools for exactly this reason.
Table Saw vs. Panel Saw for Sheet Goods
A dedicated vertical or sliding panel saw is designed specifically for large sheet material.
It supports the panel while the saw carriage or table controls the cut.
A table saw requires the entire panel to move past a stationary blade.
For high-volume sheet cutting, a panel saw can be easier and safer.
For a general woodworking shop, the table saw remains more versatile.
Can You Cut Panels With a Small Jobsite Table Saw?
Yes, but large sheets require special caution.
A jobsite saw has a small table and lightweight base.
A full sheet can easily outweigh or destabilize the saw.
Use secure outfeed and side support.
Make sure the saw stand cannot move or tip.
If handling still feels awkward, break the panel down with a circular saw first.
There is no advantage in forcing a full sheet through a small saw simply because the fence has enough nominal capacity.
Common Mistakes When Cutting Panels on a Table Saw
One common mistake is trying to handle a full sheet without enough support.
Another is relying on a crooked panel edge against the rip fence.
A third is using the rip fence and miter gauge in a way that traps an offcut.
Some users also remove the riving knife unnecessarily.
Another mistake is standing directly behind the workpiece where kickback would travel.
Using a dull blade is also problematic because it encourages excessive feed pressure.
Finally, do not attempt to save time by reaching behind the blade and pulling the sheet through. Keep control from the safe operator side and provide enough outfeed support for the panel to continue moving naturally.
FAQs About How to Cut Panels on a Table Saw
How do you cut panels on a table saw?
Fully support the panel, set the rip fence for parallel cuts, raise the blade only enough to clear the material, and feed the sheet smoothly while keeping it flat and stable.
Can you cut a 4 × 8 sheet on a table saw?
Yes, if the saw has enough capacity and the sheet is fully supported. On small saws or when working alone, breaking the sheet down first is often safer.
What blade is best for cutting plywood panels?
A sharp carbide blade with a moderate-to-high tooth count is generally best. For especially clean veneer cuts, a 60- to 80-tooth blade can work well on a typical 10-inch table saw.
Which side of plywood should face up?
On a conventional table saw, the top surface often receives the cleaner edge because the blade teeth enter from the top.
How high should the table saw blade be?
Set it only high enough for the teeth to project slightly above the panel, following the saw manufacturer’s guidance.
Do I need an outfeed table for large panels?
It is highly recommended. Without rear support, the panel can drop and twist against the blade.
Can I use the rip fence to crosscut panels?
Not as a simple trapped reference while also using a miter gauge. For crosscuts, use a properly designed sled or another safe method.
Why is my plywood chipping on the table saw?
Common causes include a dull or low-tooth-count blade, poor support around the blade, incorrect face orientation, or an unstable feed.
Can a table saw cut MDF?
Yes. MDF cuts cleanly, but it creates substantial fine dust, so use good dust control and respiratory protection.
Can I cut melamine on a table saw?
Yes. Use a sharp fine-tooth blade, good support, and preferably a zero-clearance insert to reduce chipping.
Why does my panel bind against the blade?
The sheet may be twisting, the fence may be misaligned, the kerf may be closing, or the workpiece may not be adequately supported.
Should I use a riving knife when cutting panels?
Yes, whenever the cutting operation allows it. A correctly aligned riving knife helps reduce kickback risk.
Is a track saw safer for full sheets?
It is often easier to control because the panel stays stationary while the saw moves. This can make full-sheet breakdown much more manageable.
Should a helper pull the panel from behind the saw?
No. A helper should support the panel’s weight but should not pull or steer it.
Is it better to rough-cut panels first?
For full sheets on a small saw, yes. Rough-cut slightly oversized pieces with a circular or track saw, then trim them precisely on the table saw.
Conclusion
Learning how to cut panels on a table saw is less about forcing large sheets through the blade and more about controlling the material correctly.
A table saw is excellent for accurate, straight, repeatable panel cuts, but only when the sheet remains fully supported and stable throughout the operation.
For rip cuts, use the fence as the reference and keep a straight panel edge against it.
Support the workpiece at the front, rear, and side as necessary so its weight never causes it to rotate or drop while touching the blade.
Choose a sharp carbide blade appropriate for the material. Fine-tooth blades generally produce cleaner cuts in plywood, veneers, and melamine, while a good combination blade can handle a wide range of ordinary sheet-goods work.
Keep the blade exposure modest, use the riving knife whenever possible, and never stand directly in the likely kickback path.
For large crosscuts or full 4 × 8 sheets, remember that the table saw is not always the safest first tool. A circular saw or track saw allows you to leave the full sheet stationary and cut it into manageable sections.
You can then bring those smaller pieces to the table saw for accurate final sizing.
This two-stage approach is particularly useful with compact jobsite saws, where a full panel can overwhelm the size and stability of the machine.
The practical rule is simple: support the entire panel, use the correct reference system, keep the workpiece moving straight, and never sacrifice control just to make a full sheet fit on the table saw. When a sheet is too large to handle comfortably, break it down first and use the table saw for the precision work it does best.