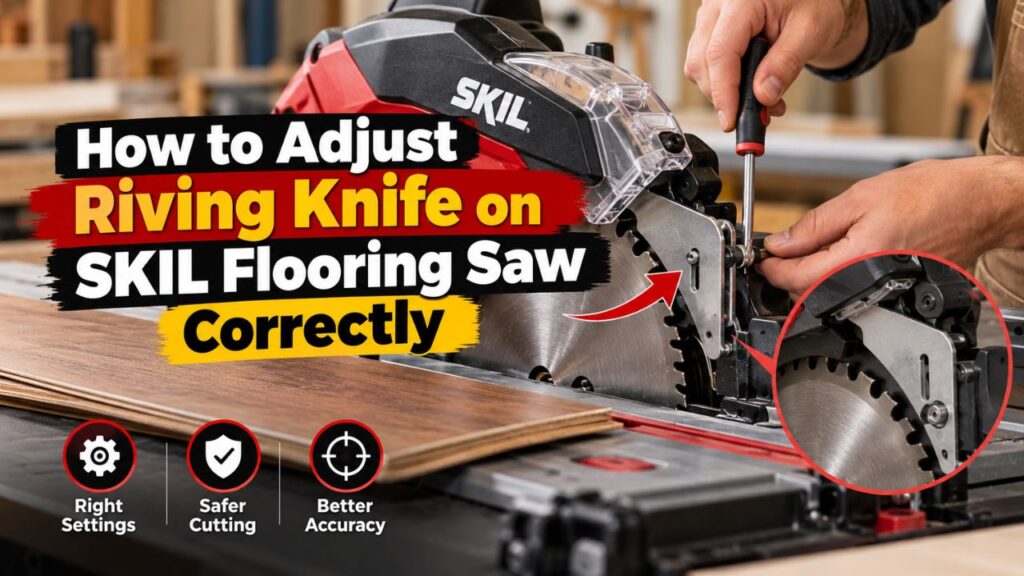
How to Adjust Riving Knife on SKIL Flooring Saw Correctly
To learn how to adjust riving knife on SKIL flooring saw models such as the 3601/3601-02, unplug the saw, remove the anti-kickback pawls, slightly loosen the two Phillips-head screws that secure the riving knife to the blade guard, align the knife directly in line with the saw blade, and retighten both screws. The knife should track directly behind the blade rather than sitting noticeably to either side.
This adjustment is important because the riving knife helps keep a rip cut from closing around the rear of the blade. If the knife is noticeably misaligned, flooring or other material can rub against it, wander away from the fence, feed poorly, or contribute to an increased kickback risk.
The adjustment on the SKIL flooring saw is simpler than the multi-direction adjustments found on some full-size table saws. On the 3601 series, the user adjustment described in the manual is primarily about bringing the riving knife into the same line as the blade. You should not bend the knife or start adding improvised washers simply because the alignment looks wrong.
Blade compatibility matters as well. On the SKIL 3601-02, the original 4-3/8-inch blade has a 0.078-inch kerf and a 0.047-inch body, while replacement blades must have a kerf of at least 0.061 inch and a body thickness no greater than 0.057 inch. Using an incompatible thin-kerf or overly thick-body blade can prevent the riving knife from working correctly even if the knife itself is perfectly aligned.
In this guide, I’ll explain the adjustment process from start to finish, how to check whether the riving knife is centered behind the blade, what symptoms indicate misalignment, how blade thickness affects the system, and what to do if the knife still rubs after adjustment.
What Does the Riving Knife Do on a SKIL Flooring Saw?
A riving knife is the thin metal plate positioned immediately behind the saw blade during a rip cut.
Its job is not to cut the flooring.
Instead, it follows the kerf created by the blade and helps prevent the two newly cut edges from closing around the rear of the rotating blade.
That matters because wood-based flooring and other materials can contain internal stresses. After the blade separates the material, the two sides of the cut can move slightly.
If the cut closes around the back of the blade, the spinning teeth can grab the workpiece and push it backward toward the operator.
That sudden movement is known as kickback.
The riving knife helps keep the kerf open and guides the workpiece past the rear of the blade.
On the SKIL 3601 flooring saw, the anti-kickback pawls work alongside the riving knife during rip cutting. The owner’s manual instructs the user to make sure the riving knife is aligned and the anti-kickback pawls are functioning before beginning a rip cut.
Why Alignment Matters
The knife needs to follow the path of the blade.
Imagine looking directly down the tooth line from the front or rear of the saw.
The riving knife should appear to continue along that same path.
If it sits too far left, the workpiece can hit the left side of the knife.
If it sits too far right, the material can hit the right side.
Either condition can make feeding feel unusually difficult.
A misaligned knife can also push the flooring sideways against the fence, which is exactly what you do not want during a rip cut.
Key Takeaways:
- The riving knife follows the blade kerf and helps reduce the chance of the cut closing on the blade.
- It should sit directly in line with the blade rather than noticeably to one side.
- The anti-kickback pawls and riving knife are both important during rip cutting.
How to Tell if the Riving Knife Needs Adjustment
Do not adjust the riving knife simply because you have never adjusted it before.
First check whether there is actually a problem.
The clearest visual sign is a knife that does not line up with the blade when viewed along the cutting path.
You may also notice problems when feeding material during a rip cut.
Flooring Rubs Against the Riving Knife
The workpiece may pass through the front of the blade normally and then suddenly become harder to push as the cut reaches the riving knife.
That can mean the knife is offset relative to the kerf.
However, rubbing does not automatically prove the knife is misaligned.
An incompatible blade with an overly narrow kerf can create exactly the same problem.
Material Moves Away From the Fence
A badly offset knife can push the workpiece sideways after the blade cuts it.
If you find yourself applying unusual side pressure simply to keep flooring against the rip fence, stop the saw and investigate.
Do not compensate by forcing the material harder.
The Knife Looks Crooked Behind the Blade
With the saw unplugged, sight along the blade and riving knife.
The knife should be visually centered in the cutting path.
A straightedge can also help during inspection, provided it is used carefully against the blade body rather than relying on alternating tooth tips that project to both sides.
The Problem Appeared After a Blade Change
This is an important clue.
If the saw worked properly before a blade replacement and began binding immediately afterward, check blade specifications before adjusting everything else.
The new blade may have an incorrect kerf or body thickness.
Before You Adjust the Riving Knife
Important Safety Warning: Disconnect the flooring saw from the electrical outlet before touching the blade, riving knife, anti-kickback assembly, screws, or guard. Do not rely only on the power switch being in the OFF position. SKIL specifically requires disconnecting the plug before assembly, adjustment, or repair work on the riving knife.
Wait until the blade has completely stopped before approaching it.
I also recommend cleaning loose sawdust from the blade and knife area before evaluating alignment. Packed dust can make components appear closer together than they really are and can interfere with your view of the mounting screws.
Wear eye protection if you use compressed air or another cleaning method, although vacuuming is usually preferable for controlling fine flooring dust.
Confirm the Blade Is Installed Correctly First
A riving knife cannot be aligned accurately to a blade that is itself incorrectly installed.
Check that the blade sits properly against its inner collar and that the outer collar and blade bolt are correctly assembled.
The 3601 uses a 4-3/8-inch blade with a 3/4-inch arbor, and the rotation arrow on the blade should match the rotation direction indicated by the saw. The blade bolt uses a left-hand thread on this model.
You generally do not need to remove the blade merely to align the riving knife.
The point is to make sure the blade is seated normally before using it as the alignment reference.
How to Adjust Riving Knife on SKIL Flooring Saw Step by Step
The following procedure matches the riving-knife alignment instructions for the SKIL 3601/3601-02 flooring saw.
If your saw has a different model number or a visibly different riving-knife mounting design, use the instructions for that specific model instead of assuming the procedure is identical.
1. Unplug the Flooring Saw
Turn the saw off and remove the plug from the electrical outlet.
Set the power cord where it cannot accidentally be reconnected while you are working.
Do not perform this adjustment with the saw energized.
2. Remove the Anti-Kickback Pawls
The anti-kickback pawls sit around the riving-knife area and need to be moved out of the way so you can access and align the knife properly.
Remove them according to the saw’s normal mounting arrangement.
Keep the components nearby so they can be correctly reinstalled before rip cutting.
Do not permanently operate the saw without safety components merely because removing them makes the workpiece easier to feed.
3. Locate the Two Riving-Knife Screws
Look at the riving knife where it mounts to the blade-guard assembly.
The SKIL 3601 adjustment uses two Phillips-head screws.
These screws clamp the knife in its aligned position.
Before loosening them, look carefully at the current knife position. This gives you a reference and can help you understand which direction it needs to move.
4. Slightly Loosen Both Screws
Use an appropriately sized Phillips screwdriver.
Loosen the two screws only enough to allow the riving knife to shift into alignment.
Do not unnecessarily remove the screws.
Keeping them partially engaged makes it easier to control the knife and prevents small hardware from being lost inside the saw.
5. Align the Riving Knife With the Blade
Move the riving knife sideways as needed until it sits directly in line with the blade.
Sight along the blade from the front and rear.
You want the knife centered behind the cutting path.
Do not align it only with one saw tooth. Carbide teeth are normally wider than the blade body and alternate slightly from side to side because they create the kerf.
Instead, consider the overall plane of the blade and the path created by the teeth.
6. Hold the Knife in Position and Tighten the Screws
Once alignment looks correct, keep the riving knife from shifting and retighten both mounting screws securely.
Tighten them evenly.
You do not need to apply excessive force. The goal is to prevent movement without stripping the screw heads or damaging the mounting assembly.
7. Recheck the Alignment
Tightening screws can sometimes move a component slightly.
Sight along the blade again after both screws are secure.
If the knife moved, loosen the screws slightly and repeat the alignment.
It is better to spend another minute correcting the position than to discover the problem while feeding flooring through a running blade.
8. Reinstall the Anti-Kickback Pawls
Reinstall the anti-kickback pawls correctly.
Make sure they can move as intended and are not jammed against the knife or blade.
Before rip cutting, the 3601 manual calls for lowering the pawls to their working position and checking that they function properly.
9. Check for Clearance Before Reconnecting Power
With the machine still unplugged, make sure nothing appears to contact the blade improperly.
The riving knife should sit behind the blade rather than touching it.
The pawls and guard components should also move normally.
If the blade was changed during the same service, SKIL instructs users to check for contact with the table or base structure before operation.
10. Make a Careful Test Cut
After everything is reassembled and the work area is clear, reconnect the saw.
Use a straight scrap piece similar to the flooring you normally cut.
During the test, the material should feed smoothly through the blade and past the riving knife without suddenly being pushed sideways.
If it binds, turn the saw off and disconnect it again before investigating.
Never reach toward the knife or blade while it is moving.
Key Takeaways:
- Unplug the saw before making any adjustment.
- The SKIL 3601 adjustment uses two screws to bring the knife directly in line with the blade.
- Recheck alignment after tightening because the knife can shift slightly.
- Reinstall and verify the anti-kickback pawls before performing a rip cut.
How Precisely Should the Riving Knife Line Up With the Blade?
The knife should be centered within the path created by the blade teeth.
It does not need to be as wide as the kerf.
In fact, it must be thinner than the kerf so the material can pass around it.
At the same time, the riving knife needs to be thick enough relative to the blade body to perform its intended anti-kickback function.
This is why blade selection matters so much on the SKIL flooring saw.
SKIL 3601 Blade and Riving-Knife Compatibility
For the 3601-02, the original blade specifications include:
| Specification | SKIL 3601-02 |
| Blade diameter | 4-3/8 in. (110 mm) |
| Arbor | 3/4 in. |
| Original blade kerf | 0.078 in. (2 mm) |
| Original blade body | 0.047 in. (1.2 mm) |
| Minimum replacement kerf | 0.061 in. |
| Maximum replacement blade body | 0.057 in. |
| Minimum blade speed rating | 11,000 RPM |
These dimensions matter because the riving knife has to fit inside the kerf while remaining wider than an unsuitable blade body relationship would allow.
Why an Extra-Thin-Kerf Blade Can Cause Binding
Suppose the replacement blade cuts a slot narrower than the riving knife.
The front of the flooring passes through the saw blade.
Then the narrower cut reaches the wider riving knife.
The workpiece cannot pass freely.
It begins rubbing or binding even though the knife may be perfectly centered.
No amount of sideways riving-knife adjustment can fix that mismatch.
The proper solution is to install a compatible blade.
Why an Overly Thick Blade Body Is Also Wrong
The riving knife is supposed to be thicker than the blade body while remaining thinner than the kerf.
If the body of a replacement blade is too thick, that relationship is lost.
SKIL therefore specifies a maximum 0.057-inch blade-body thickness for this model.
This is an easy specification to overlook when buying a replacement blade.
Do not shop only by diameter and arbor size.
Riving Knife Alignment vs. Blade Alignment
If the knife refuses to line up correctly, consider whether the real issue is the blade.
A blade that is not seated flat against the arbor components may wobble or sit at an angle.
In that situation, adjusting the riving knife to match one section of the blade will not produce consistent alignment through an entire rotation.
With the saw unplugged, inspect the blade carefully.
It should be flat, secure, and free of obvious damage.
Do not operate a blade that is cracked, badly warped, missing carbide tips, or otherwise damaged.
Check for Blade Runout
Rotate the unplugged blade carefully by hand while watching its position relative to a fixed reference.
A small visual variation may simply come from the alternating tooth set, but obvious side-to-side movement of the blade plate is a problem.
If the blade plate itself wobbles substantially, remove and inspect it.
A warped blade should be replaced rather than using the riving knife to compensate for it.
How to Check Alignment With a Straightedge
A small straightedge can make inspection easier.
Disconnect the saw first.
Place the straightedge gently against the flat body of the saw blade, avoiding protruding carbide teeth where possible.
Extend the straightedge toward the riving knife.
The knife should fall within the blade’s cutting path and should not be noticeably displaced to one side.
Repeat the check from the other side if access allows.
Because blade teeth create a kerf wider than the blade body, do not interpret a small intentional clearance as misalignment.
The goal is centering, not making the knife touch the blade.
Should the Riving Knife Touch the Saw Blade?
No.
The riving knife should not rub against the rotating blade.
It sits behind it with enough clearance for normal operation.
If you hear metal rubbing, scratching, or unusual vibration after adjustment, shut the machine off immediately.
Disconnect the plug and inspect the alignment before making another cut.
Operating with metal contact can damage the blade, knife, or guard assembly and creates an unnecessary safety risk.
What if the Riving Knife Is Bent?
A bent knife is different from a knife that is merely shifted sideways at its mounting screws.
If the plate itself curves, twists, or has been physically damaged, loosening the alignment screws may not correct it.
Do not try to hammer the knife straight while it is attached to the saw.
And do not intentionally bend it to make an incompatible blade work.
If a damaged knife cannot be positioned correctly using the normal adjustment, I recommend replacing the damaged part or having the saw inspected by an authorized or qualified service technician.
A riving knife is a safety component, not a part to modify casually.
What if the Riving Knife Still Rubs After Adjustment?
If the knife looks centered but material still catches on it, work through the system methodically.
First, recheck the blade specification.
An extra-thin-kerf replacement blade is one of the most important possibilities on the 3601.
Next, inspect the knife for bending or twisting.
Then check whether the blade itself is warped or incorrectly seated.
Also inspect the rip fence.
The SKIL instructions require the rip fence to be parallel to the blade before rip cutting. A fence that angles toward the rear of the blade can pinch the workpiece and create a binding sensation that may be incorrectly blamed on the riving knife.
Finally, verify that the flooring itself is straight enough to follow the fence.
A severely bowed or damaged plank can behave unpredictably even when the machine is correctly adjusted.
How the Rip Fence Affects Riving-Knife Performance
The riving knife and rip fence work together during a rip cut, but they perform different jobs.
The fence establishes the width of the cut and guides one edge of the workpiece.
The riving knife helps manage the kerf after the workpiece has passed the blade.
If the fence is not parallel with the blade, the material may be forced diagonally toward the rear blade teeth or riving knife.
That increases resistance and can contribute to kickback.
Therefore, if a rip cut suddenly becomes difficult, do not automatically loosen the riving knife.
Check both alignment systems.
Anti-Kickback Pawls and the Riving Knife
The anti-kickback pawls are toothed components that help resist backward movement of the workpiece.
During normal forward feeding, the material passes beneath them.
If the material attempts to move backward, the pawls are designed to engage the surface.
The 3601 manual instructs users preparing for rip cutting to lower the pawls to their lowest position. It also identifies proper pawl function and riving-knife alignment as checks that should be completed before the rip begins.
Do not remove the pawls simply because they create slight resistance during feeding.
They are part of the saw’s kickback-protection system.
If they are damaged, dull, or not moving properly, service them according to the manufacturer’s instructions rather than leaving them off.
When Should You Check Riving-Knife Alignment?
You do not need to adjust the knife before every cut, but periodic inspection is sensible.
I would specifically check it after changing the blade.
I would also inspect alignment after transporting the saw if it received a significant bump, after a jam or kickback event, or whenever rip cuts begin feeding differently than they normally do.
If flooring consistently rubs on one side of the knife, that is another good reason to inspect it.
A visual alignment check takes very little time and can identify a problem before it becomes serious.
Key Takeaways:
- If the knife still rubs after adjustment, verify blade kerf, blade-body thickness, blade condition, and fence alignment.
- Do not bend or grind the riving knife to accommodate an incorrect blade.
- Check alignment after blade changes, impacts, jams, or unexplained changes in rip-cut performance.
Common Riving Knife Adjustment Mistakes
One of the most common mistakes is adjusting the knife while the saw remains plugged in.
Even if you do not intend to touch the switch, there is no reason to leave power connected while your hands are near the blade.
Another mistake is loosening the mounting screws completely when only a small amount of movement is required.
Slightly loosening them gives you much better control.
A third mistake is aligning the knife with one carbide tooth rather than considering the entire blade plane and kerf.
Because blade teeth project alternately to the sides, one tooth does not represent the center of the cutting path.
The most serious mistake is attempting to correct binding by modifying the riving knife when the replacement blade is actually incompatible.
Check the blade dimensions before altering anything.
Can You Run a SKIL Flooring Saw Without the Riving Knife?
For normal rip cutting, I would not recommend defeating or removing the riving knife.
The component exists to help reduce the possibility of the workpiece closing around the rear of the blade.
The saw’s rip-cutting procedure is designed around the riving knife and anti-kickback system being correctly installed and functioning.
Removing a safety device because material is binding avoids the symptom without correcting the underlying problem.
If the knife causes binding, determine whether it is misaligned, bent, or being used with an incompatible blade.
Can You Adjust Riving-Knife Height on the SKIL 3601?
The owner’s alignment procedure for the SKIL 3601/3601-02 describes loosening the two mounting screws and bringing the riving knife in line with the blade.
It does not provide a normal user procedure for setting a separate operating height or blade-to-knife gap as you might find on some full-size table saws.
For that reason, I would not invent a height adjustment by enlarging holes, adding washers, or modifying the mounting bracket.
If the knife appears vertically incorrect despite being installed in its original components, inspect for damage or incorrect assembly and seek qualified service if necessary.
How to Test the Saw After Riving-Knife Adjustment
Use a straight scrap of flooring or comparable stock.
Before starting, configure the machine correctly for rip cutting.
Confirm that the saw assembly is locked as required, the fence is set and parallel with the blade, the riving knife is aligned, and the pawls are operational.
Stand out of the direct kickback path rather than directly behind the workpiece.
Feed the material smoothly against the fence.
The cut should progress without the workpiece suddenly slowing as it reaches the knife.
Use the provided push stick as required to complete the rip safely. SKIL specifically describes push-stick use as essential during the 3601 rip-cutting procedure.
If anything feels wrong, stop.
Do not troubleshoot a moving saw.
FAQs about How to Adjust Riving Knife on SKIL Flooring Saw
How do you adjust the riving knife on a SKIL 3601 flooring saw?
Unplug the saw, remove the anti-kickback pawls, slightly loosen the two Phillips screws securing the riving knife to the blade-guard assembly, align the knife with the blade, and retighten the screws.
Recheck alignment before reinstalling the pawls and using the saw.
Should the riving knife be exactly centered behind the blade?
It should be aligned within the blade’s kerf and centered with the cutting path.
It should not sit noticeably to the left or right of the blade.
Should a riving knife touch the blade?
No.
The knife should remain behind the saw blade without rubbing against it.
Any metal-to-metal contact should be investigated before the saw is operated.
Why is my flooring binding on the riving knife?
The knife may be misaligned or bent, but the replacement blade may also have too narrow a kerf.
On the SKIL 3601-02, the replacement blade kerf should be at least 0.061 inch.
What blade size does a SKIL 3601 flooring saw use?
The 3601 uses a 4-3/8-inch (110 mm) blade with a 3/4-inch arbor.
The blade must also meet the saw’s kerf, plate-thickness, and speed requirements.
Can I use a thin-kerf blade on a SKIL flooring saw?
Only if it remains within the specified requirements.
For the SKIL 3601-02, the manual warns against blades with a kerf narrower than 0.061 inch because the workpiece can bind against the riving knife.
How thick can the blade body be?
For the SKIL 3601-02, the replacement blade body should be no thicker than 0.057 inch.
A thicker plate can interfere with the intended relationship between the blade and riving knife.
Why did the riving knife start rubbing after I changed the blade?
The replacement blade may have a different kerf or plate thickness, it may not be seated properly on the arbor, or the riving knife may have shifted.
Check blade compatibility before making additional adjustments.
Can I bend a riving knife back into alignment?
I would not intentionally bend the knife as a normal adjustment method.
Use the provided alignment screws. If the knife itself is physically bent or damaged and cannot be properly aligned, replace or professionally service it.
Do I remove the anti-kickback pawls before adjustment?
Yes. The SKIL 3601 riving-knife alignment procedure instructs you to remove the anti-kickback pawls before loosening the riving-knife mounting screws.
Reinstall them correctly before rip cutting.
How often should I check the riving knife?
Inspect it periodically and whenever you change the blade, experience a jam or kickback, transport the saw roughly, or notice unusual resistance during rip cutting.
What if the riving knife cannot be aligned?
Stop using the saw for rip cuts until the cause is identified.
Possible causes include a bent knife, damaged mounting hardware, incorrectly seated blade, warped blade, or damaged guard assembly.
Does the rip fence need to be parallel with the blade?
Yes.
The SKIL rip-cutting instructions call for verifying that the fence is parallel with the blade before the cut.
A misaligned fence can pinch the workpiece and create symptoms similar to a riving-knife problem.
Why is the riving knife important for flooring?
When ripping flooring lengthwise, the cut edges can move after passing the blade.
The riving knife helps keep the kerf separated behind the blade and reduces the opportunity for the workpiece to contact the rear blade teeth.
Can I rip flooring without the anti-kickback pawls?
I would use the safety equipment supplied and specified for the saw.
If the pawls interfere because they are damaged or malfunctioning, repair the problem rather than permanently removing them.
Conclusion
Knowing how to adjust riving knife on SKIL flooring saw models such as the 3601/3601-02 is relatively simple: disconnect the power, remove the anti-kickback pawls, slightly loosen the two riving-knife mounting screws, position the knife directly in line with the blade, and retighten the screws.
The important part is understanding what you are actually adjusting. The goal is not to make the knife touch the blade or to move it as close as possible. The goal is to keep it centered in the cutting path so the workpiece can move through the blade kerf and past the knife without rubbing or being pushed sideways.
If alignment looks correct but the flooring still binds, I would check the blade before making further adjustments. On the SKIL 3601-02, blade compatibility is critical: the replacement blade needs a kerf of at least 0.061 inch and a body no thicker than 0.057 inch. An extra-thin-kerf blade can make a correctly positioned riving knife feel too wide.
Also verify that the blade is properly seated and undamaged, the rip fence is parallel, and the anti-kickback pawls operate correctly.
Most importantly, never adjust the knife with the saw plugged in, never grind or bend the knife to compensate for the wrong blade, and do not continue a rip cut when the workpiece suddenly begins binding. A properly aligned riving knife should work quietly in the background, allowing the flooring to pass smoothly while adding an important layer of protection against kickback.