Can a Chop Saw Cut Laminate Flooring? Complete Cutting Guide
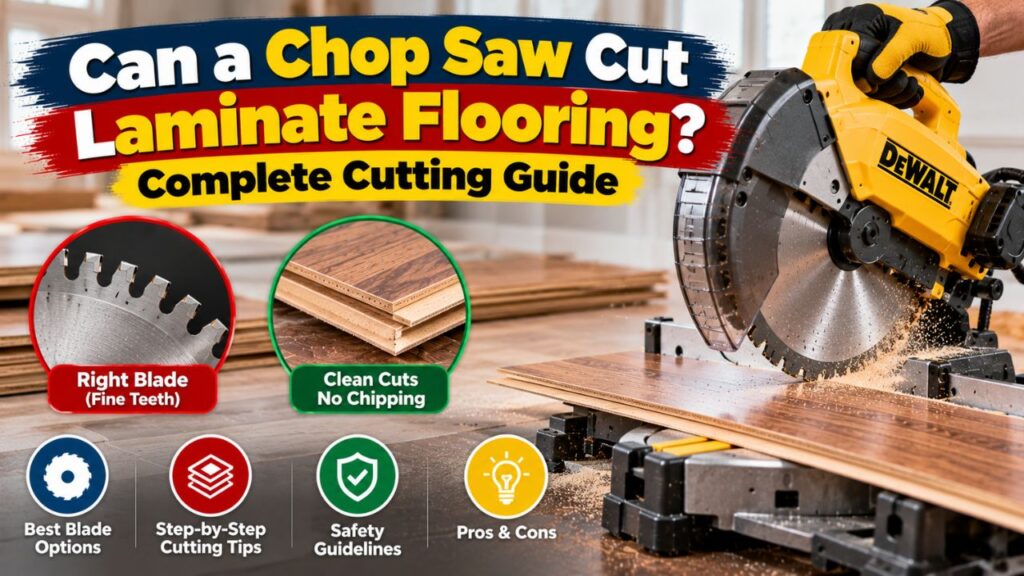
If you are wondering can a chop saw cut laminate flooring, yes—if by “chop saw” you mean a wood-cutting miter saw fitted with a sharp, fine-tooth carbide or laminate blade. However, an abrasive metal-cutting chop saw is not the right tool for laminate flooring and should not be converted with an inappropriate wood blade. For repeated straight crosscuts during laminate installation, a miter saw is actually one of the fastest and most convenient cutting tools you can use.
The terminology creates much of the confusion. Many homeowners casually call a miter saw a chop saw because the blade pivots downward in a chopping motion. Technically, however, a traditional chop saw often refers to a heavier-duty machine designed to cut metal with an abrasive wheel, while a miter saw is designed for wood and wood-based materials.
That distinction matters for both cut quality and safety.
Laminate flooring has a hard decorative wear layer over a fiberboard or composite core. It cuts easily enough with a power saw, but that wear layer can chip badly if you use a coarse construction blade, dull teeth, excessive feed pressure, or poor support.
A properly equipped miter saw can make clean, square cuts quickly. It is particularly useful for shortening boards at the end of each row. It is less useful for long rip cuts, curved cutouts, and irregular wall shapes, where a table saw, circular saw, or jigsaw may be more appropriate.
In this guide, I’ll explain when a chop saw can cut laminate flooring, the important difference between a chop saw and miter saw, which blade works best, how to prevent chipping, which side of the plank should face up, and when another cutting tool is a better choice.
Can a Chop Saw Cut Laminate Flooring Safely?
The answer depends entirely on which machine you have.
If your “chop saw” is actually a conventional wood-cutting miter saw, then yes. Install a suitable laminate or fine-finish carbide blade and use it for straight crosscuts and angled cuts.
If you have an abrasive metal chop saw, I do not recommend using it for laminate flooring.
An abrasive metal-cutting wheel works by grinding through material rather than producing the clean shearing action of woodworking teeth. That can generate excessive heat, rough edges, unpleasant debris, and unnecessary damage to the flooring.
More importantly, metal chop saws and woodworking miter saws are engineered differently. Guards, clamping arrangements, RPM ranges, blade or wheel specifications, arbor dimensions, and cutting actions can vary.
Do not install a wood blade on a metal chop saw unless the machine manufacturer explicitly states that the tool is designed and approved for that exact type and size of blade.
For laminate flooring, use a saw intended to cut wood or engineered wood products.
Chop Saw vs. Miter Saw for Laminate Flooring
The terms are frequently used interchangeably, but understanding the difference prevents the wrong tool from being used.
| Tool | Typical Cutting Material | Suitable for Laminate Flooring? |
| Wood miter saw | Wood, trim, flooring | Yes |
| Sliding miter saw | Wood, wide trim, flooring | Yes |
| Abrasive metal chop saw | Steel and other metals | No |
| Metal-cutting carbide saw | Metal | Generally not the appropriate flooring tool |
A wood miter saw is what most people actually want for laminate flooring.
It uses a toothed circular blade and typically allows the blade assembly to pivot for angle cuts.
A sliding compound miter saw also moves forward and backward, allowing it to cut wider planks.
Why People Call a Miter Saw a Chop Saw
A miter saw can make a simple 90-degree “chop” cut by lowering the blade through the workpiece.
That is why the informal name stuck.
When someone says they are cutting flooring with a chop saw, they often mean a 10-inch or 12-inch miter saw.
For the rest of this guide, when I discuss cutting laminate successfully with a chop saw, I am referring to a woodworking miter saw, not an abrasive metal-cutting machine.
Key Takeaways:
- A woodworking miter saw can cut laminate flooring very effectively.
- An abrasive metal chop saw is not the right machine for laminate.
- Never substitute an incompatible blade simply because the arbor appears to fit.
Why a Miter Saw Works Well for Laminate Flooring
Laminate flooring installation requires many repeated crosscuts.
You reach the end of a row, measure the remaining distance, cut the final plank, and start again.
A miter saw is excellent for this workflow.
Place the plank against the fence, align the cutting mark, lower the blade, and you can make a square cut in seconds.
The saw also makes it easy to cut small angles if the wall or layout requires them.
Repeatable Square Cuts
The fence and table support the plank at a fixed 90-degree relationship to the blade.
That means you do not have to guide the saw manually along a pencil line as you would with a circular saw or jigsaw.
Once the saw is correctly adjusted, repeated crosscuts are highly consistent.
Fast Workflow
For a room requiring dozens of plank cuts, speed becomes important.
Keeping a miter saw set up near the installation area allows you to measure, walk to the saw, cut, and return without repeatedly setting up guides or clamps.
Clean Cuts With the Correct Blade
A fine-tooth carbide blade produces a clean enough edge for laminate flooring, especially because many perimeter cuts eventually disappear under baseboard or trim.
Even so, reducing chips is important because large fractures can extend beyond the hidden area or damage the locking profile.
What Blade Should You Use on a Chop Saw for Laminate Flooring?
For a wood miter saw, use a sharp, fine-tooth carbide blade or a blade specifically designed for laminate and other abrasive engineered materials.
Laminate is harder on saw teeth than ordinary softwood because of its wear-resistant surface.
A coarse framing blade may cut the board quickly, but it can leave noticeable chips.
10-Inch Miter Saw
For a typical 10-inch miter saw, approximately 60–80 teeth is a practical range.
A 60-tooth finish blade provides a good combination of speed and cleanliness.
An 80-tooth blade can produce a smoother crosscut when appearance matters.
12-Inch Miter Saw
For a 12-inch saw, approximately 80–100 teeth works well for clean laminate crosscuts.
Because the blade has a larger circumference, additional teeth help maintain a fine cutting action.
Carbide vs. PCD
For occasional DIY flooring, a quality carbide-tipped blade is usually all you need.
If you install laminate professionally or expect to make hundreds of cuts, a laminate-specific blade using very durable carbide or polycrystalline diamond cutting edges can last substantially longer.
PCD blades cost considerably more, so I would not consider one essential for a single small room.
Can You Use the Blade Already on Your Chop Saw?
Maybe, but inspect it before starting.
A typical miter saw may come with a general-purpose blade. If it is sharp and has a reasonably fine tooth count, it can be adequate for a small laminate project.
A coarse 24- or 32-tooth construction blade is not my preferred choice.
It may produce acceptable cuts when the cut edge will be completely hidden, but it increases the chance of chipping.
If the existing blade has already cut a lot of lumber, has missing or damaged carbide teeth, creates burns, or requires significant pressure, replace it before cutting laminate.
A fresh flooring plank costs enough that sacrificing several boards to a dull blade rarely saves money.
Which Side of Laminate Should Face Up on a Miter Saw?
With a conventional miter saw, I generally recommend placing the decorative finished face upward.
The front of a typical miter-saw blade moves downward into the workpiece. The teeth therefore enter the upper surface first, helping produce a cleaner finished face when the blade is sharp.
The underside is generally more vulnerable to exit tear-out.
This is different from the usual advice for a handheld circular saw, where laminate is commonly positioned decorative-side down because the blade cuts upward through the plank.
Why Cutting Direction Matters
Splintering occurs most easily where blade teeth exit the material.
On a miter saw, the decorative surface is normally best positioned where the teeth enter.
However, saws and blade designs vary.
If you are installing expensive flooring and want to be certain, make a test cut using an offcut.
Inspect both surfaces.
That one test tells you more about your actual blade and saw combination than a universal rule ever could.
How to Cut Laminate Flooring With a Chop Saw
Once you have confirmed that the machine is a wood miter saw and installed the right blade, the actual cutting process is straightforward.
Measure the Plank
Measure the distance required at the end of your flooring row.
Account for the expansion clearance specified by the laminate manufacturer.
Do not cut the plank tightly against a wall simply because the baseboard will hide the edge.
Laminate flooring needs room to move.
Mark the Cut
Mark the measurement clearly with a sharp pencil.
Use a square when you need a 90-degree cut.
Always identify which side is waste so you do not accidentally shorten the plank by the width of the saw kerf.
Position the Plank
Place the laminate flat on the saw table with the decorative face upward for a conventional miter-saw setup.
Hold the plank firmly against the rear fence.
Make sure the material is supported on both sides, particularly if the board is long.
Never cut a plank while one end is hanging awkwardly and pulling the board away from the fence.
Align the Blade
With the motor off, lower the blade carefully until the teeth are close to the layout mark.
Position the kerf on the waste side.
Raise the blade again before starting the motor.
Do not start the saw with the teeth contacting the flooring.
Start the Saw
Hold the board securely, keeping your hands outside the saw manufacturer’s designated no-hand zone.
Start the saw and allow the blade to reach full speed.
Then lower it smoothly through the laminate.
Do not slam the blade downward.
Complete the Cut
Continue through the plank until the blade has passed completely through the material.
Keep the saw head down momentarily and release the trigger.
Let the blade stop before raising it when practical, particularly when cutting delicate material.
Raising a still-spinning blade back through the plank can sometimes catch loose fibers or small offcuts.
Inspect the Edge
Check for large chips, cracks, or damage to the click-lock profile.
A tiny amount of edge roughness is usually irrelevant when the cut will be hidden.
Major fractures are different and may weaken the plank.
Key Takeaways:
- Cut laminate with the decorative face up on a conventional miter saw unless a test cut shows otherwise.
- Keep the plank flat and firmly against the fence.
- Start the blade before contacting the flooring and lower it smoothly rather than aggressively.
How to Prevent Chipping When Using a Chop Saw
Blade selection is the biggest factor, but several other techniques improve the finish.
Use a Sharp Blade
Laminate wears cutting edges relatively quickly.
If the first cuts look good and later cuts begin chipping, the blade may simply be losing its edge.
Do not compensate by pushing harder.
Use a Fine Tooth Count
More teeth generally create a smoother crosscut because each tooth removes less material.
For most miter saws, 60–100 teeth depending on blade diameter provides a good finish range.
Support the Flooring
The plank should sit flat on the saw table.
If it vibrates during the cut, the hard laminate surface can fracture around the kerf.
Use extension supports for long boards.
Let the Blade Reach Full Speed
Allow the motor to stabilize before lowering the blade.
Entering the flooring while the blade is still accelerating can cause unnecessary grabbing or chipping.
Do Not Force the Cut
A miter saw has enough power to cut laminate easily.
Use a smooth, controlled movement.
If the saw seems unusually difficult to push through the board, inspect the blade rather than adding force.
Use Painter’s Tape When Necessary
Painter’s tape over the cutting area can make pencil lines easier to see and may slightly reduce loose surface chipping.
It is most useful when you need an especially neat cut.
A good blade should still be your primary solution.
How to Use a Sliding Miter Saw for Laminate Flooring
A sliding miter saw is especially useful when laminate planks are too wide for a standard non-sliding saw.
The safest cutting sequence for most sliding miter saws is important.
Typically, you pull the saw head toward you while raised, lower it into the workpiece at the front edge, and then push the blade assembly backward toward the fence through the cut.
This allows the blade rotation to work with the intended motion of the saw.
Do not make an uncontrolled climb cut by reversing the intended sliding sequence.
Always follow the specific operating instructions for your saw.
Support Wide Planks Properly
The plank needs to remain flat against the table and fence through the entire sliding motion.
If the board rocks, the cut can wander or bind.
For extra-long flooring, use extension wings, rollers, or another level support.
Can a Chop Saw Make Rip Cuts in Laminate Flooring?
No, not practically.
A miter saw is designed primarily for cutting across the width of a workpiece.
It cannot safely rip a long flooring plank lengthwise in the way a table saw or circular saw can.
This becomes important when you reach the final row and need to reduce a plank’s width.
For a long rip, use:
- A table saw
- A circular saw with a guide
- A track saw
- A jigsaw for irregular last-row cuts
Do not attempt to feed a plank lengthwise through a miter saw or improvise a cutting technique the tool was not designed to perform.
Can a Chop Saw Cut Angles in Laminate Flooring?
A miter saw is excellent for angled crosscuts.
Rotate the miter table to the required angle, secure the setting, and position the plank firmly against the fence.
This can be useful near diagonal walls, unusual transitions, or certain decorative layouts.
Remember that actual room corners are not always exactly 90 degrees.
Measure the real angle rather than assuming the building is perfectly square.
For complex irregular shapes, a jigsaw is usually easier.
Can a Chop Saw Cut Engineered Laminate Flooring?
If by engineered laminate you mean a laminated plank flooring product compatible with woodworking saws, yes.
The same general technique applies.
Use a fine-tooth carbide blade and avoid damaging the tongue-and-groove or click-lock edges you need for assembly.
Always distinguish laminate from other flooring products such as rigid stone-based tile or ceramic material.
A blade appropriate for wood-fiber laminate is not automatically appropriate for every hard flooring product.
Can a Chop Saw Cut Vinyl Plank Flooring?
Some vinyl plank flooring can be cut with a miter saw, but it is a different material from laminate.
Many luxury vinyl plank products can also be scored and snapped, cut with a flooring cutter, or cut with a jigsaw depending on thickness and construction.
If you switch between laminate and vinyl, check the flooring manufacturer’s cutting recommendations rather than assuming the same blade and technique are ideal.
When Is a Chop Saw Better Than a Circular Saw?
A miter saw is better when you have many repetitive crosscuts.
You do not need to clamp a guide or manually steer the tool.
Place the plank against the fence and cut.
That makes it particularly efficient when installing full rooms of laminate.
A circular saw is more versatile for ripping.
It can shorten planks and also cut their full length, making it a better one-tool solution if you own only one saw.
For a larger flooring project, having both tools is very convenient.
Chop Saw vs. Jigsaw for Laminate Flooring
A miter saw wins for straight crosscuts.
A jigsaw wins for shapes.
If you need to cut around a pipe, vent, door frame, column, or irregular wall, the narrow jigsaw blade can turn through curves and make notches that a large circular blade cannot.
A practical installation setup often uses the miter saw for routine end cuts and the jigsaw for special cuts.
Chop Saw vs. Table Saw for Laminate Flooring
These two machines complement each other.
A miter saw handles crosscuts quickly.
A table saw handles rip cuts efficiently.
If you are installing a large area of laminate, having both can dramatically speed up the work.
A table saw is particularly valuable when several first- or last-row planks need to be ripped to identical widths.
The miter saw remains more convenient for constantly shortening boards as you move from row to row.
What Cuts Can’t a Chop Saw Make?
A miter-style chop saw is not a universal flooring cutter.
It is poorly suited to long rip cuts, curves, enclosed openings, and detailed notches.
Trying to force the saw to perform those operations creates unnecessary risk.
Use a jigsaw for curves and notches, a hole saw for many pipe openings, and a table or circular saw for ripping.
The best flooring installation often involves several tools, each doing the type of cut it handles naturally.
Key Takeaways:
- A miter saw is one of the best tools for repeated laminate crosscuts.
- It is not suitable for ripping planks lengthwise.
- A jigsaw, circular saw, or table saw should handle cuts the miter saw cannot make safely.
Common Mistakes When Cutting Laminate With a Chop Saw
Using the wrong type of chop saw is the biggest mistake.
An abrasive metal saw should not be treated as a substitute for a woodworking miter saw.
Another common error is leaving a coarse construction blade installed because it still feels sharp. Laminate may come out badly chipped even though that blade works perfectly well for framing lumber.
Plank support also gets overlooked.
Long laminate boards can act like levers if most of the board is hanging beyond the saw table. Support them so the cutting area remains flat and stable.
Incorrect face orientation can also create unnecessary chipping.
With a conventional miter saw, start with the decorative side upward and make a test cut if the finish is important.
Finally, do not forget the flooring layout.
You can make a perfectly smooth cut and still ruin the board by cutting off the tongue or groove you needed for installation.
Check plank orientation before every unusual cut.
Is a Flooring Cutter Better Than a Chop Saw?
For certain installations, a manual laminate flooring cutter is extremely convenient.
It can produce straight cuts without electricity and creates very little airborne sawdust.
It is also quieter.
However, flooring cutters have limitations regarding plank thickness, width, and the types of cuts they can make.
They generally cannot replace a jigsaw for curves or a table saw for every rip.
A miter saw is more versatile for angled crosscuts and can also be useful for many other woodworking projects after the floor is finished.
If dust control is your top concern and your flooring is compatible with the cutter, a dedicated flooring cutter can be an excellent alternative.
Dust Control When Cutting Laminate With a Miter Saw
Laminate cutting creates fine dust.
Set up the saw outdoors, in a garage, or in a designated cutting station whenever possible rather than filling the installation room with airborne particles.
Connect a dust extractor or shop vacuum if your saw supports one.
Wear appropriate eye and respiratory protection.
Sweep or vacuum plank surfaces before installing them. Dust trapped in click-lock joints can interfere with proper assembly.
Keeping the cutting area separate from the finished floor also prevents abrasive debris from being walked across the new decorative surface.
Chop Saw Safety When Cutting Laminate
Use a saw designed for woodworking and install only a blade that matches the required diameter, arbor, and maximum RPM specifications.
Disconnect the power or remove the battery before changing blades.
Inspect the guard to make sure it operates freely.
Keep your hands well away from the blade and respect the manufacturer’s no-hand zone.
For small offcuts, do not try to hold tiny pieces dangerously close to the blade. Modify your cutting strategy or use another tool.
Always keep the plank firmly against the fence.
Wait for the blade to reach full speed before cutting.
If the saw binds or behaves unexpectedly, release the trigger and let everything stop before repositioning the material.
Do not reach near a spinning blade to remove an offcut.
For a sliding miter saw, use the cutting motion specified by the manufacturer rather than improvising a pull-through technique.
FAQs about can a chop saw cut laminate flooring
Can a chop saw cut laminate flooring?
Yes, if you mean a woodworking miter saw.
Install a fine-tooth carbide or laminate blade and use it primarily for straight crosscuts and angled cuts.
Can a metal chop saw cut laminate flooring?
I do not recommend it.
An abrasive metal chop saw is designed for a different material and cutting system. Use a woodworking miter saw instead.
Is a chop saw the same as a miter saw?
Not technically.
A traditional chop saw often refers to a metal-cutting machine, while a miter saw is designed for wood and can rotate to make angled cuts.
However, many people informally call a miter saw a chop saw.
What blade should I use to cut laminate flooring?
Use a sharp, fine-tooth carbide finish or laminate blade.
A 10-inch miter saw commonly works well with approximately 60–80 teeth, while a 12-inch saw typically uses around 80–100 teeth for fine crosscuts.
Can I use a 40-tooth blade?
A quality 40-tooth blade may cut laminate adequately, particularly if cut edges will be hidden.
For the cleanest miter-saw crosscuts, I generally prefer a higher tooth count.
Is an 80-tooth blade good for laminate flooring?
Yes.
An 80-tooth 10-inch or 12-inch fine-finish blade can produce very clean crosscuts, depending on the specific blade design.
Should laminate flooring face up or down on a chop saw?
With a conventional woodworking miter saw, place the decorative surface up as a good starting point.
Make a test cut because blade geometry and saw configuration can affect which side has the cleanest finish.
Why is my chop saw chipping the laminate?
The blade may be too coarse or dull, the plank may be vibrating, or you may be cutting too aggressively.
Use a sharp fine-tooth blade and support the plank securely.
Can painter’s tape prevent chipping?
It can help slightly and makes layout lines easier to see, but the blade condition and tooth geometry have a much greater effect.
Can I cut laminate flooring with a sliding miter saw?
Yes.
A sliding miter saw is particularly useful for wide laminate planks that exceed the crosscut capacity of a fixed-head saw.
Can I make rip cuts with a miter saw?
No. A miter saw is not intended for ripping long planks lengthwise.
Use a table saw, circular saw, track saw, or jigsaw as appropriate.
Can a chop saw cut laminate at an angle?
A miter saw can.
Rotate the table to the required miter angle and cut the plank while keeping it flat against the fence.
Can I cut curves with a chop saw?
No.
Use a jigsaw for curves and irregular shapes.
Is a miter saw better than a jigsaw for laminate flooring?
For repeated straight crosscuts, yes.
For curves, notches, and cutouts, the jigsaw is better.
Is a miter saw better than a circular saw?
For repeated crosscuts, the miter saw is faster and easier.
A circular saw is more versatile because it can also make long rip cuts.
Can a 10-inch miter saw cut laminate flooring?
Yes.
A 10-inch miter saw with a quality 60- to 80-tooth carbide blade is an excellent flooring setup.
Can a 12-inch miter saw cut laminate?
Yes.
Use an appropriate fine-finish blade, often in the 80- to 100-tooth range.
Will cutting laminate dull my saw blade?
Yes, laminate is abrasive and can dull woodworking blades faster than ordinary softwood.
Higher-quality carbide or laminate-specific blades generally last longer.
Do I need a special laminate blade?
Not necessarily for occasional DIY use.
A good fine-tooth carbide finish blade can provide excellent results.
For high-volume work, a dedicated laminate blade offers better durability.
Should I cut laminate flooring indoors?
You can, but laminate produces substantial fine dust.
Whenever possible, cut outdoors or in a separate work area and use dust extraction and appropriate respiratory protection.
What is the best tool for cutting laminate flooring?
There is no single best tool for every cut.
A miter saw is excellent for crosscuts, a table or circular saw for rips, and a jigsaw for curves and notches.
Conclusion
If you are asking can a chop saw cut laminate flooring, the answer is yes when the tool is actually a woodworking miter saw, but no when you mean a conventional abrasive metal chop saw.
A miter saw is one of the best tools for repeated laminate-flooring crosscuts. It is fast, accurate, and easy to set up for square or angled cuts.
For a 10-inch miter saw, I recommend a sharp fine-tooth carbide blade with roughly 60–80 teeth. For a 12-inch saw, approximately 80–100 teeth provides a good starting range. A laminate-specific carbide or PCD blade may last longer if you do this type of work frequently.
With a conventional miter saw, start by placing the decorative face upward, support the plank firmly against the fence, let the blade reach full speed, and lower it smoothly without forcing the cut. Make a test cut before beginning the installation if chipping is a concern.
I would use the miter saw for routine crosscuts and angled end cuts, then switch tools when the job changes. Use a table saw or circular saw for long rip cuts and a jigsaw for curves, pipe cutouts, and irregular notches.
Most importantly, do not try to convert a metal abrasive chop saw into a laminate-flooring saw with an incompatible woodworking blade. Use the tool and blade combination the manufacturer designed for wood-based materials. With the correct miter saw and a sharp fine-tooth blade, laminate flooring can be cut quickly, accurately, and with very little visible chipping.