What Size Miter Saw for Laminate Flooring? 10 vs. 12 Inch
If you are wondering what size miter saw for laminate flooring is best, a 10-inch miter saw is usually the ideal choice for most residential laminate-flooring installations. It has enough cutting capacity for common plank widths, is easier to move than a 12-inch saw, and accepts fine-tooth blades that can produce clean crosscuts. A 12-inch miter saw is useful for unusually wide flooring, thicker materials, or when you already own one, but most homeowners do not need the extra capacity just for laminate.
The type of miter saw matters almost as much as blade diameter. A basic 10-inch non-sliding saw may struggle to crosscut today’s wider laminate planks in one pass, while a 10-inch sliding compound miter saw can handle substantially wider flooring without requiring a larger blade.
Blade choice is also critical. Laminate has an abrasive wear layer and dense composite core that can chip easily and dull unsuitable blades relatively quickly. A sharp carbide blade with a fine tooth count generally gives better results than the coarse blade commonly supplied with a construction miter saw.
In this guide, I’ll explain which miter saw size works best for laminate flooring, when to choose a 10-inch versus 12-inch model, why a sliding saw is valuable, what blade to use, how to avoid chipped edges, and when another saw is better for rip cuts and irregular flooring cuts.
What Size Miter Saw for Laminate Flooring Is Best?
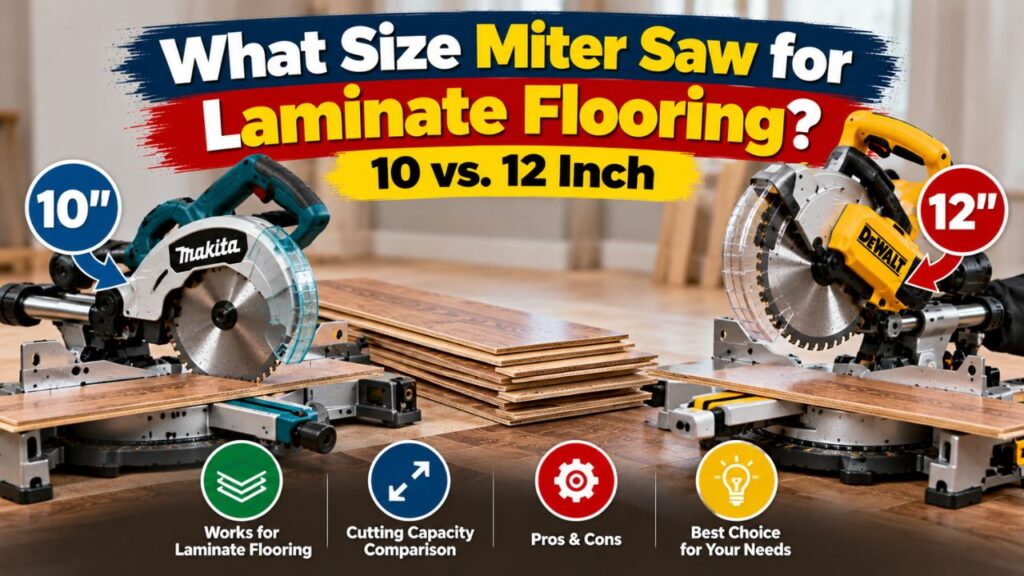
For most people, I recommend a 10-inch sliding compound miter saw.
It offers the best balance of cutting capacity, portability, blade availability, and cost for normal laminate-flooring installation.
Most laminate planks are relatively thin, so vertical cutting depth is rarely the problem. The bigger issue is the width of the plank.
A non-sliding miter saw can only cut material as wide as the blade and saw geometry allow. A sliding model lets the saw head move forward and backward, dramatically increasing crosscut capacity.
That means a 10-inch slider can often handle flooring that would be too wide for a standard 10-inch chop-style miter saw.
Quick Size Comparison
| Miter Saw Type | Laminate Flooring Suitability | Best For |
| 7 1/4-inch miter saw | Good for narrower planks | Small jobs and portability |
| 8 1/2-inch slider | Very good | Compact flooring installation |
| 10-inch non-sliding | Good for moderate plank widths | Basic crosscuts |
| 10-inch sliding | Excellent | Most laminate flooring |
| 12-inch non-sliding | Very good | Wider planks |
| 12-inch sliding | Excellent but often unnecessary | Very wide material and general remodeling |
The important point is that blade diameter does not determine crosscut width by itself.
A 10-inch sliding saw can often cut wider flooring than a 12-inch non-sliding model.
For this reason, check the saw’s published crosscut capacity rather than choosing solely by the number printed on the blade.
Key Takeaways:
- A 10-inch sliding miter saw is the best all-around size for most laminate flooring.
- Sliding capacity is often more important than simply moving from a 10-inch to a 12-inch blade.
- Check your plank width against the saw’s actual crosscut capacity before buying or renting a saw.
Is a 10-Inch Miter Saw Big Enough for Laminate Flooring?
Yes. A 10-inch miter saw is big enough for the vast majority of laminate-flooring projects.
Laminate flooring is generally much thinner than dimensional lumber, so a 10-inch blade has more than enough vertical cutting depth.
The only question is whether the saw can cut all the way across the plank.
10-Inch Non-Sliding Miter Saw
A standard 10-inch non-sliding miter saw is perfectly usable when your laminate planks are within its crosscut capacity.
This type of saw can be an excellent option if you already own one.
The downside is that wider modern laminate boards may exceed what the saw can crosscut in a single pass.
You should not solve this by cutting halfway, flipping the plank, and guessing at the alignment unless the manufacturer specifically provides a safe and accurate procedure. It is easy to end up with a stepped or mismatched cut.
10-Inch Sliding Miter Saw
The sliding version is much more versatile.
Instead of the saw head only pivoting downward, it can travel along rails or another sliding mechanism.
That additional travel allows the blade to cross wider stock.
For flooring installation, this is extremely useful because laminate planks can be relatively wide even though they are thin.
A 10-inch slider is therefore the size I would choose if I were buying a miter saw specifically for laminate flooring and also wanted a useful saw for future trim, molding, and woodworking projects.
Do You Need a 12-Inch Miter Saw for Laminate Flooring?
Usually, no.
A 12-inch miter saw provides more cutting capacity, but laminate flooring does not normally require the extra vertical depth of a 12-inch blade.
The larger saw becomes useful mainly when you need more width capacity or also plan to cut larger building materials.
When a 12-Inch Saw Makes Sense
A 12-inch model can make sense if you are cutting unusually wide flooring or if the saw will also be used for larger trim, dimensional lumber, beams, or substantial remodeling work.
It can also be sensible if you already own one.
There is no reason to purchase a smaller saw simply because laminate flooring is thin.
Install a suitable fine-tooth blade and use the 12-inch saw you already have.
Downsides of a 12-Inch Miter Saw
The larger size comes with tradeoffs.
A 12-inch saw is generally heavier, takes up more workspace, and uses more expensive blades.
Larger blades can also have more potential deflection than a smaller blade, although a good-quality 12-inch finish blade can still make very accurate flooring cuts.
For someone who primarily needs to install laminate and do occasional home projects, I consider a 12-inch saw more capacity than necessary.
Can a 7 1/4-Inch Miter Saw Cut Laminate Flooring?
Yes, depending on the plank width and the saw’s design.
Compact 7 1/4-inch miter saws are attractive because they are lightweight and often use the same common blade diameter as circular saws.
A sliding 7 1/4-inch model can have surprisingly useful crosscut capacity.
For narrow and medium-width laminate, it may work extremely well.
The limitation again is width rather than thickness.
Before choosing one, check the maximum crosscut dimension at 90 degrees and compare it with the widest flooring plank you expect to install.
If the capacity is sufficient, there is nothing inherently wrong with using a smaller miter saw.
For a professional installer who carries equipment from job to job, the portability can be a major advantage.
For a homeowner who wants one general-purpose miter saw, I would still lean toward 10 inches because it gives you more versatility for future work.
Sliding vs. Non-Sliding Miter Saw for Laminate Flooring
For laminate flooring, I generally prefer a sliding miter saw.
The reason is simple: flooring tends to be thin and wide.
A sliding mechanism addresses exactly that problem.
Non-Sliding Saw
A non-sliding miter saw is simpler and often lighter.
For planks within its capacity, it can produce fast, accurate cuts.
If all your flooring is narrow enough, there is nothing wrong with using one.
Sliding Saw
A sliding saw provides much greater crosscut width.
That makes it more useful for modern wide-plank laminate and also for cutting shelving, wider trim, and other materials after the flooring project is complete.
The main disadvantages are increased size, cost, and mechanical complexity.
For flooring, those disadvantages are usually outweighed by the additional cutting capacity.
Key Takeaways:
- You do not normally need a 12-inch saw just because you are cutting laminate flooring.
- A 7 1/4-inch or 10-inch saw can work perfectly if its crosscut capacity matches the plank width.
- For wide laminate planks, choose a sliding saw rather than focusing only on larger blade diameter.
What Miter Saw Blade Should You Use for Laminate Flooring?
The blade often matters more to edge quality than whether the saw is 10 or 12 inches.
Laminate flooring contains a tough wear surface over a decorative layer and a dense core.
That construction can be abrasive and prone to chipping.
A coarse framing blade is not my first choice.
Use a Fine-Tooth Carbide Blade
A sharp carbide-tipped finish blade is generally the best option.
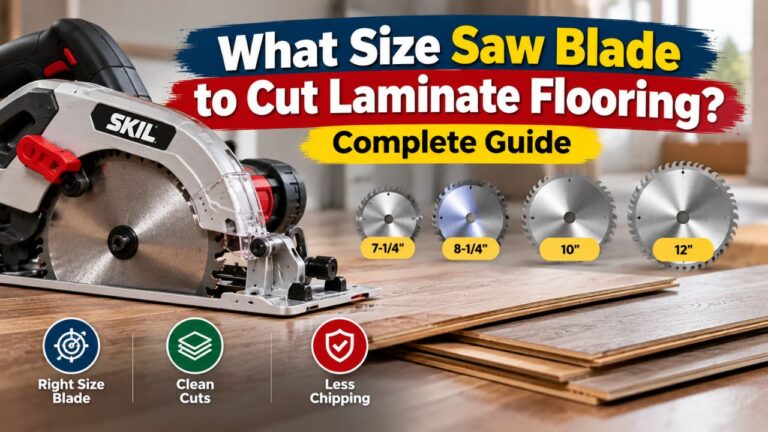
For a 10-inch miter saw, a blade in roughly the 60- to 80-tooth range is commonly a good choice for clean laminate crosscuts.
For a 12-inch saw, fine-finish blades may have correspondingly higher tooth counts.
Do not focus on tooth count alone.
A well-designed blade intended for laminate, melamine, plywood, or fine finish work may outperform a generic blade with more teeth.
Why Carbide Matters
Laminate is harder on cutting edges than ordinary softwood.
Carbide teeth retain their sharpness much better than basic steel teeth when cutting abrasive materials.
If you have a large floor to install, expect blade wear to be faster than when cutting ordinary pine trim.
Avoid a Dull Blade
A dull blade can cause:
- Chipped laminate edges.
- Excess heat.
- Burning.
- Slower cuts.
- Increased feed pressure.
- Poorer overall accuracy.
If the blade begins producing noticeably rougher cuts, do not compensate by pushing harder.
Inspect or replace the blade.
How Many Teeth Should a Miter Saw Blade Have for Laminate?
There is no universal magic number, but a fine-tooth blade is generally preferable.
For a 10-inch saw, I would typically start with approximately 60 to 80 teeth.
A sharp 60-tooth finish blade can produce excellent flooring cuts.
An 80-tooth blade may produce an even finer crosscut, although the specific blade geometry matters.
For a 12-inch saw, you may see 80-, 96-, or higher-tooth-count finish blades.
More teeth do not automatically guarantee a better result.
A premium 60-tooth blade intended for finished materials can outperform a cheap 80-tooth blade.
Use the blade manufacturer’s material recommendations as the deciding factor.
Which Side of Laminate Flooring Should Face Up on a Miter Saw?
For most miter saws, place the finished decorative surface facing up.
A miter-saw blade normally rotates downward into the top of the workpiece at the cutting area.
Because the teeth enter the finished face first, the upper surface often receives the cleaner cut.
The underside is more likely to show minor breakout as the blade exits.
However, blade geometry and the flooring itself can affect the result.
I strongly recommend making one test cut on scrap before cutting your finished pieces.
Inspect both faces.
If the decorative side chips more than expected, confirm that the blade is sharp and appropriate before continuing.
Support the Plank Flat
Laminate flooring must sit flat against the saw table and fence.
If the plank rocks or bows during cutting, edge quality and accuracy suffer.
Make sure there is no sawdust trapped underneath.
Long planks also need extension supports or stands so their weight does not lift the section sitting on the saw.
How to Cut Laminate Flooring With a Miter Saw
Using the correct saw size is only part of the process.
Good measuring and cutting technique prevent waste.
Measure the Plank
Measure the opening where the flooring will go.
If the cut is at the end of a row against a wall, include the expansion clearance required by the flooring manufacturer.
Do not cut flooring tight against the wall unless the installation system specifically calls for it.
Floating laminate normally requires perimeter movement space.
Mark the Waste Side
Use a pencil and square to mark the cut.
Place a small X on the section you will discard.
The blade has width, so align the teeth on the waste side of your finished dimension.
Support the Flooring
Place the board flat on the saw table with its long edge firmly against the fence.
For a long plank, use an extension wing, roller stand, or other support at approximately the same height as the saw table.
The flooring should not seesaw or tip as you cut.
Start the Blade Before Contacting the Flooring
With the blade clear of the plank, start the saw and let it reach full speed.
Then lower it into the flooring smoothly.
On a sliding miter saw, follow the manufacturer’s specified cutting sequence.
Many sliding saws are designed so the head is extended toward the operator, lowered into position, and then pushed back through the work, but operating procedures vary by saw.
Always use your model’s manual.
Complete the Cut Before Raising the Blade
After finishing the cut, release the trigger and allow the blade to stop while it remains down if that is the safe procedure specified for your saw.
Raising a still-spinning blade through the freshly cut edge can sometimes pull fibers or small offcuts upward.
How to Prevent Chipping When Cutting Laminate Flooring
Laminate chipping is usually caused by a combination of blade condition, cutting direction, vibration, and surface support.
The first solution is a sharp fine-tooth blade.
If that is already correct, several other techniques can help.
Use a Zero-Clearance Insert or Fence
A zero-clearance throat insert supports the material closer to the blade.
A sacrificial fence can provide similar support at the back of the cut.
This reduces the unsupported area where fibers and laminate layers can break away.
Only use accessories and setups that are safe and compatible with your miter saw.
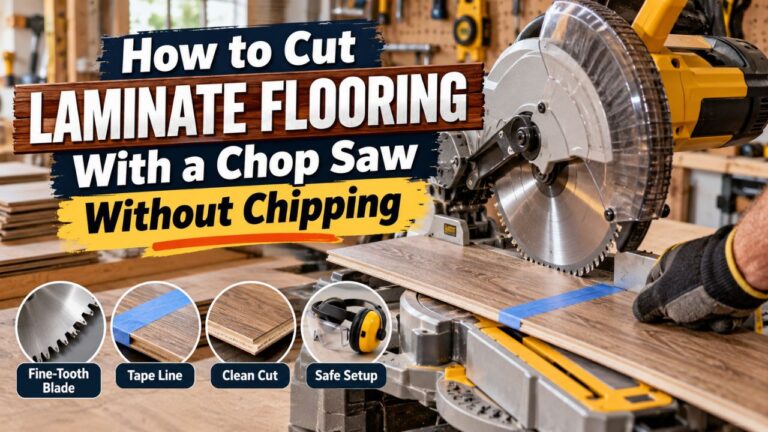
Apply Painter’s Tape
For particularly chip-prone flooring, painter’s tape over the cut line may help support the surface.
Mark your cut over the tape and saw through both.
Remove the tape slowly afterward.
It is a simple technique worth testing on scrap, although a proper blade is more important.
Do Not Force the Cut
Let the blade work.
Pushing a dull or overloaded blade rapidly through laminate tends to make the edge worse.
A smooth controlled feed usually produces better results.
Can You Use a Miter Saw for Lengthwise Cuts?
No, not in the normal way.
A miter saw is primarily designed for crosscutting material across its width.
It is not a rip saw.
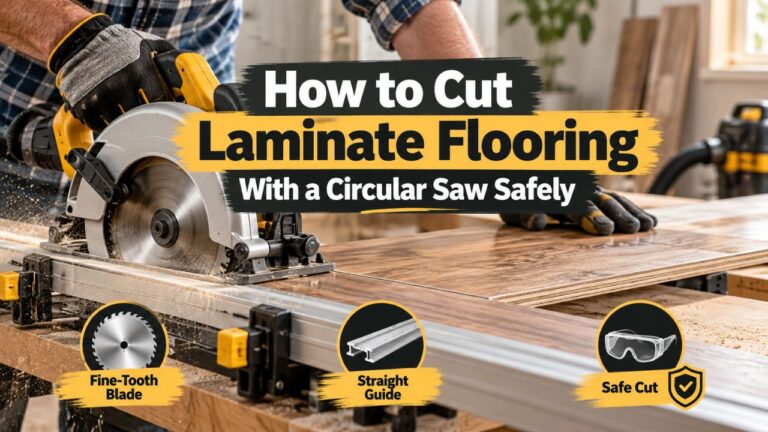
If you need to narrow a laminate plank lengthwise for the first or final row, use a table saw, circular saw with guide, track saw, or another suitable ripping tool.
Trying to rotate a long flooring plank and feed it lengthwise through a miter saw is unsafe and impractical.
This distinction is important because most laminate installations require both types of cuts.
A miter saw can handle the majority of end cuts quickly, but you may still need another tool for the final row.
Miter Saw vs. Table Saw for Laminate Flooring
These two saws perform different jobs.
| Task | Miter Saw | Table Saw |
| Shortening planks | Excellent | Possible |
| Repeated crosscuts | Excellent | Good with proper setup |
| Angle cuts | Excellent | Possible |
| Lengthwise ripping | Poor choice | Excellent |
| Narrowing first/last row | No | Excellent |
| Portability | Good | Varies |
| Wide plank crosscuts | Excellent with slider | Depends on setup |
If I were installing an entire laminate floor, I would ideally have both a miter saw and a ripping tool.
The miter saw would handle end cuts.
The table saw or guided circular saw would handle lengthwise cuts.
Miter Saw vs. Circular Saw for Laminate Flooring
A circular saw is more versatile because it can both crosscut and rip.
However, a miter saw is faster and easier for repeated crosscuts.
With a miter saw, you can place the flooring against the fence, align the mark, and cut.
For a circular saw, you need to support the plank and may need a square or guide.
If you already own only a circular saw, you do not need to buy a miter saw solely to install one small room of laminate.
If you are flooring several rooms and will make hundreds of end cuts, a miter saw can save significant time.
Miter Saw vs. Flooring Cutter
A manual laminate flooring cutter is another alternative.
It uses a long lever to shear or crush-cut the plank rather than using a spinning blade.
Its biggest advantage is reduced dust and noise.
A flooring cutter can be convenient inside the room where installation is happening.
However, cut quality and maximum plank capacity depend heavily on the cutter.
A miter saw gives you greater versatility for trim and other construction tasks after the flooring project is complete.
For a DIY homeowner buying one tool for multiple projects, I generally prefer the miter saw.
For a professional installer who values fast, dust-free indoor cuts, a flooring cutter can be extremely useful.
Key Takeaways:
- Use the miter saw for crosscuts, not lengthwise ripping.
- A table saw or guided circular saw is better for narrowing the first and final rows.
- A manual flooring cutter can be convenient when dust and noise are major concerns.
What Size Miter Saw for Wide-Plank Laminate?
Wide-plank laminate is where saw capacity becomes most important.
Do not assume a 10-inch non-slider can cut every wide plank simply because the material is thin.
Measure the plank from edge to edge.
Then compare that figure with the saw’s 90-degree crosscut capacity.
If the plank exceeds that capacity, choose a sliding saw or another cutting tool.
A 10-inch sliding saw is usually enough for common residential wide-plank products.
If your flooring is exceptionally wide, a 12-inch slider provides more reserve capacity.
There is no benefit in buying excessive size if your actual boards fit easily on a smaller machine.
What Size Miter Saw for Laminate Flooring Trim?
If you also plan to install baseboard, shoe molding, quarter-round, or transition trim, a 10-inch compound miter saw becomes even more useful.
A 10-inch saw easily handles most residential trim profiles.
The compound function lets you make angle and bevel cuts where needed.
For oversized crown molding or very large trim, a 12-inch slider may offer more capacity.
But for ordinary laminate-flooring trim, 10 inches remains my preferred general-purpose size.
Common Mistakes When Choosing a Miter Saw for Laminate
The most common mistake is assuming a larger blade automatically means a better flooring saw.
Crosscut capacity depends on the entire saw design.
A 10-inch slider may be far more useful than a larger non-sliding model.
Another mistake is spending heavily on a large saw while continuing to use the coarse construction blade included with it.
For laminate, investing in the correct blade can have a bigger effect on results than buying a larger saw.
A third mistake is ignoring plank width.
Always check the actual material before purchasing or renting equipment.
Finally, remember that a miter saw does not replace a rip-cutting tool.
Even the largest sliding miter saw is not intended to rip a 6-foot laminate plank lengthwise.
Miter Saw Safety for Laminate Flooring
Laminate flooring is lightweight enough that it may appear harmless, but the saw does not care what material you are cutting.
Always keep your hands outside the manufacturer’s marked danger zone.
Use eye and hearing protection.
Laminate also creates fine dust, so dust collection and appropriate respiratory protection are important, particularly when cutting a large quantity.
Keep long planks fully supported.
Do not allow an unsupported end to pull the workpiece away from the fence.
Make sure the plank is flat against both the table and fence before lowering the blade.
Never hold a very short offcut directly beside the blade with your fingers.
Use proper workholding or change the cutting method when a piece is too small to control safely.
FAQs about What Size Miter Saw for Laminate Flooring
Is a 10-inch miter saw enough for laminate flooring?
Yes. A 10-inch saw is sufficient for most laminate-flooring installations, especially if it has a sliding mechanism for wider planks.
Is a 12-inch miter saw better for laminate flooring?
Not necessarily.
A 12-inch saw has greater capacity, but a 10-inch slider is usually easier to handle and provides all the capacity most laminate projects need.
Can a 7 1/4-inch miter saw cut laminate flooring?
Yes, provided its crosscut capacity is wide enough for your flooring plank.
Compact sliding models can be surprisingly capable.
Do I need a sliding miter saw?
Not always.
If your plank width fits within a non-sliding saw’s crosscut capacity, a standard saw works fine.
For wide laminate, a sliding model is much more versatile.
What blade should I use for laminate flooring?
Use a sharp carbide-tipped fine-finish blade designed for laminate, melamine, plywood, or other finished materials.
How many teeth should a 10-inch blade have for laminate flooring?
Approximately 60 to 80 teeth is a practical range for many clean crosscuts.
Blade design and sharpness matter as much as tooth count.
Can I use the blade that came with my miter saw?
Possibly, but many saws include a relatively coarse general construction blade.
A fine-finish blade usually produces cleaner laminate cuts.
Should laminate face up or down on a miter saw?
For most conventional miter saws, place the finished face up so the blade enters the visible surface first.
Make a test cut on scrap to confirm the cleanest orientation.
Can I cut wide laminate planks with a 10-inch miter saw?
A 10-inch sliding miter saw can handle many wide laminate planks.
Compare the plank width with your saw’s stated 90-degree crosscut capacity.
Can you rip laminate flooring with a miter saw?
No. A miter saw is not designed for long lengthwise rip cuts.
Use a table saw, track saw, or guided circular saw instead.
Can you cut laminate flooring at an angle with a miter saw?
Yes.
Angle cuts are one of the main strengths of a miter saw.
Set the miter angle according to the required layout and support the plank firmly against the fence.
Can a miter saw cut engineered flooring too?
Yes. A miter saw can also crosscut engineered hardwood, provided you use an appropriate sharp finish blade.
Will laminate flooring dull a miter saw blade?
Yes. Laminate’s hard wear layer and dense core can be abrasive, so blades may dull faster than when cutting ordinary softwood.
Is a cordless miter saw good for laminate flooring?
Yes, provided it has sufficient cutting capacity and battery runtime.
Cordless models can be especially convenient when working in multiple rooms or locations without nearby power.
Do I need a miter saw just to install laminate flooring?
No.
A circular saw, table saw, jigsaw, or flooring cutter can perform various flooring cuts.
A miter saw is simply one of the fastest and most convenient tools for repeated crosscuts.
Conclusion
If you are deciding what size miter saw for laminate flooring to use, a 10-inch sliding compound miter saw is the best overall choice for most homeowners and DIY installers. It has plenty of cutting depth, handles common wide-plank laminate, accepts widely available blades, and is easier to transport and store than most 12-inch saws.
A basic 10-inch non-sliding saw can also work if your flooring fits within its crosscut capacity. For narrower flooring, even a compact 7 1/4-inch sliding saw may be sufficient.
I would choose a 12-inch saw only when the flooring or other materials require the additional capacity, or when you already own one. Buying a larger saw solely because it sounds more powerful usually does not improve a typical laminate installation.
Whichever saw size you use, put just as much attention into the blade. A sharp fine-tooth carbide blade designed for clean finished-material cuts will usually produce far better laminate edges than a coarse construction blade.
Finally, remember that the miter saw is primarily for shortening planks and making angled crosscuts. When you need to rip the first or final row lengthwise, switch to a table saw, track saw, or guided circular saw. Choosing each tool for the cut it does best will make the installation faster, cleaner, and safer.