How to Sharpen a Tenon Saw: Step-by-Step Guide for Beginners
If you want to know how to sharpen a tenon saw, clamp the blade securely in a saw vise, lightly joint uneven teeth, restore their shape with the correct triangular saw file, set the teeth only if necessary, and file each tooth while maintaining the saw’s original rake and fleam angles. A rip-filed tenon saw is normally filed straight across the toothline with little or no fleam, while a crosscut tenon saw requires alternating bevel angles.
Sharpening a traditional tenon saw is much more precise than sharpening a coarse general-purpose handsaw because backsaw teeth are usually small and closely spaced. Fortunately, you do not need expensive machinery. A properly sized triangular file, a stable vise, good lighting, and careful filing technique are enough for most routine sharpening.
The most important rule is not to reshape a saw unnecessarily. If your tenon saw previously cut well and has simply become dull, preserving its existing tooth geometry is usually better than trying to create new rake and fleam angles from scratch.
You also need to determine whether the blade is actually designed to be resharpened. Traditional high-carbon-steel backsaws normally are, while some modern saws use hardened teeth that ordinary saw files cannot effectively cut.
In this guide, I’ll explain how to sharpen a tenon saw from inspection through final test cuts, including file selection, jointing, tooth setting, rip versus crosscut filing, rake and fleam angles, common mistakes, and when professional sharpening makes more sense.
How to Sharpen a Tenon Saw
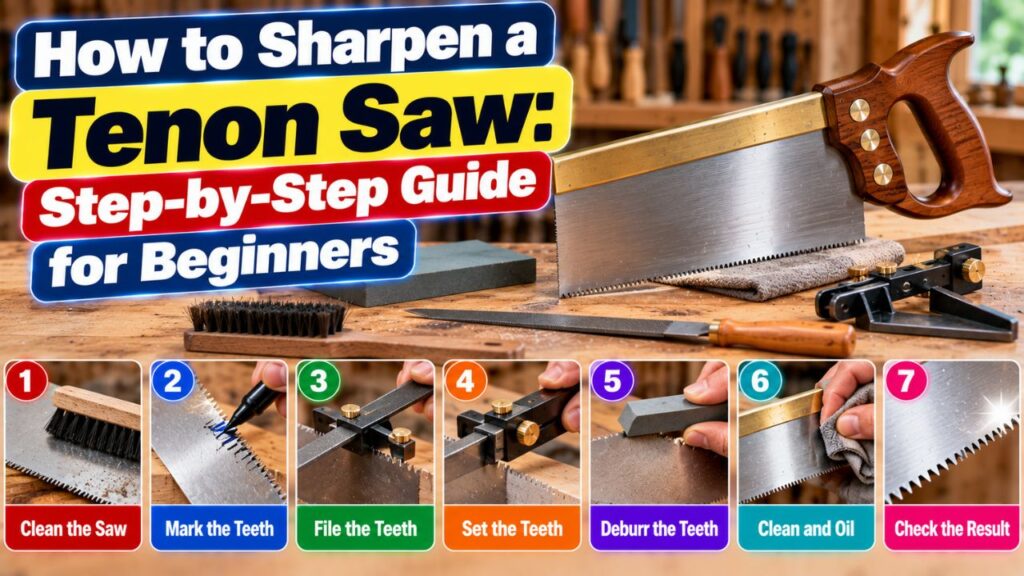
A complete tenon-saw sharpening normally involves four related operations: jointing, shaping, setting, and final filing. You may not need all four every time.
If the teeth are still even, properly shaped, and correctly set, a light sharpening can require little more than touching each gullet with a suitable triangular file until the tooth points are sharp again.
A neglected saw is different. If some teeth are taller than others, several teeth are damaged, or the saw wanders badly in a cut, you may need to joint and reshape the entire toothline before final sharpening.
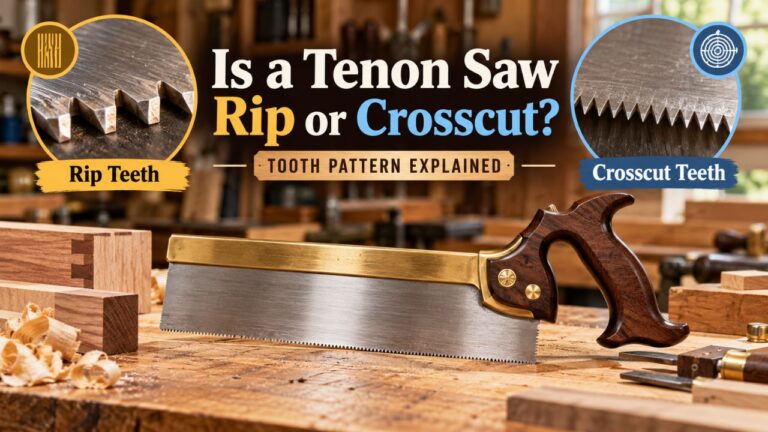
Before doing anything, identify whether your saw is filed for ripping or crosscutting.
Most traditional tenon saws intended primarily for cutting tenon cheeks along the grain use a rip tooth pattern. However, manufacturers also sell crosscut tenon saws for cutting shoulders, trimming stock, and cutting across the grain.
That distinction determines how the file must be presented to the teeth.
Rip vs Crosscut Tenon Saw Sharpening
| Feature | Rip-Filed Tenon Saw | Crosscut Tenon Saw |
| Main cutting action | Chisels fibers along grain | Slices fibers across grain |
| Fleam | Usually 0° | Alternating bevel |
| File direction | Essentially straight across blade | Angled alternately |
| Typical use | Tenon cheeks, ripping | Shoulders, trimming, crosscuts |
| Beginner difficulty | Easier | More demanding |
If you are uncertain which type you have, inspect the teeth under good light or magnification.
Rip teeth resemble a row of small chisels. Crosscut teeth have alternating bevels that make the points resemble tiny knives.
Key Takeaways:
- Determine whether the tenon saw is rip- or crosscut-filed before sharpening.
- Preserve the existing tooth geometry unless you intentionally want to change how the saw cuts.
- A lightly dull saw may need only filing; damaged or uneven teeth require more complete restoration.
First Check Whether Your Tenon Saw Can Be Sharpened
Do this before buying files or altering the teeth.
Traditional tenon saws generally use high-carbon steel that can be sharpened repeatedly. Many premium modern backsaws are made this way as well.
Some inexpensive modern saws, however, have impulse-hardened or hard-point teeth. These teeth are heat treated to a hardness that can be greater than an ordinary saw file.
Such a blade may be intended to be replaced rather than conventionally sharpened.
How to Tell if the Teeth Are Fileable
Start with the manufacturer’s information if it is available. Look for terms such as:
Resharpenable, fileable, high-carbon steel, impulse hardened, induction hardened, or hard point.
If the documentation is unavailable, a cautious file test can provide a clue.
Place a proper saw file against one inconspicuous tooth and make a very light stroke. A fileable tooth should allow the file to bite and remove metal normally.
If the file simply skates across the surface without cutting, stop. The teeth may be too hard for conventional filing.
Do not keep forcing an expensive file against hardened teeth because you may damage the file without improving the saw.
Tools You Need to Sharpen a Tenon Saw
You do not need a large sharpening system, but the tools must fit the fine tooth geometry.
| Tool | Purpose |
| Triangular saw file | Sharpens and shapes the teeth |
| Saw vise or suitable clamping jaws | Holds the blade rigidly |
| Small mill file | Joints uneven tooth tips |
| Saw set | Adjusts tooth set when required |
| File handle | Improves control and hand safety |
| Rake/fleam guide | Helps maintain consistent angles |
| Fine stone | Corrects excessive set or final side irregularities |
| Magnification and strong light | Makes small teeth easier to inspect |
A dedicated saw vise is ideal because it supports the thin plate close to the teeth and reduces vibration.
If you do not own one, you can make simple wooden jaws for a bench vise. Clamp the blade so the gullets sit only a short distance above the jaws. The closer the teeth are to the support, the less they chatter while filing.
Always Put a Handle on the File
A triangular saw file has a pointed tang.
Do not use the bare tang as a handle. A proper file handle gives you better control and reduces the chance of injuring your palm if the file slips.
This inexpensive detail makes precision filing noticeably easier.
What Size File Do You Need for a Tenon Saw?
Use a tapered triangular saw-sharpening file matched to the tooth pitch.
A common tenon saw may have somewhere around 9 to 14 teeth per inch, although individual saws vary.
A useful general guide is:
| Approximate Tooth Pitch | Typical Saw File |
| 9–10 TPI | 6-inch double-extra-slim or similar appropriate file |
| 11–14 TPI | 5-inch double-extra-slim file |
| Finer teeth | Smaller extra-slim or double-extra-slim file as appropriate |
The exact terminology varies between file manufacturers, so matching the file to the manufacturer’s recommended tooth range is preferable to selecting solely by file length.
The file should fit comfortably into the gullet without being so small that only a tiny section of its faces does all the cutting.
Using an oversized file makes it difficult to seat the file properly between fine teeth. Using one that is unnecessarily small causes rapid wear and can make consistent tooth shaping harder.
Understand Rake and Fleam Before Filing
Two terms cause most of the confusion in saw sharpening: rake and fleam.
Once you understand them, the process becomes much easier.
What Is Rake Angle?
Rake describes the angle of the front cutting face of the tooth.
A more aggressive tooth has less rake and tends to cut faster but can feel grabby or difficult to start.
Additional rake makes the cutting action gentler and smoother.
Fine backsaws often use a moderate amount of rake because precise starting and control matter.
There is no single ideal rake angle for every tenon saw. Traditional rip backsaws commonly use relatively modest rake, while some modern tenon saws are manufactured with rake angles in the low-to-mid teens.
If your saw already performs well, I recommend matching the existing rake rather than changing it.
What Is Fleam Angle?
Fleam is the sideways angle at which the file crosses the toothline.
A rip tooth normally has essentially 0° fleam, meaning the file works straight across the blade.
Crosscut teeth use alternating fleam. This creates beveled cutting edges that slice wood fibers across the grain.
Fine crosscut backsaws often use fairly modest fleam compared with coarse crosscut handsaws.
Again, reproducing the original geometry is usually safer than choosing a new angle from a generic chart.
Step 1: Clean and Inspect the Saw
Before filing, wipe dust, pitch, and surface grime from the blade.
You need to see the teeth clearly.
Place the saw under strong directional lighting and inspect the toothline from both the side and above. Magnification can be extremely helpful on a fine tenon saw.
Look for uneven teeth, broken points, missing teeth, excessive set, inconsistent tooth spacing, and areas that are visibly dull.
A dull cutting edge reflects light. A truly sharp point or edge reflects very little because there is almost no flat surface for the light to bounce from.
If the saw has only become mildly dull and the teeth remain uniform, avoid unnecessary aggressive jointing.
Step 2: Clamp the Saw Securely
Clamp the saw plate in your saw vise with the toothline close to the top of the jaws.
Only enough blade should project above the jaws for the file to clear them comfortably.
If too much thin blade is exposed, it will vibrate.
That vibration creates the unpleasant screeching sound sometimes heard during saw filing and makes precise control difficult.
Position the saw at a comfortable working height. Ideally, the teeth should be high enough that you can see them clearly without bending over throughout the job.
Good lighting from the side helps small flats and tooth points become visible.
Step 3: Joint the Teeth if Necessary
Jointing means lightly filing across the tops of the teeth to bring them to a common height.
Place a small smooth or appropriately cut mill file in a jointing guide or hold it carefully square to the saw plate.
Run the file lightly along the entire toothline.
The objective is not to remove large amounts of metal. You simply want each tooth tip to develop a tiny bright flat.
Those flats act as visual indicators during the next stage.
If one tooth has a large flat while another has almost none, their heights are different. Filing the teeth later removes those flats while restoring consistent points.
Do You Need to Joint Every Time?
Not necessarily.
Some saw filers prefer a very light jointing on every full sharpening because it guarantees a consistent toothline.
For an accurately maintained backsaw receiving a minor touch-up, jointing may be extremely light or unnecessary.
Fine backsaw teeth are small, so aggressive jointing can create much more reshaping work than you intended.
My recommendation for beginners is simple: if the toothline is visibly uneven, joint it lightly. If the saw has uniformly shaped teeth and only needs a small refresh, preserve as much existing geometry as possible.
Step 4: Reshape Uneven Teeth
After significant jointing, the teeth may need to be reshaped before final sharpening.
Seat the triangular file in each gullet and work toward making the teeth equal in size and spacing.
Watch the bright flats created during jointing.
The file removes metal from two neighboring teeth at once. Your goal is to reduce the flats progressively while keeping the gullets and tooth spacing uniform.
Do not simply give every gullet exactly the same number of strokes if the teeth are already uneven.
One tooth may require more correction than another.
Look at the toothline frequently rather than filing mechanically.
Key Takeaways:
- Joint only enough to bring tooth tips into alignment.
- The small bright flats left by jointing show you where more filing is needed.
- Concentrate on equal tooth shape rather than blindly giving every gullet the same number of strokes.
Step 5: Check the Tooth Set
The set is the slight alternating bend of the teeth to the left and right of the saw plate.
That alternating set creates a kerf slightly wider than the blade, allowing the saw plate to move through the cut without binding.
Fine tenon saws generally need very little set.
Too much set creates a wide kerf, wastes effort, and can make precise joinery less accurate.
Do You Need to Reset the Teeth Every Time?
No.
A properly maintained tenon saw may go through several light sharpenings before it needs to be reset.
Make a test cut before changing anything.
If the saw travels freely in the kerf and does not bind, the existing set may be perfectly adequate.
If it binds even though the blade is straight and sharp, additional set may be required.
If the saw feels loose in its kerf or produces an unnecessarily wide cut, it may already have too much set.
How to Set the Teeth
Use a saw set appropriate for the small teeth on your backsaw.
Set alternating teeth very slightly to one side, then turn the saw around and set the remaining teeth in the opposite direction.
Only the upper portion of each tooth needs to bend.
The goal is consistency, not maximum movement.
Premium fine backsaws can use only a few thousandths of an inch of set on each side. That illustrates how subtle the adjustment should be.
Over-setting a fine tenon saw can make it cut aggressively but less precisely.
Step 6: File a Rip-Cut Tenon Saw
If your tenon saw is sharpened for rip cutting, this is the simpler filing pattern.
Rip teeth behave like small chisels.
Set the triangular file into the first gullet and maintain the original rake angle.
For ordinary rip filing, the file runs straight across the saw plate with essentially zero fleam.
Push the file forward smoothly.
Saw files cut primarily on the forward stroke, so release pressure as you bring the file back.
If this is routine sharpening, one controlled stroke per gullet may be enough. Very fine premium saws can require remarkably little metal removal.
Watch the tooth tips carefully.
You want the jointing flats to disappear at approximately the same time while maintaining uniform tooth size.
Keep the Rake Consistent
Consistency matters more than chasing a theoretically perfect number.
A simple file-angle guide attached to the end of the file gives your eye a longer reference line and makes it much easier to repeat the same rake from tooth to tooth.
Without a guide, beginners often gradually change the file angle as they work down the blade.
The result is a saw that has aggressive teeth at one end and relaxed teeth at the other.
Step 7: File a Crosscut Tenon Saw
Crosscut sharpening requires more care because each tooth receives a bevel.
Instead of filing square across the blade, angle the triangular file horizontally to create fleam.
The direction alternates because alternating teeth cut opposite sides of the kerf.
You generally file every other gullet from one side, then reposition or turn the saw and file the remaining gullets from the opposite side.
Maintain the same rake and fleam angles throughout the entire toothline.
Why Crosscut Sharpening Is Harder
With rip filing, you mainly control rake while keeping the file square across the plate.
With crosscut filing, you must control both rake and fleam simultaneously.
Small variations can cause one side of the saw to cut more aggressively than the other, making the saw drift away from your intended line.
If you own an expensive crosscut tenon saw and cannot confidently identify its existing geometry, professional sharpening can be a sensible choice.
A minor error on a coarse utility saw is relatively easy to repair. Incorrectly reshaping an entire line of fine crosscut backsaw teeth creates significantly more restoration work.
Step 8: Stop Filing as Soon as the Teeth Are Sharp
More filing is not better filing.
The objective is to bring the cutting edges back to clean points while removing as little steel as necessary.
If you jointed the saw, watch the bright flats on top of the teeth.
As sharpening progresses, those flats become narrower.
When the adjacent faces meet cleanly and the flat disappears, that tooth is sharp.
Continuing to file after that point unnecessarily changes the tooth size and can create an uneven toothline.
A light touch is especially important on a fine tenon saw because each tooth contains very little metal.
Step 9: Check the Saw From Above
After filing, look straight down the toothline under good lighting.
The set should appear balanced from side to side.
You should not see random teeth sticking noticeably farther left or right than their neighbors.
Also look along the tooth points.
They should appear uniform without obvious high or low sections.
If the saw is consistently over-set or pulls toward one side during the test cut, very light side dressing with a fine stone can sometimes correct the problem.
Do this cautiously.
Stoning removes set. A few light passes can make a noticeable difference on a fine backsaw.
Step 10: Make a Test Cut
Do not judge sharpening solely by appearance.
Use scrap wood similar to the material you normally cut.
For a rip-filed tenon saw, make a short rip cut along the grain. For a crosscut saw, test across the grain.
A properly sharpened saw should start predictably and cut without requiring heavy downward pressure.
It should track straight when your technique is straight and should not bind excessively in the kerf.
The finished cut should also tell you a great deal.
If the saw cuts aggressively but leaves a rough surface, the tooth geometry may be too aggressive for your needs.
If it starts smoothly but cuts painfully slowly, the rake may be overly relaxed or the teeth may not yet be fully sharp.
If it consistently pulls to one side, unequal set or unequal sharpening is a likely cause.
Key Takeaways:
- Stop filing when the cutting faces meet at sharp points; extra strokes can create uneven teeth.
- Test the saw in wood similar to what you normally cut.
- Binding, drifting, grabbing, and slow cutting provide useful clues about what still needs correction.
How Sharp Should a Tenon Saw Be?
A well-sharpened tenon saw should cut with relatively little downward force.
The weight of the saw plus a controlled stroke should do most of the work.
If you find yourself pressing hard to make progress, the teeth may be dull or incorrectly shaped.
However, do not confuse poor technique with dullness.
A sharp tenon saw can still jump or grab if you force it downward, particularly when starting a cut.
Use light pressure, especially for the first few strokes.
Once the kerf is established, lengthen the stroke and allow more of the toothline to work.
Should You Change the Tooth Geometry While Sharpening?
Usually, no.
If the saw originally cut well, preserving its factory or existing geometry is the safest choice.
There are situations where an experienced filer might intentionally change rake or fleam to alter performance.
Less rake can make a saw more aggressive. More rake can make it easier to start and smoother to control. Greater crosscut fleam can increase slicing action but may also make fine teeth more delicate.
Those adjustments are useful when tuning a saw for a specific job, but they are unnecessary for routine maintenance.
For your first sharpening, I recommend treating the existing teeth as your template.
Common Tenon Saw Sharpening Mistakes
One of the biggest mistakes is removing too much metal.
Saw sharpening is a precision task. A fine backsaw may need only one light stroke in each gullet during routine maintenance.
Another common error is using the wrong file. If the triangular file is too large or too small for the tooth pitch, it becomes difficult to control the shape consistently.
Changing the file angle from one end of the blade to the other is another problem. A rake or fleam guide makes consistency much easier.
Over-setting the teeth is also common among beginners. A tenon saw needs enough clearance to avoid binding, but excessive set makes the kerf wider and can reduce precision.
Finally, avoid attempting to file hardened disposable teeth. If the saw is not designed for resharpening, conventional filing is unlikely to produce good results.
Why Does My Tenon Saw Cut to One Side After Sharpening?
A saw that consistently drifts left or right commonly has unequal tooth set or unequal sharpening.
For example, if the teeth projecting to one side are slightly farther out than those projecting to the other, that side can influence the cut.
Unequal bevels on a crosscut saw can cause a similar effect.
Before modifying the saw, make several test cuts and make sure your sawing technique is not responsible.
If the saw consistently pulls the same direction regardless of your stance or workpiece, inspect the set closely.
Very light stoning on the side toward which correction is needed can balance an over-set saw, but this should be done gradually. Removing too much set creates the opposite problem and can make the saw bind.
How Often Should You Sharpen a Tenon Saw?
There is no fixed sharpening interval.
A hobby woodworker may use a quality tenon saw for a long time before it noticeably dulls, while a professional using one every day will need more frequent maintenance.
Sharpen when performance changes.
Typical signs include increased downward pressure, slower cutting, rougher surfaces, difficulty starting, or visibly rounded tooth tips reflecting light.
Light, frequent maintenance is easier than waiting until the saw is extremely dull.
When the existing teeth remain uniform, a minor touch-up removes very little metal and is much easier than a complete restoration.
How Long Does It Take to Sharpen a Tenon Saw?
Once you understand the technique, a simple touch-up can be relatively quick.
A complete restoration takes longer because you may need to joint, reshape, reset, sharpen, and tune the teeth.
Beginners should not work against the clock.
The file stroke itself takes only seconds. Most of the skill lies in keeping the angle consistent and knowing when to stop.
Working slowly for your first few sharpening sessions will usually produce a better saw than trying to file every tooth quickly.
Can You Sharpen a Tenon Saw Without a Saw Vise?
Yes, but the blade still needs rigid support.
A normal woodworking vise can be adapted with long wooden jaws that clamp the blade close to the toothline.
The important goal is to stop vibration.
If the saw chatters loudly every time the file contacts a tooth, your clamping arrangement is not supporting the blade well enough.
Move the jaws closer to the gullets or improve the clamping setup.
For someone who plans to maintain several handsaws, a dedicated saw vise is a worthwhile convenience.
When Should You Have a Tenon Saw Professionally Sharpened?
DIY sharpening makes sense when the saw is in good condition and simply needs its cutting edges refreshed.
Professional filing becomes more attractive when the saw has badly uneven teeth, missing or damaged teeth, severe rust at the toothline, a badly distorted set, or complicated crosscut geometry you do not feel comfortable reproducing.
An expensive vintage or premium backsaw can also justify professional work for the first restoration.
Once an experienced filer establishes a clean, consistent toothline, maintaining it yourself becomes much easier.
I would especially consider professional service before attempting major geometry changes on a valuable crosscut backsaw.
How to Keep a Tenon Saw Sharp Longer
Good storage matters almost as much as sharpening.
Do not throw a fine backsaw loose into a toolbox where its teeth can strike steel tools.
Keep the toothline protected and wipe the blade after use so moisture and sawdust do not encourage corrosion.
A light protective coating on the plate can help prevent rust during longer storage.
When sawing, avoid forcing the blade.
Heavy downward pressure does not make a sharp saw perform better and can increase wear or damage delicate teeth.
Let the tooth geometry perform the cutting.
FAQs about How to Sharpen a Tenon Saw
What file do you use to sharpen a tenon saw?
Use a tapered triangular saw-sharpening file sized for the saw’s tooth pitch.
Many tenon saws in the 11–14 TPI range work with a 5-inch double-extra-slim taper file, while approximately 9–10 TPI teeth commonly use a 6-inch double-extra-slim file. Always check the file manufacturer’s recommended tooth range.
Are tenon saws rip or crosscut?
Many traditional tenon saws are rip filed because their primary purpose is cutting tenon cheeks along the grain.
However, crosscut tenon saws also exist. Identify the actual tooth pattern before sharpening rather than assuming every tenon saw is rip filed.
What angle do you sharpen a tenon saw at?
The correct angle depends on the existing tooth geometry.
Rip teeth normally use zero fleam and are filed straight across the blade while maintaining the existing rake. Crosscut teeth require an alternating fleam angle.
For routine sharpening, matching the manufacturer’s original geometry is preferable to choosing a new universal angle.
Do you need to joint a tenon saw before sharpening?
Not always.
Jointing is useful when tooth heights are uneven because it produces small flats that guide subsequent filing.
A well-maintained saw receiving a light touch-up may require extremely little jointing or none at all.
Do you need to set the teeth every time you sharpen?
No.
Reset the teeth only when the existing set is insufficient or uneven.
Repeated unnecessary setting can produce an overly wide kerf and reduce the precision of a fine backsaw.
Can you sharpen a hardened tenon saw?
Impulse-hardened or hard-point teeth may be too hard for conventional saw files.
Check the manufacturer’s instructions. If a normal saw file skates across the tooth instead of cutting it, the saw may not be intended for traditional resharpening.
How do I know when my tenon saw is sharp?
The saw should cut with little downward pressure, start predictably, and move through the wood without excessive binding.
Under strong light, sharp tooth points also show little or no reflective flat at their tips.
Why does my tenon saw grab after sharpening?
The rake may have become too aggressive, the teeth may be uneven, or you may be applying too much downward pressure.
Compare the new tooth geometry with the original profile and try starting the cut with lighter pressure.
Why does my tenon saw bind in the cut?
Insufficient set is one possible cause.
A bent blade, incorrect tooth geometry, or poor sawing technique can also cause binding.
Check the set before assuming the teeth need to be bent farther outward.
Why does my tenon saw cut crooked after sharpening?
Unequal set or uneven filing can make a saw favor one side.
Check whether the teeth project evenly from both sides and whether crosscut bevels are consistent.
Also make sure your sawing technique is not causing the drift before altering the teeth.
Can I sharpen a tenon saw with a normal metal file?
Use a proper triangular saw file for the teeth.
A small mill file is appropriate for jointing, but an ordinary flat metal file cannot correctly form the 60-degree gullets of conventional Western saw teeth.
Should I sharpen from the heel to the toe?
You can establish a consistent routine in either practical direction, but maintaining the same body position and filing geometry matters more.
For crosscut teeth, many filing methods sharpen alternating gullets from one side, then turn or reposition the saw and complete the remaining teeth.
How many file strokes should each tooth get?
There is no universal number.
A well-maintained tenon saw may need only one controlled stroke per gullet. Uneven or damaged teeth may require additional shaping.
Use the condition of the tooth rather than an arbitrary stroke count to decide when to stop.
Can a beginner sharpen a tenon saw?
Yes, particularly a rip-filed saw that is already in reasonably good condition.
Rip sharpening is easier because it does not require alternating fleam angles.
Work slowly, use a guide if necessary, and preserve the existing tooth geometry.
Is a crosscut tenon saw harder to sharpen?
Yes.
Crosscut sharpening requires consistent rake plus alternating fleam, so there are more angles to control.
For a valuable saw with very fine crosscut teeth, professional sharpening may be worthwhile if you are inexperienced.
Conclusion
Learning how to sharpen a tenon saw is mainly about consistency and restraint. You do not need to remove much steel; you need to restore the existing cutting edges while keeping every tooth as uniform as possible.
First confirm that the blade has resharpenable teeth. Then choose a triangular saw file matched to the tooth pitch and clamp the blade securely so it cannot vibrate. Lightly joint uneven teeth, reshape them only where necessary, and adjust the set only if the saw actually needs it.
For a rip-filed tenon saw, keep the file essentially square across the blade with zero fleam while maintaining the existing rake angle. For a crosscut saw, preserve the alternating fleam and rake geometry throughout the entire toothline.
My recommendation for a first-time sharpener is to avoid experimenting with tooth geometry. Use the existing teeth as your template and remove the minimum amount of metal required to make them sharp. A well-maintained tenon saw often needs only a very light filing.
After sharpening, test the saw in suitable scrap wood. It should start cleanly, cut with little downward pressure, track predictably, and move through the kerf without excessive binding. If those characteristics are present, there is no reason to keep filing.
With careful maintenance, a traditional fileable tenon saw can be sharpened repeatedly and remain an accurate joinery tool for many years.