How to Mount a Panel Saw
To learn how to mount a panel saw, first determine whether your model is designed for a freestanding stand, wall-supported installation, or permanent floor/wall anchoring. Position the frame on a flat, structurally sound surface, set the manufacturer-specified rearward angle, secure the saw with the approved stand or anchors, make sure the counterweight and carriage have full clearance, and then check the frame, rollers, blade alignment, and measuring system before making a test cut.
Do not simply bolt a vertical panel saw flat against a wall. Many machines are designed to lean backward at a specific angle so sheet material remains against the frame while cutting. The required angle, mounting hardware, and support points vary by manufacturer and model.
For example, Safety Speed’s EF5 instructions state that when the optional stand is not used, the saw should be supported against a solid vertical surface with blocking at the upper frame, positioned at approximately a 15-degree angle, and secured at the top so it cannot be pushed over. The manual also warns against allowing the wall to interfere with the counterweight system and says not to use banding as the retaining method.
Freestanding installations are different. A manufacturer-approved frame stand attaches directly to designated locations on the saw, and those locations can vary between panel saw models. Safety Speed specifically notes that stand configuration and attachment methods differ by model.
Because a vertical panel saw is large, heavy, and capable of handling full sheets of plywood, MDF, plastic, or other panels, correct installation is as much a safety issue as an accuracy issue.
In this guide, I’ll explain how to mount a panel saw on a wall or stand, how to choose the installation location, what type of support is required, how to establish the correct angle, and how to check alignment before using the saw.
What Does Mounting a Panel Saw Mean?
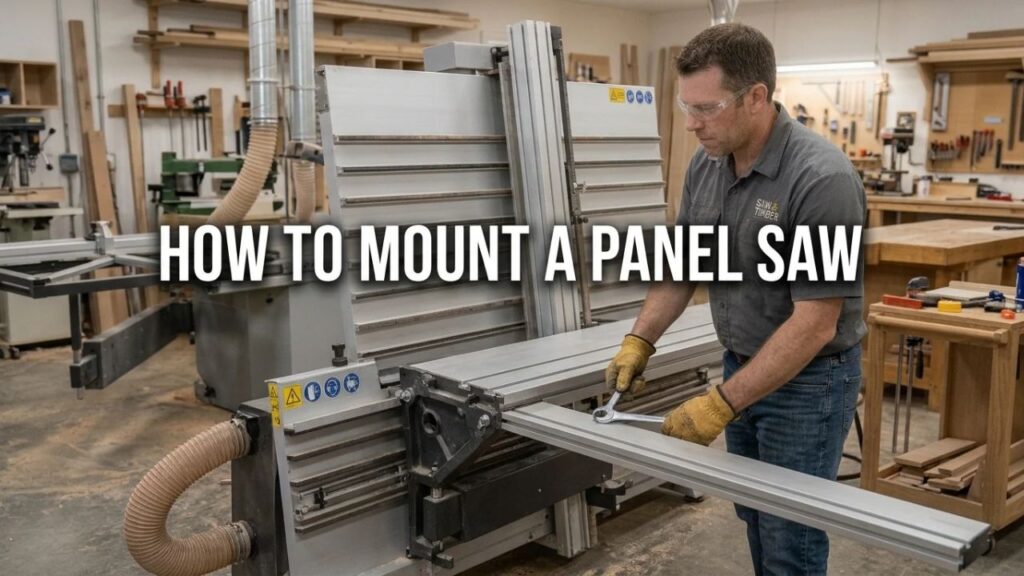
For a vertical panel saw, “mounting” normally means installing and stabilizing the complete saw frame in the shop.
Depending on the design, the machine may be:
- Supported against a wall
- Attached to a dedicated freestanding stand
- Mounted to a mobile stand
- Anchored to the floor
- Secured to both a structural wall and floor
The mounting arrangement keeps the saw from tipping while also establishing the correct operating position.
This is different from installing the saw motor, blade, carriage, or accessories.
Why Vertical Panel Saws Need Proper Support
A panel saw has a tall frame and handles large sheet goods.
Loading a 4 × 8 sheet onto the rollers creates forces against the machine. Moving large panels from side to side can also push or pull on the frame.
If the frame is unstable, the saw can move, tip, lose calibration, or create an unsafe cutting condition.
Proper mounting keeps the machine rigid enough for accurate cuts and stable enough for safe material handling.
Check the Panel Saw Manual Before Mounting
This should be the first step.
Panel saws do not all use the same mounting method.
Even machines from the same manufacturer may have different frame stands, attachment locations, angles, or anchoring requirements.
Safety Speed’s documentation, for example, states that slightly different fixed stands and attachment methods are required for different saw models.
Your manual should tell you:
The correct operating angle, approved stand configuration, mounting points, required clearances, machine weight, electrical requirements, and whether permanent anchors are required.
Do Not Copy Another Saw’s Installation Blindly
Two vertical panel saws can look similar while having very different frame structures.
Attaching a bracket at an arbitrary point on the frame can interfere with:
Counterweights, guide tubes, carriage travel, dust collection hoses, rulers, rollers, or frame alignment.
Use only structural attachment points approved for your model.
Key Takeaways:
- Determine whether your panel saw is wall-supported, freestanding, mobile, or permanently anchored.
- Do not assume mounting points or stand configurations are universal.
- Follow the manual for the exact model before drilling holes or installing anchors.
Choose the Right Location for the Panel Saw
A good installation starts with enough working space.
Do not position the saw based only on the width of the machine itself.
Remember that sheet goods can extend several feet beyond either end of the frame.
Allow Space on Both Sides
A vertical panel saw used for ripping needs enough horizontal clearance for long panels to move across the machine.
For a standard 4 × 8 sheet, you need sufficient room to load the sheet and slide it through the cutting area.
If the shop has a wall, cabinet, workbench, or column immediately beside the panel saw, you may not be able to make certain cuts.
Allow Space in Front
The operator needs room to stand in front of the machine and maneuver large sheet goods.
Avoid creating a narrow aisle where the operator has to twist or lift sheets awkwardly.
The space should also accommodate a sheet leaning outward slightly during loading.
Check Overhead Clearance
A tall panel saw may extend well above normal workbench height.
Check for:
Ceiling beams, lights, electrical conduit, dust collection ducting, garage door tracks, shelving, and sprinkler systems.
Remember that the top of the carriage, counterweight, or dust system may require additional room.
Keep the Floor Flat
The base of the panel saw should sit on a stable, reasonably level floor.
A severely uneven floor can twist the frame.
Frame twist can affect roller alignment and cutting accuracy.
If the floor is irregular, use only an approved leveling or mounting method rather than stacking loose wood scraps beneath the machine.
Make Sure the Wall or Structure Is Strong Enough
If the panel saw depends on a wall for support, that wall must be structural enough to resist the forces created during use.
Do not secure a large panel saw to drywall alone.
Drywall is a finish material, not an appropriate structural mounting point for a heavy machine.
Wood-Framed Wall
For a wood-framed wall, mounting hardware generally needs to engage structural framing such as studs or purpose-installed blocking.
The exact fastener size and arrangement should come from the saw manufacturer or a qualified installer.
If the manufacturer’s mounting locations do not align with existing studs, structural blocking may need to be installed.
Concrete or Masonry Wall
Concrete and masonry require anchors designed for the specific substrate and load.
Do not assume any concrete screw or expansion anchor is adequate.
Concrete block, solid concrete, brick, and hollow masonry can require different anchoring systems.
When structural anchoring requirements are unclear, have the installation reviewed by someone qualified to select anchors for the substrate and load.
Understand the Panel Saw’s Rearward Angle
A vertical panel saw may look almost upright, but many designs intentionally lean backward.
This rearward angle helps gravity keep the panel against the support frame and rollers.
The angle must be set correctly.
Do Not Make the Frame Perfectly Vertical Unless Required
A common installation mistake is using a level to make the saw frame perfectly plumb.
That may be incorrect.
Some panel saws are specifically designed to operate at an angle.
For example, the Safety Speed EF5 documentation specifies approximately a 15-degree operating angle for the wall-supported configuration. It notes that this places the front of the guide tubes roughly 30 inches from the wall in that configuration, although the exact distance varies by model.
That measurement should not be copied to another brand or model.
Use your saw’s required angle.
Why Too Little Angle Is a Problem
If the saw is too upright, a large sheet may tend to fall away from the frame.
This can make material handling harder and less predictable.
Why Too Much Angle Is Also a Problem
Excessive lean changes how the sheet sits on the rollers and increases the machine’s footprint.
It can also place the frame and stand outside the geometry intended by the manufacturer.
Use the designed position rather than deciding that more lean must be safer.
How to Mount a Panel Saw Against a Wall
A wall-supported vertical panel saw normally rests on the floor while its upper frame is restrained or supported by the wall.
The wall does not necessarily carry the entire weight.
The manufacturer’s design determines how loads are distributed.
Step 1: Unplug the Saw
Disconnect electrical power before positioning, mounting, adjusting, or adding accessories.
Do not work around the carriage or blade while the machine is energized.
Safety Speed’s installation instructions specifically require the tool to be unplugged before adjustments or accessory installation.
Step 2: Get Assistance
Do not attempt to position a large panel saw by yourself.
Even portable models are awkward because of their height and shape.
The manufacturer’s EF5 instructions specifically warn against lifting or leaning the machine without assistance.
Use enough people or proper lifting equipment for the machine’s weight.
Step 3: Position the Base
Place the lower frame where you want the saw to operate.
Check that the entire base sits securely and does not rock.
Leave adequate space for the manufacturer-required rearward lean.
Step 4: Provide Wall Clearance
The rear of the panel saw may contain:
Counterweights, cables, pulleys, electrical components, or dust collection equipment.
Do not push these parts directly against the wall.
Some wall-mounted installations require blocking between the wall and upper frame specifically to maintain this clearance.
Safety Speed instructs users of its wall-supported setup to provide blocking so the upper frame is supported without the counterweight assembly touching the wall.
Step 5: Establish the Correct Angle
Move the upper frame toward the wall until the manufacturer’s required operating angle is achieved.
Measure according to the method specified in the manual.
Do not guess based on appearance.
Step 6: Secure the Upper Frame
Use the manufacturer’s approved restraint or mounting hardware.
Depending on the design, this may involve:
Structural brackets, security chain, cable, bolts, or another specified system.
Safety Speed’s cited wall-supported configuration uses a lightweight chain or security rope at the top to prevent the machine from being pushed over backward and specifically says not to use banding.
That is an example for those machines—not a universal mounting method.
Step 7: Verify Counterweight Clearance
Move the carriage through its intended range with the machine unplugged.
Make sure the counterweight or cable system does not:
Touch the wall, rub a bracket, snag on hardware, or contact a dust hose.
Any interference should be corrected before power is connected.
Step 8: Tighten and Recheck
After all supports are installed, verify:
The base remains flat, the frame did not twist during tightening, and the saw maintains its intended angle.
Then tighten mounting hardware according to the manufacturer’s instructions.
Key Takeaways:
- Wall support must engage structural material, not drywall alone.
- Maintain clearance around the counterweight and moving mechanisms.
- Set the manufacturer’s intended rearward angle before final tightening.
How to Mount a Panel Saw on a Freestanding Stand
A freestanding stand eliminates the need for the wall to support the saw.
This can be useful when:
The machine must sit away from a wall, the shop layout changes frequently, the wall cannot accept structural attachments, or access is required behind the machine.
Use a stand designed for your exact panel saw.
Step 1: Identify the Stand Components
A typical fixed frame stand may use angled steel supports connected between upper portions of the panel saw frame and a lower bracket.
Exact designs differ considerably.
Safety Speed’s EF5 stand, for example, uses two long angle-steel supports and a lower bracket, with attachment locations that vary by saw model.
Step 2: Support the Saw During Assembly
Do not rely on a partially assembled stand to hold the machine.
Keep the frame supported while attaching the stand components.
A helper should stabilize the saw until every structural connection is complete.
Step 3: Attach the Lower Bracket
Install the lower support only at the designated frame location.
Use the supplied hardware.
Do not drill additional holes into the saw frame unless explicitly instructed.
Step 4: Attach the Upper Supports
Connect the stand arms to the designated upper frame locations.
Initially leaving hardware slightly loose may be required on certain designs so the stand geometry can be adjusted.
Follow the stand instructions.
Step 5: Establish the Operating Angle
Position the stand so the saw reaches the specified rearward angle.
The stand should determine and maintain this geometry.
Step 6: Tighten the Stand Hardware
Once the angle and alignment are correct, tighten every fastener as specified.
Safety Speed’s procedure, for example, calls for establishing the proper angle before tightening the stand’s connecting hardware.
Step 7: Lower the Saw Onto the Stand Carefully
Allow the stand to take the machine’s load gradually.
Confirm that it remains stable without rocking.
If the stand spreads, shifts, twists, or does not sit flat, stop and correct the installation.
Does a Freestanding Panel Saw Need to Be Bolted to the Floor?
It depends on the machine.
Some stands are designed to support the panel saw without permanent floor anchors.
Other industrial models may require floor anchoring.
Do not assume that “freestanding” automatically means “never anchored.”
Machine size matters significantly. Large industrial vertical saws can weigh hundreds of pounds; for example, Safety Speed lists its model 7000 at approximately 950 pounds, illustrating how substantial some vertical panel saw installations can be.
Use the anchoring requirements in the manual for your specific machine.
If Floor Anchors Are Required
Confirm that the floor is suitable.
Concrete thickness, reinforcement, anchor diameter, embedment, edge distance, and machine loading can affect anchor selection.
Do not drill into a slab blindly if you do not know whether utilities, post-tension cables, or other embedded systems are present.
Can You Make a DIY Panel Saw Stand?
Technically, a custom stand can be engineered, but it should not be treated as a casual woodworking project.
The stand is responsible for preventing a tall machine from tipping while full-size panels are being loaded and moved.
A custom design must account for:
Machine weight, center of gravity, rearward operating angle, lateral loads from panel movement, frame attachment locations, counterweight clearance, and floor stability.
For a commercial panel saw, I generally recommend the manufacturer’s stand or an engineered installation rather than an improvised support.
A stand that merely holds the machine upright in an empty shop may behave very differently when a heavy 4 × 8 sheet is moved rapidly across it.
How to Level a Panel Saw After Mounting
“Leveling” a vertical panel saw does not necessarily mean making the entire frame vertically plumb.
Instead, you normally want the machine installed without twist and with its material-support system correctly aligned.
Check the Lower Rollers
The rollers supporting sheet material should form a consistent path.
A long straightedge can help reveal whether one part of the machine has been twisted or distorted during mounting.
Check Side-to-Side Level
If the machine slopes significantly from one end to the other, sheet goods may roll or slide unexpectedly.
Use a level on an appropriate horizontal frame member or roller reference recommended by the manufacturer.
Check Frame Twist
Tightening wall brackets or stand bolts unevenly can twist a large frame.
This can affect the relationship between the carriage and material support.
If the machine was accurate before anchoring but becomes difficult to calibrate afterward, frame distortion should be considered.
Check the Saw Carriage After Mounting
With power disconnected, move the saw carriage along its complete travel.
It should move smoothly without binding.
Check that:
The carriage rollers remain engaged properly, cables remain correctly positioned, counterweights move freely, and nothing contacts newly installed mounting hardware.
A mounting bracket that interferes with the counterbalance system can create a serious safety problem.
Check Carriage Return
On counterbalanced designs, verify the carriage behaves as described by the manufacturer.
Do not modify counterweights simply because the carriage movement feels different after installation.
First verify the machine has been mounted at the correct angle.
Check Blade Alignment
Mounting a panel saw can affect calibration, especially if the frame was transported or flexed during installation.
Do not assume the machine is ready for precision cutting immediately.
Check Crosscut Alignment
The blade path should be square to the material support when making a vertical crosscut.
Use the manufacturer’s squaring procedure.
A large framing square may help with an initial check, but a test cut provides a more meaningful final verification.
Check Rip Orientation
If the saw motor rotates for horizontal ripping, verify it locks securely into the correct position.
Do this with the machine unplugged.
The blade must be correctly oriented and locked before cutting.
Check Measuring Scales
After the machine is physically mounted and blade alignment has been verified, calibrate rulers, stops, and measuring tapes.
Calibrating the scale before the frame is permanently positioned can waste time because small mounting changes can alter the final measurement.
Make a Test Cut Before Production Use
Do not begin with an expensive finished panel.
Use a straight scrap sheet large enough to reveal alignment problems.
Make a crosscut.
Measure both diagonals or check the cut edge against a reliable square.
Then test a rip cut if the saw is designed for ripping.
Look for More Than Dimensional Accuracy
Also observe:
Carriage movement, vibration, unusual noises, blade-guard operation, sheet stability, dust collection, and whether the frame moves while cutting.
If the machine rocks or shifts, correct the mounting before continued operation.
Key Takeaways:
- Mounting should be followed by carriage, frame, blade, and measuring-system checks.
- Do not confuse the designed rearward lean with incorrect leveling.
- Use scrap material for the first calibration cuts.
How Much Space Does a Panel Saw Need From the Wall?
There is no universal distance.
The required spacing is determined by the machine’s angle and rear components.
For one Safety Speed wall-supported configuration, the documentation notes approximately 30 inches between the front guide tubes at floor level and the wall when the machine is at roughly 15 degrees, while explicitly noting that this varies by model.
Therefore, do not design a shop around a generic 30-inch measurement.
Check your manual and physically account for:
Stand legs, counterweight box, dust collection hose, motor, carriage, electrical connection, and maintenance access.
How High Should You Mount a Panel Saw?
Most full vertical panel saws are not mounted at an arbitrary height like a wall cabinet.
Their base or lower frame rests at a designed position on the floor.
That establishes the height of the rollers and cutting system.
Do not raise the complete machine on blocks merely to make the work surface more comfortable unless the manufacturer provides an approved elevated installation.
Changing base height can alter stability and make loading heavy panels more difficult.
Can You Mount a Panel Saw to Drywall?
Not to drywall alone.
If the machine uses wall restraints, those restraints need suitable structural support behind the wall surface.
That may mean:
Wood studs, structural blocking, concrete, masonry, or another engineered support.
A drywall anchor designed for pictures or shelving is not an appropriate substitute for structural machine mounting.
Can You Mount a Panel Saw to a Concrete Wall?
Yes, many wall-supported machines can be installed adjacent to a concrete wall when appropriate anchoring and blocking are used.
The challenge is choosing the correct anchors.
Solid concrete, hollow concrete block, and brick behave differently.
Anchor type and depth should be selected based on the actual substrate and loading requirements.
The panel saw manufacturer’s mounting instructions remain the starting point.
Should a Panel Saw Be Bolted Directly Against the Wall?
Usually not unless the design specifically calls for it.
A vertical panel saw often needs rear clearance for its counterweight, frame, and accessories.
It may also be designed to lean backward instead of standing flat against the wall.
Bolting the frame tightly against a wall can interfere with these systems and potentially distort the machine.
Use the manufacturer’s mounting arrangement.
Can You Put Wheels on a Panel Saw?
Some manufacturers offer wheel kits or mobile configurations.
Safety Speed, for example, offers multiple panel saw models and accessories intended for different installation arrangements, including stands and wheel-equipped machines.
Do not attach generic casters directly to a panel saw frame.
A mobile base changes the machine’s center of gravity and the way it responds to side loads.
Use a mobility system designed for the machine.
Electrical Setup After Mounting
Do not connect power until the physical installation is complete.
Confirm that the electrical supply matches:
Voltage, phase, amperage, plug configuration, and grounding requirements.
Industrial panel saws can have very different electrical specifications from smaller portable models. Safety Speed’s current vertical saw lineup, for example, includes machines ranging from 120-volt models to larger industrial saws available with 230- or 460-volt power configurations.
Never modify the plug or bypass electrical protection simply to fit an existing outlet.
Have a qualified electrician install the proper circuit when required.
Dust Collection Considerations
Plan dust collection before finalizing the machine location.
A dust hose must move without catching on:
The carriage, frame, counterweight cable, sheet material, or wall brackets.
A poorly routed hose can pull on the carriage during cutting.
Leave enough room behind or above the saw for the dust system to operate through the complete carriage travel.
Common Panel Saw Mounting Mistakes
One of the biggest mistakes is assuming the machine should stand perfectly vertical.
Many panel saws require a deliberate rearward lean.
Another is supporting the upper frame directly against a wall where the counterweight assembly needs clearance.
Mounting only to drywall is another serious mistake.
A fourth problem is tightening mounting brackets in a way that twists the frame.
This can create alignment problems that appear to be blade or carriage defects.
Using an improvised stand without evaluating stability is also risky.
Finally, many users mount the saw correctly but skip calibration. Transporting and positioning a large frame can affect alignment, so the saw should always be checked after installation.
FAQs about How to Mount a Panel Saw
How do you mount a panel saw?
Determine whether the manufacturer specifies a wall-supported or freestanding setup, position the base on a stable floor, establish the required rearward angle, secure the frame using approved hardware, and check alignment before use.
Does a panel saw need to be mounted to a wall?
Not always.
Some models use freestanding stands, while others can be supported against a wall.
Follow the configuration approved for your saw.
Can a panel saw stand by itself?
Yes, if it is equipped with a manufacturer-approved freestanding stand or designed as a freestanding machine.
Do not assume a wall-supported frame can stand safely without its restraint.
What angle should a panel saw be mounted at?
It varies by model.
Some Safety Speed wall-supported machines specify approximately 15 degrees, but that number should not be applied universally.
Why does a panel saw lean backward?
The backward lean helps sheet material remain against the machine frame and supports stable handling.
It may also be part of the saw’s counterbalance and frame geometry.
Can I mount a panel saw directly to drywall?
No.
Any required wall restraint should connect to structural framing, blocking, concrete, masonry, or another suitable structural support.
Can I mount a panel saw to studs?
Potentially, if that mounting arrangement meets the manufacturer’s requirements.
The attachment points and hardware must be appropriate for the machine.
Can I mount a panel saw to concrete?
Yes, when the machine design allows it and suitable anchors are used.
Anchor selection depends on the substrate and loading.
Does a panel saw need floor anchors?
Some do and some do not.
Check the manufacturer’s installation requirements for the exact model.
Can I use a homemade stand?
A custom stand needs to be engineered for machine weight, operating angle, center of gravity, material-loading forces, and attachment points.
A manufacturer-approved stand is generally the safer option.
How much space should I leave behind a panel saw?
Enough to provide the specified operating angle and unrestricted movement of the counterweight, carriage, dust system, and other rear components.
There is no universal distance.
How much space should be left beside the saw?
Enough for the longest sheet material you expect to rip or load.
A saw positioned too close to a side wall may be unable to process full-length panels.
Does the panel saw need to be perfectly level?
The horizontal material-support system should be correctly aligned, but the complete frame may intentionally lean backward.
Do not make the saw vertically plumb unless the manufacturer requires it.
Should I mount the saw before calibrating it?
Yes.
Complete the permanent mounting first, then perform final blade, carriage, and measuring-scale calibration.
How do I know if the frame is twisted?
Check the material-support rollers, carriage travel, frame reference points, and test cuts.
Uneven anchoring or floor conditions can distort the frame.
Should the counterweight touch the wall?
No, unless the machine manufacturer explicitly designed it that way.
Moving counterweight components need sufficient clearance.
Can I use straps to hold the saw to the wall?
Use only the restraint method specified by the manufacturer.
For example, Safety Speed specifically warns against using banding for the wall-supported EF5 installation.
Can one person mount a panel saw?
Generally, large vertical panel saws should not be positioned alone.
Use helpers or appropriate lifting equipment.
Should I use a level when mounting a panel saw?
Yes, for checking horizontal alignment and frame condition, but remember that the machine may intentionally lean backward.
A level should not automatically be used to make the vertical frame perfectly plumb.
Do I need to recalibrate a panel saw after moving it?
Yes, checking calibration after relocation is good practice.
Movement can affect frame position, measuring scales, or blade alignment.
Can a panel saw be mobile?
Some models support wheel kits or mobile stands.
Use a mobility system specifically approved for the machine.
Conclusion
Learning how to mount a panel saw starts with understanding that a vertical panel saw is not simply a large tool that should be bolted flat against the nearest wall.
First identify the mounting system intended for your exact model. Some panel saws use a dedicated freestanding stand, while others rely on a solid wall or structural support. Larger industrial models may have additional floor anchoring requirements.
Choose a location with enough space to handle full-size sheets on both sides of the saw. Make sure the floor is stable and the wall, if used, provides structural support rather than relying on drywall alone.
Next, establish the manufacturer’s required rearward operating angle. Many panel saws intentionally lean backward so sheet goods remain against the support frame. Do not make the machine perfectly vertical simply because a level says it is plumb.
When wall supporting the saw, maintain adequate clearance around the counterweight, carriage, cables, and dust collection components. If you use a freestanding stand, attach it only at the mounting locations specified for your model and set the frame angle before final tightening.
Once the machine is secure, do not immediately begin production cutting. Move the carriage through its full travel with the power disconnected, confirm that the counterweight operates freely, inspect the material rollers, check blade squareness, calibrate the measuring scales, and make test cuts in scrap material.
Most importantly, do not improvise structural mounting hardware or supports on a large panel saw when the manufacturer provides a specified installation method. A properly mounted panel saw should remain stable while large sheets are loaded and moved, maintain its designed cutting geometry, and allow every moving component to operate without interference.