How to Sharpen a Back Saw: Step-by-Step Filing Guide
If you want to know how to sharpen a back saw, first determine whether its teeth are designed to be resharpened, then secure the blade in a saw vise, lightly joint uneven teeth if necessary, maintain the existing rake and fleam angles with the correct triangular saw file, and file each tooth until it is sharp and even. If the saw needs tooth setting, do that before the final sharpening pass so you do not damage freshly filed edges.
Sharpening a traditional backsaw is more precise than simply rubbing a file across each tooth. The teeth need to remain the same height, approximately the same size, properly shaped, and consistently set from side to side. You also need to know whether the saw is rip-filed or crosscut-filed, because the file is held differently for each tooth pattern.
A well-sharpened backsaw should start easily, track straight, cut efficiently, and leave a clean kerf without requiring excessive downward pressure. Poor sharpening can create the opposite problems: uneven cutting, drifting to one side, rough surfaces, slow progress, or teeth that grab the wood.
In this guide, I’ll explain how to sharpen a back saw from start to finish, including the tools you need, how to tell whether a blade can be sharpened, jointing and setting, rip versus crosscut filing, rake and fleam, correcting uneven teeth, testing the saw, and avoiding common sharpening mistakes.
How to Sharpen a Back Saw
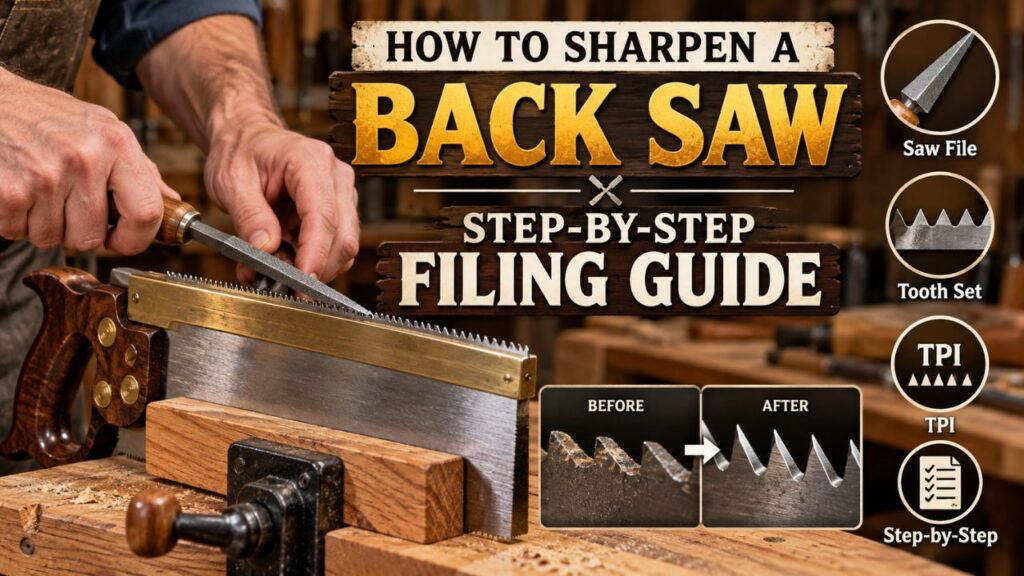
The basic sharpening sequence for a traditional Western backsaw is:
Inspect the teeth and determine their existing geometry. Clean the blade if necessary and clamp it securely in a saw vise. If tooth heights are uneven, lightly joint the tops. Correct badly shaped teeth before final sharpening. Set the teeth only if the existing set is inadequate or uneven. Finally, sharpen every tooth with an appropriately sized triangular saw file while maintaining consistent rake and, for a crosscut pattern, consistent fleam.
For a saw that is simply dull but still has good tooth shape and set, you usually do not need major restoration work. A careful touch-up that follows the existing geometry may be enough.
A neglected vintage saw with rounded teeth, uneven tooth heights, missing set, or badly distorted gullets needs considerably more preparation.
First Check Whether the Saw Can Be Resharpened
Before buying files, inspect the teeth.
Traditional Western backsaws normally use saw steel that can be sharpened repeatedly with a triangular file.
Some modern backsaws, however, have hardened or impulse-hardened teeth. These teeth may be much harder than an ordinary saw file. If a file skates across the tooth without cutting effectively, the teeth may not be intended for conventional hand sharpening.
Disposable or replaceable-blade backsaws may be designed so the blade is replaced rather than sharpened.
Do not force a file against extremely hard teeth. You can quickly ruin the file while achieving very little.
If you are unsure, check the saw manufacturer’s information before proceeding.
What Tools Do You Need to Sharpen a Back Saw?
You do not need an elaborate sharpening shop, but the correct basic tools make a major difference.
The essential tool is a triangular taper saw file correctly sized for the teeth. You also need a way to hold the blade rigidly, ideally a saw vise. A flat mill file and simple jointing block are useful for leveling tooth height, while a saw set is needed if the teeth require additional or corrected set.
A bright work light is extremely helpful because backsaw teeth can be very small.
For fine teeth, magnification can make it easier to see whether tiny jointing flats remain on the tooth tips.
A permanent marker is also useful. Coloring the toothline makes fresh file cuts easier to see and helps you monitor your progress.
Choose the Correct Triangular Saw File
Western backsaw teeth are normally sharpened with a triangular saw file, not an ordinary flat file.
The file should fit the gullets without being so small that one corner becomes worn immediately.
For fine backsaws, an extra-slim, double-extra-slim, needle, or similarly fine triangular file may be necessary.
The correct file size depends primarily on tooth pitch rather than blade length.
A practical rule is to choose a file large enough that the gullet does not consume most of a single file face. This lets you rotate the file periodically and use multiple edges rather than quickly wearing one corner.
Why a Saw Vise Matters
The blade should be held rigidly close to the toothline.
If the plate vibrates or chatters while you file, controlling the tooth shape becomes much harder and the file can produce an unpleasant squealing sound.
A purpose-built saw vise is ideal, but wooden jaws held in a normal bench vise can work.
Clamp the blade with only enough toothline exposed to give the file clear access.
Key Takeaways:
- Confirm that the teeth are conventional fileable steel before sharpening.
- Use a triangular saw file sized to the tooth pitch.
- Clamp the blade firmly and close to the teeth to prevent vibration.
Understand Back Saw Tooth Geometry Before Filing
You do not need to become a sawmaker to sharpen a backsaw, but you should understand several basic terms.
Pitch
Pitch describes how closely the teeth are spaced, commonly expressed as PPI, or points per inch, or TPI, teeth per inch.
Fine joinery backsaws may have many small teeth per inch, while larger tenon saws often use coarser teeth.
Sharpening does not normally change the intended pitch unless you are completely retoothing the saw.
Rake
Rake describes the forward or backward angle of the cutting face of the tooth.
A more aggressive tooth can cut quickly but may be harder to start or more likely to grab.
Adding more relaxed rake generally makes the saw easier and smoother to start.
For routine sharpening, the safest beginner strategy is to preserve the saw’s existing rake rather than redesigning the tooth geometry.
Fleam
Fleam is the sideways bevel used primarily on crosscut teeth.
A crosscut saw cuts across wood fibers, so alternating beveled teeth act more like small knife points that sever fibers cleanly.
Traditional rip teeth use little or no fleam because they cut more like tiny chisels along the grain.
Set
Set is the slight alternating bend of the teeth to the left and right of the blade.
This makes the kerf slightly wider than the saw plate, reducing binding.
Too little set can make the blade bind.
Too much set creates an unnecessarily wide kerf, requires more effort, and can reduce precision.
A fine backsaw intended for dry cabinetmaking normally needs only enough set to prevent binding.
Is Your Back Saw Rip-Cut or Crosscut?
Determine the tooth pattern before filing.
This is especially important because rip and crosscut backsaws are not sharpened the same way.
Rip-Filed Back Saw
Viewed from above, rip teeth are filed essentially straight across the saw plate, with little or no sideways bevel.
Each tooth works somewhat like a tiny chisel.
Dovetail saws and some tenon saws are commonly rip-filed because many of their important cuts run with the grain.
Crosscut-Filed Back Saw
Crosscut teeth have alternating bevels.
Viewed from above, the cutting points form alternating knife-like edges designed to sever fibers across the grain.
Carcass saws and other backsaws designed primarily for crosscutting commonly use this pattern.
What If You Cannot Tell?
Do not immediately reshape the teeth.
Use magnification and examine several teeth under strong light. Existing file marks and alternating bevels can reveal the pattern.
If you still cannot identify it and the saw is valuable, vintage, or unfamiliar, professional sharpening may be safer than accidentally converting the tooth geometry.
Step 1: Clean and Inspect the Saw
Before filing, clean resin, dirt, and surface contamination from the toothline.
You need a clear view of each tooth.
Inspect the blade for more than dullness.
Look for unequal tooth heights, broken teeth, inconsistent spacing, damaged gullets, excessive set, missing set, and a toothline that rises or falls unexpectedly.
If all the teeth are evenly shaped and the saw simply feels dull, sharpening will be straightforward.
If some teeth are much taller than others, sharpening them individually without correcting their height can make the saw cut roughly.
Step 2: Joint the Teeth If Necessary
Jointing means lightly filing across the tops of the teeth so their points lie on a consistent line.
Place a fine flat file in a jointing block or other guide that keeps it square to the saw plate.
Make light passes along the toothline.
Do not aggressively flatten the teeth.
Your goal is to leave a tiny bright flat on the tip of each tooth. These flats become visual indicators during sharpening.
When every appropriate tooth tip has a small flat, you know the toothline has been leveled.
Do You Need to Joint Every Time?
Not necessarily.
If a saw is only slightly dull and its tooth height is already uniform, extensive jointing creates unnecessary filing work.
For a routine touch-up, you may need only a very light jointing pass—or none at all if you are experienced enough to maintain the existing geometry accurately.
For a saw with visibly uneven teeth, jointing is much more important.
Do Not Over-Joint Fine Back Saw Teeth
Fine teeth contain very little material.
A few aggressive strokes with a flat file can remove a surprising amount.
Use light pressure and inspect frequently.
The goal is not to convert the toothline into a flat strip of steel. You only need enough material removed to establish consistent reference flats.
Step 3: Reshape Uneven Teeth Before Final Sharpening
After jointing, inspect the flats.
If one tooth has a much wider flat than the neighboring teeth, it was lower and needs more material removed from the adjacent gullets to restore its point.
This stage is often called shaping.
Place the triangular file in each gullet and work progressively so the teeth become equal in size and spacing.
Watch the small flats at the tooth tips rather than concentrating only on the number of file strokes.
The goal is to make the flats shrink evenly.
If you simply give every gullet exactly two strokes regardless of tooth condition, an uneven saw will remain uneven.
Avoid Creating Cows and Calves
Saw sharpeners sometimes use the expression “cows and calves” for alternating large and small teeth.
This usually develops when the filer unintentionally removes more material from one side of a gullet than the other.
Concentrate on maintaining consistent file position and shifting the gullet only where necessary to correct tooth size.
For a beginner, slow visual inspection is more important than speed.
Step 4: Set the Teeth Only If Needed
Do not automatically reset every saw each time you sharpen it.
If the saw already cuts freely without binding and the alternating set remains consistent, leave it alone.
Repeated unnecessary setting can fatigue the teeth and make the kerf wider than necessary.
If the saw does need set, use a suitable saw-setting tool adjusted conservatively.
Set alternating teeth to one side, then work the remaining teeth in the opposite direction.
Only the upper portion of the tooth should be bent. You are not trying to bend the entire tooth from its root.
Why Set Before the Final Sharpening Pass?
Setting places mechanical force on the teeth.
If you fully sharpen first and then aggressively set them, the saw set can potentially affect the freshly sharpened points.
For a saw that requires both operations, I prefer to establish the shape, apply the necessary set, and then perform the final sharpening.
Key Takeaways:
- Joint only enough to create small reference flats on uneven teeth.
- Use those flats to guide shaping instead of counting identical file strokes.
- Do not add more set unless the saw actually needs it.
Step 5: Sharpen a Rip-Filed Back Saw
A rip pattern is the easier of the two common tooth geometries for beginners to learn.
Clamp the saw with the teeth just above the vise jaws.
Place the triangular file into the first gullet.
For a basic rip filing, hold the file essentially square across the saw plate, meaning little or no fleam. Maintain the intended rake angle as you file.
If the existing teeth are shaped correctly, copy their rake rather than trying to establish a new angle.
Push the file smoothly through the gullet.
Saw files cut on the forward stroke, so release pressure as you return the file.
Watch the Jointing Flats
As you sharpen adjacent tooth faces, the tiny flat on each tooth tip should become smaller.
Continue until the flat just disappears and a clean point is formed.
Then stop.
Do not continue filing a tooth simply because you gave the previous one more strokes.
Once the flat disappears, additional filing lowers that tooth and begins changing the geometry you just worked to equalize.
Keep the File Angle Consistent
Consistency matters more than chasing an exact angle to a fraction of a degree.
A small wooden filing guide attached to the file handle or tang can give you a visual reference for rake.
The most common beginner error is allowing the file angle to change gradually while moving from heel to toe.
Stop occasionally and check your hand position.
Step 6: Sharpen a Crosscut Back Saw
Crosscut sharpening requires more coordination because the teeth have alternating bevels.
The file is still positioned in the gullet between two teeth, but instead of remaining square across the blade, it is swung sideways to produce fleam.
The exact angle varies with the saw’s intended behavior.
For routine sharpening, preserve the existing bevel rather than attempting to redesign it.
Follow the Alternating Bevel Pattern
Crosscut teeth alternate direction.
A practical method is to sharpen every other tooth from one side of the saw, following the existing set and bevel pattern.
Then turn the saw around and sharpen the teeth you skipped from the opposite side.
Maintain the same rake and fleam relationships throughout each pass.
This creates two repeating rows of cutting points.
Do Not Chase Extreme Fleam
More fleam can produce a cleaner crosscut, but extremely acute points are also more delicate.
A general-purpose backsaw needs a balance between smooth cutting, durability, and ease of starting.
Unless you specifically want to modify how the saw behaves, copying the existing tooth geometry is the safest approach.
Use Guides While Learning
Maintaining both rake and fleam simultaneously can be difficult at first.
A simple visual filing guide attached to the end of the file can help you hold the same orientation for each tooth.
You do not need expensive equipment. Even a small piece of wood fixed to the file as a reference can improve consistency.
How Sharp Should Back Saw Teeth Be?
You do not need to polish the teeth.
A properly filed saw tooth develops a crisp point when the jointing flat disappears.
Under strong light, a genuinely sharp edge reflects very little light. Rounded or dull tooth tips often appear as tiny bright spots.
This makes directional lighting extremely useful.
Run your eyes along the toothline. If several teeth still flash under the light while neighboring teeth appear crisp and dark, those teeth may still have small flats.
Do not run your fingers along the tooth points to test sharpness.
They are capable of cutting skin just as readily as wood.
Should You Sharpen Every Tooth the Same Number of Strokes?
Not necessarily.
On a perfectly maintained saw where every tooth is already identical, similar file strokes may work.
In the real world, individual teeth often need different amounts of correction.
The jointing flats tell you how much material remains.
One tooth may require a single controlled pass while another needs more shaping.
Your objective is uniform tooth geometry, not equal stroke counts.
This distinction is one of the biggest improvements a beginner can make.
How to Test the Back Saw After Sharpening
Remove the saw from the vise and make test cuts in straight-grained scrap wood similar to the material you normally use.
Do not begin by forcing the saw.
A sharp backsaw should start predictably and cut with relatively little downward pressure.
Pay attention to four things: starting behavior, cutting speed, tracking, and surface quality.
If the Saw Pulls to One Side
A saw that consistently drifts left or right may have unequal set or uneven sharpening.
Do not immediately file all the teeth again.
First determine whether the saw is pulling consistently and whether your own sawing technique is contributing.
If the set is genuinely unequal, very light side dressing or careful set correction may solve the problem.
Heavy-handed correction can quickly make matters worse.
If the Saw Binds
Binding can indicate too little set, a damaged plate, or a kerf that is too narrow for the blade.
Confirm that the saw is actually binding rather than simply cutting slowly.
Add set conservatively only after identifying it as the cause.
If the Saw Cuts Roughly
Rough cutting can come from uneven tooth height, excessive set, inconsistent fleam, or badly shaped teeth.
Inspect the toothline under strong light again before making additional changes.
Key Takeaways:
- Stop filing each tooth when its jointing flat disappears.
- Test the saw in scrap wood before making further adjustments.
- Pulling, binding, or rough cutting usually points to tooth or set inconsistency rather than a need for aggressive filing.
Rip vs. Crosscut Back Saw Sharpening
The main differences can be summarized simply:
| Feature | Rip-Filed Back Saw | Crosscut-Filed Back Saw |
| Primary cutting direction | Along the grain | Across the grain |
| Tooth action | Chisel-like | Knife-like |
| Fleam | Little or none | Alternating bevel |
| Filing difficulty | Easier | More demanding |
| Typical use | Dovetails, tenon cheeks | Shoulders, accurate crosscuts |
| Beginner approach | File square across plate while maintaining rake | Preserve existing alternating bevel and rake |
Some backsaws use hybrid geometry intended to work reasonably well both with and across the grain.
If yours is a hybrid, follow the existing geometry unless you have a specific reason to change it.
How Often Should You Sharpen a Back Saw?
There is no fixed schedule.
A frequently used professional woodworking saw may need attention much sooner than a hobby saw used occasionally.
Sharpen based on performance.
Typical signs include slower cutting, increased pressure needed to make progress, difficult starting, poorer surface quality, or obviously rounded tooth points under bright light.
A lightly dull saw is much easier to touch up than one used until the teeth are badly rounded.
For that reason, I prefer light maintenance sharpening before the saw becomes seriously dull.
Can You Sharpen a Back Saw Without a Saw Set?
Yes, if the existing set is still adequate.
Sharpening and setting are separate operations.
A backsaw may become dull while retaining perfectly usable set. In that case, there is no reason to reset the teeth.
If the kerf has become too narrow, teeth have been improperly flattened, or the set is uneven, then a saw-setting tool becomes useful.
Avoid trying to bend fine teeth individually with improvised pliers unless you understand the risk of breaking or distorting them.
Can You Sharpen a Back Saw Without Jointing It?
Yes, for a light touch-up when the teeth remain equal in height and properly shaped.
Jointing becomes important when tooth tips are uneven or when you need a visual reference during reshaping.
The more correction a saw requires, the more valuable jointing becomes.
For a badly neglected vintage saw, skipping jointing usually means you sharpen existing errors instead of correcting them.
Can You Sharpen Hardened Back Saw Teeth?
Many hardened-tooth saws are not intended to be sharpened with ordinary saw files.
If the teeth are substantially harder than the file, the file may skate rather than bite.
Trying harder only damages the file.
If the manufacturer describes the blade as hardpoint, impulse hardened, induction hardened, disposable, or replaceable, check whether resharpening is supported.
For inexpensive replaceable-blade saws, replacement is often the practical solution.
Traditional fileable backsaws are different: they can be resharpened repeatedly when maintained correctly.
Common Back Saw Sharpening Mistakes
One common mistake is using the wrong file size. A file that is poorly matched to very fine teeth makes the gullets difficult to control and can wear unevenly.
Another is filing every tooth by an identical number of strokes instead of paying attention to tooth height.
Beginners also frequently change the rake or fleam accidentally as they move along the blade. A filing guide and bright light make this much easier to control.
Over-setting is another problem. A precision backsaw does not need an enormous kerf. More set is not automatically better.
Finally, avoid continuing to file after the jointing flat has disappeared. That lowers the tooth and creates the uneven toothline you were trying to eliminate.
When Should You Have a Back Saw Professionally Sharpened?
Sharpening your own backsaw is a worthwhile woodworking skill, especially when the existing teeth are in reasonably good condition.
Professional work makes more sense when the saw has major damage.
Examples include several broken teeth, badly uneven pitch, serious rust at the toothline, a bent plate, damaged spine, dramatically inconsistent set, or teeth that need complete retoothing.
I would also consider professional sharpening for a valuable antique saw if you are not yet comfortable reshaping fine teeth.
Practice first on an inexpensive fileable saw.
Once you understand how jointing flats, rake, fleam, and set interact, maintaining a good backsaw becomes much less intimidating.
Key Takeaways:
- Light, frequent touch-ups are easier than restoring badly rounded teeth.
- Hardened disposable teeth may not be suitable for ordinary file sharpening.
- Valuable or severely damaged saws are good candidates for professional sharpening.
FAQs about how to sharpen a back saw
What file do I need to sharpen a back saw?
Use a triangular taper saw file sized to the tooth pitch.
Fine backsaws usually require slim or very fine triangular files, while coarser tenon saw teeth can use larger saw files.
Can I use a regular metal file to sharpen a back saw?
A triangular saw file is the correct tool for conventional Western backsaw teeth because it simultaneously forms the adjoining tooth faces and gullet.
A flat file is useful for jointing tooth tips but not for normal final tooth sharpening.
Do I need to joint a back saw before sharpening?
Not always.
Jointing is helpful when the teeth have become uneven. For a light touch-up on a well-maintained saw, extensive jointing may not be necessary.
Should I set a back saw before or after sharpening?
If the teeth need additional set, I prefer to establish their shape, apply the necessary set, and then perform the final sharpening pass.
This reduces the chance of damaging freshly sharpened points during setting.
Do back saw teeth need to be set?
Usually, yes, but only slightly.
Alternating set creates a kerf wide enough for the blade to pass without binding.
A fine backsaw generally needs less set than a coarse saw used in wet or rough lumber.
How do I know whether my back saw is rip or crosscut?
Inspect the teeth from above.
Rip teeth generally have little or no alternating sideways bevel, while crosscut teeth show alternating fleam that forms knife-like points.
What is fleam when sharpening a saw?
Fleam is the sideways bevel angle filed into saw teeth.
It is primarily associated with crosscut teeth and helps them sever wood fibers cleanly.
What is rake angle on a back saw?
Rake describes the angle of the cutting face of each tooth relative to the saw’s cutting direction.
More relaxed rake generally makes a saw smoother and easier to start, while more aggressive geometry can cut faster but may feel grabby.
What rake angle should I use?
For routine sharpening, preserve the existing rake if the saw previously performed well.
There is no single ideal rake for every backsaw because tooth pitch, wood species, cutting direction, and desired behavior all matter.
Do rip saw teeth need fleam?
Traditional rip teeth generally use little or no fleam.
They work more like small chisels than the alternating knife edges of a crosscut saw.
How can I tell when a tooth is sharp?
After light jointing, a dull tooth has a tiny flat on its tip.
During sharpening, that flat becomes progressively smaller. When it just disappears and a crisp point remains, stop filing that tooth.
Why does my back saw pull to one side after sharpening?
Unequal tooth set or uneven sharpening can make the saw track toward one side.
First confirm that the problem is consistent and not caused by your sawing technique before adjusting the teeth.
Why does my back saw bind after sharpening?
The teeth may have insufficient set, the set may be uneven, or the saw plate may have another problem.
Do not automatically increase the set until you identify the cause.
Can too much set make a back saw cut poorly?
Yes.
Excessive set creates a wider kerf than necessary, removes more wood, and can reduce the precision expected from a backsaw.
Can I sharpen a fine dovetail saw myself?
Yes, provided the teeth are conventional fileable steel.
Fine dovetail teeth require a very small triangular file, good lighting, steady technique, and often magnification.
Can I sharpen a tenon saw the same way as a back saw?
A tenon saw is a type of backsaw, so the same fundamental principles apply.
The exact filing method depends on whether its teeth are rip-filed, crosscut-filed, or hybrid.
How often should a back saw be sharpened?
Sharpen it when performance begins to decline rather than following a fixed schedule.
If the saw becomes slow, difficult to start, or requires noticeably more pressure, inspect the teeth.
How many strokes should I give each tooth?
There is no universal number.
File according to the tooth’s condition and use jointing flats as your guide. Stop when the flat disappears and the tooth geometry is correct.
Can hardened back saw teeth be sharpened?
Some hardened teeth are too hard for ordinary saw files and are designed as replaceable or disposable blades.
Check the manufacturer’s specifications before attempting to sharpen them.
Is sharpening a back saw difficult?
Basic rip filing is quite learnable with practice.
Crosscut filing requires more control because you must maintain both rake and alternating fleam, but a simple filing guide and careful practice make the process manageable.
Is it worth sharpening an old back saw?
Often, yes, particularly if the plate, spine, handle, and toothline are fundamentally sound.
A quality traditional backsaw can be sharpened many times and can provide excellent performance when properly restored.
Conclusion
If you want to learn how to sharpen a back saw, begin by determining whether the teeth are conventional fileable steel and whether the saw is rip-filed or crosscut-filed. Then secure the blade firmly, inspect the toothline, and correct only what actually needs attention.
For an uneven saw, lightly joint the teeth so small flats appear at their tips. Reshape the teeth until those flats become uniform, correct the set only if necessary, and then make the final sharpening passes with a properly sized triangular saw file.
For rip teeth, the file is generally held with little or no fleam while maintaining consistent rake. Crosscut teeth require alternating bevels, making accurate and consistent file orientation more important. In either case, the best beginner strategy is usually to preserve a tooth geometry that already works rather than trying to redesign the saw.
The most important sharpening habit is to watch the teeth rather than count strokes. File until the small jointing flat just disappears, then stop. Continuing beyond that point lowers the tooth and creates unevenness.
After sharpening, make several test cuts in scrap wood. A properly sharpened backsaw should start cleanly, track straight, cut without excessive pressure, and move through the kerf without binding.
I recommend practicing first on an inexpensive, traditional fileable saw. Once you learn to recognize proper tooth shape, maintain consistent rake and fleam, and use jointing flats as a visual guide, backsaw sharpening becomes a repeatable maintenance skill rather than a mysterious specialist job.