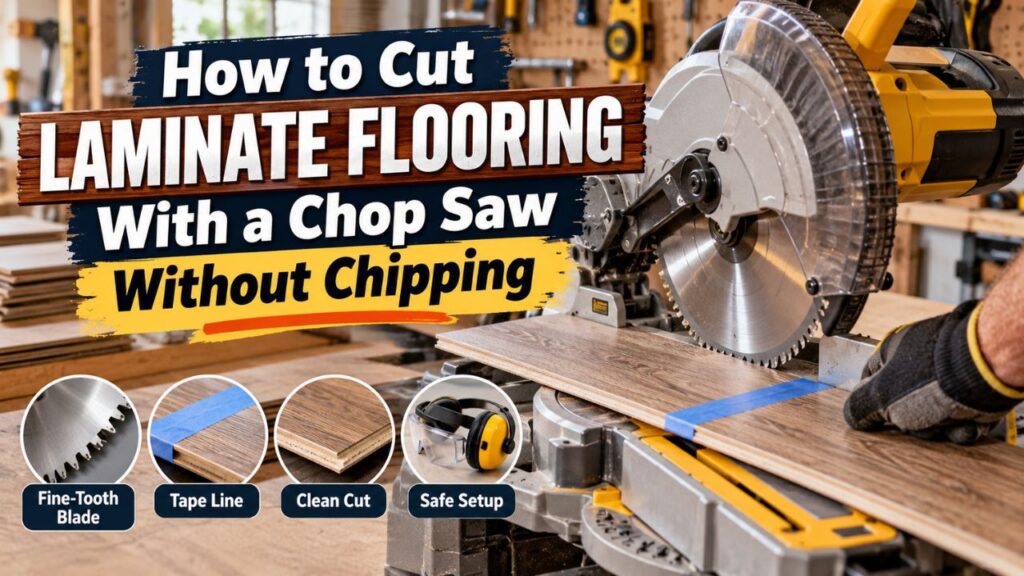
How to Cut Laminate Flooring With a Chop Saw Without Chipping
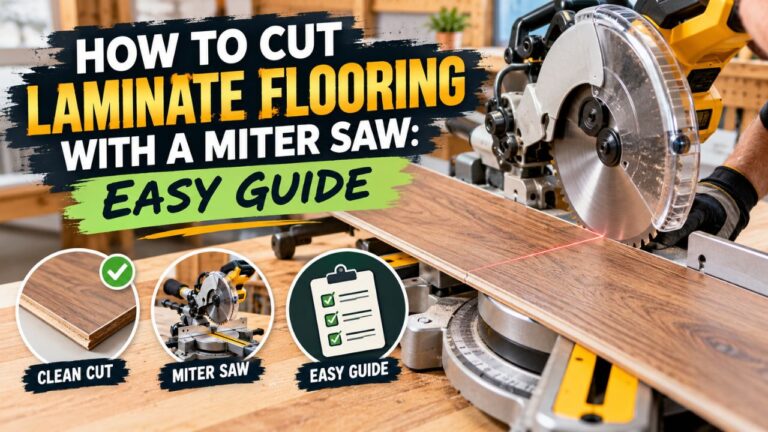
If you want to know how to cut laminate flooring with a chop saw, use a wood-cutting miter-style chop saw fitted with a sharp, fine-tooth blade, place the laminate flat against the saw table and fence, and normally keep the decorative face up so the blade enters the finished surface cleanly. Let the blade reach full speed, lower it smoothly through the plank, and wait for it to stop before raising the saw head. This method works especially well for cutting laminate planks to length and making angled end cuts.
There is one important distinction before you begin. In the United States, people sometimes use “chop saw” to mean a miter saw, but a true abrasive metal-cutting chop saw is a different machine. Do not use an abrasive metal chop saw to cut laminate flooring. For flooring, you want a miter saw, compound miter saw, or sliding miter saw equipped with a blade approved for cutting wood-based products or laminate.
Laminate can be harder on saw blades than its wood-like appearance suggests. Its wear layer is highly abrasive, while the decorative surface can chip if the blade is dull, too coarse, or pushed through the plank too aggressively. Choosing the correct blade and supporting the plank properly therefore matter just as much as choosing the saw.
In this guide, I’ll explain the complete process for cutting laminate flooring with a chop saw, including blade selection, plank orientation, measuring, avoiding chips, making straight and angled cuts, dealing with wide boards, controlling dust, and knowing when another saw is a better choice.
How to Cut Laminate Flooring With a Chop Saw
A miter-style chop saw is one of the fastest tools for making repeated crosscuts in laminate flooring. A crosscut runs across the width of a plank, which is the type of cut you normally make when shortening the last board in a row.
The basic process is simple: measure the required plank length, account for the manufacturer’s required expansion gap, mark the cut, support the plank on the saw, align the blade on the waste side of your mark, and lower a fine-tooth blade through the material at a controlled speed.
The biggest challenge is preventing chips in the decorative wear layer.
Laminate flooring usually consists of several layers bonded together, including a dense core, printed décor layer, and protective top surface. That upper surface is harder and more brittle than ordinary unfinished wood, so a coarse construction blade can tear small pieces from the edge of the cut.
A sharp finishing blade makes a major difference.
Best Chop Saw Setup for Laminate Flooring
| Saw Setup | Recommended Choice |
| Saw type | Miter, compound miter, or sliding miter saw |
| Blade | Sharp fine-tooth carbide or laminate-specific blade |
| 10-inch blade | Commonly 60–80+ teeth for clean crosscuts |
| Decorative side | Usually face up on a standard miter saw |
| Miter angle | 0° for square crosscuts |
| Plank support | Flat on table and firmly against fence |
| Dust control | Dust extractor/shop vacuum where compatible |
| Best cuts | Crosscuts and angled end cuts |
For a full-room installation, I would rather use a good miter saw with a quality finish blade than repeatedly struggle with a coarse general-purpose blade. The cleaner cuts save time and reduce wasted planks.
Key Takeaways:
- Use a wood-cutting miter-style chop saw, not an abrasive metal chop saw.
- A sharp, fine-tooth blade is the most important factor in preventing chipped edges.
- A chop saw is best for crosscuts and angled end cuts, not long rip cuts.
Is a Chop Saw Good for Cutting Laminate Flooring?
Yes, provided you are referring to a miter-style saw designed to cut wood.
A miter saw is particularly useful during laminate installation because you make many repeated crosscuts. Each flooring row commonly ends with a plank that must be shortened to fit the remaining space while maintaining the required expansion gap.
Once the saw station is properly set up, you can measure, mark, cut, and return to installation very quickly.
A sliding miter saw is even more useful with wide laminate planks because the blade assembly can travel across a greater width than a basic non-sliding saw.
However, a chop saw is not the only saw you will usually need.
It performs exceptionally well for shortening planks but is not suitable for every flooring cut. Lengthwise cuts along the entire plank, curved cutouts, door-jamb notches, and irregular shapes usually require another tool.
Chop Saw vs Miter Saw: Is There a Difference?
The terminology can be confusing.
A miter saw uses a circular toothed blade and is designed for precise crosscuts and angled cuts in wood and similar materials. Many people casually call this a chop saw because the blade head “chops” downward.
A traditional abrasive chop saw, however, is commonly designed for cutting metal with an abrasive wheel.
That type of metal-cutting machine is not what I recommend for laminate flooring.
If your machine has an abrasive wheel rather than a toothed wood-cutting blade, use a different tool.
What Blade Should You Use to Cut Laminate Flooring?
Blade selection has a major effect on both cut quality and how long the blade stays sharp.
For a typical 10-inch miter saw, a fine-finish carbide blade with roughly 60 to 80 teeth or more is a good starting point. A blade specifically marketed for laminate, melamine, flooring, or fine finish work can perform even better.
The exact tooth count is less important than using a sharp blade designed to produce clean cuts in hard surfaced materials.
A coarse framing blade with relatively few teeth is excellent for fast construction cuts in lumber but is not my first choice for laminate.
Why Fine Teeth Reduce Chipping
A coarse blade removes larger bites of material with each tooth.
That aggressive cutting action can fracture the brittle decorative layer at the cut edge.
A fine-tooth blade takes smaller bites, creating a smoother edge.
The difference becomes especially noticeable on dark flooring, high-contrast patterns, and boards where the cut remains partially visible near transitions.
Carbide vs Specialized Laminate Blades
A quality carbide-tipped finishing blade is perfectly suitable for many DIY laminate installations.
If you are installing a large amount of laminate, however, a blade specifically designed for abrasive flooring materials may be worthwhile.
Laminate’s hard wear layer can dull ordinary woodworking blades faster than natural softwood.
Some specialized flooring blades use very durable tooth materials designed to withstand abrasive surfaces for longer periods.
For one bedroom, I would generally use a good fine-tooth carbide blade if I already owned one.
For several rooms or repeated professional installations, investing in a laminate-specific blade makes more sense.
Do Not Use a Dull Blade
A blade can still spin and cut after it has become too dull for clean laminate work.
Warning signs include increased chipping, burning, slower cutting, greater feed pressure, or a noticeably rougher edge.
If your first several planks cut cleanly but later cuts become progressively worse, inspect the blade instead of assuming your technique suddenly changed.
Which Side of Laminate Flooring Should Face Up?
With a conventional miter saw, I recommend starting with the decorative finished side facing up.
The blade enters the upper face of the plank as the saw head moves downward. A sharp blade therefore cuts into the finished surface before exiting through the underside.
This usually gives you a cleaner visible face.
However, blade geometry, saw design, and the flooring itself can affect chip-out. Before cutting expensive flooring, make one test cut on a scrap piece.
If the decorative side chips more than expected, verify that the blade is sharp, appropriate for laminate, and installed in the correct rotation.
Why Plank Orientation Changes With Different Saws
Do not assume the same face orientation applies to every cutting tool.
A miter saw, circular saw, table saw, and jigsaw engage the material differently.
The goal is generally to arrange the plank so the blade cuts into the decorative layer cleanly rather than lifting and tearing it.
This is why flooring manufacturers often recommend checking the blade’s tooth direction before deciding which face should be up or down.
For a standard downward-cutting miter saw, decorative side up is the normal starting point.
Key Takeaways:
- A fine-tooth carbide or laminate-specific blade is better than a coarse construction blade.
- Standard miter-saw cuts are normally made with the finished face up.
- Always test your exact blade and flooring on a scrap plank before beginning production cuts.
Tools and Setup You Need
A complicated tool list is unnecessary.
You need the miter saw, suitable blade, tape measure, pencil, and enough support to keep the plank stable.
Painter’s tape can help protect the surface and make pencil marks easier to see on dark or highly patterned flooring.
Eye protection is essential, and hearing protection is appropriate around a powered miter saw.
Laminate cutting can also generate substantial fine dust. Connecting the saw’s dust port to compatible extraction equipment and wearing appropriate respiratory protection can make the work considerably cleaner, especially indoors.
Set the saw on a stable workbench or miter-saw stand rather than working from an unstable temporary surface.
Step 1: Measure the Plank Carefully
Most laminate cutting mistakes begin before the saw is ever turned on.
Measure the distance the plank needs to cover and account for the flooring manufacturer’s required expansion space around walls and fixed objects.
Do not automatically cut a board to the exact wall-to-plank measurement.
Floating laminate needs room to expand and contract.
Required perimeter clearance varies among flooring systems, so use the installation instructions supplied with your particular product.
Use the Correct End of the Plank
Laminate click-lock systems have specific tongue-and-groove profiles.
Before marking your cut, make sure you are shortening the correct end.
Cutting the wrong end can remove the locking profile you needed to connect the board to the previous plank.
A useful habit is to physically place or orient the board as it will be installed before transferring the measurement.
Step 2: Mark the Cut Line
Use a sharp pencil to make a clear line across the decorative surface.
If the flooring pattern makes pencil marks difficult to see, place painter’s tape across the cut area and mark on the tape.
Painter’s tape can also help reduce small chips along the surface.
Do not rely on an extremely wide pencil line. Accuracy matters when you are fitting repeated rows.
If you need a square cut, use a speed square or combination square to extend your measurement cleanly across the plank.
Step 3: Set the Chop Saw to 0 Degrees
For an ordinary square crosscut, set the miter angle to 0 degrees and lock the saw securely.
Check that the bevel adjustment is also locked in the correct position.
For an angled wall or special layout, adjust the miter angle accordingly.
Before powering the saw, lower the blade with the machine switched off to confirm that it will meet the correct side of your marked line.
Keep in mind that the blade itself removes material. This removed width is called the kerf.
Align the blade on the waste side of the mark rather than centering it over material you need to keep.
Step 4: Position and Support the Laminate
Lay the plank flat on the miter-saw table with the decorative surface up.
Push the plank firmly against the fence.
Long laminate boards need support beyond the small saw table. If one end hangs unsupported, the plank can tilt or lift during the cut.
Use an extension wing, roller stand, or another stable support adjusted to approximately the same height as the saw table.
The plank should sit naturally flat rather than being forced downward against an unsupported end.
Keep Your Hands Away From the Blade
Miter saws have a designated hand-clearance or no-hands area.
Follow the safe-distance requirements in your particular saw manual.
Never place your hand close to the blade just because a laminate plank is thin and easy to hold.
If the workpiece is too short to hold safely, use an appropriate clamping method or change your cutting strategy rather than placing fingers near the blade.
Step 5: Let the Blade Reach Full Speed
Start the saw while the blade is clear of the plank.
Wait until it reaches full operating speed before making contact with the laminate.
Do not start the blade while its teeth are already resting against the flooring.
Once the blade is at speed, lower it smoothly through the plank.
Avoid slamming the saw downward.
A controlled cutting motion gives the teeth time to slice through the brittle wear layer instead of striking it violently.
You also should not force a dull blade through the material. If the saw requires excessive pressure, stop and inspect the blade.
Step 6: Complete the Cut and Let the Blade Stop
Continue the cut completely through the plank.
Once the blade has passed through the material, release the trigger while keeping the saw head down.
Wait until the blade stops rotating before raising the head.
This practice reduces the chance that a spinning blade will catch the fresh cut edge or a loose offcut as it rises.
Remove the plank only after the blade has stopped.
Inspect the cut for chips and confirm the measurement before moving on to the next board.
Step 7: Test-Fit the Plank
Take the freshly cut board to the installation area and test-fit it before cutting several more pieces based on the same assumption.
Check that the click joint engages properly and that the required expansion space remains at the wall.
If the fit is correct, continue the installation.
If it is too long, make another controlled trim rather than trying to force the plank into place.
Key Takeaways:
- Measure while accounting for the flooring manufacturer’s expansion-gap requirement.
- Support the entire plank and keep it flat against the saw table and fence.
- Let the blade reach full speed, lower it smoothly, and wait for it to stop before lifting the saw head.
How to Cut Laminate Flooring Without Chipping
A little edge chipping is not always a major problem because baseboard or shoe molding often covers perimeter cuts.
Still, cleaner cuts make installation easier and are important around transitions or other visible locations.
The first defense against chipping is a sharp fine-tooth blade.
Painter’s tape across the cut line can provide additional support to the decorative layer.
You can also score a particularly critical cut line lightly with a sharp utility knife before sawing, although this requires care to keep the score exactly on the intended line.
Most importantly, do not rush the saw through the material.
Make a Test Cut First
Different laminate products behave differently.
One plank may cut beautifully with a particular 60-tooth blade while another highly abrasive or brittle product looks better with a specialized flooring blade.
Sacrifice a small offcut before starting the installation.
That single test can tell you whether the face orientation, blade, and feed speed are giving you acceptable results.
How to Make Angled Cuts With a Chop Saw
A miter saw is particularly useful when a plank must meet an angled wall.
Measure the angle carefully and transfer the cut line to the board.
Unlock the saw’s miter adjustment, rotate the table to the required angle, and lock it firmly.
Make a dry alignment check before starting the motor.
For unusual room angles, it can be helpful to create a cardboard or scrap-flooring template first rather than experimenting on a full plank.
Remember to preserve the required perimeter expansion space even when the wall is angled.
Can You Rip Laminate Flooring With a Chop Saw?
Generally, no.
A chop or miter saw is designed primarily to cut across a workpiece.
A rip cut travels lengthwise down the plank, often for several feet. A miter saw does not have the travel needed to make this kind of cut safely or accurately.
Rip cuts are commonly required for the first or last row when a full-width plank will not fit.
For those cuts, use a table saw, track saw, circular saw with a straightedge, or an appropriate jigsaw depending on the job and the manufacturer’s recommendations.
Trying to improvise a long rip cut with a miter saw is unnecessary and unsafe.
What if the Laminate Plank Is Too Wide for the Chop Saw?
A basic non-sliding miter saw has limited crosscut capacity.
Modern laminate planks can be quite wide, so some boards may extend beyond the maximum reach of a small saw.
A sliding miter saw solves this problem by allowing the saw head to travel forward and backward on rails.
Check your saw’s maximum crosscut capacity before beginning the project.
Do not try to cut halfway through a plank, flip it over, and guess at the second half unless you have a reliable method for perfectly aligning both cuts. Misalignment can leave a stepped or rough edge.
If the board exceeds the saw’s safe capacity, use another cutting tool.
Can You Use the Blade That Came With the Chop Saw?
Possibly, but it may not give the cleanest result.
Many miter saws are supplied with general-purpose blades intended to handle common lumber and trim.
If the included blade has relatively few teeth, it may chip laminate more than a dedicated fine-finish blade.
Make a test cut.
If the edge is clean enough for your installation, there is no rule saying you must replace the blade.
If it produces obvious chips, upgrade before cutting the rest of the flooring.
The cost of a good blade can quickly pay for itself by preventing wasted planks.
Why Does Laminate Flooring Dull Saw Blades?
Laminate is not simply decorative paper glued to soft wood.
The wear surface is engineered to resist abrasion from shoes, furniture, dirt, and everyday traffic.
That same durability makes it abrasive to cutting tools.
Over many cuts, the hard surface can wear saw teeth faster than ordinary lumber.
This is especially relevant during large flooring installations where one blade may make dozens or hundreds of crosscuts.
If cut quality deteriorates as the project progresses, do not immediately blame the flooring. Inspect the blade for dullness or damage.
How to Control Laminate Dust
Power-saw cutting creates a significant amount of fine debris.
Whenever practical, place your cutting station outdoors or in a well-ventilated work area away from finished rooms.
Connect the miter saw’s dust port to a compatible dust extractor or shop vacuum.
Wear eye protection and appropriate respiratory protection, especially during repeated indoor cutting.
Do not remove or defeat the blade guard in an attempt to improve dust collection.
Also clean dust from the saw table and fence periodically. A buildup under the plank can prevent it from lying completely flat and affect cutting accuracy.
Common Mistakes When Cutting Laminate With a Chop Saw
One of the most common mistakes is using the wrong kind of chop saw. A metal-cutting abrasive saw and a wood-cutting miter saw are not interchangeable simply because both have pivoting heads.
Another mistake is using a coarse or dull blade. This creates far more chipping than necessary and often requires greater cutting pressure.
Poor plank support can also cause trouble. A long unsupported board may lift from the table or shift against the fence just as the blade reaches it.
Raising the blade while it is still spinning can damage the newly cut edge or catch a loose offcut.
Finally, many flooring mistakes come from forgetting the expansion gap or cutting off the wrong tongue-and-groove end rather than from the saw itself.
Chop Saw vs Other Tools for Laminate Flooring
A miter saw is excellent, but it is most useful as part of a small group of flooring tools.
| Tool | Best Laminate Flooring Use |
| Miter/chop saw | Fast crosscuts and angled end cuts |
| Sliding miter saw | Wide plank crosscuts |
| Table saw | Long straight rip cuts |
| Circular saw | Rip cuts and general straight cuts |
| Jigsaw | Notches, curves, vents, and irregular shapes |
| Laminate cutter | Quiet, low-dust crosscuts on compatible flooring |
| Handsaw | Occasional cuts without power tools |
If I were installing an entire room, I would normally pair a miter saw with a jigsaw and some method of making clean rip cuts.
That combination handles almost every situation you are likely to encounter.
Key Takeaways:
- A chop saw excels at shortening boards but cannot replace every flooring saw.
- Use a table saw, circular saw, or other suitable tool for long rip cuts.
- A jigsaw is usually the better choice for irregular cutouts around pipes, vents, and doorways.
When a Manual Laminate Cutter May Be Better
A powered chop saw is fast and precise, but it is noisy and produces dust.
A manual laminate flooring cutter can be attractive when you are working inside an occupied house, apartment, or other location where dust control matters.
These tools shear or press through compatible flooring without a high-speed blade.
The resulting edge does not always look as polished as a fine saw cut, but perimeter cuts are usually hidden by trim.
Compatibility varies by flooring thickness and construction, so verify that the cutter is designed for your particular product.
For angle cuts and complicated shapes, powered saws still offer more flexibility.
Safety Tips for Cutting Laminate Flooring
A miter saw is capable of making extremely fast, clean cuts, which also means blade contact can cause severe injury.
Keep the guards installed and functioning.
Secure the saw on a stable surface, support long boards, and keep your hands outside the manufacturer’s designated danger zone.
Let the motor reach full speed before the blade touches the plank.
Never reach toward a small offcut while the blade is moving.
If a piece becomes trapped near the blade or guard, disconnect the power or remove the battery before clearing it.
Do not wear loose clothing or jewelry that could reach the blade area.
Dust, noise, and flying chips are also considerations, so use suitable eye, hearing, and respiratory protection.
FAQs about How to Cut Laminate Flooring With a Chop Saw
Can you cut laminate flooring with a chop saw?
Yes, if the chop saw is a wood-cutting miter-style saw equipped with an appropriate toothed blade.
Abrasive metal chop saws should not be used for laminate flooring.
What kind of blade should I use?
Use a sharp fine-tooth carbide finishing blade or a blade specifically designed for laminate, melamine, or flooring.
For many 10-inch miter saws, approximately 60–80 teeth or more provides a much cleaner cut than a coarse framing blade.
Should laminate flooring face up or down on a chop saw?
On a conventional miter saw, start with the decorative side facing up because the blade normally enters the upper surface as it cuts downward.
Make a test cut because blade and flooring designs can vary.
How do I stop laminate from chipping?
Use a sharp fine-tooth blade, cut at a controlled speed, support the board properly, and consider placing painter’s tape over the cut line.
A laminate-specific blade can further improve results.
Can I use a 40-tooth blade?
It may cut the flooring, but a higher tooth-count finish blade generally produces a cleaner edge.
If a 40-tooth blade leaves visible chips, move to a finer blade.
Can I use a 60-tooth blade?
Yes. A sharp 60-tooth carbide blade can work well for many laminate flooring crosscuts, particularly on a 10-inch saw.
A higher tooth count or laminate-specific blade may produce an even cleaner edge.
Can I use an 80-tooth blade?
Yes. An 80-tooth fine-finish blade is a strong choice for clean laminate crosscuts when it is compatible with your saw.
Can I make rip cuts with a chop saw?
No. A miter-style chop saw is intended for crosscuts and short angled cuts.
Use a table saw, circular saw, track saw, or another suitable tool for long cuts running parallel with the plank.
Can a 10-inch miter saw cut laminate flooring?
Yes, provided the board fits within the saw’s crosscut capacity.
Very wide planks may require a sliding miter saw or another cutting method.
Is a sliding miter saw better?
It is better for wide flooring because the sliding mechanism increases crosscut capacity.
For narrow standard planks, a non-sliding saw may be entirely adequate.
Do I need painter’s tape?
No, but it can be helpful.
Tape makes cut marks more visible and may reduce small chips along the decorative surface.
Why is my chop saw chipping laminate?
The most likely causes are a dull or coarse blade, cutting too aggressively, poor plank support, or incorrect plank orientation.
Start by checking the blade and making a slower test cut.
Can I cut several laminate planks at once?
I generally recommend cutting one plank at a time unless both the flooring and saw setup specifically allow safe stacked cutting.
Individual cuts provide better control over alignment and reduce the chance that planks shift.
Do laminate cut edges have to be perfect?
Perimeter cut edges are often hidden beneath baseboard, shoe molding, or transition trim, so tiny chips may not matter.
Visible transition areas and exposed edges deserve cleaner cuts.
How much expansion space should I leave?
Follow the manufacturer instructions for your exact laminate flooring.
Required expansion gaps vary by product and installation conditions, so do not rely on one universal measurement.
Can I use a chop saw for angled laminate cuts?
Yes. One of the main advantages of a miter saw is its ability to make accurate angled crosscuts.
Set and lock the required miter angle before starting the cut.
Conclusion
Learning how to cut laminate flooring with a chop saw is straightforward once the saw, blade, and plank are set up correctly. For flooring work, use a wood-cutting miter or sliding miter saw—not an abrasive metal chop saw.
Fit the machine with a sharp fine-tooth carbide or laminate-specific blade. For many 10-inch saws, a 60- to 80-tooth or finer finishing blade is a good choice. Place the flooring flat against the table and fence, normally with the decorative face up, and make a test cut before committing to the rest of the flooring.
Measure carefully, account for the required expansion gap, and align the blade with the waste side of your mark. Let the saw reach full speed before entering the plank, lower the head smoothly without forcing it, and wait until the blade completely stops before raising it.
For most DIY laminate installations, I consider a miter-style chop saw one of the best tools for repeated crosscuts because it is fast, accurate, and easy to use once the cutting station is established. A sliding model is even more useful for wide planks.
Just remember its limitation: a chop saw is primarily a crosscutting tool. Use a table saw, circular saw, or another suitable tool for long rip cuts, and use a jigsaw for irregular shapes and notches.
With a good blade, proper support, and controlled technique, a chop saw can produce clean, accurate laminate flooring cuts with very little chipping and make the entire installation move much faster.