How to Cut Vinyl Plank Flooring With a Miter Saw Cleanly
To learn how to cut vinyl plank flooring with a miter saw, mark the plank accurately, place it flat and firmly against the fence, use a sharp fine-tooth carbide blade, allow the saw to reach full speed, and lower the blade smoothly through the material without forcing it. For most vinyl plank flooring, keep the finished surface facing up when using a conventional miter saw so the blade enters through the decorative layer first.
A miter saw is one of the fastest tools for making repeated straight crosscuts when installing luxury vinyl plank, rigid-core vinyl, SPC, or similar flooring. It is particularly convenient at the end of each row, where a full plank needs to be shortened to fit the remaining space.
However, not every vinyl plank behaves the same way. Flexible luxury vinyl tile can cut very differently from thick rigid-core SPC flooring. Some planks cut almost effortlessly, while harder mineral-filled cores can be abrasive and may chip if you use a coarse or dull blade.
A miter saw also has an important limitation: it is designed primarily for crosscutting, not for ripping a plank lengthwise. You will still need another cutting method for narrowing the first or last row or creating complicated notches.
In this guide, I’ll explain how to cut vinyl plank flooring with a miter saw, which blade works best, whether the finished side should face up or down, how to prevent chipping, how to make angled cuts, and when another tool is a better choice.
Can You Cut Vinyl Plank Flooring With a Miter Saw?
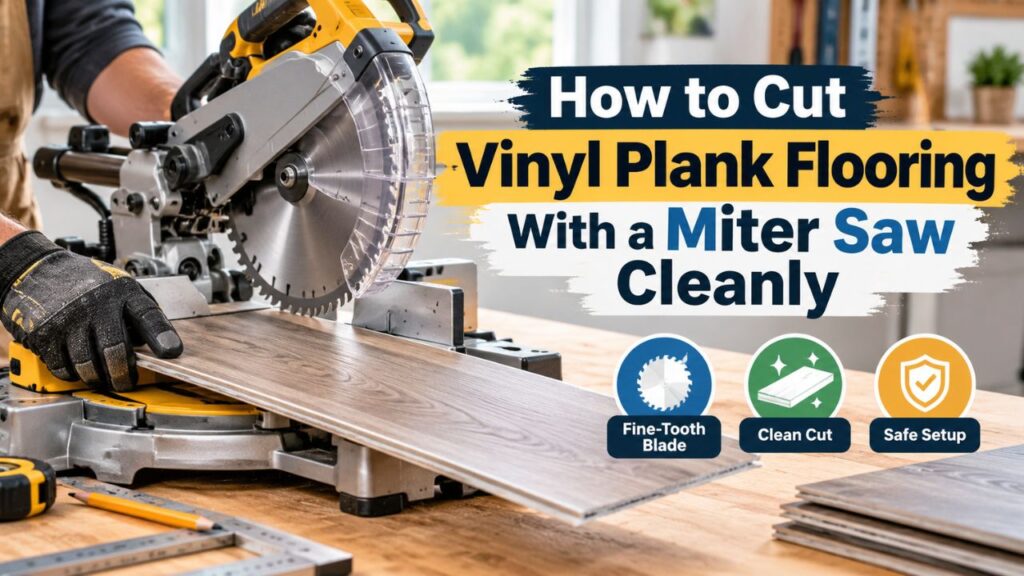
Yes. A miter saw is an excellent option for making straight cuts across vinyl plank flooring.
It is especially useful during larger installations because you can create a dedicated cutting station, place each measured plank against the fence, align the blade, and make the cut in seconds.
This is generally faster than setting up a circular saw for each individual crosscut.
A miter saw also makes it easy to produce consistent 90-degree cuts.
That is helpful when the cut end will sit near a wall, transition, doorway, or another fixed feature.
What Types of Vinyl Flooring Can a Miter Saw Cut?
A suitable miter saw can cut many common products, including:
- Luxury vinyl plank, or LVP
- Rigid-core vinyl plank
- SPC flooring
- WPC flooring
- Some vinyl-composite flooring
The important point is that the manufacturer’s cutting recommendations take priority.
Some thin flexible vinyl flooring can be scored and snapped with a utility knife, making a power saw unnecessary.
Other rigid products are much easier to cut cleanly with a saw.
What Is a Miter Saw Best For?
A miter saw is best for shortening planks.
It handles ordinary square crosscuts very well and can also make angled end cuts when necessary.
It is not normally the tool I would choose for cutting several feet along the length of a plank.
For rip cuts, a circular saw, table saw, jigsaw, flooring cutter, or another manufacturer-approved method is more practical.
Key Takeaways:
- A miter saw is excellent for straight crosscuts in vinyl plank flooring.
- It works particularly well with rigid-core LVP and SPC.
- Use a sharp fine-tooth carbide blade for cleaner cuts.
- A miter saw is generally not suitable for long rip cuts.
What Miter Saw Blade Should You Use for Vinyl Plank Flooring?
Blade selection can make the difference between a smooth edge and a chipped or rough cut.
For vinyl plank flooring, I generally recommend a fine-tooth carbide-tipped blade intended for finish work, laminate, plywood, or similar composite materials.
A very coarse construction blade will cut the plank, but the result may not be as clean.
Good Tooth Count for a 10-Inch Miter Saw
For a typical 10-inch saw, approximately 60 to 80 teeth is a useful range for many vinyl flooring products.
A 60-tooth blade offers a good balance between cutting speed and edge quality.
An 80-tooth finish blade can provide an even finer cut, particularly on rigid decorative surfaces.
Good Tooth Count for a 12-Inch Miter Saw
Because a 12-inch blade has a larger circumference, comparable finish blades usually have more teeth.
An approximately 80- to 100-tooth carbide blade can be a good choice for clean flooring crosscuts.
The exact number is less important than using a sharp, high-quality blade designed for fine cutting.
Why Carbide Is Important
Rigid vinyl flooring can contain dense composite or mineral-filled core materials.
These products can be much more abrasive than ordinary wood.
Carbide-tipped teeth remain sharp considerably longer than ordinary steel teeth.
If you are flooring an entire home or several rooms, expect the flooring to put noticeable wear on the blade.
Do You Need a Special Vinyl Flooring Blade?
Not necessarily.
Some manufacturers sell blades specifically marketed for vinyl, laminate, or composite flooring.
They can be excellent choices, but a quality fine-finish carbide blade may also perform very well.
Use a blade that is compatible with your saw’s diameter, arbor, maximum RPM, and blade-guard requirements.
Should Vinyl Plank Face Up or Down on a Miter Saw?
With a conventional miter saw, I normally position the vinyl plank with the finished decorative surface facing up.
A miter-saw blade generally enters the upper surface of the flooring first.
The surface where the teeth enter often receives the cleaner edge, while minor breakout or chipping is more likely where the blade exits underneath.
This is the opposite of the setup commonly used with a conventional handheld circular saw.
Why This Matters More With Rigid-Core Flooring
Soft flexible vinyl is not especially prone to splintering.
SPC and other rigid-core products can behave differently.
The decorative wear layer and rigid core can chip around a coarse or dull blade.
Keeping the finished face up and using a fine-tooth blade usually helps minimize visible damage.
Make a Test Cut First
Not every flooring product behaves identically.
Before cutting an expensive plank to final size, make one cut through a scrap piece.
Inspect both faces.
If one orientation produces a noticeably cleaner finished surface, use that setup for the remaining installation.
A 30-second test can prevent a large pile of chipped planks.
How to Cut Vinyl Plank Flooring With a Miter Saw Step by Step
The cutting process is simple, but careful measuring and work support are important.
1. Measure the Required Length
Measure from the previous plank to the wall or other boundary.
Account for the expansion gap required by the flooring manufacturer.
Floating vinyl floors should not normally be cut tightly against fixed walls.
For example, if the remaining space is 18 inches and the flooring requires a 1/4-inch perimeter gap, the finished plank length would need to account for that clearance.
Follow the specification for your particular product rather than relying on one universal expansion measurement.
2. Confirm Which End You Need to Cut
Vinyl plank flooring normally uses interlocking profiles along its edges.
Before marking the plank, determine which tongue or groove needs to remain so the board can connect to the installed flooring.
This sounds simple, but cutting the wrong end is one of the easiest mistakes to make during a large installation.
I recommend placing the plank beside the open space first and visualizing how it will lock into place.
Then mark the waste end.
3. Mark the Plank
Use a tape measure and fine pencil.
A small square can help create a precise 90-degree line across the board.
Mark the waste side as well.
This makes it less likely that you will accidentally cut on the wrong side of your measurement line.
4. Position the Plank on the Miter Saw
Lay the plank flat on the saw table.
Keep its finished decorative surface facing up unless your test cut indicates another orientation works better.
Push the plank firmly against the fence.
The material should not be twisted, bowed, or held at an angle.
5. Support Long Planks
A long vinyl plank can extend far beyond a compact miter-saw table.
If the unsupported end hangs downward, the plank may tilt during the cut.
Use an extension wing, roller stand, workbench, or another stable support so the plank remains approximately level with the saw table.
Do not attempt to hold a long floppy plank level with one hand while operating the saw awkwardly with the other.
6. Align the Blade With the Waste Side
With the saw switched off, lower the blade carefully toward your mark without contacting the material.
Check exactly where the teeth will cut.
Remember that the blade has width.
If you center the blade directly over your measurement line, part of the material on both sides of the line will be removed.
Place the kerf on the waste side so the finished plank keeps the intended dimension.
7. Secure the Workpiece
Keep the plank firmly against the fence.
If your saw includes a suitable work clamp, it can be particularly useful for short or awkward pieces.
Your supporting hand should remain well outside the manufacturer’s designated no-hand zone around the blade.
Never hold a tiny offcut immediately beside the blade.
8. Start the Saw
Raise the blade clear of the flooring.
Start the saw and allow the motor to reach full operating speed.
Do not start the blade while it is touching the plank.
9. Lower the Blade Smoothly
Bring the saw down through the flooring using a controlled motion.
Do not slam the blade through the plank.
A sharp fine-tooth blade should cut through vinyl flooring with relatively little effort.
Let the teeth do the work.
Excessive downward pressure can contribute to rough cuts, vibration, or unnecessary blade wear.
10. Finish the Cut and Let the Blade Stop
Complete the cut fully.
Keep the saw head down momentarily and release the trigger.
For the cleanest and safest operation, allow the blade to stop before raising it through the freshly cut edge, especially when working with small offcuts or materials prone to movement.
Then raise the saw and remove the plank.
Inspect the edge before installing it.
Key Takeaways:
- Keep the plank flat and firmly against the fence.
- Put the blade kerf on the waste side of your mark.
- Let the saw reach full speed before entering the flooring.
- Make a smooth controlled cut rather than forcing the blade.
How to Prevent Vinyl Plank Flooring From Chipping
Vinyl itself does not splinter like solid wood, but rigid-core flooring can chip or fracture around a poorly made cut.
The first solution is a sharp fine-tooth blade.
If the blade is dull, replacing it usually makes a larger improvement than any special cutting trick.
Keep the Finished Side Up
Because the blade normally enters from the upper surface, face-up positioning often gives the decorative side a cleaner edge.
Use Painter’s Tape
If your particular flooring chips easily, place painter’s tape across the cutting line.
Redraw the line on the tape and cut through both layers.
The tape may help support the thin surface layer around the cut.
Support the Flooring
A plank that vibrates during cutting is more likely to produce an irregular edge.
Keep it fully seated against the fence and support long overhanging sections.
Do Not Use a Damaged Blade
Inspect for chipped or missing carbide teeth.
A damaged blade can create vibration, increase cutting forces, and leave an unnecessarily rough edge.
How Fast Should You Cut Vinyl Flooring With a Miter Saw?
You normally run the miter saw at its designed blade speed.
What you control is how quickly you lower the saw through the flooring.
Use a smooth, moderate feed.
Do not force the blade rapidly through dense rigid-core material.
At the same time, excessively slow cutting with a dull blade can create heat.
Certain vinyl-containing materials may soften or leave melted burrs if too much heat builds at the cut.
If you notice melting or a strong burnt-plastic smell, stop and inspect your technique and blade.
A sharp blade should produce clean chips or dust without requiring excessive force.
How to Cut SPC Vinyl Flooring With a Miter Saw
SPC stands for stone-plastic or stone-polymer composite.
SPC planks are generally harder and more rigid than flexible vinyl flooring.
This makes them durable underfoot, but the rigid core may behave more like a brittle composite when sawed.
A fine-tooth carbide blade is therefore particularly helpful.
Support the plank well and lower the blade at a controlled rate.
Do not bend the plank near the cut while the blade is moving.
SPC Dust Requires Attention
Some rigid-core flooring contains mineral fillers, and cutting can generate significant fine dust.
Do not assume that dust from something sold as “vinyl flooring” is harmless.
Check the product’s installation instructions and safety information.
Use effective dust collection where practical and wear suitable respiratory protection when the product or cutting conditions call for it.
Cutting outside or in a well-ventilated dedicated cutting area can also keep dust away from the installed flooring and living space.
How to Cut WPC Vinyl Plank Flooring
WPC, commonly called wood-plastic or wood-polymer composite flooring, tends to have a different core structure from SPC.
It may feel somewhat less brittle during cutting.
The same basic miter-saw procedure applies:
Measure carefully, support the plank, use a suitable fine-tooth carbide blade, and make a controlled crosscut.
Again, follow the manufacturer’s recommended cutting method because formulations vary.
Can You Cut Luxury Vinyl Plank With a Miter Saw?
Yes.
A miter saw can cut LVP very efficiently.
However, thin flexible LVP may be so easy to score and snap that using a large power saw offers little benefit.
A utility knife can produce almost no sawdust and requires less setup.
For thick rigid luxury vinyl, the miter saw becomes much more attractive.
During a large room installation, its speed is especially useful.
How to Make Angled Cuts in Vinyl Plank Flooring
One advantage of a miter saw is that angled crosscuts are easy.
If a wall, transition, or architectural feature requires an angled end, rotate the miter table to the required angle.
Mark the plank carefully and make a test fit.
Rooms are rarely perfectly square, so do not assume an apparent 45-degree corner actually requires an exact 45-degree flooring cut.
Measure the real angle whenever fit matters.
Compound Cuts Are Rarely Necessary
Most flooring remains flat on the subfloor, so bevel cuts are usually unnecessary.
A miter adjustment handles most angled end cuts.
If you believe you need a compound angle, double-check whether the flooring or trim is actually the component that should receive that cut.
Can You Rip Vinyl Plank Flooring With a Miter Saw?
Generally, no.
A miter saw is not designed to feed a long plank lengthwise through its blade.
Its cutting width is limited by the saw’s crosscut capacity.
Even a sliding compound miter saw cannot perform a several-foot rip cut in the way a table saw or circular saw can.
For narrowing a full plank, I would use a different tool.
Good options can include a circular saw with a guide, jigsaw, table saw, flooring cutter capable of rip cuts, or a score-and-snap method if the product supports it.
Do not improvise by turning the flooring into an unstable orientation on the miter-saw table.
How to Cut the Last Row of Vinyl Plank Flooring
The last row often needs to be narrowed rather than shortened.
That makes the miter saw less useful.
Measure the space between the installed flooring and wall at several locations.
Subtract the manufacturer’s required perimeter gap.
Transfer the resulting measurements to the plank.
Then make the lengthwise cut using an appropriate ripping tool.
The miter saw can still be used to shorten the plank before or after the rip cut.
Preserve the Correct Locking Edge
The most important detail is keeping the interlocking edge needed to connect the last row to the previous row.
Before cutting, determine which long side must remain intact.
If you rip off the wrong locking profile, the plank may no longer engage properly.
Cutting Vinyl Flooring Around Doors and Corners
A miter saw handles the basic end crosscut but is not ideal for an L-shaped notch.
Use a jigsaw or another suitable detail-cutting tool for the second leg of the notch.
For door jambs, an oscillating multi-tool is commonly used to undercut the trim so the flooring can slide underneath.
This often creates a cleaner appearance than attempting to cut the vinyl plank perfectly around every contour of the casing.
For complicated shapes, make a cardboard or paper template before cutting the actual flooring.
Miter Saw vs. Circular Saw for Vinyl Plank Flooring
Both tools have a useful role.
A miter saw is generally more convenient for repeated crosscuts.
A circular saw is more versatile for long rip cuts.
| Task | Miter Saw | Circular Saw |
| Straight crosscut | Excellent | Excellent |
| Repeated end cuts | Excellent | Good |
| Angled crosscut | Excellent | Good with guide |
| Long rip cut | Poor | Excellent |
| Small irregular notch | Poor | Poor |
| Fast flooring station | Excellent | Good |
If I were installing an entire room and had both tools available, I would use the miter saw for routine crosscuts and the circular saw for long rips.
Miter Saw vs. Jigsaw for Vinyl Flooring
A jigsaw offers more flexibility.
It can make curved cuts, notches, vent openings, and many of the awkward shapes that a miter saw cannot.
But for a simple square crosscut, the miter saw is faster and easier to keep straight.
This makes the two tools complementary rather than competitors.
Use the miter saw for repetition and the jigsaw for detail.
Miter Saw vs. Vinyl Flooring Cutter
A manual flooring cutter can be a very attractive alternative.
It produces little or no airborne sawdust and can often make routine crosscuts extremely quickly.
It is also quieter.
However, cutters have material and thickness limitations.
Not every cutter works with every SPC or rigid-core product.
A miter saw is usually more familiar to homeowners who already own woodworking tools, and it can handle a broad range of rigid flooring materials when fitted with an appropriate blade.
Cutting Vinyl Plank Flooring Safely With a Miter Saw
A vinyl plank may seem much less intimidating than a large piece of lumber, but the miter saw is still a powerful woodworking machine.
Wear eye protection.
Repeated cuts also justify hearing protection.
Use respiratory protection and dust control as required for your flooring material.
Keep Hands Away From the Blade
Follow the saw manufacturer’s designated hand-clearance zone.
Never hold the flooring immediately next to the cutting line.
This becomes especially important near the end of a row where you may need only a short flooring piece.
If the workpiece is too short to hold safely, use the saw’s clamp or another approved cutting method.
Never Cut a Loose Stack of Planks
You may be tempted to stack several identical planks and cut them simultaneously.
I would avoid this unless both the flooring and saw manufacturers specifically support the setup and the stack can be secured correctly.
Individual planks can shift, producing inaccurate cuts or unsafe movement.
Keep the Floor Clear
Vinyl flooring offcuts can be slippery.
Do not allow them to accumulate around your feet.
Maintain a clean cutting station so you are standing securely whenever you operate the saw.
Key Takeaways:
- Use eye, hearing, and appropriate respiratory protection.
- Keep your hands outside the saw’s safety zone.
- Support long planks instead of trying to balance them.
- Keep dust and slippery flooring scraps out of the work area.
Common Mistakes When Cutting Vinyl Plank With a Miter Saw
One of the most common mistakes is using a coarse framing blade.
It may work, but a fine-tooth carbide blade usually leaves a cleaner edge.
Another problem is cutting with the plank poorly supported.
Long flooring can lift away from the fence or table if its free end hangs downward.
Measuring from the wrong locking edge is another frequent installation error.
The cut may be perfectly straight but the plank can still be unusable if you removed the tongue or groove required for assembly.
Some installers also push the blade through the material unnecessarily fast.
A controlled cut is usually cleaner.
Finally, do not use the miter saw for a task it was not designed to perform. Long rips and complicated internal notches belong to other tools.
How to Make a Large Vinyl Flooring Job Faster
Create a dedicated cutting station close enough to the installation area to reduce walking but far enough away that dust does not contaminate the room.
Set up left and right work supports approximately level with the miter-saw table.
Keep your tape measure, square, pencil, and spare blades nearby.
When possible, measure several pieces before returning to the saw.
Mark each plank clearly so you know which room position or row it belongs to.
Do not increase speed by rushing the actual saw cut.
The biggest time savings come from reducing unnecessary movement and measurement mistakes.
FAQs about How to Cut Vinyl Plank Flooring With a Miter Saw
Can you cut vinyl plank flooring with a miter saw?
Yes. A miter saw is one of the best tools for making fast, accurate crosscuts in rigid vinyl plank flooring.
What blade should I use for vinyl plank flooring?
Use a sharp fine-tooth carbide blade intended for clean finish cuts, laminate, or similar composite materials.
How many teeth should a miter saw blade have for vinyl flooring?
For a 10-inch saw, approximately 60–80 teeth works well for many vinyl flooring products. For a 12-inch saw, approximately 80–100 teeth is a useful general range.
Should vinyl plank flooring face up or down on a miter saw?
I normally place the finished decorative surface face up because a conventional miter-saw blade enters the material from the top.
Can a 60-tooth blade cut vinyl plank flooring?
Yes. A sharp 60-tooth carbide blade is a good general-purpose choice for many rigid vinyl flooring products.
Can I use a 24-tooth blade?
It will usually cut the flooring, but I would prefer a finer blade because a coarse framing blade is more likely to leave rough or chipped edges.
Can a miter saw cut SPC flooring?
Yes. A fine carbide blade works well for many SPC products. Support the plank and pay attention to the fine dust produced by the mineral-filled core.
Does vinyl plank flooring melt when cut with a saw?
Some vinyl-containing materials can develop heat-related burrs or softening if the blade is dull or cutting conditions create excessive friction. A sharp blade and controlled feed help prevent this.
Can you rip vinyl planks with a miter saw?
A miter saw is not designed for long rip cuts. Use a circular saw, table saw, jigsaw, appropriate flooring cutter, or manufacturer-approved score-and-snap method instead.
Can I make angled vinyl flooring cuts with a miter saw?
Yes. Adjusting the miter angle makes it easy to create angled end cuts.
Why is my vinyl flooring chipping?
Possible causes include a dull or coarse blade, poor plank support, excessive cutting force, or the characteristics of a rigid-core flooring product.
Should I use painter’s tape when cutting vinyl flooring?
It is optional. Painter’s tape can sometimes support the surface around the cut, but blade quality and proper cutting technique are more important.
Is a miter saw better than a jigsaw for vinyl plank flooring?
For straight crosscuts, yes. For curved cuts and notches, the jigsaw is generally more useful.
Is a miter saw better than a flooring cutter?
It depends on the product and job. A flooring cutter is quieter and creates less dust, while a miter saw can be more versatile for rigid materials and angled cuts.
Do I need a dust mask when cutting vinyl flooring?
Cutting can produce fine dust, especially with rigid mineral-filled products. Follow the flooring manufacturer’s safety information and use appropriate respiratory protection and dust control for the material you are cutting.
Conclusion
The key to how to cut vinyl plank flooring with a miter saw is using a sharp fine-tooth carbide blade, supporting the plank properly, and making a smooth crosscut without forcing the saw.
For most rigid vinyl flooring, a 60- to 80-tooth blade on a 10-inch miter saw is a practical choice. A larger 12-inch saw will typically use a correspondingly higher tooth count for a similarly fine finish.
Position the decorative face up for a conventional miter-saw cut, mark the finished length carefully, and place the blade kerf on the waste side of your line.
Before pulling the trigger, make sure the plank is completely flat against the saw table and fence. Support long overhanging sections so they cannot tilt or twist during the cut.
Let the blade reach full speed before lowering it into the flooring. Use steady pressure and let the carbide teeth cut at their natural rate.
For repeated crosscuts, the miter saw is hard to beat. It makes end-of-row cutting quick, accurate, and repeatable.
However, it is not a complete flooring-cutting solution. For long rip cuts along the first or last row, use a circular saw, jigsaw, table saw, flooring cutter, or another method approved for your particular flooring. A jigsaw is also much better for notches and irregular shapes.
Finally, remember that different vinyl flooring cores produce different dust and cutting behavior. Rigid SPC products can contain substantial mineral material and may generate very fine dust, so follow the flooring manufacturer’s safety guidance, use effective dust collection when possible, and protect your eyes, hearing, and lungs appropriately.
For most installations, the practical setup is simple: use the miter saw for fast crosscuts, use a fine carbide blade with the finished face up, keep the flooring fully supported, and switch to another cutting tool when the job requires a rip or complicated shape.