How to Cut Engineered Hardwood Flooring With a Circular Saw
To learn how to cut engineered hardwood flooring with a circular saw, measure and mark the board accurately, install a sharp fine-tooth carbide blade, support the flooring securely, place the finished face in the correct orientation, and guide the saw steadily through the cut without forcing it. A circular saw works very well for straight crosscuts and lengthwise rip cuts in engineered hardwood, especially when you use a straightedge guide for long cuts.
Engineered hardwood is generally easier to cut than many people expect, but its layered construction means edge quality matters. The top layer is real hardwood veneer, while the layers beneath may consist of plywood, high-density fiberboard, or another engineered core depending on the product. A dull or overly coarse blade can chip the decorative surface even when the cut itself is straight.
A circular saw is especially useful when installing flooring because it is portable and can handle long boards without requiring you to carry them across a table saw. It is not, however, the best tool for every cut. Curves, pipe cutouts, and complicated notches are usually easier with a jigsaw or oscillating multi-tool.
In this guide, I’ll explain how to cut engineered hardwood flooring with a circular saw step by step, which blade to use, which side should face up, how to make straight crosscuts and rip cuts, how to reduce splintering, and how to avoid the most common safety and installation mistakes.
Can You Cut Engineered Hardwood Flooring With a Circular Saw?
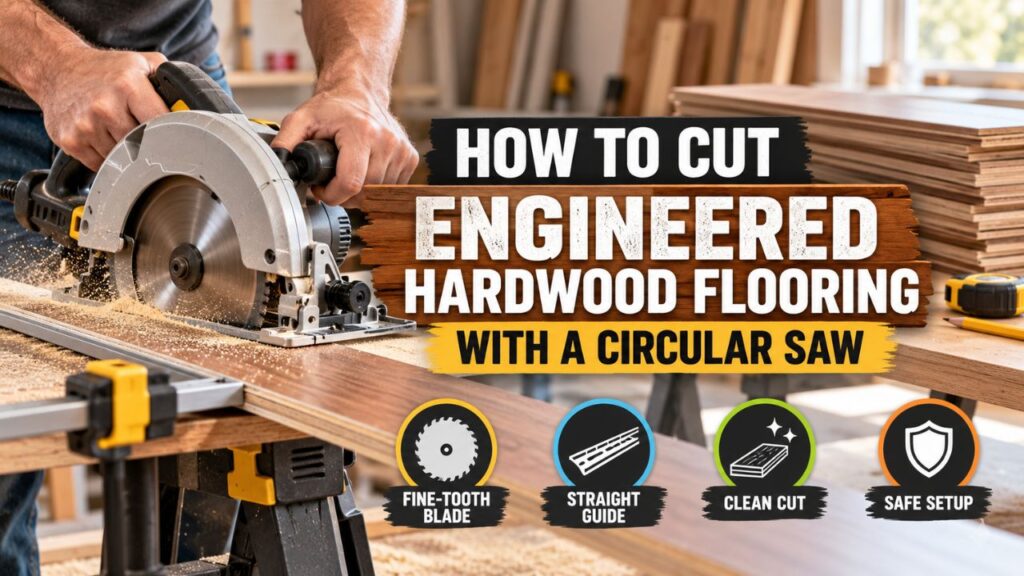
Yes. A circular saw is one of the most practical power tools for cutting engineered hardwood flooring.
It works well for both crosscuts, where you shorten a board across its width, and rip cuts, where you narrow the plank lengthwise.
For flooring installation, those two cuts cover most of the straight cutting you will need.
A circular saw is particularly useful when cutting long engineered hardwood boards because the board can remain stationary while the saw travels across it. That can be easier than controlling a long plank on a small portable table saw.
The key is using the correct blade and supporting the flooring properly.
Engineered hardwood can contain several layers with different grain directions. If the board is poorly supported, the cut can vibrate and chip. If the blade is dull, it can tear the veneer instead of slicing cleanly through it.
What Cuts Can You Make?
A circular saw is well suited to:
- Straight crosscuts to shorten flooring.
- Lengthwise rip cuts for first or last rows.
- Straight angled cuts when the saw or guide is set correctly.
- Repeated straight cuts with a guide or jig.
It is less suitable for curved cuts, narrow internal notches, or detailed cuts around pipes and door trim.
For those jobs, I would switch tools rather than trying to make the circular saw do everything.
Key Takeaways:
- A circular saw works very well for straight crosscuts and rip cuts in engineered hardwood flooring.
- Blade quality and workpiece support have a major effect on chipping.
- Use a different tool for curves, small notches, and detailed cutouts.
Choose the Right Circular Saw Blade
The blade is one of the biggest factors in cut quality.
A general construction blade can technically cut engineered hardwood, but it may leave a rougher edge than you want.
For flooring, I recommend a sharp carbide-tipped blade designed for fine finish work, plywood, hardwood, or laminate-type materials.
How Many Teeth Should the Blade Have?
For a typical 7 1/4-inch circular saw, a blade with roughly 40 to 60 teeth is a good starting point for clean flooring cuts.
A finer blade generally gives a cleaner crosscut because more teeth are contacting the material.
However, tooth count is not the only consideration.
Blade sharpness, tooth geometry, kerf width, feed speed, and the type of core inside the flooring also matter.
A sharp 40-tooth finish blade can produce an excellent result, while a dull 60-tooth blade may burn or chip the board.
Crosscutting vs. Ripping
For straight crosscuts, a finer blade is usually ideal.
For long rip cuts, an extremely high-tooth-count blade can cut more slowly and may generate extra heat.
A quality 40-tooth or similar combination blade may therefore be a good compromise when you need to make both rip and crosscuts during an installation.
If appearance is especially important, make a test cut on an offcut before starting production cuts.
That tells you more than the number printed on the blade.
Use Carbide Teeth
Engineered flooring can be abrasive, particularly when the core contains dense composite material.
Carbide teeth hold their edge better than basic steel teeth and are the practical choice for this type of work.
If you are cutting a large room, check the blade occasionally. A blade that starts producing increasing tear-out or requiring more feed pressure may be getting dull.
Which Side Should Face Up When Cutting Engineered Hardwood?
With most handheld circular saws, the finished decorative face should usually face down for the cleanest visible cut.
That is because the teeth of a conventional circular saw generally enter the workpiece from the bottom and exit through the top.
The exit side tends to experience more visible splintering.
By placing the hardwood surface down, most of that tear-out occurs on the less important underside.
However, blade design and flooring construction can affect the result.
Before cutting an expensive plank, make a test cut on scrap from the same flooring.
Inspect both faces and confirm which orientation produces the cleaner finish.
What If the Cut Edge Will Be Hidden?
Many flooring cuts disappear under baseboard, shoe molding, transition strips, or another plank edge.
In that case, minor chipping at the very edge may not matter.
You should still aim for a clean cut, but there is no reason to obsess over a microscopic chip that will never be visible after installation.
How to Cut Engineered Hardwood Flooring With a Circular Saw Step by Step
The following method works well for standard straight flooring cuts.
Step 1: Measure Carefully
Measure the space where the plank will be installed.
If you are cutting the end of a board near a wall, remember to account for the expansion clearance required by your flooring manufacturer.
Floating engineered hardwood normally requires space around the perimeter so the floor can move slightly as environmental conditions change.
The exact gap varies by product, so follow the installation instructions supplied with your flooring.
Measure twice before cutting.
Flooring errors become expensive quickly when several planks are cut short.
Step 2: Mark the Cut Line
Use a sharp pencil and square for crosscuts.
For a lengthwise rip, mark both ends of the required width and connect them with a long straightedge.
If the cut will be made with a guide, you may need an additional offset mark representing the distance between the edge of your circular-saw base and the blade.
Do not assume the saw cuts directly against the guide line.
The blade is usually several inches away from the edge of the saw shoe.
Step 3: Identify the Waste Side
Mark the piece you do not need with a small X.
That prevents cutting on the wrong side of your line.
Remember that the blade removes material equal to the width of its kerf.
For precise work, position the blade on the waste side rather than directly through the finished dimension line.
Step 4: Support the Flooring Securely
The plank needs support on both sides of the cut.
For crosscuts, place the flooring on sawhorses or a stable work surface with support close enough to prevent vibration.
A sheet of rigid foam insulation underneath long boards can also provide full support for appropriate cutting setups, provided the saw depth is adjusted so the blade only enters the foam slightly.
Whatever method you use, make sure the cut section will not pinch the blade as it separates.
Do not place both ends on supports while leaving the center unsupported in a way that makes the kerf close around the blade.
Step 5: Set the Blade Depth
Adjust the circular saw so the blade projects only slightly beyond the bottom of the flooring.
You generally do not need several inches of exposed blade beneath a plank that may be less than an inch thick.
A modest amount of projection gives the teeth enough clearance to cut while reducing unnecessary blade exposure.
Disconnect the saw from power or remove the battery before making blade changes or adjustments when required by the tool’s safety procedure.
Step 6: Clamp a Straightedge Guide When Needed
For a simple crosscut, a speed square or cutting guide can help keep the saw square.
For long rip cuts, clamp a straight straightedge or dedicated circular-saw track parallel to the cut.
Measure the saw’s base-to-blade offset carefully.
For example, if the blade is 1 1/2 inches from the edge of the saw shoe, position the guide 1 1/2 inches away from the actual cut line on the appropriate side.
Test the setup before cutting an important plank.
Step 7: Put the Finished Face in the Preferred Orientation
For most circular-saw setups, place the decorative hardwood surface down.
Support it on a clean surface so the finished face is not scratched.
If your test cut shows your particular blade produces a cleaner result another way, use the orientation confirmed by your test.
Step 8: Allow the Saw to Reach Full Speed
Position the saw so the blade is clear of the board.
Turn it on and let it reach full operating speed before contacting the flooring.
Starting the blade while it is touching the wood can cause the saw to jump or damage the edge.
Step 9: Guide the Saw Steadily
Move the saw forward smoothly.
Keep the base plate flat against the flooring.
Do not force the tool.
A sharp blade should advance with moderate pressure.
If the saw begins slowing dramatically, check whether you are feeding too quickly, whether the blade is dull, or whether the kerf is pinching.
Keep your attention on the guide or cut line rather than staring directly at the blade.
Step 10: Finish the Cut Without Twisting
Continue past the end of the plank.
Do not rotate the saw sideways while the blade is still inside the cut.
Wait for the blade to stop before setting the saw down unless your tool has a guard and operating procedure designed for safe placement.
Inspect the cut before moving to the next plank.
Key Takeaways:
- Measure the finished dimension and mark the waste side before cutting.
- Support the board so the kerf cannot close around the blade.
- Keep the saw base flat and feed steadily without forcing or twisting the tool.
How to Make a Straight Crosscut
Crosscuts are the most common engineered-hardwood flooring cuts.
You usually make one when the final plank in a row needs to be shortened.
A speed square makes this much easier.
Mark the length with a pencil.
Place the square against the board edge and position it so the circular-saw base can ride along the square while the blade follows the cut line.
Clamp the square if necessary.
With the finished face down, start the saw outside the board, bring it to full speed, and push it across while keeping the shoe against the guide.
The result should be much straighter than trying to follow a pencil line freehand.
Use the Offcut to Start the Next Row When Appropriate
Many flooring layouts reuse the cut-off from the end of one row to begin the next row, provided it meets the manufacturer’s minimum plank-length and joint-stagger requirements.
This reduces waste.
Do not automatically reuse every offcut, though.
Proper joint staggering is important both visually and mechanically in many flooring systems.
Follow the flooring manufacturer’s layout requirements.
How to Rip Engineered Hardwood Lengthwise
Rip cuts are often required for the first or final row.
A circular saw can make these cuts very accurately when used with a straightedge guide.
Measure the Required Width
Measure the remaining distance to the wall at several points.
Walls can bow or taper.
Subtract the required expansion gap.
If the width changes from one end to the other, mark both measurements on the plank and connect them.
Preserve the Correct Locking Edge
Engineered hardwood may use tongue-and-groove or click-lock edges.
Before ripping, determine which side needs to remain intact so the plank can connect to the floor.
For the last row, you generally remove material from the wall-facing edge rather than cutting away the locking profile needed to connect to the previous row.
The exact orientation depends on the flooring system.
Use a Guide
Do not attempt a long precision rip by simply watching a pencil line.
Clamp a straightedge or compatible saw guide.
Set the guide offset correctly and make one continuous cut.
If the wall is significantly curved, a straight guide may not reproduce the required shape.
In that case, transfer the wall profile to the plank and use a jigsaw for the irregular portions.
How to Prevent Chipping
Engineered hardwood’s decorative veneer can splinter if the cut is rough.
Fortunately, several simple changes help.
Use a Sharp Blade
This is the most important step.
A dull blade tears at fibers and forces you to push harder.
If the saw produces a noticeably rougher cut than it did earlier, blade wear may be the cause.
Put the Finished Surface Down
On a typical handheld circular saw, this usually places the visible hardwood veneer on the cleaner entry side of the cut.
Always verify with a test piece.
Score the Cut Line
For highly visible cuts, you can lightly score the finished surface along the cut line with a sharp utility knife before sawing.
This severs some surface fibers before the blade reaches them.
Use a straightedge and work carefully so the knife does not slip.
Painter’s Tape Can Help
Applying painter’s tape over the cut line can sometimes reduce minor surface splintering.
Draw the cut line on the tape and saw through it.
Remove the tape carefully afterward.
This is a useful extra step, but it does not compensate for a dull blade.
Keep the Board Supported
Vibration increases edge damage.
Support the flooring close to the cut so the board remains stable while the blade passes through it.
How to Cut the Last Row of Engineered Hardwood
The final row is often the most challenging because it usually needs a lengthwise rip.
Start by measuring the distance from the previous row to the wall in several places.
Do not assume the wall is straight.
Subtract the required expansion clearance.
Transfer those measurements to the final plank.
If the wall is straight enough for a normal rip, clamp a guide and use your circular saw.
If the wall curves or has several irregularities, a jigsaw may be more practical after the basic width has been established.
Remember the Baseboard
In many installations, the perimeter gap is later covered by baseboard, shoe molding, or another trim detail.
That means the wall-facing cut does not usually need furniture-grade appearance.
It does need to be straight enough to fit properly while preserving the expansion space.
Cutting the First Row
The first row may also need ripping.
This is often done when laying out the room reveals that an uncut first row would leave an extremely narrow final row.
Balancing the first and last rows usually produces a better-looking installation.
For example, if your layout would leave a final strip only about 1 inch wide, you may choose to rip several inches from the first row so both sides have more substantial boards.
Check the flooring manufacturer’s minimum-width guidance if provided.
When ripping the first row, make sure you remove the wall-facing edge, not the profile needed for the second row to connect.
How to Cut Around Doorways and Obstacles
A circular saw is not the best tool for every obstacle.
For an L-shaped cut around a cabinet, vent, or doorway, you may be able to use the circular saw for the long straight section and finish the corner with a jigsaw.
Do not force the circular saw to make a tight internal corner.
Its round blade naturally cuts beyond the visible top intersection if you plunge too deeply.
For detailed fitting, a jigsaw gives much better control.
Door Jambs
Instead of shaping every flooring plank around a door casing, flooring installers often undercut the jamb or casing so the flooring can slide underneath.
An oscillating multi-tool or jamb saw is generally better suited to that job than a circular saw.
Circular Saw vs. Table Saw for Engineered Hardwood Flooring
Both tools work well, but each has advantages.
| Feature | Circular Saw | Table Saw |
| Portability | Excellent | Lower |
| Crosscutting long planks | Very good with guide | Good with support |
| Lengthwise ripping | Very good with straightedge | Excellent |
| Repeated identical rips | Slower | Excellent |
| Long-board handling | Board remains stationary | Board moves through saw |
| Irregular cuts | Limited | Very limited |
| Small jobsite setup | Excellent | Requires more space |
For an installation inside a house, I often prefer the circular saw because it is easy to move and does not require feeding long flooring boards through a table.
If I need to rip many boards to exactly the same width, the table saw becomes faster.
Circular Saw vs. Miter Saw
A miter saw is excellent for repeated crosscuts.
If you need to shorten dozens of flooring boards, it can be faster and more convenient than a circular saw.
However, a miter saw cannot make normal lengthwise rip cuts through long flooring.
A circular saw is much more versatile if you only want to bring one saw to the job.
For a complete flooring installation, many installers use both.
Circular Saw vs. Jigsaw
The circular saw wins for straightness and speed.
The jigsaw wins for irregular shapes.
Use the circular saw for straight crosscuts and rips.
Use the jigsaw for curves, pipe cutouts, irregular wall profiles, and notches.
Trying to make long straight rips with a jigsaw can lead to blade wandering, while trying to make detailed curves with a circular saw can be unsafe and inaccurate.
Key Takeaways:
- Use a circular saw for straight cuts and a jigsaw for irregular shapes.
- A table saw is faster for repeated identical rips, while a circular saw is easier to move around a flooring job.
- Choose the tool according to the cut rather than forcing one saw to handle every situation.
Circular Saw Safety When Cutting Flooring
Circular saws deserve full attention even when the flooring material is thin.
Wear eye and hearing protection.
Use dust collection when available and appropriate respiratory protection when producing significant flooring dust.
Keep your hands out of the blade path.
Support the Board Correctly
Never hold one end of the flooring in your hand while making a cut near that hand.
Place the plank on a stable surface.
Make sure the offcut can separate without pinching the blade.
Do Not Defeat the Blade Guard
The lower blade guard should move freely and return automatically.
Do not tie it open to make flooring cuts faster.
Check Below the Board
Before cutting, make sure the blade will not hit a workbench, sawhorse, floor, screw, nail, or another hidden object.
This is particularly important when cutting over foam insulation or a temporary work surface.
Avoid Kickback
Kickback can occur if the blade becomes pinched or the saw twists inside the kerf.
Keep the guide straight, support the board correctly, and do not force the saw sideways.
If the saw begins binding, release the trigger while keeping control of the tool and allow the blade to stop before removing it from the cut.
Common Mistakes When Cutting Engineered Hardwood
One of the most common mistakes is using a rough framing blade.
It may cut quickly, but the veneer can suffer unnecessary tear-out.
Another mistake is placing the finished face upward without considering the direction of the circular-saw teeth.
For many setups, face down produces a cleaner visible surface.
Poor support is another major issue.
A long plank that flexes during the cut can pinch the blade or break fibers at the end.
Flooring installers also occasionally remove the wrong tongue or groove during a rip cut.
Before starting the saw, mentally place the board in its installed orientation and verify which edge must remain.
Finally, do not forget the expansion gap.
Cutting the board so tightly that it must be forced against the wall can interfere with the floating floor’s ability to move.
How to Get More Accurate Repeated Cuts
If several pieces need the same length, create a simple measuring system rather than checking each one independently.
A stop block can be useful when used with an appropriate cutting jig that does not trap the workpiece.
For circular-saw crosscuts, a homemade crosscut guide can also speed up repetitive work.
A zero-clearance-style guide allows you to align the guide edge directly with your cut mark rather than repeatedly measuring the shoe offset.
For long repeated rips, however, a table saw may become the more efficient tool.
Can You Cut Engineered Hardwood Flooring After Installation?
It is possible in certain repair situations, but a normal circular saw is not always the safest or most precise choice.
Once flooring is installed, the blade depth must be controlled carefully so you do not cut deeply into the subfloor, underlayment, heating components, wiring, or other materials below.
A track saw, plunge saw, oscillating multi-tool, or specialty flooring tool may be more appropriate depending on the repair.
For a normal new installation, make the cuts before the board is installed.
FAQs about How to Cut Engineered Hardwood Flooring With a Circular Saw
Can a circular saw cut engineered hardwood flooring?
Yes. A circular saw can make clean crosscuts and lengthwise rip cuts in engineered hardwood when equipped with an appropriate sharp carbide blade.
What circular saw blade is best for engineered hardwood flooring?
A sharp carbide-tipped fine-finish blade designed for hardwood, plywood, laminate, or similar materials is a good choice.
For a typical 7 1/4-inch saw, roughly 40 to 60 teeth works well for many flooring cuts.
How many teeth should a circular saw blade have for engineered hardwood?
There is no universal requirement.
A 40-tooth blade can be a good all-around choice, while a 50- or 60-tooth finish blade may produce cleaner crosscuts.
Blade sharpness and tooth design are just as important as tooth count.
Should engineered hardwood face up or down when using a circular saw?
For a conventional handheld circular saw, the finished face usually produces the cleanest result when placed down because the blade enters from underneath and exits through the top.
Test on scrap first.
How do you stop engineered hardwood from splintering?
Use a sharp fine-tooth blade, support the board securely, place the decorative face on the cleaner side of the cut, and feed the saw smoothly.
Scoring the cut line or applying painter’s tape can also help.
Can I rip engineered hardwood with a circular saw?
Yes.
Clamp a straightedge or compatible guide parallel to the desired cut and run the saw against it.
This works especially well for narrowing the first or last flooring row.
Can I freehand a long rip cut?
You can physically follow a line, but I would not recommend it for flooring where straightness matters.
A clamped guide gives a much more consistent edge and reduces the chance of wandering.
Do I need to leave an expansion gap?
Most floating engineered-hardwood installations require perimeter expansion space.
The correct gap depends on the flooring system, so follow the manufacturer’s installation instructions.
Can I use a framing blade?
It will cut the flooring, but a coarse framing blade is more likely to leave a rough or chipped veneer edge.
A fine-finish carbide blade is usually the better option.
Can a circular saw cut click-lock engineered hardwood?
Yes.
The cutting method is the same, but be careful not to remove a locking tongue or groove that you still need for installation.
Can I use a circular saw for the final flooring row?
Yes.
Measure the remaining width, account for the required expansion gap, and rip the boards lengthwise using a straightedge guide.
How deep should I set the circular saw blade?
Set the blade only slightly deeper than the flooring thickness, following the saw manufacturer’s guidance.
Excessive blade exposure is unnecessary.
Can I cut engineered flooring with the finished face up?
Yes, but the top face may experience more chipping with many circular-saw setups.
A scrap test will tell you which orientation works best with your blade.
What tool should I use for curved engineered hardwood cuts?
Use a jigsaw for curves, pipe cutouts, and irregular wall profiles.
A circular saw is intended primarily for straight cuts.
Can I cut engineered hardwood indoors?
You can, but sawdust can spread throughout the room.
When practical, cut in a dedicated work area with dust collection, ventilation, and appropriate personal protective equipment.
Conclusion
Learning how to cut engineered hardwood flooring with a circular saw is mostly about choosing the right blade, supporting the board correctly, and guiding the saw accurately.
For most installations, I recommend a sharp carbide-tipped fine-finish blade. On a typical 7 1/4-inch circular saw, a quality 40- to 60-tooth blade is a practical range for clean flooring cuts, although the best blade depends on your specific engineered hardwood.
For crosscuts, use a square or guide rather than relying entirely on a pencil line. For lengthwise cuts, clamp a straightedge and account for the distance between the blade and the edge of the saw base.
In most conventional circular-saw setups, placing the finished hardwood face down helps keep the visible veneer cleaner, but make a test cut first because blade design can change the result.
When ripping the first or final row, preserve the locking edge you need and remember to allow the expansion space specified by the flooring manufacturer.
Most importantly, keep the plank properly supported, set an appropriate blade depth, keep the saw shoe flat, and never twist or force the saw through the cut. With a sharp blade and a simple guide, a circular saw can produce fast, straight, clean engineered-hardwood flooring cuts throughout an entire installation.