How to Remove Hardwood Flooring With a Circular Saw the Right Way
If you want to know how to remove hardwood flooring with a circular saw, the basic method is to set the blade depth to the exact thickness of the hardwood, cut the flooring into manageable sections, and then pry those sections away from the subfloor. The most important part is controlling cutting depth so the blade passes through the hardwood without cutting deeply into plywood, OSB, concrete, radiant-heating components, or anything else underneath.
A circular saw can make removal much faster when dealing with old nail-down or glued-down hardwood that does not need to be saved. Instead of prying full-length boards one at a time, you can divide the floor into smaller sections that are easier to lift with a pry bar.
However, a circular saw is not always the best removal tool. If you want to reuse the hardwood, cutting it into pieces defeats the purpose. Floating engineered hardwood can usually be unlocked rather than cut. Glued hardwood over concrete also requires extra care because a wood-cutting blade must not be allowed to contact the slab.
Hidden nails and staples are another major concern. A standard finish blade is not intended to repeatedly strike flooring fasteners, and a blade that binds or catches can cause kickback. Circular-saw manufacturers specifically warn that blind cuts into existing structures require extra caution because the blade may contact hidden objects.
In this guide, I’ll explain when a circular saw is appropriate, how to identify your hardwood installation method, how deep to set the blade, how to divide the flooring into removable sections, how to pry it up without unnecessarily damaging the subfloor, and when a different removal method is safer.
Should You Use a Circular Saw to Remove Hardwood Flooring?
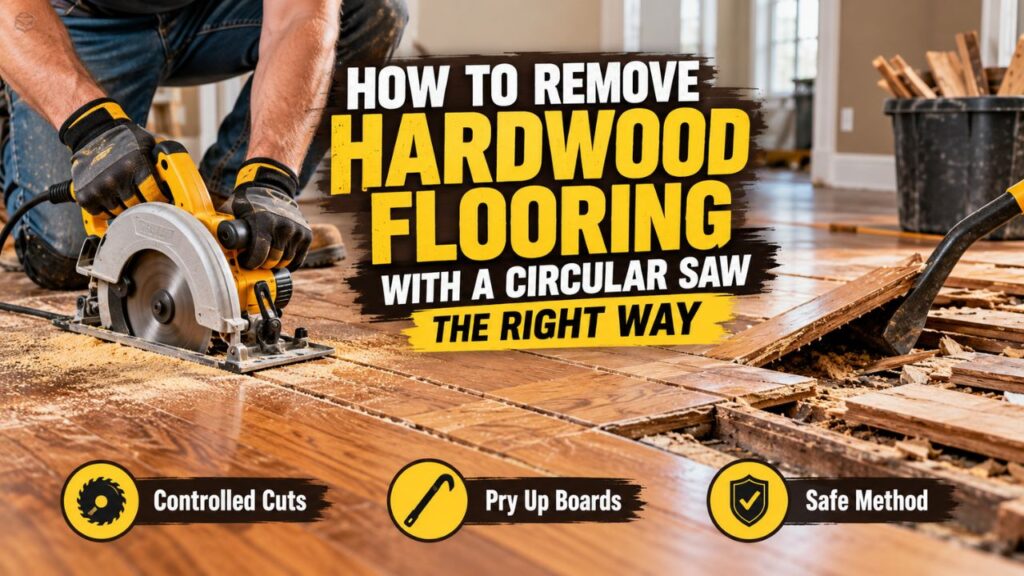
A circular saw works best when the existing hardwood is being demolished rather than preserved.
For a full-room removal of old nail-down solid hardwood, making controlled relief cuts can drastically reduce the amount of force required to pry the flooring loose.
It is also useful when individual boards are so tightly interlocked that you cannot establish a practical starting point.
The circular saw becomes less useful when the flooring can simply be disassembled.
Nail-Down Hardwood
Traditional 3/4-inch solid hardwood is commonly blind-nailed or stapled through the tongue.
This is one of the situations where circular-saw removal can work well.
You can cut the floor into shorter sections and then use a pry bar to break the tongue-and-groove connections and pull the boards away from the fasteners.
Expect to encounter nails or staples during demolition. Whenever possible, plan the cuts away from visible fastener lines and use a blade intended for demolition or nail-embedded wood if contact with fasteners cannot reasonably be avoided.
Glued-Down Hardwood
A circular saw can divide glued-down hardwood into smaller sections, but cutting is only half of the job.
The adhesive still has to be separated from the subfloor.
Depending on the glue and substrate, you may need a heavy floor scraper, pry bar, chisel, or powered floor-removal machine after making the cuts.
If the flooring is bonded directly to concrete, blade-depth control becomes particularly important.
Floating Hardwood or Engineered Flooring
I would usually not start with a circular saw.
Remove the baseboard or quarter-round and work backward from the final installed row, unlocking the planks according to the flooring system.
This creates less dust, preserves the planks, and eliminates unnecessary saw work.
Hardwood You Want to Reuse
Do not cut it into demolition-size pieces.
Instead, remove the first accessible row carefully and work backward through the floor with pry bars, nail pullers, and other appropriate hand tools.
The process takes longer, but intact boards can potentially be cleaned and reused.
| Flooring Installation | Circular Saw Useful? | Best General Approach |
| Nail-down solid hardwood | Yes | Cut into sections and pry |
| Stapled hardwood | Yes | Cut sections, then pull staples |
| Glue-down hardwood | Sometimes | Cut sections and scrape adhesive |
| Hardwood over concrete | With extra caution | Shallow cuts only; protect slab |
| Floating engineered hardwood | Usually unnecessary | Unlock planks from wall |
| Flooring being salvaged | No | Pry boards intact |
| Unknown installation | Not yet | Identify floor and substrate first |
Key Takeaways:
- Circular-saw removal makes the most sense when nail-down or glued flooring is being discarded.
- Floating or reusable hardwood should usually be removed without cutting.
- Blade depth and hidden fasteners are the two biggest concerns.
Before Cutting, Find Out What Is Under the Hardwood
Do not put a circular saw onto an existing floor until you know what the blade could reach.
The hardwood might be installed over plywood, OSB, older plank subflooring, concrete, sleepers, underlayment, or another finished floor.
There may also be floor-heating components or utilities underneath.
A floor register, threshold, doorway, transition strip, or already damaged board may provide an exposed edge where you can inspect the flooring thickness and substrate.
If no edge is visible, remove a small section using a safer hand-tool method before setting the saw depth.
Check for Radiant Floor Heating
If the floor contains or may contain radiant heating, I would avoid blind circular-saw cutting until you know exactly where the heating system is located.
Damaging an electric heating cable or hydronic tube can turn a flooring-removal project into a much more expensive repair.
Watch for Old Flooring Materials
Older floors may have several layers.
For example, hardwood could have been installed over older resilient flooring or adhesive.
If you encounter an unknown older flooring layer, backing, or adhesive that may contain asbestos, stop before sawing or grinding it. EPA guidance warns that suspected asbestos-containing materials should not be sawed, sanded, drilled, or otherwise disturbed before they are properly assessed.
Similarly, renovation in pre-1978 U.S. homes can disturb lead-based paint on nearby trim or painted surfaces and create hazardous dust. EPA recommends lead-safe work practices for renovations that may disturb lead-based coatings.
What Circular Saw Blade Should You Use?
For clean hardwood construction work, you might normally reach for a fine-tooth carbide blade.
Demolition is different.
Old hardwood flooring can contain hidden nails, staples, broken fasteners, or repair screws.
A fine finish blade is unnecessary and may be a poor choice if you expect accidental contact with metal.
For floor demolition, I prefer a carbide demolition blade specifically rated by its manufacturer for nail-embedded wood when fastener contact is reasonably possible.
This does not mean you should deliberately saw through every nail.
Avoid fasteners whenever you can.
The demolition-rated blade simply gives you a more appropriate tool for a rough environment where occasional hidden metal may be unavoidable.
Do Not Use a Damaged Blade
Inspect the blade before beginning.
Do not use one with cracked teeth, damaged carbide tips, excessive dullness, or visible distortion.
A dull or damaged blade increases cutting force and makes binding more likely. Circular-saw safety guidance emphasizes using a sound, properly maintained blade because binding is a major contributor to kickback.
How Deep Should You Set the Circular Saw?
This is the most important setup adjustment in the project.
Set the saw to cut through the hardwood flooring but not substantially into the subfloor.
If the hardwood is 3/4 inch thick, the saw should be set approximately to that flooring thickness—not to its maximum cutting depth.
The best approach is to measure the actual boards rather than assuming.
Older flooring may have been sanded several times and could be noticeably thinner than its original dimension.
Why Cutting Too Deep Is a Problem
If the blade extends unnecessarily far below the floor, it can cut into plywood or OSB, weaken the subfloor, strike fasteners below the floor, or reach utilities you did not intend to disturb.
On concrete, an over-deep cut may allow a woodworking blade to contact the slab.
That can damage the blade instantly and may cause unpredictable saw behavior.
Circular-saw manufacturers recommend limiting blade projection rather than exposing far more blade than the material requires. Bosch, for example, advises shallow blade projection for normal cutting.
Make a Shallow Test Cut
Before cutting across the room, make one controlled test in an area that will be removed.
Inspect the kerf.
You want to see that the hardwood has been severed while the subfloor remains essentially untouched.
If the cut does not quite reach through the flooring, increase the blade depth only slightly and test again.
How to Remove Hardwood Flooring With a Circular Saw Step by Step
Once you understand the flooring construction and have established the correct blade depth, removal becomes much more straightforward.
1. Clear and Prepare the Room
Remove furniture and anything else that could obstruct movement.
Take off shoe molding, quarter-round, and other trim that traps the flooring at the perimeter.
If baseboards will be reused, score paint or caulk joints before carefully prying them away.
Remove doors when they interfere with the work area.
Vacuum loose dirt so the saw base can ride flat across the flooring.
2. Establish a Starting Area
Look for a doorway, floor vent, damaged plank, transition, or other location where the floor edge is already accessible.
An exposed edge makes removal easier because you may be able to pry several boards before any sawing is required.
If the entire floor is tightly enclosed, choose a section that will be discarded and where you have already confirmed what lies below it.
3. Measure the Hardwood Thickness
Use an exposed board edge whenever possible.
Measure from the finished top surface to the bottom of the hardwood itself.
Do not accidentally include underlayment or part of the subfloor in the measurement.
Adjust the circular saw with its power disconnected or battery removed.
Lock the depth adjustment securely.
4. Plan Manageable Sections
For a complete demolition, the goal is not precision joinery.
You simply want to shorten the boards enough that they become easier to pry.
Sections around 2 to 3 feet long can be manageable for many nail-down floors, although the ideal spacing depends on board width, fastening, adhesive, and how easily the floor releases.
Do not make dozens of unnecessary cuts.
Start with a few and see how the flooring responds.
5. Mark the Cut Lines
Use chalk or a straightedge to make the cut locations easy to follow.
Before each line, look for visible nails, repair screws, floor registers, plumbing penetrations, electrical floor boxes, and other obstructions.
Remember that blind fasteners can still be present.
6. Make the First Controlled Cut
Starting a circular saw in the middle of an installed floor may require a plunge-style cut.
A plunge cut with a conventional circular saw is an advanced operation because the blade is entering a blind surface and kickback risk is greater. If you are not already comfortable performing plunge cuts according to your saw manufacturer’s instructions, use a plunge saw/track saw designed for the operation or open the initial section by another method.
Keep your body out of the direct kickback path and maintain firm control of the saw.
The saw’s lower guard must remain functional; portable circular saws are required to have guarding that returns to cover the blade when the tool leaves the work.
Once the blade is fully established in the flooring, guide the saw steadily along the marked line.
Do not force it.
If the blade begins binding, release the trigger and hold the saw still until the blade stops completely before investigating the problem.
7. Cut Only the Flooring Layer
Listen and feel carefully during the cut.
A sudden change in sound can indicate contact with a fastener or different underlying material.
Stop if anything feels wrong.
After the first line, inspect the cut again to confirm you are not significantly damaging the subfloor.
8. Create Enough Relief to Begin Prying
You do not necessarily need to grid the entire room before lifting anything.
Make a few cuts, then try prying those sections.
Once the first section comes out, the exposed edges often make the remaining flooring much easier to remove.
9. Pry From the Cut or Exposed Edge
Slide a flat pry bar beneath the hardwood.
Lift gradually rather than jerking upward with maximum force.
For tongue-and-groove flooring, getting the first section free is usually the hardest part.
Once that opening exists, you can often work beneath adjacent boards and break them loose progressively.
10. Remove or Flatten Remaining Fasteners
After the hardwood comes up, nails and staples may remain in the plywood or OSB.
Pull them with suitable pliers, nail pullers, or a pry bar.
Do not leave sharp fasteners projecting from the subfloor where they can cause injury.
If a fastener genuinely cannot be removed and the next flooring system allows it, it may sometimes be driven flush, but removal is generally preferable.
11. Clean and Inspect the Subfloor
Vacuum debris thoroughly.
Then inspect for saw cuts, loose panels, water damage, squeaks, protruding fasteners, adhesive residue, rot, and uneven areas.
The condition of the subfloor now matters more than how quickly the old hardwood came out.
Key Takeaways:
- Measure the actual flooring and set the saw only deep enough to sever it.
- Make a few relief cuts first instead of unnecessarily cutting the entire room into tiny pieces.
- Once an opening exists, use a pry bar to do most of the remaining removal.
How to Remove Nail-Down Hardwood Flooring
Nail-down flooring usually becomes easier after the first few boards are removed.
Blind nails or staples are driven through the tongue at an angle, so pulling a full-length plank directly upward can require considerable force.
Cutting a long board into shorter sections reduces the leverage required.
Once a section has been cut, work a flat bar under the edge and gradually lift along its length.
Do not concentrate all the force in one tiny area of plywood. That can tear the subfloor surface.
A larger demolition bar may help after enough room has been opened.
Avoid Trying to Saw Every Fastener
Hardwood-floor nails are normally hidden at tongue joints.
If you deliberately cut directly along those joints, the blade may repeatedly contact metal.
Instead, use saw cuts mainly to shorten boards and create access.
Let the pry bar separate most of the fastened joints.
This approach is easier on the blade and generally creates less noise and debris.
How to Remove Glued-Down Hardwood With a Circular Saw
Glue-down removal can be significantly harder.
The saw can divide the hardwood into smaller sections, but adhesive may hold each piece firmly to the substrate.
Start with relatively small test sections rather than cutting the whole room.
If a 2-foot section still requires extreme effort, making somewhat smaller sections may help.
After cutting, use a heavy floor scraper or pry bar beneath the hardwood.
On plywood subfloors, work carefully to avoid peeling large layers from the plywood.
On concrete, the adhesive may remain after the wood is removed and require a separate removal process compatible with the adhesive and new flooring.
Be Especially Careful Over Concrete
Confirm the exact hardwood thickness before cutting.
A wood-cutting circular-saw blade should not extend into the concrete.
If the floor is very thin or unevenly sanded, controlling that depth can be difficult.
In those circumstances, a floor scraper or professional removal machine may be the safer choice.
How to Remove Hardwood Without Damaging the Subfloor
The biggest mistake is assuming that a few shallow saw marks in plywood do not matter.
One superficial scratch may be insignificant, but repeated deep cuts across a structural subfloor can weaken it and create additional repair work.
Your blade should barely complete the hardwood cut.
When prying, spread the load by moving the pry bar along the board rather than forcing one point upward until the plywood splinters.
If the hardwood is glued to plywood, some surface damage may be unavoidable.
The goal is to minimize it.
After removal, any significant gouges, delamination, water-damaged panels, or deep saw cuts need to be evaluated before installing the new floor.
What If the Circular Saw Hits a Nail?
Stop pushing.
Do not attempt to “power through” simply because the blade continues rotating.
Release the trigger and keep the saw under control until the blade stops.
Then remove the tool and inspect the area.
If the blade struck metal, inspect its teeth before continuing. A damaged carbide tip or distorted blade is a reason to replace it.
Also determine whether the object was actually a flooring nail.
A larger screw, steel plate, pipe, or other hidden object may indicate that you should stop cutting that area entirely.
Nail-Embedded Wood Blades Still Require Caution
A demolition blade marketed for nail-embedded wood is more tolerant of occasional fastener contact.
It does not make blind sawing risk-free.
The hidden object could be much larger than a nail, and kickback remains possible whenever the blade binds.
How to Minimize Dust During Hardwood Removal
Cutting a finished hardwood floor can create a surprising amount of dust.
Close doors leading to the rest of the house and isolate the work area where practical.
If your circular saw supports compatible dust extraction, use it.
A HEPA-equipped vacuum can help control fine renovation dust.
Wear the eye, hearing, and respiratory protection appropriate for the material and tool.
Do not simply blow fine debris through the room with compressed air.
Vacuuming and controlled cleanup are more effective.
For old painted floors or trim in pre-1978 housing, dust control becomes particularly important because cutting and demolition can disturb lead-based coatings.
When You Should Not Use a Circular Saw
There are several situations where I would choose another method.
Do not use a circular saw if you cannot determine the flooring thickness or what lies underneath.
Avoid it when known radiant heating is directly below the flooring unless you have reliable construction information and an appropriate removal plan.
If suspected asbestos-containing flooring, backing, or adhesive is present beneath the hardwood, do not saw into or disturb that material before proper assessment.
A circular saw is also the wrong method if the boards need to be salvaged.
Finally, if making plunge cuts with a handheld circular saw is outside your experience, use another opening method or hire a flooring professional.
There is no benefit in saving demolition time while increasing kickback risk.
Key Takeaways:
- Stop if you cannot identify the floor thickness, subfloor, or hidden systems.
- Old suspect flooring or adhesive should be assessed before aggressive cutting or demolition.
- A circular saw is useful for demolition, not for preserving reusable boards.
Circular Saw vs. Other Hardwood Removal Tools
A circular saw is only one part of a good demolition setup.
An oscillating multi-tool is slower but much more controlled for cuts near walls, cabinets, thresholds, and other areas where a circular saw cannot reach safely.
A reciprocating saw can be useful in some demolition work, but sliding a long blade blindly beneath flooring creates its own risk of damaging subflooring, pipes, wiring, or surrounding materials.
A floor scraper is extremely useful for glue-down installations.
For a large commercial-style glued floor, a powered floor-removal machine may save far more time than relying on a handheld circular saw and pry bar.
A hammer and chisel are useful for establishing the first opening or cleaning up small sections.
For most nail-down hardwood removal, my preferred combination is a circular saw for selected relief cuts, a flat pry bar for actual lifting, and pliers or a nail puller for cleanup.
Common Mistakes to Avoid
The biggest error is setting the blade too deep.
Maximum blade exposure does not make demolition better. It simply increases the chance of cutting something you intend to keep.
Another mistake is making hundreds of cuts before testing whether they are necessary. Once the first several boards come loose, the rest may pry up much more easily.
Do not use an expensive fine-finish blade for rough demolition where hidden nails are likely.
Do not assume every old hardwood floor is nailed to plywood. Some are glued to concrete, attached over sleepers, or installed above previous flooring.
And never place your free hand near the blade path simply because the saw is making only a shallow cut.
Hardwood-floor removal is demolition work, but circular-saw safety rules do not become less important just because the material is going into the trash.
FAQs about How to Remove Hardwood Flooring With a Circular Saw
Can you use a circular saw to remove hardwood flooring?
Yes. A circular saw can cut unwanted hardwood into smaller sections that are easier to pry from the subfloor. It is most useful for nail-down and some glue-down floors that will not be reused.
How deep should I set a circular saw for hardwood-floor removal?
Set the blade approximately to the actual thickness of the hardwood so it passes through the flooring without significantly cutting the subfloor. Measure the existing floor rather than assuming its original thickness.
Can I cut through hardwood flooring and the subfloor together?
Only if the subfloor itself is intentionally being demolished and you have confirmed what lies beneath it. If the subfloor will remain, do not cut through it.
What blade should I use to remove old hardwood flooring?
A durable carbide demolition blade rated for nail-embedded wood is a practical choice when hidden flooring fasteners may be encountered. Avoid deliberately cutting nails whenever possible.
Can a circular saw cut through hardwood-floor nails?
Some demolition blades are rated for occasional contact with nail-embedded wood, but that does not mean you should intentionally cut every flooring nail. Pry the flooring away from most fasteners instead.
How large should I cut the hardwood sections?
There is no single required size. Sections around 2 to 3 feet long can be manageable on many floors, but start with a few cuts and adjust according to how easily the boards release.
Can I remove hardwood flooring without cutting it?
Yes. If you want to salvage the boards, carefully pry them up intact. Floating hardwood can often be unlocked without cutting as well.
How do I remove the first hardwood board?
Look for an accessible edge at a doorway, vent, transition, or damaged area. If none exists and the floor will be discarded, a carefully planned relief cut can help create an opening.
Can I use a circular saw on hardwood glued to concrete?
It can be used to divide the hardwood into smaller pieces, but blade depth must be controlled so the wood-cutting blade does not hit concrete. A scraper or floor-removal machine may still be required to separate the adhesive.
Will a circular saw damage plywood underneath?
It can if the blade is set too deep. Measure the hardwood and make a shallow test cut before proceeding across the room.
Can I use a circular saw if the floor has radiant heat?
I would avoid blind cutting unless you know exactly where the heating system is located and can guarantee the blade will remain safely above it.
Is it easier to cut hardwood into small pieces before removal?
Usually, yes, particularly with tightly nailed or glued flooring. However, excessively small sections create unnecessary cutting and dust. Start with moderate-size relief cuts.
Should I remove baseboards before hardwood flooring?
Remove shoe molding or quarter-round first. Whether the baseboard itself must come off depends on the installation and the new flooring plan, but removing it often improves access around the room perimeter.
How do I remove nails after the hardwood is gone?
Use suitable pliers, a nail puller, or a pry bar. Remove projecting staples and nails before walking or installing new flooring over the subfloor.
Can old flooring adhesive contain asbestos?
Some older flooring systems and mastics can contain asbestos. You cannot reliably identify asbestos by appearance alone. If suspect material will be disturbed, have it assessed appropriately before sawing, scraping, or grinding it.
Is a circular saw the fastest way to remove hardwood flooring?
It can make nail-down floor demolition much faster, but the fastest method depends on the installation. Large glue-down floors may be better handled with powered floor-removal equipment.
Conclusion
If you need to know how to remove hardwood flooring with a circular saw, the key is to use the saw as a controlled demolition tool rather than trying to cut blindly through the entire floor assembly.
First identify whether the hardwood is nailed, stapled, glued, or floating and determine exactly what lies underneath it. Then measure the actual hardwood thickness and set the circular saw blade just deep enough to sever the flooring while protecting the subfloor.
For nail-down hardwood that will be discarded, I recommend making a limited number of relief cuts to create manageable sections and then doing most of the removal with a pry bar. For glue-down flooring, smaller sections can make scraping easier, but adhesive removal will still require additional work.
Use a durable demolition blade when hidden flooring fasteners are a concern, but avoid intentionally sawing through nails whenever possible. Stop immediately if the saw binds, strikes an unidentified object, or begins cutting into a material you did not expect.
Most importantly, do not use this method when the flooring needs to be salvaged, when radiant heating or hidden utilities are uncertain, or when old suspect flooring materials may contain hazardous substances.
A circular saw can dramatically speed up hardwood-floor demolition, but only when blade depth, hidden fasteners, subfloor protection, and kickback risk are controlled from the beginning.