How to Attach Track Saw Guide to Wood Floor Without Damage
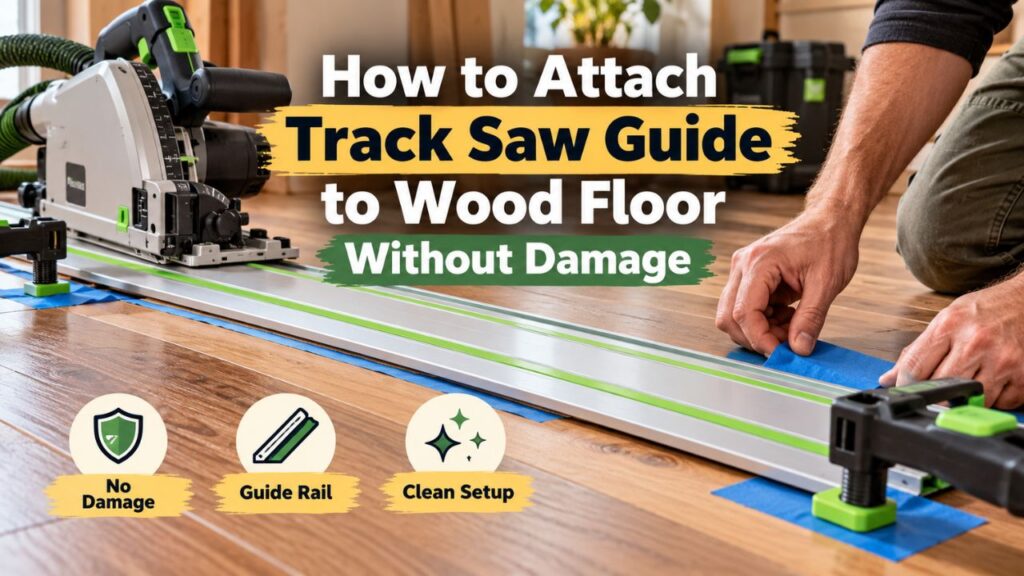
If you want to know how to attach track saw guide to wood floor surfaces, you normally should not screw or nail the guide rail to the flooring. Instead, position the rail on your cut line and secure it with its built-in non-slip strips, compatible guide-rail clamps, manufacturer-approved adhesive pads, or another non-damaging system designed for your track. The correct method depends mainly on whether you are cutting a loose flooring plank or cutting flooring that is already installed.
Most modern track-saw rails are designed to stay in place without permanent fastening. Many have rubber or foam anti-slip strips underneath, while dedicated rail clamps can lock a guide to a loose workpiece. Some rail systems also offer removable adhesive-pad or suction accessories for situations where ordinary clamps cannot reach the workpiece. Festool, for example, specifically offers a guide rail designed to use adhesive pads for applications including flooring and large work surfaces.
The biggest mistake is treating the guide rail like a temporary piece of lumber and driving screws through it into a finished hardwood floor. That can damage both the flooring and the track, and it is usually unnecessary.
In this guide, I’ll explain how to secure a track-saw guide to loose and installed wood flooring, how to position the splinter guard accurately, which attachment methods are safest for finished floors, how to prevent the rail from slipping, and what to check before plunge-cutting an installed hardwood floor.
Do You Actually Need to Attach a Track Saw Guide to the Floor?
In many cases, no.
A quality guide rail often has non-slip strips on its underside that create friction against the workpiece. When the floor surface is clean, flat, and dry, those strips may provide enough grip for a normal straight cut.
Guide rails are specifically designed to provide straight guidance while protecting the work surface. Festool, for example, describes its rails as having a foamed rubber backing that resists sliding and helps protect the material underneath. The same rail also uses a splinter guard along the cutting edge.
However, relying on friction alone is appropriate only when the rail feels completely stable.
If the rail can move when you apply moderate sideways pressure with your hand, secure it before cutting.
The best method depends on the situation.
| Situation | Best Rail-Securing Method |
| Loose hardwood plank on workbench | Guide-rail clamps |
| Large loose flooring panel | Clamps or anti-slip strips |
| Installed finished wood floor | Anti-slip strips or approved removable pads |
| Clamps cannot reach underside | Manufacturer-approved adhesive or suction system |
| Very slick floor finish | Approved temporary securing accessory |
| Damaged or worn rail grip strips | Replace grip strips or use compatible clamps |
The rail should be secure, but it should not be permanently attached to the floor.
Key Takeaways:
- Do not normally screw or nail a track-saw rail into hardwood flooring.
- Use the rail’s grip strips, compatible clamps, or a manufacturer-approved temporary attachment system instead.
Method 1: Use the Track’s Built-In Non-Slip Strips
For an installed hardwood floor, this should usually be your first option.
Turn the guide rail over and inspect its underside.
Most professional track systems have one or more rubberized or foam grip strips running along the bottom.
These strips provide friction against the flooring and also prevent the aluminum rail from directly scratching the finish.
Clean the Floor First
Dust is the enemy of track grip.
Fine sawdust between the rubber strip and hardwood can act almost like tiny ball bearings.
Vacuum the area and wipe it with a clean, dry cloth.
Do the same to the underside of the guide rail.
Do not apply wax, oil, silicone, or another slippery product before positioning the track.
Position the Rail
Mark the cut accurately.
On a properly prepared track-saw rail, the rubber splinter strip along the cutting side normally represents the blade’s cutting line once it has been trimmed to your saw.
Position that edge directly against your cut marks.
Do not automatically measure from the aluminum edge of the track because the splinter guard is usually the more useful cutting reference.
Test the Grip
Before starting the saw, press gently sideways against the guide rail.
It should remain in place.
Next, place the saw on the rail—with the tool switched off—and move it through the full intended travel.
Watch the track.
If it shifts while you slide the saw, it needs additional securing.
When Friction Alone Works Best
Built-in grip strips work particularly well when the flooring is:
Clean.
Flat.
Dry.
Free from loose dust.
Not unusually glossy or slippery.
The weight of a long rail and track saw also contributes to stability.
However, never assume the track cannot move simply because it feels heavy.
Method 2: Use Track Saw Guide-Rail Clamps
If you are cutting a loose hardwood flooring plank, clamps are usually my preferred method.
Track-saw clamps are different from ordinary clamps because their upper portion slides into the groove or channel underneath the guide rail.
That lets you secure the rail without placing a clamp body above the track, where it would interfere with the saw.
Bosch, for example, offers dedicated quick clamps whose fastening tabs fit into its track slots specifically to secure the rail to the workpiece. Festool similarly provides fastening clamps designed to fit the guide-rail clamp groove.
How to Clamp a Loose Flooring Plank
Place the flooring on a stable workbench or sacrificial cutting surface.
Position the guide rail over your marks.
Slide one track clamp into the rail channel from one end.
Move it to the appropriate position and tighten it underneath the workpiece.
Install a second clamp near the other end.
The rail should now be locked to the plank.
Do Not Overtighten
Engineered hardwood and prefinished flooring can be damaged by excessive clamping pressure.
You only need enough pressure to prevent movement.
If the clamp pad contacts a finished surface, make sure it is clean and non-marring.
A small particle of grit trapped under the clamp can leave a dent or scratch.
Why Normal Clamps Can Be Awkward
A standard F-style or bar clamp placed across the top of the guide rail can block the track saw.
Dedicated track clamps stay mostly underneath the workpiece and out of the saw’s travel path.
That is why I recommend using clamps designed for your particular rail system whenever possible.
Why Guide-Rail Clamps Usually Do Not Work on an Installed Floor
Once hardwood flooring is installed, you normally cannot reach underneath it with a clamp.
There is no exposed bottom edge for the clamp jaw.
That means the normal track-clamp method becomes impractical.
This is where anti-slip strips, removable adhesive systems, or other surface-mounted accessories become useful.
Do not solve the access problem by driving a screw through the track into the floor.
There are better options.
Method 3: Use Manufacturer-Approved Adhesive Pads
Some track-saw systems provide removable adhesive pads specifically for applications where mechanical clamping is impossible.
This can be extremely useful on an installed floor.
For example, Festool’s FS/2-KP guide rail is designed to accept adhesive pads that allow the rail to be secured to work surfaces when clamps cannot be used, and flooring is one of the applications the manufacturer specifically describes.
The important word here is approved.
Do not assume any random double-sided construction tape is safe for a finished hardwood floor.
Protect the Floor Finish
Prefinished hardwood may have polyurethane, aluminum-oxide, oil, wax, or another factory-applied finish.
An aggressive adhesive can pull finish from the floor or leave residue.
Before using any temporary adhesive system, confirm that:
The rail manufacturer permits it.
The flooring surface is compatible.
The adhesive can be removed without damaging the finish.
If you are uncertain, test it on leftover flooring rather than on the installed floor.
Do Not Leave Adhesive in Place Longer Than Necessary
Temporary adhesives can become harder to remove after extended contact, especially in warm conditions.
Install the pads, make the cut, and remove the system according to its manufacturer’s directions.
Do not leave the rail taped to the floor overnight simply because you plan to continue the job the next morning.
Method 4: Use a Compatible Suction Attachment
Certain guide-rail systems can be held to smooth, non-porous surfaces using suction accessories.
For example, Festool offers a guide-rail suction system designed to secure the guide to flat, non-porous material without conventional clamps.
Whether this works on your wood floor depends heavily on the finish and surface texture.
A perfectly smooth sealed floor may allow good suction.
Wire-brushed, hand-scraped, textured, or open-grain flooring may not.
Always test the holding force before starting the saw.
Suction should be considered a compatible accessory method—not something to improvise with unrelated household suction cups.
How to Position the Track Saw Guide on the Wood Floor
Securing the rail is only useful if it is positioned correctly.
Start by marking the intended cut at multiple points.
If you are removing a strip of flooring along a wall, measure from a reliable reference rather than assuming the wall is perfectly straight.
Connect the marks if necessary.
Align the Splinter Guard With the Cut
A track saw’s splinter strip has two jobs.
It supports the wood fibers near the blade, and once calibrated to the saw, its edge indicates where the blade will cut.
Position that edge on the portion of the work you intend to keep.
Be careful about blade kerf.
The saw removes a strip of material rather than making a zero-width line.
For precise flooring work, establish which side is waste before positioning the track.
Check the Whole Rail
A long guide can be perfectly aligned at one end and several millimeters or fractions of an inch off at the other.
Check both ends and at least one point near the middle.
Only secure the guide after the full rail is aligned.
Use Enough Rail Length
The guide should extend sufficiently beyond the work so the saw is properly supported before the blade enters the flooring and after it completes the cut.
Manufacturer requirements differ.
For example, Festool’s track-saw guidance emphasizes choosing a rail long enough to support the saw properly at both the beginning and end of a cut.
Use the rail length specified or recommended for your saw rather than starting a plunge cut with part of the saw hanging beyond an inadequately short track.
Key Takeaways:
- Position the splinter guard on the intended cut line before securing the rail.
- Make sure the rail is long enough to support the saw properly through the entire cut.
How to Secure a Track on an Installed Hardwood Floor Step by Step
If the flooring is already installed, I recommend this sequence.
1. Identify Exactly What You Are Cutting
Before touching the saw, determine why the installed flooring needs to be cut.
Typical reasons include removing damaged boards, creating a clean perimeter cut, installing a transition, or opening an area for remodeling.
Know which side of the cut must remain undamaged.
2. Determine What Is Below the Flooring
This is extremely important.
An installed hardwood floor may sit over plywood, OSB, underlayment, sleepers, concrete, radiant-heating components, or other materials.
There may also be fasteners below the cut.
Do not plunge through an installed floor without understanding the assembly beneath it.
3. Clean the Floor and Rail
Vacuum the cut area.
Clean the guide’s grip strips.
A clean contact surface improves both holding power and scratch protection.
4. Mark the Cut
Measure at several locations.
Use a pencil or removable marking method appropriate for the finish.
Avoid permanent markers that can stain unfinished edges or pores.
5. Place the Splinter Strip on the Line
Set the rail carefully and check alignment from one end to the other.
Do not move to securing the guide until you are satisfied with its position.
6. Choose the Least Damaging Holding Method
Try the built-in anti-slip strips first.
If additional security is required and your guide supports approved adhesive pads, use them.
A compatible suction device may be another option on sufficiently smooth flooring.
Avoid improvised permanent fastening.
7. Test for Movement
With the saw switched off, put it on the rail and move it through the intended travel.
Do not plunge the blade.
Watch the track closely.
It must stay exactly on the cut line.
8. Set the Cutting Depth
Set the plunge depth only as deep as necessary to cut the hardwood flooring and any material you intentionally need to penetrate.
If you only want to sever the flooring, avoid unnecessarily cutting deeply into the subfloor.
Check your saw’s depth scale and allow for the additional height introduced by the guide rail if the saw’s system requires that adjustment.
9. Connect Dust Extraction
A track saw paired with a suitable vacuum can control much of the dust produced during an installed-floor cut.
This is particularly valuable indoors, where hardwood and engineered-flooring dust can spread quickly.
10. Make the Cut Smoothly
Place the saw fully on the rail.
Start it according to the manufacturer’s procedure and allow the blade to reach operating speed before feeding through the material.
Keep steady forward pressure.
Do not press sideways against the guide.
The track is there to control direction; forcing the saw against one side can disturb the rail or increase friction.
How to Attach the Guide to a Loose Hardwood Plank
The procedure is easier when the flooring has not yet been installed.
Place the plank on a stable sacrificial work surface.
Align the guide with your cut marks.
Insert compatible clamps into the underside channel of the guide rail.
Clamp both the track and flooring securely to the work surface.
Now check that the rail cannot move.
Because you can reach the underside of a loose plank, there is little reason to rely only on friction when maximum precision is required.
This method is especially useful when ripping an expensive prefinished board lengthwise.
Should You Use Double-Sided Tape?
Only with caution.
Temporary tape can be useful in certain woodworking situations, but finished hardwood flooring adds another concern: the floor finish.
General-purpose carpet tape, construction tape, or aggressive double-sided mounting tape may leave residue or damage the coating.
I would choose a manufacturer-approved guide-rail adhesive system before improvising with strong double-sided tape.
If no approved system is available and you are considering tape, test the exact product on spare flooring first.
Do not assume painter’s tape underneath stronger tape guarantees protection. Different finishes react differently to adhesive and removal.
Can You Screw a Track Saw Guide to the Wood Floor?
For normal flooring work, I would avoid it.
Driving screws through a guide rail can damage the rail, flooring, subfloor, or hidden material below.
It can also leave holes that are difficult or impossible to hide.
Track-saw rails are generally designed to be held by friction, clamps, or dedicated accessories rather than fastened with screws through their bodies.
If your project involves flooring that is definitely being demolished, surface damage may no longer matter, but you still need to consider what the screw could hit underneath.
Even during demolition, securing the track with its intended system is usually cleaner and simpler.
How to Keep the Track From Sliding
If the guide moves despite having anti-slip strips, investigate the cause instead of immediately adding more holding force.
First clean the underside of the rail.
Then clean the floor.
Inspect the rubber strips for wear, hardened material, peeling adhesive, or contamination.
A worn strip may need replacement.
Next, check your sawing technique.
A track saw should move forward along the rail.
If you push strongly sideways while cutting, you can overcome the friction holding the guide.
Use smooth forward pressure.
Avoid Standing on the Track
It may seem convenient to hold a guide rail in place with your foot while cutting flooring.
I would avoid this.
Your body position becomes awkward, the pressure can distort or move the track, and you are working unnecessarily close to an operating saw.
Use a proper holding method.
Protecting a Prefinished Hardwood Surface
A track rail may have protective strips, but dirt trapped beneath it can still scratch a finished floor.
Before placing the guide, inspect both surfaces.
Vacuum rather than simply sweeping large amounts of grit from side to side.
Do not drag the aluminum guide across the floor.
Lift it, reposition it, and lower it gently.
If your rail has damaged or missing protective strips, repair or replace them before placing bare aluminum directly against an expensive finish.
Avoid covering the entire floor with a thick protective sheet underneath the track unless you know it will remain stable.
A soft or slippery material between the track and flooring can make the rail less secure.
Cutting an Installed Engineered Wood Floor
Engineered flooring requires the same general track-securing approach as solid hardwood, but the cutting depth deserves extra attention.
The plank may contain a relatively thin hardwood wear layer over a plywood or composite core.
A sharp carbide blade generally gives the cleanest cut.
If you are cutting a prefinished surface, use the guide rail’s splinter strip properly and check the blade condition before beginning.
A dull blade can chip the top veneer or overheat the cut.
If you need only to remove the engineered flooring and preserve the subfloor, make a test plunge in a sacrificial or hidden section where appropriate so you can verify the correct depth.
Watch for Flooring Nails and Staples
Existing hardwood floors may be secured with cleats, nails, or staples.
Their locations can be difficult to predict, particularly on older floors that have been repaired.
A saw blade striking metal can damage teeth and produce dangerous debris.
Before making a long cut through installed flooring, investigate how the flooring is attached and whether your path is likely to cross fasteners.
This matters especially when cutting close to board edges, where hidden flooring fasteners are commonly located.
Check for Radiant Floor Heating
If the room has radiant heating, do not cut into the floor until you understand where the system is located and how deep it sits.
Some installations use electric heating cables or hydronic tubing below the finish flooring.
A track saw can cut through far more than the hardwood layer if depth is set carelessly.
Damaging a heating cable or water line can turn a simple flooring job into a major repair.
If the location of a concealed system cannot be verified, stop before plunge-cutting.
Use the Correct Blade Depth
One of the advantages of a track saw is precise depth adjustment.
Use it.
If the hardwood is 3/4 inch thick and your objective is only to cut the flooring, you do not need the blade extending deeply into the structure below.
Set the depth only slightly beyond the material you intentionally need to sever, following your saw manufacturer’s guidance and accounting for the guide rail where necessary.
A shallow, controlled depth reduces unnecessary damage beneath the flooring and can also reduce blade exposure.
Track Saw Guide Rail vs. Straightedge
You could guide an ordinary circular saw with a straightedge, but a proper track-saw rail offers several advantages.
The saw physically engages with the guide rather than merely riding beside it.
The splinter strip identifies the blade path and supports the surface near the cut.
Anti-slip backing helps prevent rail movement.
And compatible clamps can fit into channels without interfering with the saw.
For a precision cut in an expensive wood floor, I would choose the dedicated track whenever possible.
Common Mistakes When Attaching a Track Saw Guide to Flooring
The most common mistake is assuming that the rail must be physically fastened with screws.
It normally does not.
Another mistake is setting the rail directly onto a dusty floor. Even a good anti-slip strip cannot grip properly when loose sawdust separates it from the finish.
A third problem is securing only one end and failing to check the other. Long rails can pivot slightly around one attachment point.
Users also sometimes align the wrong part of the guide with the cut. On many track systems, the calibrated splinter strip represents the blade line—not the outside edge of the aluminum extrusion.
Finally, do not forget to check cutting depth. A perfectly attached rail does not protect plumbing, fasteners, heating systems, or the subfloor from a blade set too deep.
Key Takeaways:
- Clean both the flooring and guide before positioning the track.
- Before cutting installed flooring, verify blade depth and investigate hidden fasteners, heating systems, and other material beneath the floor.
FAQs about How to Attach Track Saw Guide to Wood Floor
Do you need to clamp a track saw guide?
Not always.
Quality guide rails often use non-slip material underneath and may remain stable without clamps for normal cuts.
If the track can move, secure it with compatible clamps or another approved method before cutting.
How do you clamp a track saw rail to flooring?
For a loose plank, slide dedicated track clamps into the rail’s clamp channel and tighten them underneath the workpiece.
Installed flooring usually cannot be clamped this way because you cannot reach the underside.
How do you secure a track saw rail on an installed floor?
Start with the rail’s built-in anti-slip strips.
If additional holding power is needed, use a manufacturer-approved removable adhesive or suction system that is compatible with the floor finish.
Can you screw a guide rail into a wood floor?
You generally should not.
Screws can damage the floor and track and may penetrate hidden material underneath.
Track rails are normally designed to work with non-slip strips, clamps, or dedicated accessories.
Can I use double-sided tape under a track saw rail?
Potentially, but general-purpose tape can damage or leave residue on some flooring finishes.
A manufacturer-approved removable attachment system is preferable.
Test any adhesive on spare flooring before applying it to the installed surface.
Will a track saw guide scratch hardwood?
A clean rail with intact protective strips should minimize the risk, but grit trapped underneath can scratch the finish.
Clean both the rail and flooring before positioning it and lift rather than drag the rail.
Why does my track saw rail keep slipping?
The floor or grip strips may be dusty, the anti-slip strips may be worn, the floor finish may be unusually slick, or you may be applying excessive sideways pressure while cutting.
Clean everything first and use a compatible securing method if necessary.
What part of the track should line up with the cut mark?
On most calibrated track-saw systems, the splinter guard or rubber cutting edge represents the blade path.
Follow the instructions for your specific track because rail designs vary.
Can I use track clamps on an installed hardwood floor?
Usually not in the normal way because a guide-rail clamp needs access beneath the workpiece.
They work much better when cutting loose flooring boards or panels.
How deep should I set a track saw when cutting hardwood flooring?
Set the blade only as deep as necessary to cut the material you intend to remove, following the saw manufacturer’s instructions.
If you want to preserve the subfloor, avoid unnecessarily deep blade penetration.
Can I cut engineered hardwood with a track saw?
Yes.
A track saw is excellent for long, straight cuts in engineered hardwood, particularly when equipped with a sharp blade appropriate for finished wood products.
Can I use a track saw directly on a finished floor?
Yes, if the rail and saw are designed for the application and the surface is properly protected.
Make sure the underside of the guide is clean, its protective strips are intact, and the track cannot move.
How do I keep the track from moving without clamps?
Clean the anti-slip strips and flooring, apply smooth forward pressure while cutting, and use any manufacturer-approved adhesive or suction accessory available for your rail if additional holding force is necessary.
Can I stand on the guide rail to stop it moving?
I would not recommend it.
Standing on the rail can create an awkward and unsafe body position and may distort or shift the guide.
Secure it using the intended accessories instead.
What should I check before cutting an installed wood floor?
Confirm what is beneath the floor, how the boards are fastened, whether radiant heating is present, how deep the blade needs to cut, and whether the guide is securely positioned.
Conclusion
Learning how to attach track saw guide to wood floor surfaces is mostly about securing the rail without permanently fastening or damaging the flooring. In most situations, you should not drive screws or nails through the guide rail.
For a loose flooring plank, I recommend using dedicated guide-rail clamps. They fit into the track’s clamp channel and hold both the rail and workpiece securely without interfering with the saw.
For an installed hardwood floor, begin with the rail’s built-in anti-slip strips. Clean both the floor and the underside of the rail carefully, align the splinter guard with the cut marks, and test the guide for movement before switching on the saw.
If friction alone is not sufficient and ordinary clamps cannot be used, a manufacturer-approved removable adhesive or suction system is the next option. Avoid aggressive improvised tapes on finished flooring unless you have confirmed they will not damage the coating.
Most importantly, securing the rail is only part of making a safe cut. Before plunge-cutting installed flooring, determine what lies below it, check for fasteners and radiant-heating systems, and set the blade only as deep as necessary.
A properly positioned track generally needs very little force to stay accurate. Keep the surface clean, use the guide system as its manufacturer intended, and let the track control the saw rather than trying to force the tool against the rail.