What Saw Is Best for Installing Hardwood Flooring? Full Guide
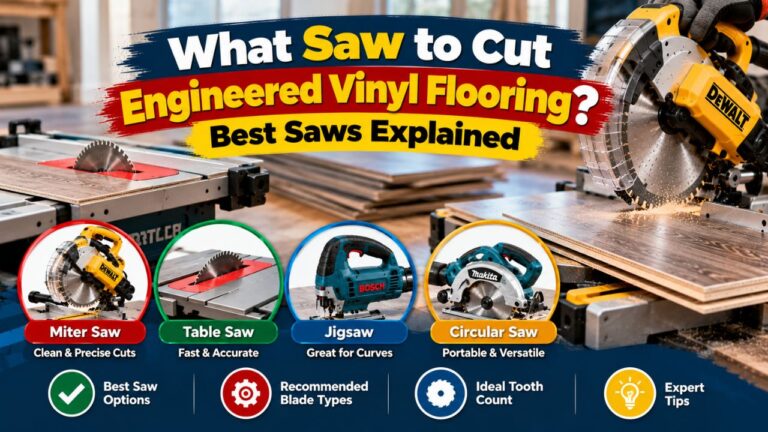
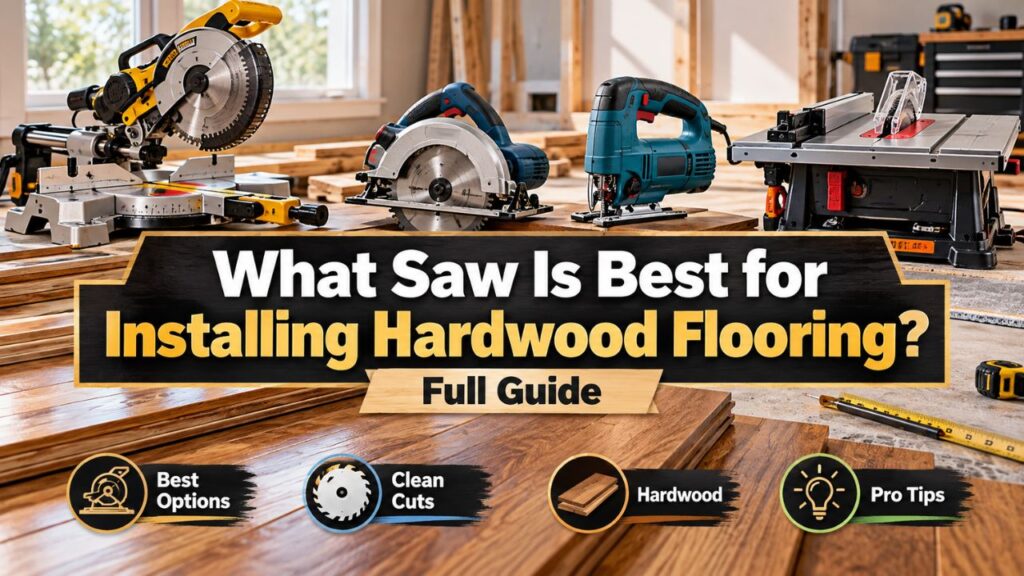
If you are wondering what saw is best for installing hardwood flooring, a miter saw is the best choice for the repeated crosscuts you will make during installation, while a table saw is best for long rip cuts. For a complete DIY installation, I recommend a miter saw plus a table saw or circular saw, with a jigsaw for notches and irregular cuts. If you want to buy only one saw, a circular saw is the most versatile option because it can make both crosscuts and rip cuts.
Hardwood flooring installation involves more than simply shortening boards. You may need to crosscut the last board in each row, rip the first and final rows to width, cut around floor vents or pipes, fit boards at doorways, and occasionally follow an uneven wall.
That is why professional flooring instructions commonly list more than one cutting tool. Miter and table saws are especially common recommendations for solid hardwood, while circular and jig saws are also useful for engineered flooring and detail work.
Blade selection is just as important as saw selection. Prefinished hardwood can splinter at the surface if you use a coarse or dull blade, while thick solid hardwood can make an unnecessarily fine blade cut slowly and generate heat.
In this guide, I’ll explain which saw is best for installing hardwood flooring, which saw to use for each type of cut, what blade works best, and what combination of tools makes the most sense for DIY and professional installations.
What Saw Is Best for Installing Hardwood Flooring?
For most hardwood flooring projects, I consider a miter saw the most useful primary saw because the majority of cuts made during installation are crosscuts.
Every time you reach the end of a flooring row, the final plank usually needs to be shortened. A miter saw performs these cuts quickly, squarely, and consistently.
However, a miter saw cannot make a long cut down the full length of a flooring plank. Those rip cuts are commonly needed for the first and last rows.
That is where a table saw or guided circular saw becomes important.
A jigsaw completes the setup by handling the shapes that neither of those saws can cut easily.
Best Saw for Each Hardwood Flooring Cut
| Flooring Task | Best Saw |
| Repeated straight crosscuts | Miter saw |
| Angled end cuts | Miter saw |
| Long rip cuts | Table saw |
| Rip cuts without a table saw | Circular saw with guide |
| Curves and irregular shapes | Jigsaw |
| Pipe or vent cutouts | Jigsaw |
| Wide board crosscuts | Sliding miter saw or circular saw |
| Undercutting door casing | Jamb saw or oscillating multi-tool |
| Cutting already-installed flooring | Circular saw with controlled depth or oscillating tool |
For a serious full-room installation, my preferred combination is a sliding miter saw, table saw or circular saw, and jigsaw.
You do not necessarily have to own all three. A circular saw and jigsaw can complete most DIY installations, although repeated end cuts will take longer than they would with a miter saw.
Key Takeaways:
- A miter saw is the best primary saw for repeated hardwood flooring crosscuts.
- A table saw is best for long, accurate rip cuts.
- A circular saw is the most versatile choice if you want to use only one main saw.
- A jigsaw handles the irregular cuts the other saws cannot.
Miter Saw: Best for Repeated Hardwood Flooring Crosscuts
A miter saw is the tool I would expect to use most often during a typical hardwood-floor installation.
A crosscut runs across the width of a flooring board. You make this cut whenever a full-length board will not fit at the end of a row.
With a miter saw, you simply mark the plank, place it flat against the fence, align the blade with the waste side of your line, and lower the blade through the wood.
The process is much faster than setting up a guide for every cut.
Why a Sliding Miter Saw Is Better for Wide Flooring
A standard non-sliding miter saw has limited crosscut capacity.
That may not matter with narrow strip flooring, but modern engineered hardwood boards can be quite wide.
A sliding miter saw allows the blade assembly to travel horizontally, substantially increasing its cutting capacity.
If you are buying a miter saw specifically for flooring and general remodeling, I would choose a sliding model when the budget and available workspace allow it.
It will also be useful later for cutting:
- Baseboards
- Door casing
- Quarter round
- Shoe molding
- Stair components
That makes it a particularly practical saw for an entire flooring project rather than just the planks themselves.
Miter Saws Are Also Excellent for Angled Cuts
Rooms are not always perfectly square.
If a board needs an angled end to follow a wall, hearth, transition, or another architectural feature, a miter saw makes the adjustment easy.
Measure or transfer the required angle, rotate the miter table, lock it securely, and make a test fit before cutting additional boards.
What Size Miter Saw Is Best for Hardwood Flooring?
A 10-inch miter saw is enough for many hardwood flooring installations.
A 12-inch saw offers more cutting capacity but is larger, heavier, and generally more expensive.
For narrow traditional hardwood strips, a 10-inch saw is more than adequate.
For extra-wide engineered hardwood, a 10-inch or 12-inch sliding miter saw gives you considerably more flexibility than a basic fixed-head model.
Rather than choosing by blade diameter alone, check the saw’s actual crosscut capacity and compare it with the width of your flooring.
Table Saw: Best for Long Rip Cuts
A table saw becomes particularly valuable when you reach the first or last row of flooring.
A rip cut runs parallel with the length of a plank.
Imagine your hardwood board is 5 inches wide, but the final space along the wall requires a board only 2¾ inches wide after allowing for the specified expansion clearance.
That board must be ripped lengthwise.
A table saw is ideal because its fence keeps the plank at a consistent width through the entire cut.
Why the Table Saw Is So Useful for Flooring
Once the fence is adjusted, you can rip several boards to exactly the same width.
This is much faster than measuring and marking every board individually.
A table saw also makes it easier to produce a straight edge over long flooring boards.
For professional installers or homeowners who already own one, I would strongly prefer a table saw for repeated straight rip cuts.
Do You Need a Table Saw to Install Hardwood?
No.
A table saw is extremely convenient, but it is not essential.
A circular saw with a straightedge can perform the same basic lengthwise cutting operation.
The main difference is speed and repeatability.
If you need to rip ten boards to exactly 2¾ inches wide, a table saw is more efficient because you set the fence once and repeat the cut.
For one or two last-row planks, a guided circular saw may be simpler.
Key Takeaways:
- A table saw is the fastest, most repeatable option for long flooring rip cuts.
- You do not need to buy one solely for one small flooring project.
- A guided circular saw is an excellent substitute when only a few rip cuts are required.
Circular Saw: Best Single Saw for DIY Hardwood Flooring
If you want one saw that can handle the widest variety of hardwood flooring cuts, I recommend a circular saw.
It can make:
- Crosscuts
- Rip cuts
- Bevel cuts
- Wide-board cuts
The main disadvantage is that it relies more heavily on guides and careful marking than a miter or table saw.
For a homeowner installing one room and trying to minimize tool purchases, that tradeoff is usually reasonable.
How to Make Straight Crosscuts
Mark the board with a square and clamp it to a stable cutting surface.
You can cut freehand when a concealed end does not require extreme precision, but a square or straightedge guide makes the result much more consistent.
Remember to account for the distance between the blade and the edge of the saw’s base plate when positioning the guide.
How to Make Long Rip Cuts
For first- and last-row boards, mark the required width at both ends of the plank.
If the wall is not straight, measure at several points and transfer the wall profile to the flooring.
Clamp a straightedge parallel to the cut line and guide the circular saw along it.
A track-style guide can make this process even easier.
Set the Blade Depth Correctly
There is normally no reason to leave the blade at maximum depth for flooring.
Set it so the teeth extend only slightly beyond the bottom of the material—typically around 1/8 to 1/4 inch for a normal through-cut.
This reduces the amount of exposed blade and generally improves control.
Track Saw: Premium Alternative to a Table Saw
A track saw performs many of the same flooring tasks as a circular saw but runs along a dedicated guide rail.
For long rip cuts, it provides outstanding straightness and repeatability.
It also makes it easy to cut a board that tapers because of a crooked wall. Simply position the track along the desired cut line rather than trying to keep the workpiece against a parallel table-saw fence.
Is a Track Saw Worth Buying for Hardwood Flooring?
For one small flooring job, probably not.
A circular saw and straightedge are much less expensive and can achieve a very similar result.
A track saw becomes worthwhile if you also build cabinets, cut sheet goods, trim doors, or perform regular remodeling work.
For contractors, its portability can be particularly attractive because you can obtain table-saw-like straight cuts without carrying a full-size stationary saw into every job.
Jigsaw: Best for Notches and Irregular Flooring Cuts
A jigsaw should not be your primary hardwood flooring saw, but it is one of the most useful secondary tools.
Its narrow reciprocating blade can follow curved and irregular lines.
That makes it ideal when a flooring plank has to fit around:
- Pipes
- Floor vents
- Columns
- Doorways
- Corners
- Irregular walls
A miter saw cannot make these shapes, and a circular saw cannot easily turn corners.
Jigsaw Blade Selection Matters
Use a sharp blade suitable for clean cuts in hardwood.
Standard jigsaw blades usually cut on the upstroke, which can produce more splintering on the upper surface.
For prefinished flooring, you can place the decorative face down when using a normal up-cut blade or choose a reverse-tooth blade designed to produce a cleaner upper face.
Because blade designs vary, make a test cut on an offcut before making a visible cut.
Do Not Use a Jigsaw for Everything
A jigsaw can technically cut a board to length or even rip a plank.
However, the blade can deflect, particularly in thick solid hardwood.
A cut can look straight from above while the bottom edge wanders away from the line.
For long straight cuts, use a miter, circular, track, or table saw whenever practical.
What Saw Is Best for Solid Hardwood Flooring?
For 3/4-inch solid hardwood flooring, my ideal setup is a miter saw and table saw.
The miter saw handles end cuts.
The table saw handles width adjustments.
A jigsaw takes care of detailed fitting.
Solid hardwood is relatively thick and can be demanding on a blade, especially with dense species such as hickory, maple, or oak.
Use a sharp carbide-tipped blade and let the saw cut at its natural rate rather than forcing the board through.
Thick Hardwood Can Change the Best Blade Choice
A very high tooth-count blade may produce a beautiful finish crosscut, but it is not always the fastest choice for long rips through thick solid hardwood.
For rip cuts that will be concealed by trim, a dedicated ripping or combination blade may cut more efficiently and generate less heat.
For visible crosscuts, a higher tooth-count finish blade is preferable.
This is one reason the best flooring shop can use different blades on the miter and table saw rather than expecting one blade design to perform every task equally well.
What Saw Is Best for Engineered Hardwood Flooring?
Engineered hardwood can be cut with the same general saws:
- Miter saw
- Table saw
- Circular saw
- Jigsaw
Because engineered flooring has a real wood veneer over a layered core, preventing surface chipping becomes particularly important.
Use a sharp fine-finish carbide blade for crosscuts.
If the product uses a click-lock edge, also be careful not to remove the wrong tongue or groove when cutting the final plank.
I recommend physically orienting the board as it will sit in the row before making your measurement. This simple step helps prevent cutting off the locking end you still need.
What Saw Blade Is Best for Hardwood Flooring?
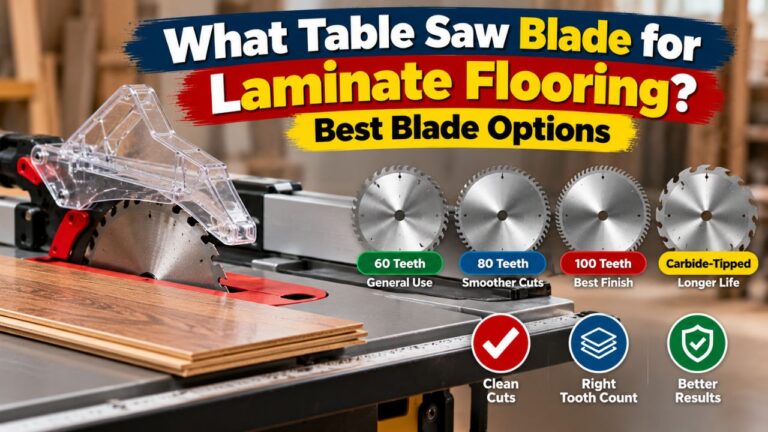
For most hardwood flooring crosscuts, a sharp carbide-tipped finish blade is the best choice.
A 10-inch miter saw fitted with a blade around 60 teeth is a common and practical setup for clean flooring work. Some installers prefer even finer blades when cutting delicate prefinished surfaces.
The correct blade for a table saw depends more on whether you are crosscutting or ripping.
Crosscutting
More teeth generally produce a finer crosscut.
For finished hardwood, approximately 60 teeth on a 10-inch blade is a useful reference point.
A high-quality combination or fine-finish blade can produce clean edges with little splintering.
Ripping
Long rips benefit from larger gullets and fewer teeth so chips can clear effectively.
A dedicated rip blade may therefore have considerably fewer teeth than your miter-saw blade.
If the ripped edge will be concealed beneath baseboard or shoe molding, maximum surface finish may not be necessary.
Combination Blades
A good combination blade is a reasonable choice when you do not want to change blades frequently.
It may not rip as quickly as a dedicated rip blade or crosscut as perfectly as a fine finish blade, but it provides a useful balance for DIY work.
Sharpness Matters More Than Chasing a Specific Tooth Count
A sharp quality blade with a sensible tooth design can outperform a dull blade that has the theoretically perfect tooth count.
If cutting suddenly requires more force, begins burning the wood, or produces increasing splintering, inspect the blade.
Key Takeaways:
- Fine-tooth carbide blades are excellent for clean hardwood flooring crosscuts.
- Long rips through thick hardwood may perform better with a dedicated rip or combination blade.
- Keep the blade sharp; pushing a dull blade harder is not a solution.
Which Side of Hardwood Flooring Should Face Up When Cutting?
The answer depends on the saw.
Miter Saw
With a conventional miter saw, the blade enters through the upper surface.
For prefinished hardwood, I normally place the finished face up.
This generally leaves the decorative surface cleaner.
Table Saw
A table-saw blade rotates upward through the board.
The cleaner surface is generally the top face because the teeth enter from below and cut upward.
Prefinished flooring is therefore commonly placed finished side up on a table saw.
Circular Saw
A standard handheld circular saw typically cuts upward through the material.
The upper surface is more likely to splinter, so I normally place finished side down.
Jigsaw
With a standard up-cut jigsaw blade, place the finished face down.
With a reverse-tooth blade, finished face up can provide the cleaner visible edge.
Always test your particular blade and flooring because tooth geometry can alter the result.
How to Cut Hardwood Flooring Without Splintering
Start with the correct blade and orientation.
Do not use a coarse construction blade for delicate visible cuts simply because it happens to be installed on the saw.
Painter’s tape placed over the cut line can provide a little extra support to the finish and make markings easier to see.
For critical cuts, lightly scoring the finish along the cut line with a sharp utility knife can further reduce fiber breakout.
Support the board properly so it cannot vibrate.
Allow the blade to reach full operating speed before entering the material, and feed it smoothly.
Forcing the blade does not improve productivity if the result is a chipped or burned board.
What Saw Do You Need for the First Row?
The first row sometimes needs to be ripped narrower to produce a balanced room layout or follow an uneven starting wall.
Use a table saw when the cut is parallel and consistent.
Use a track or guided circular saw when the wall is irregular and the plank needs to taper.
Before cutting, plan the full room width.
You generally want to avoid finishing the opposite wall with an extremely narrow strip.
In some rooms, trimming both the first and last rows creates a more balanced appearance.
What Saw Do You Need for the Last Row?
The last row frequently needs a lengthwise rip.
Measure the gap between the installed floor and wall at several points and subtract the required expansion clearance.
If the wall is straight, a table saw is ideal.
If the required width varies, transfer the profile to the board and use a track saw, guided circular saw, or jigsaw as appropriate.
Do not cut the flooring tightly against the wall. Hardwood and engineered flooring need the perimeter space specified by the manufacturer.
What Tool Is Best for Door Jambs?
Instead of trying to shape every flooring plank around door casing, it is generally cleaner to undercut the casing and slide the flooring underneath.
An oscillating multi-tool or jamb saw is ideal.
Place a scrap piece of your flooring beside the casing, including underlayment when appropriate, and use it as the height reference.
Cut the bottom of the casing so the flooring can slide underneath with the required clearance.
This creates a much more professional appearance than cutting a complicated outline around the trim.
Best Saw Setup for a DIY Hardwood Flooring Installation
If you already own a circular saw, you do not necessarily need to buy a table saw.
A practical budget setup is:
Circular saw + jigsaw
The circular saw handles straight rip and crosscuts. The jigsaw handles the detailed work.
For a larger installation, I would add a miter saw.
A miter saw + circular saw + jigsaw gives a homeowner nearly everything needed for cutting hardwood flooring accurately.
For frequent or professional installation work, I would choose:
Sliding miter saw + table saw or track saw + jigsaw + oscillating multi-tool
That setup handles repetitive work quickly without forcing any one tool to perform a job it is poorly suited for.
Common Mistakes When Choosing a Saw for Hardwood Flooring
The first mistake is assuming one saw must perform every cut.
A miter saw is excellent for shortening boards but cannot rip them lengthwise. A table saw makes outstanding rip cuts but is awkward for fitting a small notch around a doorway.
Choose the tool according to the cut.
Another common mistake is focusing on the saw while ignoring the blade. A premium miter saw with a dull construction blade can leave a worse finished edge than an inexpensive saw with the correct sharp blade.
Poor support also causes trouble. Long flooring planks can shift, tilt, or pinch a blade if they hang unsupported.
Finally, do not forget the flooring system itself. Before cutting engineered click flooring, confirm which tongue or groove must remain. For solid hardwood, pay attention to the direction and layout of the board before cutting away an end.
Safety When Cutting Hardwood Flooring
Hardwood flooring is often cut repeatedly over several hours, so small shortcuts can become habits.
Use a stable saw station and support long planks.
Wear eye protection, and use hearing protection around miter, table, and circular saws.
Wood dust should also be controlled. Connect compatible dust extraction where possible and use appropriate respiratory protection when cutting repeatedly.
Never remove guards or disable safety equipment to make a flooring plank fit.
On a table saw, use the riving knife and appropriate push devices. On a miter saw, keep your hands outside the manufacturer’s no-hands zone. With a circular saw, support the work so the kerf does not close and pinch the blade.
Disconnect power or remove the battery before changing blades or clearing a jam.
FAQs about What Saw Is Best for Installing Hardwood Flooring
What is the best saw for hardwood flooring?
A miter saw is the best saw for the repeated crosscuts required during installation.
A table saw is best for long rip cuts, while a circular saw is the best all-purpose choice if you want only one main saw.
Do I need a table saw to install hardwood flooring?
No.
A circular saw with a straightedge can make the long rip cuts normally performed on a table saw.
The table saw mainly improves speed and repeatability.
Can you install hardwood flooring with a circular saw?
Yes.
A circular saw can make both crosscuts and rip cuts, making it one of the most useful tools for a DIY installation.
Add a jigsaw for irregular shapes.
Is a miter saw worth having for hardwood flooring?
Yes, particularly for a full room or several rooms.
You will make many end cuts, and a miter saw makes them far faster and more consistent than a handheld saw.
What size miter saw is best for flooring?
A 10-inch miter saw works well for many flooring products.
For wide engineered boards, a sliding miter saw offers more useful crosscut capacity.
Is a 60-tooth blade good for hardwood flooring?
Yes.
A sharp 60-tooth carbide blade on a typical 10-inch miter saw is a good choice for clean hardwood flooring crosscuts.
Long rip cuts may benefit from a lower-tooth-count ripping or combination blade.
Can I use a jigsaw for hardwood flooring?
Yes.
A jigsaw is particularly useful around pipes, vents, corners, and other irregular shapes.
It is less suitable for long precision rip cuts.
Can a jigsaw cut 3/4-inch hardwood?
Yes, with an appropriate sharp hardwood blade.
However, blade deflection becomes more important in thick material, so keep feed pressure moderate.
What saw is best for the last row of hardwood flooring?
A table saw is best for a straight, consistent-width rip.
A guided circular or track saw is excellent when the cut tapers, and a jigsaw can follow highly irregular wall profiles.
What saw is best for engineered hardwood?
A miter saw works well for repeated crosscuts, while a table or circular saw handles rip cuts.
A jigsaw is useful for detailed shapes.
What blade should I use for prefinished hardwood?
Use a sharp carbide-tipped fine-finish blade.
The exact tooth count depends on saw diameter and the type of cut, but clean crosscuts generally benefit from more teeth than fast rough ripping.
Can I use a chop saw for hardwood flooring?
If by “chop saw” you mean a wood-cutting miter saw, yes.
Do not use an abrasive metal-cutting chop saw for hardwood flooring.
Can I use a track saw instead of a table saw?
Yes.
A track saw is an excellent alternative for straight rips and can be particularly useful for tapered cuts along uneven walls.
What is the minimum saw setup I need?
A circular saw and jigsaw can handle most flooring installations.
The circular saw performs straight cuts, and the jigsaw handles detailed shapes.
Should hardwood face up or down when cutting?
It depends on the saw.
Finished side up is generally appropriate on a standard miter or table saw. Finished side down is generally better with a conventional handheld circular saw or standard up-cut jigsaw blade.
Always test on scrap first.
Conclusion
If you are deciding what saw is best for installing hardwood flooring, a miter saw is my first choice for the large number of crosscuts made during installation. It is fast, accurate, and particularly convenient for shortening end boards and cutting angles.
A table saw is the better tool for long rip cuts, especially when several first- or last-row planks must be reduced to the same width. If you do not own a table saw, a circular saw with a straightedge is an excellent substitute.
For homeowners who want only one primary saw, I recommend a circular saw because it can perform both crosscuts and rip cuts. Pair it with a jigsaw and you can handle almost every plank-cutting situation in a typical room.
For the easiest complete installation, my preferred setup is a sliding miter saw for crosscuts, a table or circular saw for rips, and a jigsaw for notches and irregular shapes. An oscillating multi-tool is also extremely useful for undercutting door casing.
Whatever saw you choose, use a blade appropriate for hardwood and the particular cut. A sharp fine-finish carbide blade is ideal for clean prefinished crosscuts, while a dedicated ripping or combination blade can be more efficient for long cuts through thick solid hardwood.
The best flooring saw is ultimately not one machine that does everything. It is the tool that safely and accurately matches the cut in front of you. Using the right saw for crosscuts, rip cuts, and detail work produces cleaner boards, less waste, and a much easier hardwood flooring installation.