How to Square a Panel Saw for Accurate 90-Degree Cuts
To learn how to square a panel saw, first make sure the saw is stable and the blade is correctly installed, then check whether the blade travels exactly 90 degrees to the material support or fence. Make a test cut on a straight-edged panel, check the cut with a reliable framing or machinist square, and adjust the saw’s guide, carriage, fence, or squaring mechanism until the cut is accurate. Recheck with another test cut before tightening all adjustment hardware fully.
On a vertical panel saw, “squaring” usually means calibrating the blade travel so a crosscut is perfectly perpendicular to the bottom material support. On a horizontal sliding panel saw, the same idea applies, although the adjustment points may involve the sliding table, crosscut fence, or fence stops instead of vertical guide rails.
A panel saw can look square and still produce an inaccurate cut across a large sheet. A tiny alignment error near the blade can become a noticeable difference by the time the cut reaches the opposite edge of a 4-foot or 8-foot panel.
For that reason, the most reliable way to square a panel saw is not simply to place a small square against the blade. You should also verify the machine by making a long test cut and measuring the actual result.
In this guide, I’ll explain how to square a panel saw, what causes it to go out of square, how to check blade and fence alignment, and how to make precise adjustments without introducing a second error.
What Does Squaring a Panel Saw Mean?
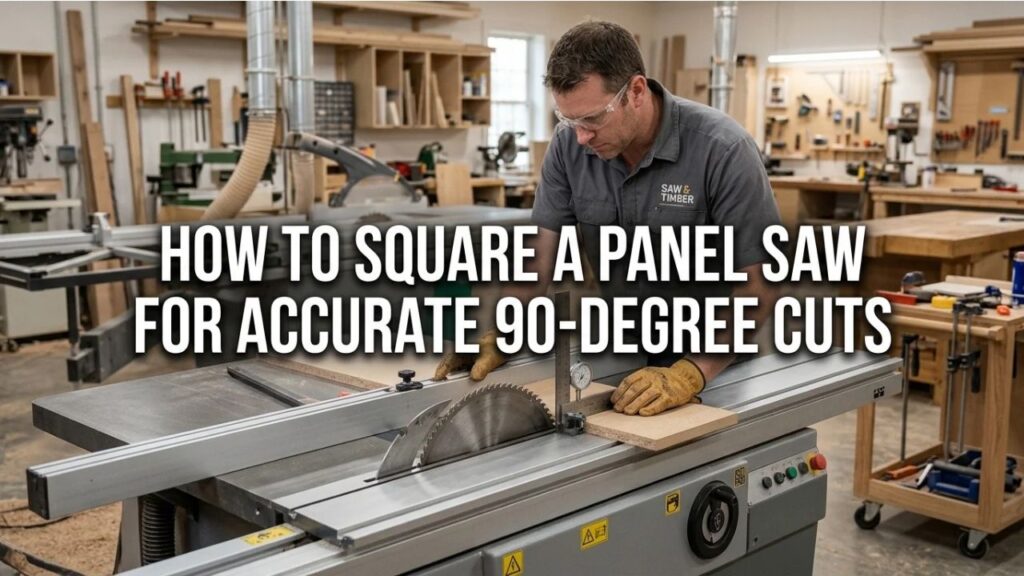
Squaring a panel saw means adjusting the machine so the blade cuts at a true 90-degree angle relative to the reference edge supporting or guiding the workpiece.
On a vertical panel saw, a sheet normally rests on lower supports or rollers.
The saw carriage then moves vertically for crosscuts.
For the resulting cut to be square, the blade’s travel must be exactly perpendicular to the line created by those lower supports.
If the guide rails lean slightly left or right relative to that reference, the cut will also lean.
Squareness Is Different From Blade Bevel
There are actually two different 90-degree relationships to consider.
First, the blade must be perpendicular to the face of the panel so the edge is not beveled.
Second, the blade’s travel path must be perpendicular to the reference edge of the sheet so the finished panel has square corners.
A saw can pass one test and fail the other.
For example, the blade might stand perfectly vertical relative to the sheet but travel diagonally across it.
The result would be a square-edged cut that is still out of square when measured from the panel’s bottom edge.
Key Takeaways:
- Squaring a panel saw means making its cut exactly 90° to the reference edge.
- Blade bevel and carriage travel are separate adjustments.
- A small alignment error can become large across a full sheet.
- Test cuts are more reliable than visual alignment alone.
Why Does a Panel Saw Go Out of Square?
Panel saws can lose calibration through normal use, movement, installation, or wear.
A machine that was accurate when new may begin producing tapered panels if its frame shifts or hardware loosens.
The Saw Was Moved
Vertical panel saws are large machines.
Moving one across a shop floor, loading it into a truck, or relocating it to another wall can slightly twist or rack the frame.
Even a small change can affect calibration.
The Floor Is Uneven
A vertical panel saw needs stable support.
If one side of the frame sits differently from the other, the machine can twist enough to affect alignment.
Leveling is not exactly the same as squaring, but a badly twisted frame can make accurate calibration difficult.
Adjustment Hardware Has Loosened
Bolts holding guide rails, fences, supports, or carriage components can loosen from vibration.
The movement may be tiny, but that can still show up across a large workpiece.
Rollers or Supports Have Shifted
On a vertical panel saw, the lower rollers or material supports establish an important reference line.
If one roller is too high or low, the panel itself may not sit on a straight reference.
You can then chase guide-rail adjustments without ever getting consistent results.
Blade or Carriage Wear
Worn carriage bearings, rollers, bushings, or guides can allow side-to-side play.
In that case, adjustment alone may not solve the problem.
Mechanical play must be corrected before accurate calibration is possible.
What Tools Do You Need to Square a Panel Saw?
You do not need an elaborate calibration kit, but the measuring tools themselves must be trustworthy.
A good large framing square or machinist square is extremely useful.
A straightedge, tape measure, pencil, and large scrap panel are also helpful.
A known-flat piece of plywood or MDF makes a good test workpiece.
Use a Reliable Square
Do not automatically assume your framing square is accurate.
An inexpensive square can itself be out of square.
You can check one using the classic flip test.
Place the square against a known straight edge and draw a line.
Flip the square over while keeping its reference edge against the same straight edge.
Draw a second line from the same starting point.
If the two lines separate significantly, the square itself is inaccurate.
Safety Before Adjusting a Panel Saw
Disconnect electrical power before placing hands near the blade, carriage, guide, or adjustment hardware.
Unplug the machine or follow its lockout procedure.
Do not rely only on the switch.
If the machine uses a removable battery rather than mains power, remove the battery before adjustment.
Make sure the blade has completely stopped before measuring around it.
Do Not Disable Guards
Some alignment checks may require access near the blade, but do not permanently remove or defeat blade guards.
If a guard must be moved according to the manufacturer’s adjustment procedure, restore it before operating the saw.
How to Square a Vertical Panel Saw
The exact adjustment hardware varies by manufacturer, but the general process is similar.
Start by checking the machine itself before changing anything.
Step 1: Make Sure the Panel Saw Is Stable
The frame should sit firmly without rocking.
If it is wall-mounted, confirm that mounting hardware is secure.
If it is free-standing, verify that all feet or supports contact the floor properly.
A twisted or unstable frame makes accurate calibration difficult.
Check the Material Supports
Look along the lower rollers or supports.
They should create one consistent reference line for the bottom edge of the panel.
If a roller is noticeably higher or lower, correct that condition first.
Otherwise, the sheet may tilt even if the saw carriage is perfectly aligned.
Step 2: Inspect the Blade
Make sure the blade is clean, sharp, and mounted correctly.
A warped blade can produce a wandering cut that looks like a squaring problem.
Check that the blade is fully seated against the arbor flange and tightened correctly.
Do not attempt to calibrate the saw around a visibly damaged or wobbling blade.
Step 3: Check the Blade Bevel
Before adjusting the carriage path, verify that the blade is perpendicular to the face of the workpiece.
Position the carriage where you can safely access the blade.
Disconnect power.
Place an accurate square against the blade plate rather than against a carbide tooth.
Carbide teeth often project slightly farther than the blade body and can give a false reading.
If the blade is not 90 degrees to the panel plane, adjust the bevel or motor mounting according to the saw’s design.
Why Blade Bevel Comes First
If the blade itself is tilted, the cut edge may be beveled.
That makes later squareness measurements less reliable.
Establish the blade at 90 degrees first, then calibrate its direction of travel.
Step 4: Make an Initial Test Cut
Use a reasonably large piece of plywood or MDF with one known straight reference edge.
Place that edge firmly against the lower support or rollers.
Make a full crosscut.
Do not push or pull the sheet sideways during the cut.
Let the panel stay naturally against its reference supports.
After the cut, disconnect the saw before making adjustments.
Step 5: Check the Cut With a Large Square
Place a reliable square against the original reference edge.
Compare the square with the freshly cut edge.
If there is no visible gap from one end to the other, the saw may already be adequately square.
If the gap increases toward one end, the blade path is not perpendicular to the bottom reference.
Use as Much Length as Possible
A small 6-inch square may hide an error that becomes obvious over 24 or 48 inches.
For panel saw calibration, longer measuring references are more informative.
Step 6: Determine Which Direction the Saw Is Out
Before loosening hardware, determine whether the cut leans left or right.
Mark the result.
It is easy to become confused once adjustment bolts are loosened.
For example, if the cut moves progressively farther to the right as the carriage travels upward, the guide system needs correction in the appropriate opposite direction.
The exact adjustment direction depends on the saw’s construction.
Step 7: Adjust the Guide Rails or Squaring Mechanism
Many vertical panel saws allow the guide assembly, rail system, or upper mounting point to shift slightly.
Loosen the required hardware only enough to permit controlled adjustment.
Do not completely dismantle the assembly unless the manufacturer specifically requires it.
Move the rail or guide by a very small amount.
Then lightly tighten the hardware.
Make Tiny Adjustments
Do not try to correct a visible 1/8-inch panel error by moving the rail 1/8 inch at the mounting point.
The geometry does not necessarily translate directly.
A tiny movement of the guide can have a much larger effect at the far end of a long cut.
Adjust gradually.
Step 8: Make Another Test Cut
Use a fresh straight edge or another section of your test panel.
Repeat the full crosscut.
Check again with the square.
If the error became smaller, you moved in the correct direction.
If it became larger, reverse the adjustment.
Continue until the cut is consistently square.
Step 9: Tighten All Hardware
Once calibration is correct, tighten the adjustment hardware securely.
Then make another cut.
This final check matters because tightening bolts can sometimes move the guide slightly.
Do not assume calibration remains perfect after everything is torqued down.
Key Takeaways:
- Stabilize the machine before touching alignment adjustments.
- Check blade bevel before carriage squareness.
- Use a large panel for test cuts.
- Make tiny adjustments and recheck after final tightening.
How to Use the Diagonal Measurement Method
If you want greater accuracy, cut a rectangular test panel and measure its diagonals.
A true rectangle has equal diagonal measurements.
For example, after trimming all necessary reference edges, measure from the upper-left corner to the lower-right corner.
Then measure from the upper-right corner to the lower-left corner.
If the measurements are equal, the panel is square.
Why This Method Is Useful
A framing square checks one corner at a time.
Diagonal measurement evaluates the geometry of the entire rectangle.
This can expose a small accumulated error across a large panel.
The Five-Cut Method for Higher Accuracy
Woodworkers often use a multiple-cut calibration method to amplify small squareness errors.
A similar concept can be used on suitable panel saws when you need very fine calibration.
Start with a rectangular panel.
Trim one edge.
Rotate the panel and trim the next edge.
Continue rotating and cutting until you have referenced all four sides.
Then make an additional narrow cut from the first side.
Measure the width of that strip at both ends.
Any difference represents accumulated squareness error over several cuts.
Why Error Amplification Helps
A machine might be only slightly out of square.
One cut may not show enough error to measure easily.
Repeated rotations multiply the effect, making it easier to detect.
For routine DIY panel cutting, a large square and diagonal check are usually enough.
For cabinetry or production work, a multi-cut method can provide finer calibration.
How to Square a Sliding Table Panel Saw
A horizontal sliding panel saw uses different mechanics from a vertical wall-style saw.
Instead of a carriage moving down guide rails, the workpiece usually moves on a sliding table past a stationary blade.
Squareness depends on the relationship between the blade, sliding table, and crosscut fence.
Start With Blade Alignment
First verify that the blade is parallel to the intended reference path of the sliding table.
If the blade is skewed relative to the table travel, the saw can bind, burn the workpiece, or produce inconsistent cuts.
Use the manufacturer’s alignment procedure.
Check the Crosscut Fence
The crosscut fence must be exactly 90 degrees to the blade’s cutting direction.
Place an accurate square between the fence and the blade plate with the machine disconnected.
Avoid measuring against a projecting carbide tooth.
Make a Test Cut
Crosscut a large test panel.
Flip or measure the resulting edge using a framing square.
If the result is out of square, make a small fence adjustment and repeat.
For precision cabinetry, use a five-cut calibration method if appropriate.
How to Square a Panel Saw Fence
The fence must provide a straight, repeatable reference.
Before adjusting the fence angle, verify that the fence itself is not bent.
A warped fence cannot be calibrated accurately.
Check 90 Degrees
With power disconnected, place a reliable square against the fence and appropriate blade reference.
If there is a gap, loosen the fence adjustment or stop and shift it slightly.
Retighten and verify.
Calibrate the 90-Degree Stop
Many saws have an adjustable stop that allows the fence to return quickly to 90 degrees.
Once the fence is truly square, adjust the stop to contact at that position.
This lets you return to square after making angled cuts.
Do not calibrate the stop before calibrating the actual fence.
How to Check Panel Saw Blade Alignment
Blade alignment matters for both accuracy and cut quality.
A blade can be perpendicular to the panel yet still be misaligned relative to the carriage or table.
Look for Blade Runout
Rotate the unplugged blade by hand while observing its position against a fixed reference.
A visibly wobbling blade may be bent or mounted incorrectly.
Significant blade runout should be corrected before squaring the machine.
Check the Arbor and Flanges
Dirt, pitch, or debris trapped between the blade and arbor flange can prevent the blade from seating flat.
Clean these surfaces when changing blades.
Do not attempt to solve runout by adjusting the panel saw frame.
Why Is My Panel Saw Cutting Out of Square?
If calibration keeps changing, look for a mechanical problem.
The guide carriage may have play.
A roller may be loose.
The fence may not lock securely.
The panel may be sagging.
The frame may be twisting under load.
Material Can Cause Apparent Errors
Plywood and MDF are usually stable enough for testing, but warped sheets can make measurements confusing.
Use a flat test piece.
Make sure its reference edge is actually straight.
A crooked factory edge will make a perfectly calibrated saw appear inaccurate.
Does the Panel Saw Have to Be Level to Be Square?
Not necessarily.
Level and square describe different relationships.
A saw could theoretically be slightly tilted relative to the floor yet still make perfectly square cuts.
However, a vertical panel saw should be installed according to the manufacturer’s leveling and mounting requirements because an uneven installation can twist the frame.
So while level does not directly create 90-degree cuts, proper installation supports consistent squareness.
How Accurate Should a Panel Saw Be?
The required accuracy depends on the work.
Construction sheathing generally tolerates more error than cabinet parts.
If you are breaking down plywood for rough framing, a tiny fraction of an inch over several feet may not matter.
For cabinets, furniture, or built-ins, small errors can multiply during assembly.
Focus on Repeatability
A saw that consistently produces the same tiny error can often be adjusted.
A saw that produces a different result every cut has another problem.
Look for loose components, carriage play, material movement, or poor work support.
How Often Should You Square a Panel Saw?
There is no universal schedule.
Check squareness whenever cuts begin fitting poorly, after moving the machine, after major service, or after a hard impact.
Production shops may check calibration routinely because small errors can waste expensive sheet goods.
For occasional DIY use, making a quick test cut before a precision project is usually sufficient.
Can Changing the Blade Affect Squareness?
Changing blades normally should not alter the guide alignment, but it can reveal or create other issues.
A different blade may have more runout.
Debris can become trapped on the arbor.
A thicker or thinner blade may also change the relationship between the kerf and measurement indicators.
After installing a new blade, verify both cut quality and calibration before beginning precision work.
Why Does My Panel Saw Cut Square at the Top but Not the Bottom?
This can indicate that the reference support is inconsistent or the panel is shifting.
On a vertical saw, inspect lower rollers and supports.
A damaged or uneven roller can tilt the workpiece.
Carriage play can also make the saw head move differently depending on its position.
Check the full guide system rather than adjusting only one stop.
Why Does My Panel Saw Cut a Taper?
A taper means the finished piece is wider at one end than the other.
This often happens when the blade travel is not perpendicular to the reference edge.
It can also result from the workpiece moving during the cut.
Make sure the sheet remains firmly supported and does not slide laterally.
If repeated test cuts show the same taper, recalibrate the saw.
Should You Square the Saw Using the Blade or the Cut?
Use both, but trust the cut as the final test.
Measuring directly against the blade is useful for preliminary setup.
It helps identify a large misalignment quickly.
However, many factors affect what the workpiece actually experiences.
Blade runout, carriage movement, frame geometry, and support alignment all combine during cutting.
A test cut incorporates all of those factors.
Common Mistakes When Squaring a Panel Saw
One common mistake is adjusting the guide before confirming that the material supports are straight.
Another is using an inaccurate framing square.
A third is measuring against a carbide tooth instead of the blade plate.
People also sometimes make large adjustments after a small cutting error, overshooting the correct setting.
Another common mistake is checking the machine over only a short distance.
A saw can appear square across 6 inches yet be noticeably wrong over 4 feet.
Finally, do not calibrate around a dull, warped, or incorrectly installed blade.
FAQs About How to Square a Panel Saw
How do you square a panel saw?
Make a test cut on a flat panel with a known straight reference edge, check the cut with an accurate large square, then adjust the guide rails, carriage, fence, or squaring mechanism until the cut is exactly 90 degrees.
How do I know if my panel saw is out of square?
A freshly cut panel will show a growing gap when checked against a framing square, or opposite diagonal measurements will differ.
Should I square the blade or the fence first?
First verify that the blade is properly installed and perpendicular to the panel face. Then calibrate the fence, guide, or carriage travel.
Can a panel saw be level but not square?
Yes. Level describes the machine relative to gravity, while square describes the cutting relationship between the blade and reference edge.
Can a panel saw be square but not level?
Technically yes, although the machine should still be installed according to its manufacturer’s leveling requirements to avoid frame distortion.
Why is my panel saw cutting crooked?
Possible causes include guide misalignment, uneven supports, carriage play, a warped blade, material movement, or a crooked reference edge.
How do you check a panel saw with a framing square?
Place the square against the panel’s known straight reference edge and compare its blade with the freshly cut edge. A widening gap indicates an out-of-square cut.
Is a small square accurate enough?
It can detect large errors, but a larger square or long test panel makes small errors easier to see.
How do you check whether a rectangular panel is square?
Measure both diagonals. If the rectangle is properly formed and both diagonals are equal, it is square.
What is the five-cut method?
It is a calibration method involving repeated cuts and rotations of a panel to amplify small angular errors, making them easier to measure.
Why does my panel saw cut a taper?
The blade path may not be perpendicular to the reference edge, or the panel may be shifting during the cut.
Can a dull blade make a panel saw appear out of square?
Yes. A dull blade can deflect or wander, particularly if the operator forces the cut.
Should I unplug a panel saw before squaring it?
Yes. Disconnect power before placing measuring tools or hands near the blade, carriage, or adjustment hardware.
How often should I check panel saw squareness?
Check it after moving the saw, after major service, whenever cut accuracy changes, and before precision work when necessary.
Does tightening the adjustment bolts change calibration?
It can. Always perform another test cut after fully tightening the adjustment hardware.
Conclusion
Learning how to square a panel saw is mainly a matter of establishing a reliable reference, measuring the actual cut, making small adjustments, and verifying the result.
For a vertical panel saw, start by confirming that the machine is stable and that the lower material supports or rollers form a straight reference line.
Then check that the blade is correctly installed and sits perpendicular to the face of the panel.
After that, make a long test crosscut.
Use an accurate framing or machinist square to compare the new cut with a known straight reference edge.
If the cut is not 90 degrees, adjust the guide rail, carriage alignment, or built-in squaring mechanism slightly and repeat the test.
For a sliding-table panel saw, focus on the relationship between the blade, sliding table, and crosscut fence.
The fence must be perpendicular to the actual blade path, not merely positioned where its scale says 90 degrees.
Whatever style of panel saw you use, avoid making calibration decisions based solely on a small square placed against the blade. A full-size test cut provides a much better picture of the machine’s real accuracy.
If you need higher precision, compare the diagonals of a rectangular test panel or use a multi-cut calibration method to amplify small angular errors.
Also remember that repeated inconsistent cuts may indicate something more than simple calibration. Worn carriage components, loose guides, uneven rollers, a warped blade, or a moving workpiece can all prevent the saw from holding square.
The practical approach is straightforward: stabilize the saw, verify the blade, establish a straight material reference, make a long test cut, measure the result, and make tiny adjustments until the cut is truly 90 degrees. Then tighten everything and test it one final time.