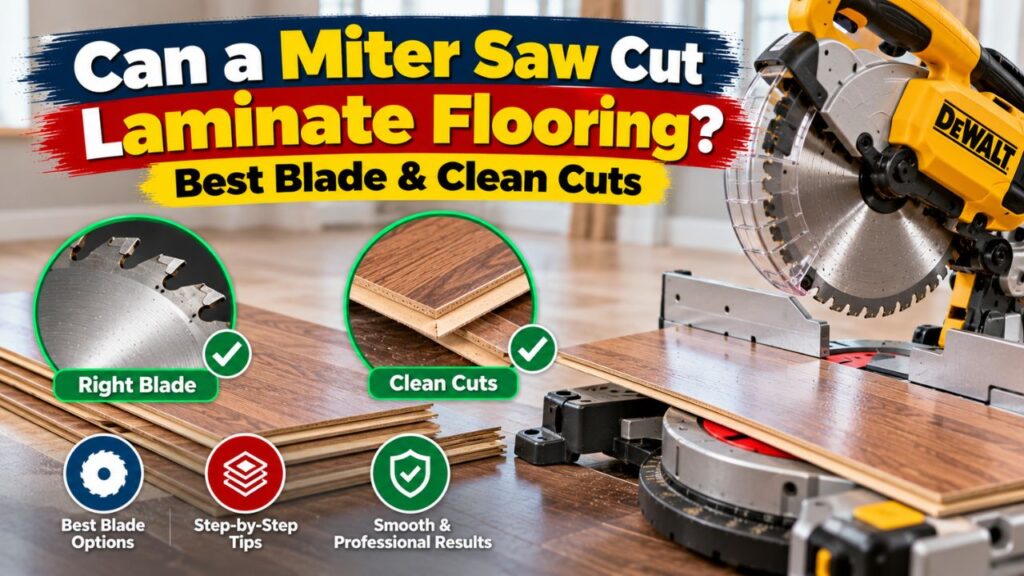
Can a Miter Saw Cut Laminate Flooring? Best Blade & Clean Cuts
Can a miter saw cut laminate flooring? Yes. A miter saw is one of the best tools for making fast, accurate crosscuts and angled cuts in laminate flooring. With a sharp fine-tooth carbide blade, proper plank support, and the finished surface facing the correct direction, a miter saw can leave a clean edge with minimal chipping.
A miter saw is especially useful during a full-room installation because nearly every row eventually requires a plank to be shortened. Instead of measuring and cutting each end by hand, you can set the plank against the fence and make a square cut in seconds.
The limitation is that a miter saw is primarily a crosscutting tool. It is excellent for shortening laminate flooring but is not normally the right machine for ripping a plank lengthwise. You will usually need a table saw, circular saw, jigsaw, or flooring cutter for the first and last rows if the planks need to be narrowed.
Blade selection also matters. Laminate has a hard wear layer over a decorative surface and a dense fiberboard core. It can chip easily and may dull ordinary woodworking blades faster than typical lumber. A sharp fine-finish carbide blade gives much better results than a coarse framing blade.
In this guide, I’ll explain when to use a miter saw for laminate flooring, which blade works best, which side should face up, how to prevent chipping, how to measure and cut accurately, and when another saw is the better choice.
Can You Use a Miter Saw for Laminate Flooring?
Yes, provided the saw is designed for woodworking and has enough crosscut capacity for your plank width.
A standard non-sliding miter saw can handle many narrow laminate planks. Wider flooring may require a sliding compound miter saw because its blade can travel forward and backward across a broader workpiece.
For ordinary end cuts, the process is simple.
The plank rests flat on the saw table with its edge against the fence. You line up your mark, start the blade, let it reach full speed, and lower it smoothly through the flooring.
The result should be a square cut that can fit against the wall while leaving the expansion clearance required by the flooring manufacturer.
Why a Miter Saw Works So Well
The biggest advantage is repeatability.
When you are installing flooring, you may need dozens of crosscuts. A miter saw lets you repeat the same cutting procedure without manually guiding a saw across every plank.
It is also easy to make accurate 90-degree cuts because the fence holds the flooring square to the blade.
If a wall, doorway, or transition requires an angled end, you can rotate the miter table to the required angle and make that cut as well.
What a Miter Saw Cannot Do Well
The main limitation is long rip cuts.
If a plank is 48 inches long and you need to remove 2 inches from its entire length, a miter saw is not designed to feed the board lengthwise past the blade.
Do not improvise by turning the plank and making a series of overlapping cuts.
Use an appropriate ripping tool instead.
Key Takeaways:
- A miter saw is excellent for straight and angled laminate crosscuts.
- A sliding miter saw provides more capacity for wide planks.
- Use another tool for long rip cuts, curves, and most detailed notches.
What Blade Should You Use to Cut Laminate Flooring?
Use a sharp fine-tooth carbide-tipped blade designed for clean crosscutting or finish work.
Laminate flooring is harder on blades than ordinary softwood because its wear layer, decorative coating, adhesives, and high-density fiberboard core can be abrasive.
A coarse blade may cut quickly, but it is more likely to damage the visible surface.
How Many Teeth Should a Miter Saw Blade Have?
The ideal tooth count depends partly on blade diameter.
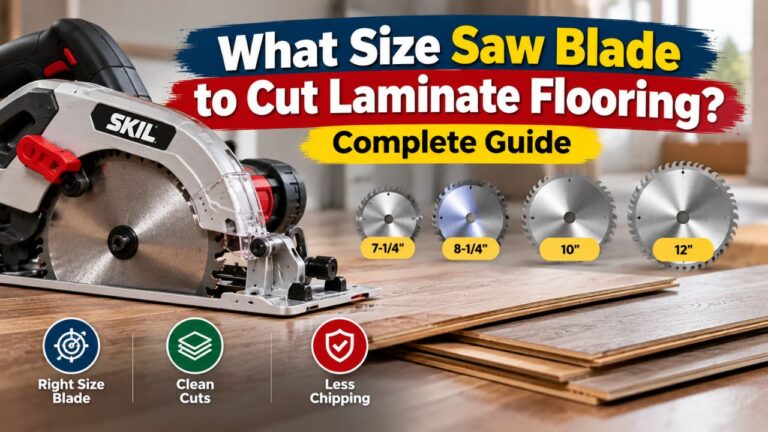
For a common 10-inch miter saw, something around 60 to 80 teeth is a practical range for clean laminate crosscuts.
For a 12-inch saw, a fine-finish blade may have approximately 80 to 100 teeth.
These are useful starting points rather than mandatory specifications.
Blade geometry and quality matter too. A sharp premium 60-tooth finish blade can sometimes produce a cleaner result than a cheap 100-tooth blade.
If the flooring manufacturer recommends a specific blade type, follow that guidance.
Why Carbide Teeth Matter
Laminate can dull plain steel teeth quickly.
Carbide-tipped blades stay sharp longer and are much better suited to repeated cuts in manufactured wood products.
A sharp blade also reduces the amount of pressure required to make the cut.
That improves both cut quality and control.
Is an ATB Blade Good for Laminate?
Yes. An alternate top bevel, or ATB, blade is a common choice for clean woodworking crosscuts.
The teeth alternate their bevel direction, helping slice through surface fibers cleanly.
A fine-finish ATB blade can work very well on laminate flooring.
Blades marketed for laminate, melamine, plywood, or finish trim may use slightly different tooth geometries, but all can be suitable when the manufacturer specifically lists the material.
Which Side of Laminate Flooring Faces Up on a Miter Saw?
With a conventional miter saw, place the finished decorative side facing upward.
A miter-saw blade generally enters the upper face of the workpiece as it moves downward through the plank.
That means a sharp blade cuts into the decorative surface rather than pulling aggressively out of it.
This usually produces less visible chipping on top.
Make a Test Cut First
Although finished-side-up is the normal rule, a test cut is always worthwhile.
Use an offcut from the same flooring and inspect both sides after cutting.
If one face shows noticeably more chipping, orient the remaining planks so the visible finished face gets the cleaner side of the cut.
Different blade designs and flooring constructions can behave slightly differently.
How to Cut Laminate Flooring With a Miter Saw
The cutting process is straightforward, but careful measurement and setup prevent most mistakes.
1. Read the Flooring Installation Instructions
Before making any cut, confirm the required perimeter expansion gap and joint-stagger requirements for your flooring.
Laminate is normally installed as a floating floor.
It must have room to expand and contract around walls and other fixed objects.
Do not assume every flooring brand requires exactly the same clearance.
2. Measure the Remaining Space
Measure from the end of the last installed plank to the wall.
Subtract the required expansion gap.
That gives you the finished length for the next piece.
For example, if you measure 26 inches to the wall and the flooring instructions require a specific clearance, the cut plank must be shorter by that amount.
3. Check the Locking Profile
Before marking the plank, look at its tongue, groove, or click-lock ends.
Make sure you are cutting off the end you do not need.
This is one of the easiest flooring mistakes to make.
You can produce a perfectly accurate cut and still ruin the plank if you remove the locking profile required to connect it to the previous board.
4. Mark the Cut
Measure from the correct end and make a pencil mark.
Use a carpenter’s square to draw a straight line across the plank.
Do not use the decorative wood-grain print as a reference because the pattern may not run perfectly square.
5. Set the Miter Saw to 90 Degrees
For a normal end-of-row cut, set the miter angle to zero.
Make sure the locking mechanism is fully engaged.
Remove loose scraps or sawdust from the table and fence so the plank can sit flat.
6. Support the Plank
Long laminate planks can hang well beyond the saw table.
Use a work support or stand so the plank stays level.
If one end drops downward, the flooring can lift away from the saw table and change the cut angle.
Proper support also makes the workpiece easier to control.
7. Put the Finished Side Up
Lay the plank with its decorative face upward and its rear edge firmly against the fence.
Make sure it sits completely flat.
The plank should not rock or bow.
8. Align the Blade With the Waste Side
With the saw turned off, lower the blade close to the flooring so you can see where the teeth will pass.
Keep the kerf primarily on the waste side of your pencil line.
The blade removes a small amount of material, so cutting through the center of your mark can make the finished piece slightly short.
9. Position Your Hands Safely
Hold the plank firmly without placing your hand inside the saw’s marked no-hands zone.
If the piece is too short to control safely, use the clamping method recommended by the saw manufacturer.
Never trade hand clearance for a slightly easier cut.
10. Start the Saw Before Contacting the Flooring
Raise the blade clear of the plank.
Start the motor and wait until the blade reaches full speed.
Then lower it smoothly.
Starting while the blade is already touching the laminate can cause grabbing and a rougher initial cut.
11. Cut Smoothly
Use controlled pressure.
Do not force the blade through the flooring.
A sharp blade should cut without excessive resistance.
If the motor slows significantly or the plank begins vibrating, stop and check the blade and workpiece setup.
12. Let the Blade Stop Before Raising It
After the blade has passed completely through the plank, release the trigger while keeping the saw head down.
Wait until the blade stops.
Then lift the saw.
This reduces the chance that a spinning blade will catch the cut edge or a loose offcut on its way back upward.
13. Test-Fit the Flooring
Place the cut plank in the row.
Check the locking joint and perimeter clearance.
Do not force a plank that is too long into place.
Remove it and trim it accurately.
Key Takeaways:
- Measure with the required expansion gap in mind.
- Confirm the tongue or click-lock orientation before cutting.
- Cut with the finished side up and keep the blade on the waste side of your mark.
- Allow the blade to stop before lifting the saw head.
How to Prevent Laminate Flooring From Chipping
Chipping is the most common complaint when cutting laminate with a miter saw.
Fortunately, it is usually manageable.
Use a Sharp Blade
Blade sharpness has a larger effect than almost anything else.
A dull blade does not slice the surface cleanly.
It tears and crushes the laminate instead.
If you notice that cuts were clean early in the installation but gradually become rough, inspect the blade.
Laminate can dull teeth faster than ordinary lumber.
Use a Finer Blade
If your current blade has relatively few large teeth, switching to a fine-finish blade can significantly improve the edge.
Avoid using a rough framing blade unless the cut will be completely hidden and appearance does not matter.
Even then, a fine blade makes the saw easier to control.
Use Painter’s Tape
For flooring that chips particularly easily, place painter’s tape over the cut line.
Mark directly on the tape.
It can help support the surface layer as the teeth pass through it.
Remove the tape carefully after cutting.
This technique is optional; a sharp blade should still be your first priority.
Support the Plank Near the Cut
If the workpiece vibrates, the decorative surface is more likely to chip.
Make sure the plank is flat against both the saw table and fence.
Support long boards at the same height as the table.
Use a Sacrificial Fence
For especially clean work, an auxiliary sacrificial fence can support the back of the plank closer to the blade.
A zero-clearance-style support reduces the open space into which the laminate surface can splinter.
Only add auxiliary fences or inserts in ways that are compatible with your saw’s guard system and manufacturer instructions.
Can a Miter Saw Rip Laminate Flooring Lengthwise?
Normally, no.
A miter saw is built to move its blade across the width of a stationary workpiece.
A rip cut requires cutting parallel to the long edge of the flooring.
If you need to narrow the final row of laminate, use a tool designed for that job.
Table Saw
A table saw is usually the fastest solution for repeated straight rip cuts.
The rip fence controls the finished width and allows the entire plank to move past the blade.
Use an appropriate fine-tooth blade and follow normal table-saw safety procedures.
Circular Saw
A circular saw can make a good long rip cut when used with a straightedge or guide.
This is useful if you do not have a table saw or if you prefer to cut flooring at the job site.
Jigsaw
A jigsaw is slower but works well when the wall is irregular and the cut must follow a slight curve.
It is also useful for notches around obstacles.
Laminate Flooring Cutter
A manual flooring cutter can make many laminate cuts without electricity or airborne sawdust.
The exact capabilities vary by cutter, so check whether the model can handle both crosscuts and long rips in your flooring type.
Can a Miter Saw Cut the Last Row of Laminate Flooring?
Only if you need to shorten the plank.
The last row commonly requires a long lengthwise cut because a full-width plank is too wide for the remaining space.
That job exceeds the normal purpose of a miter saw.
Measure the distance from the installed row to the wall at several points.
Subtract the required expansion gap.
Then transfer those measurements to the flooring and use a table saw, circular saw, or jigsaw to rip the plank.
Walls are often not perfectly straight, so do not assume one measurement represents the entire length.
Can a Miter Saw Cut Angles in Laminate Flooring?
Yes.
This is one of its main advantages over many flooring cutters.
If a wall or transition runs at an angle, use a bevel gauge or another measuring tool to determine the actual angle.
Transfer that information to the saw and adjust the miter table.
Do not automatically assume an angled corner is exactly 45 degrees.
Real rooms are frequently out of square.
When a cut is difficult to measure, leaving the plank slightly long on the first attempt may be safer. You can remove another small amount of material if necessary.
Can You Use a Miter Saw Around Door Frames?
A miter saw can cut the flooring plank to the required length, but it is usually not the right tool for trimming the door casing itself.
Laminate often looks cleaner when the flooring slides underneath the casing.
To do this, use an undercut saw or oscillating multi-tool.
Place a scrap section of laminate and any required underlayment beside the casing to establish the finished floor height.
Use that as your guide while trimming the bottom of the casing.
The flooring can then slide underneath while retaining the appropriate movement clearance.
Can You Cut Laminate Around Pipes With a Miter Saw?
Not efficiently.
A pipe opening usually requires a circular or curved cut.
Use a jigsaw, hole saw, or another suitable detail-cutting tool.
Measure the pipe position carefully and leave the clearance required by the flooring manufacturer.
Do not fit a floating laminate plank tightly around the pipe.
A pipe collar or escutcheon can conceal the expansion space afterward.
Miter Saw vs. Circular Saw for Laminate Flooring
Both can cut laminate well, but their strengths differ.
| Task | Miter Saw | Circular Saw |
| Fast crosscuts | Excellent | Good |
| Repeated square cuts | Excellent | Good |
| Angled end cuts | Excellent | Good |
| Long rip cuts | Poor choice | Very good with guide |
| Jobsite portability | Moderate | Excellent |
| Curves | No | No |
| Wide-plank capacity | Depends on saw | Usually flexible |
If most of your cuts involve shortening planks, the miter saw is easier.
If you own only one power saw and need both crosscuts and rip cuts, a circular saw is more versatile.
Miter Saw vs. Jigsaw for Laminate Flooring
A jigsaw is best for shapes the miter saw cannot make.
Use the miter saw for straight end cuts.
Use the jigsaw for:
Notches, pipe areas, curved walls, vents, and unusual obstacles.
A jigsaw usually cuts more slowly and can wander during long straight cuts.
For square crosscuts, I would choose the miter saw every time.
Miter Saw vs. Laminate Flooring Cutter
A flooring cutter has one major advantage: it can operate with very little airborne dust.
It can also be quieter than a power saw.
For simple straight cuts, this makes it attractive for indoor installations.
A miter saw has greater versatility.
It can make angle cuts, work with other wood products, and produce highly accurate repeated crosscuts.
If you already own a miter saw, there is usually no need to buy a dedicated cutter solely for a small laminate project.
For professional flooring installation, having both can be useful.
Can Laminate Flooring Damage a Miter Saw Blade?
It will not normally damage a suitable blade immediately, but it can accelerate wear.
Laminate is relatively abrasive.
After many cuts, a blade that stays sharp for a long time in ordinary pine may begin cutting laminate less cleanly.
Signs that the blade needs attention include:
- Increased cutting resistance
- Burning
- Rough edges
- More chipping than before
Clean the blade if resin or adhesive residue has accumulated.
Replace or professionally sharpen it if the carbide edges become dull.
Never use a blade with cracked teeth, missing carbide tips, or other structural damage.
Why Does My Miter Saw Burn Laminate Flooring?
Burning usually indicates excess friction.
A dull blade is a common cause.
Feeding extremely slowly can also let the blade rub against the material instead of cutting efficiently.
Check whether the blade is clean, sharp, and appropriate for laminate.
Also make sure the plank is sitting square against the fence.
If the workpiece shifts or twists during the cut, it can rub against the sides of the blade and create heat.
Why Is My Miter Saw Chipping the Flooring?
Start with blade selection.
A coarse or dull blade is the most likely explanation.
Then check flooring orientation.
The decorative surface should normally face upward.
Poor support can also contribute. A long plank hanging from the table may move as the blade enters it.
Finally, do not lift a still-spinning blade back through the flooring.
Let the blade stop before raising the saw.
Can You Cut Multiple Laminate Planks at Once?
It may seem faster to stack several planks, but I generally recommend cutting them individually unless the saw manufacturer and your work-holding arrangement specifically permit stacked cutting.
Multiple flooring planks can shift against one another.
That can reduce accuracy and make the stack more difficult to secure.
Because miter-saw cuts take only a few seconds, cutting individual planks usually provides better control with little impact on total installation time.
Do You Need to Leave an Expansion Gap?
Yes, laminate flooring typically requires perimeter movement space, although the exact amount depends on the product and installation.
A common mistake is measuring a plank exactly from one wall to the other and cutting it for a tight fit.
That can leave the floating floor trapped.
Changes in room conditions can cause laminate to expand, potentially contributing to lifting or stressed joints.
Your flooring manufacturer’s instructions should specify the correct gap.
Baseboard or shoe molding normally covers the space afterward.
Key Takeaways:
- Do not cut planks tightly between fixed walls.
- Use the exact expansion clearance specified for your flooring system.
- A miter saw is for crosscuts; use a proper ripping tool when narrowing the first or last row.
Miter Saw Safety When Cutting Laminate Flooring
A miter saw can make flooring work much faster, but its blade operates at high speed.
Wear appropriate eye protection and hearing protection.
Keep the blade guard installed and functional.
Use the saw only on a stable surface.
Support long planks so they remain level with the saw table.
Keep your hands outside the manufacturer’s no-hands zone.
If a workpiece is too short to hold safely, clamp it or modify the flooring layout instead of putting your fingers near the blade.
Control Laminate Dust
Power-saw cutting produces fine dust from the laminate surface and fiberboard core.
Use the saw’s dust collection system whenever possible.
Connecting an appropriate vacuum can substantially reduce cleanup and airborne dust.
For repeated cutting, suitable respiratory protection and good ventilation are also worthwhile.
Avoid allowing large amounts of flooring dust to accumulate around the saw.
Do Not Cut With the Blade Guard Disabled
A guard that interferes with the flooring may indicate that the workpiece or machine is being positioned incorrectly.
Do not tie or hold the guard open to make cutting more convenient.
If the flooring cannot be cut with the saw in its normal operating configuration, use a different cutting method.
Is a Sliding Miter Saw Better for Laminate Flooring?
It can be, particularly for wide planks.
A standard miter saw has a maximum crosscut capacity determined by blade diameter and saw design.
A sliding saw allows the blade assembly to travel across the workpiece, dramatically increasing that capacity.
If your laminate is too wide for a standard saw to cut through in one controlled operation, a sliding model is the better choice.
However, a sliding mechanism is not required for ordinary narrow flooring.
If your existing non-sliding saw can comfortably cut through the full width of the plank, it already has enough capacity.
Is a 10-Inch or 12-Inch Miter Saw Better?
Either can cut laminate flooring effectively.
A 10-inch saw is often lighter, less expensive, and capable of handling common plank widths, particularly in a sliding configuration.
Replacement blades also tend to cost less.
A 12-inch saw provides more capacity and can handle larger woodworking tasks outside flooring.
However, the larger blade is not automatically cleaner.
Cut quality depends mainly on tooth configuration, sharpness, machine condition, and technique.
Choose based on the plank width and the other work you expect the saw to perform.
FAQs about Can a Miter Saw Cut Laminate Flooring
Can a miter saw cut laminate flooring cleanly?
Yes. A miter saw fitted with a sharp fine-tooth carbide blade can produce very clean crosscuts in laminate flooring.
Keep the finished surface upward and support the plank securely.
What blade should I use for laminate flooring on a miter saw?
Use a fine-finish carbide-tipped crosscut blade.
For a 10-inch saw, approximately 60 to 80 teeth is a common useful range, while larger 12-inch finish blades may use roughly 80 to 100 teeth.
Blade quality and manufacturer recommendations matter more than one exact tooth count.
Should laminate flooring face up or down on a miter saw?
Place the decorative finished face upward for a conventional miter saw.
Make a scrap test if you want to confirm the cleanest orientation for your particular blade.
Can I use a 40-tooth blade?
A sharp 40-tooth blade can cut laminate, but it may produce more chipping than a finer finish blade.
For visible edges, I would use a finer blade.
Can a miter saw rip laminate flooring?
A miter saw is not designed for long rip cuts along the length of a flooring plank.
Use a table saw, circular saw, or another appropriate ripping tool.
Can a miter saw cut wide laminate planks?
Yes, if the saw has sufficient crosscut capacity.
A sliding miter saw is particularly useful for wide flooring.
Can you cut laminate flooring at 45 degrees?
Yes. Rotate the miter table to the required angle and make the cut normally.
Measure the actual room angle rather than assuming every corner is exactly 45 degrees.
Will laminate flooring dull a miter saw blade?
Yes, repeated laminate cutting can dull a blade faster than ordinary softwood.
Its hard surface and manufactured core are relatively abrasive.
A carbide-tipped blade is the best choice.
Why is my laminate chipping?
Common reasons include a dull or coarse blade, poor support, incorrect surface orientation, or moving the saw too aggressively.
Start by using a sharp fine-finish blade.
Can I use a miter saw to cut the last row?
You can use it to shorten the planks, but not normally to narrow them lengthwise.
A table saw or guided circular saw is better for ripping the final row.
Can I cut laminate around a toilet or pipe with a miter saw?
A miter saw is not suitable for most curved or detailed cutouts.
Use a jigsaw, hole saw, or another suitable detail-cutting tool.
Can I use a chop saw for laminate flooring?
If by chop saw you mean a woodworking miter saw, yes.
Do not use an abrasive metal-cutting chop saw as a substitute for a woodworking saw.
Can I use a regular wood blade?
A regular carbide woodworking blade can work if it has a sufficiently fine tooth pattern and is sharp.
A coarse framing blade is more likely to chip the laminate surface.
Should I tape the cut line?
Painter’s tape can help with particularly chip-prone flooring, but it is not always necessary.
Blade sharpness and proper support are more important.
Do I need to let the blade stop before lifting it?
Yes. Keep the saw head down after completing the cut, release the trigger, and allow the blade to stop before raising it.
This helps protect the freshly cut edge from contact with the spinning blade.
Can I cut several laminate boards together?
Cutting them individually is generally safer and more accurate unless your saw manufacturer specifically allows your stacked setup.
Individual planks are easier to support and control.
Is a miter saw better than a circular saw for laminate?
For repeated crosscuts, yes.
For long rip cuts, a circular saw is more versatile.
Many flooring installations benefit from having both tools available.
Is a miter saw better than a jigsaw?
For straight crosscuts, absolutely.
A jigsaw becomes the better choice for curves, notches, pipe openings, and other irregular shapes.
Conclusion
So, can a miter saw cut laminate flooring? Yes, and it is one of the best tools for making fast, accurate crosscuts during a laminate flooring installation.
Use a sharp fine-tooth carbide blade rather than a coarse framing blade. For many common saws, a 60- to 80-tooth finish blade on a 10-inch miter saw or a correspondingly fine blade on a larger saw provides a useful starting point, though the flooring and blade manufacturers’ guidance should take priority.
Place the decorative surface upward, keep the plank flat against the table and fence, and support long flooring so it cannot sag during the cut. Align the blade on the waste side of your mark, let it reach full speed, and lower it through the flooring smoothly. When the cut is complete, let the blade stop before raising the saw head.
A miter saw does have limitations. It is not the right tool for long rip cuts, so use a table saw, guided circular saw, or suitable alternative when narrowing the first or last row. A jigsaw or hole saw is generally better for curves, notches, and pipe openings.
Also remember that accurate flooring cutting is not about making every plank fit tightly against the wall. Maintain the expansion clearance specified by your laminate manufacturer.
For a full installation, I would use the miter saw for crosscuts and angled end cuts, a ripping tool for lengthwise cuts, and a jigsaw for detailed shapes. With that approach, a miter saw can handle the majority of routine laminate flooring cuts quickly, cleanly, and accurately.